> ## Documentation Index
> Fetch the complete documentation index at: https://docs.rootly.com/llms.txt
> Use this file to discover all available pages before exploring further.
# Adding Events to Timeline via Web Interface
> Add timeline events directly from the Rootly web interface with markdown support for event descriptions, custom timestamps, and visibility controls.
### Overview
The Web interface provides the most structured and controlled way to add timeline events to an incident. It supports rich text formatting, attachments, timestamps, and granular visibility settings—making it ideal for adding clear, polished, retrospective-ready updates.
Events added through the Web UI are treated the same as those created via Slack, email, or API, and appear immediately in the incident’s chronological timeline.
***
### Adding a Timeline Event in the Web UI
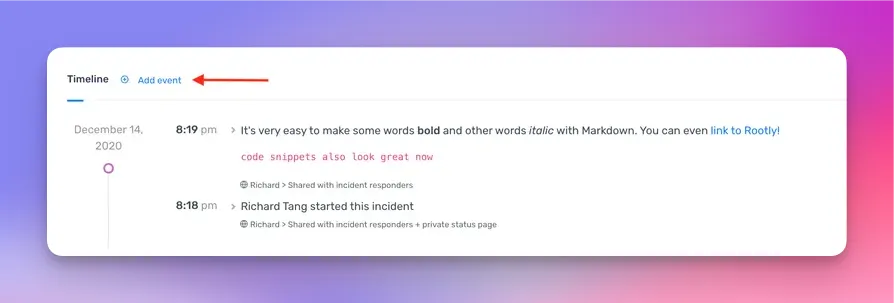
Navigate to the incident you want to update and scroll to the **Timeline** section.
Click the **Add event** button at the top of the timeline to open the event creation modal.
 Enter the text you want recorded as a timeline event.
Your description supports **Markdown formatting**, allowing you to add emphasis, structure, and links.\
This is especially helpful when summarizing findings, outlining hypotheses, or highlighting important decisions.
[Markdown](https://www.markdownguide.org/) syntax is supported in your event description.
You can optionally customize:
* **Occurred At** — set an exact timestamp or backfill earlier events
* **Attachments** — upload logs, screenshots, or supporting documents
These fields help maintain an accurate and high-quality incident timeline.
Click **Create event** to publish your entry to the timeline.\
It will appear in chronological order based on the timestamp you provided.
***
### Tips for Creating Useful Timeline Entries
* Use Markdown to structure your updates for readability
* Write concise, factual observations and decisions
* Attach files instead of pasting long logs
* Record the *why* behind actions when possible
* Use accurate timestamps when reconstructing events
Well-written timeline entries significantly accelerate retrospective creation and help future responders understand what happened.
***
### Troubleshooting
Check the **Occurred At** field.\
If left blank, Rootly uses the time you created the event.
Make sure visibility is set to **External**, not Internal.
You may not have permissions to update incidents or timeline entries.
Ensure the file type and size comply with your workspace’s attachment rules.
***
### Best Practices
* Keep entries focused and easy to scan
* Include decisions, not just actions
* Backdate events thoughtfully to maintain timeline accuracy
* Use Markdown headings, lists, and code formatting where helpful
* Add context such as impacted services or related systems
Enter the text you want recorded as a timeline event.
Your description supports **Markdown formatting**, allowing you to add emphasis, structure, and links.\
This is especially helpful when summarizing findings, outlining hypotheses, or highlighting important decisions.
[Markdown](https://www.markdownguide.org/) syntax is supported in your event description.
You can optionally customize:
* **Occurred At** — set an exact timestamp or backfill earlier events
* **Attachments** — upload logs, screenshots, or supporting documents
These fields help maintain an accurate and high-quality incident timeline.
Click **Create event** to publish your entry to the timeline.\
It will appear in chronological order based on the timestamp you provided.
***
### Tips for Creating Useful Timeline Entries
* Use Markdown to structure your updates for readability
* Write concise, factual observations and decisions
* Attach files instead of pasting long logs
* Record the *why* behind actions when possible
* Use accurate timestamps when reconstructing events
Well-written timeline entries significantly accelerate retrospective creation and help future responders understand what happened.
***
### Troubleshooting
Check the **Occurred At** field.\
If left blank, Rootly uses the time you created the event.
Make sure visibility is set to **External**, not Internal.
You may not have permissions to update incidents or timeline entries.
Ensure the file type and size comply with your workspace’s attachment rules.
***
### Best Practices
* Keep entries focused and easy to scan
* Include decisions, not just actions
* Backdate events thoughtfully to maintain timeline accuracy
* Use Markdown headings, lists, and code formatting where helpful
* Add context such as impacted services or related systems