> ## Documentation Index
> Fetch the complete documentation index at: https://docs.rootly.com/llms.txt
> Use this file to discover all available pages before exploring further.
# Airtable
> Automatically create and update Airtable records from Rootly incidents using workflow actions to track incidents, follow-ups, and metrics in your bases.
## Overview
Rootly's Airtable integration lets you push incident data directly into Airtable tables using workflow actions. When an incident is declared — or updated — Rootly can create or update a record in any base and table you choose, with full control over field mapping via Liquid variables.
Automatically create a new Airtable record when an incident is declared, capturing key fields like title, summary, severity, and more.
Update an existing Airtable record as the incident progresses — reflect status changes, resolution notes, or any custom field.
Map any Rootly incident field to any Airtable column using JSON and [Liquid variables](/liquid/incident-variables).
Target any base and table in your Airtable workspace — not limited to a single sheet.
## Before You Begin
* You must be a Rootly admin to set up the integration
* You need an Airtable account with permission to create OAuth applications
* The Airtable base and table you want to write to must already exist
## Installation
Setting up the Airtable integration requires creating an OAuth application in Airtable and connecting it to Rootly.
In Rootly, go to **Configuration → Integrations** and find **Airtable**. Click **Connect**.
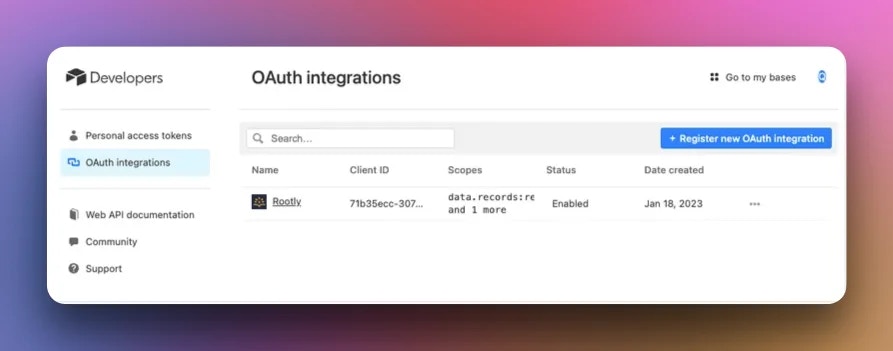
 In a new tab, go to [airtable.com/create/oauth](https://airtable.com/create/oauth) and create a new OAuth application.
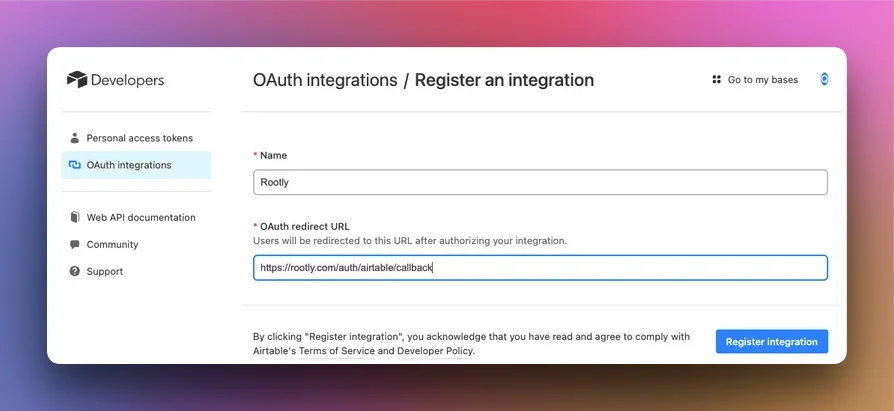
 Set the **Redirect URL** (callback URL) to:
```
https://rootly.com/auth/airtable/callback
```
Set the **Redirect URL** (callback URL) to:
```
https://rootly.com/auth/airtable/callback
```
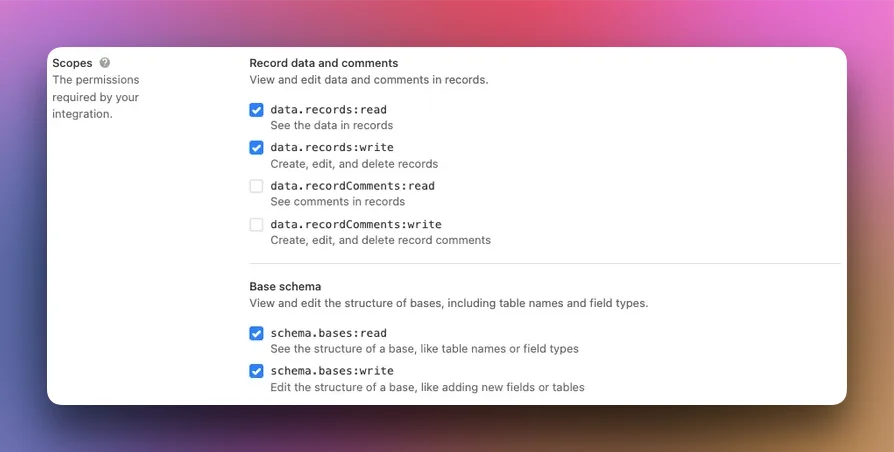
 In the OAuth app settings, enable the required scopes:
 Copy the **Client ID** and **Client Secret** from your Airtable OAuth app into Rootly and save.
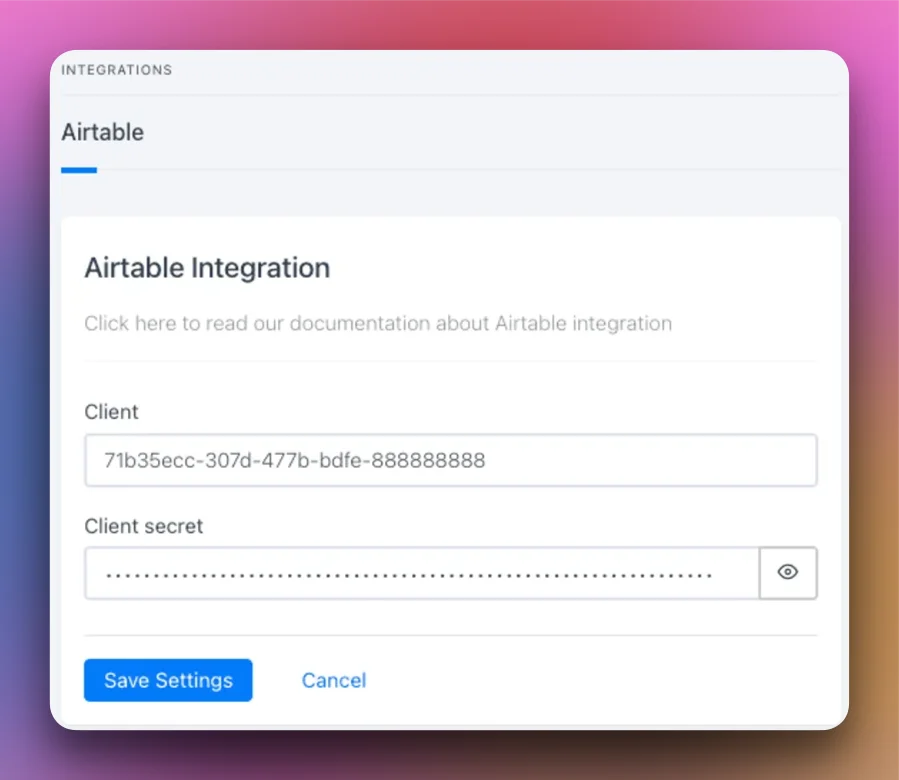 Click **Authorize** in Rootly. You'll be redirected to Airtable to grant access. Once approved, you'll return to Rootly with the integration connected.
When you connect Airtable, Rootly automatically creates a default **Create Airtable Record** workflow to get you started quickly.
## Workflow Actions
### Create Airtable Record
Creates a new record in the specified Airtable base and table when the workflow triggers.
The Airtable base to write the record to. Select from the dropdown populated from your connected account.
The table within the selected base. Populated dynamically based on the selected base.
A JSON object mapping Airtable column names to values. Supports [Liquid variables](/liquid/incident-variables).
```json theme={null}
{
"Name": "{{ incident.title }}",
"Notes": "{{ incident.summary }}",
"Started At": "{{ incident.started_at | date: '%FT%T%:z' }}",
"Severity": "{{ incident.severity }}",
"Link": "{{ incident.url }}"
}
```
### Update Airtable Record
Updates an existing record in Airtable. Use this after a record has been created to reflect incident updates.
The Airtable base ID (e.g. `appXXXXXXXXXXXXXX`). Supports Liquid variables.
The name of the table containing the record to update. Supports Liquid variables.
The ID of the Airtable record to update (e.g. `recXXXXXXXXXXXXXX`). Supports Liquid variables.
A JSON object of fields to update. Same syntax as the Create action.
## Uninstall
To remove the Airtable integration:
1. Go to **Configuration → Integrations** and find **Airtable**
2. Click **Connected** to reveal the disconnect option
3. Click **Disconnect**
Click **Authorize** in Rootly. You'll be redirected to Airtable to grant access. Once approved, you'll return to Rootly with the integration connected.
When you connect Airtable, Rootly automatically creates a default **Create Airtable Record** workflow to get you started quickly.
## Workflow Actions
### Create Airtable Record
Creates a new record in the specified Airtable base and table when the workflow triggers.
The Airtable base to write the record to. Select from the dropdown populated from your connected account.
The table within the selected base. Populated dynamically based on the selected base.
A JSON object mapping Airtable column names to values. Supports [Liquid variables](/liquid/incident-variables).
```json theme={null}
{
"Name": "{{ incident.title }}",
"Notes": "{{ incident.summary }}",
"Started At": "{{ incident.started_at | date: '%FT%T%:z' }}",
"Severity": "{{ incident.severity }}",
"Link": "{{ incident.url }}"
}
```
### Update Airtable Record
Updates an existing record in Airtable. Use this after a record has been created to reflect incident updates.
The Airtable base ID (e.g. `appXXXXXXXXXXXXXX`). Supports Liquid variables.
The name of the table containing the record to update. Supports Liquid variables.
The ID of the Airtable record to update (e.g. `recXXXXXXXXXXXXXX`). Supports Liquid variables.
A JSON object of fields to update. Same syntax as the Create action.
## Uninstall
To remove the Airtable integration:
1. Go to **Configuration → Integrations** and find **Airtable**
2. Click **Connected** to reveal the disconnect option
3. Click **Disconnect**
 ## Frequently Asked Questions
The **Base Key** is visible in the URL when you open a base in Airtable: `airtable.com/appXXXXXXXXXXXXXX/...`. The **Record ID** (format: `recXXXXXXXXXXXXXX`) can be retrieved via the Airtable API or by expanding a record and copying the ID from the URL.
Yes. Use the `incident.custom_fields` Liquid variable to access custom field values. For example: `{{ incident.custom_fields | find: 'custom_field.slug', 'your-slug' | get: 'selected_options' | map: 'value' }}`.
Airtable will return an error and the workflow action will fail. Make sure all column names in the mapping exactly match your Airtable table's field names (case-sensitive).
Yes. Add multiple **Create Airtable Record** actions to the same workflow, each targeting a different base or table.
## Frequently Asked Questions
The **Base Key** is visible in the URL when you open a base in Airtable: `airtable.com/appXXXXXXXXXXXXXX/...`. The **Record ID** (format: `recXXXXXXXXXXXXXX`) can be retrieved via the Airtable API or by expanding a record and copying the ID from the URL.
Yes. Use the `incident.custom_fields` Liquid variable to access custom field values. For example: `{{ incident.custom_fields | find: 'custom_field.slug', 'your-slug' | get: 'selected_options' | map: 'value' }}`.
Airtable will return an error and the workflow action will fail. Make sure all column names in the mapping exactly match your Airtable table's field names (case-sensitive).
Yes. Add multiple **Create Airtable Record** actions to the same workflow, each targeting a different base or table.