> ## Documentation Index
> Fetch the complete documentation index at: https://docs.rootly.com/llms.txt
> Use this file to discover all available pages before exploring further.
# Google Cloud Monitoring
> Forward alerts from Google Cloud Monitoring to Rootly for escalation, Slack routing, on-call paging, and automated incident response across GCP workloads.
## Overview
Google Cloud Monitoring can be configured as an alert source that sends webhook notifications to Rootly whenever an alert fires in your GCP environment. Once alerts arrive in Rootly, they can trigger incident workflows, page on-call responders, or route notifications to Slack.
## Before You Begin
We recommend performing the installation with a **service account** to ensure the integration does not break if the installing user leaves the company. You will need a GCP account with access to Google Cloud Monitoring and a Rootly account with Admin permissions.
## Setting Up the Integration
To integrate Google Cloud Monitoring with Rootly, you will create a webhook notification channel in GCP that forwards alert notifications to Rootly. These alerts can then be used in Rootly for automation and incident response.
Follow these steps to set up the integration:
## Step 1: Choose Your Webhook Endpoint
You will first retrieve the appropriate Rootly webhook endpoint URL where GCP will send its alerts. Rootly provides two types of webhook endpoints: **Non-paging** and **Paging**. Depending on how you want to handle alerts from GCP, you can choose either type. Below is a summary of both options:
| Endpoint Type | Behavior | URL |
| -------------- | --------------------------------------------------------------------------- | ---------------------------------------------------------------------------------------- |
| **Non-paging** | Alert appears in Rootly for visibility and automation without paging anyone | `https://webhooks.rootly.com/webhooks/incoming/google_cloud_webhooks` |
| **Paging** | Alert is received in Rootly **and** pages a specific resource you specify | `https://webhooks.rootly.com/webhooks/incoming/google_cloud_webhooks/notify//` |
For paging URLs, replace `` and `` with the resource you want to page:
| Parameter | Allowed values | Example |
| --------- | ----------------------------------------------------------------------- | ----------- |
| `TYPE` | `User`, `Group`, `EscalationPolicy`, `Service` | `Service` |
| `ID` | The unique ID of the resource in Rootly — found by editing the resource | `svc_12345` |
Copy the URL you need — you will use it in [Step 3](#step-3-create-the-webhook-notification-channel-in-gcp).
## Step 2: Retrieve Your Auth Password
Google Cloud Monitoring authenticates to Rootly using HTTP Basic Auth. The username is always `rootly` — the password is an organization-specific secret you retrieve from Rootly.
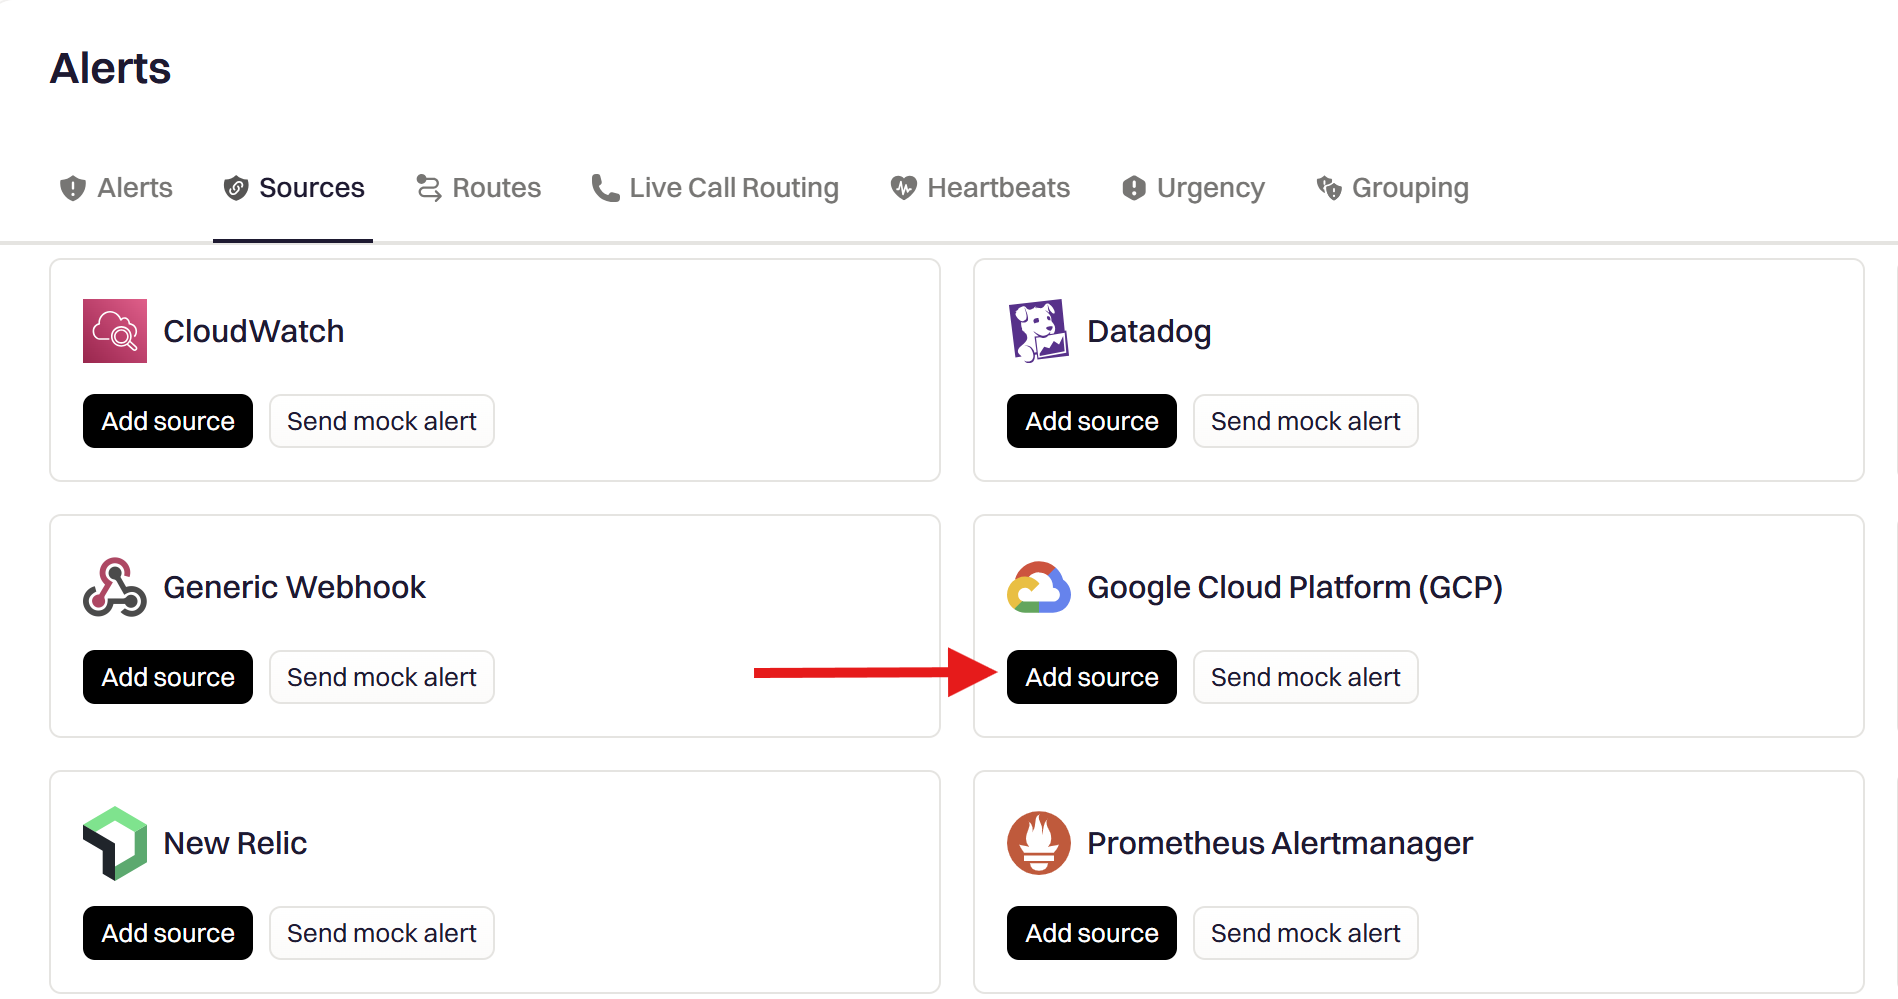
Go to **Alerts → Sources** in Rootly and click **Add Source**, then select **Google Cloud Platform**.
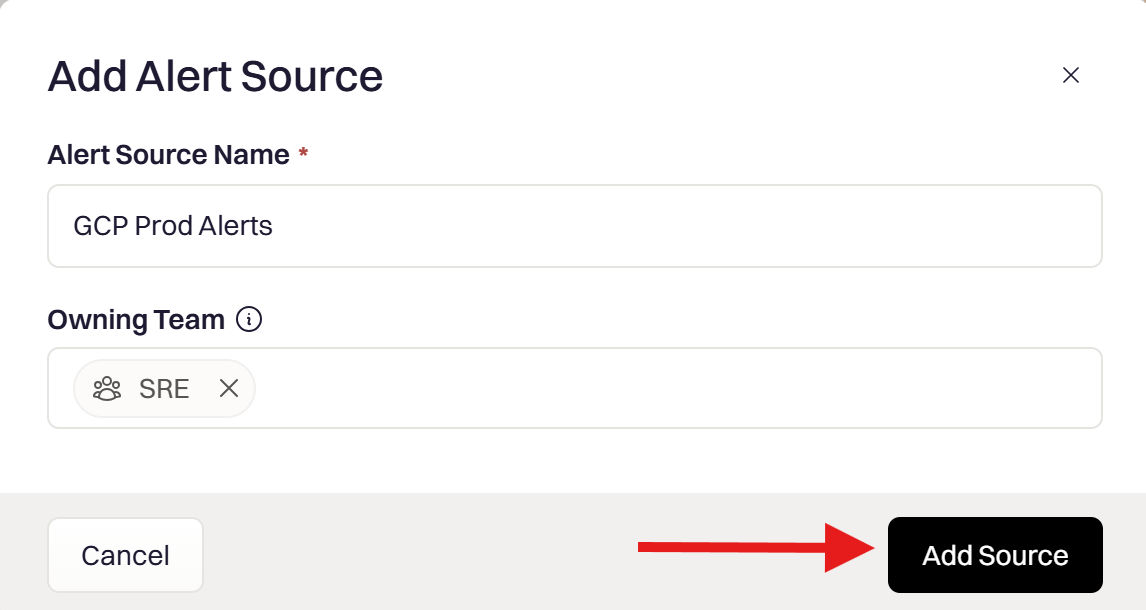
Provide an **Alert Source Name** (e.g., `GCP – Production Alerts`) and select an **Owning Team**, then click **Add Source**.
On the **Google Cloud Setup** page, find **Step 5** and copy the **Auth Password**.
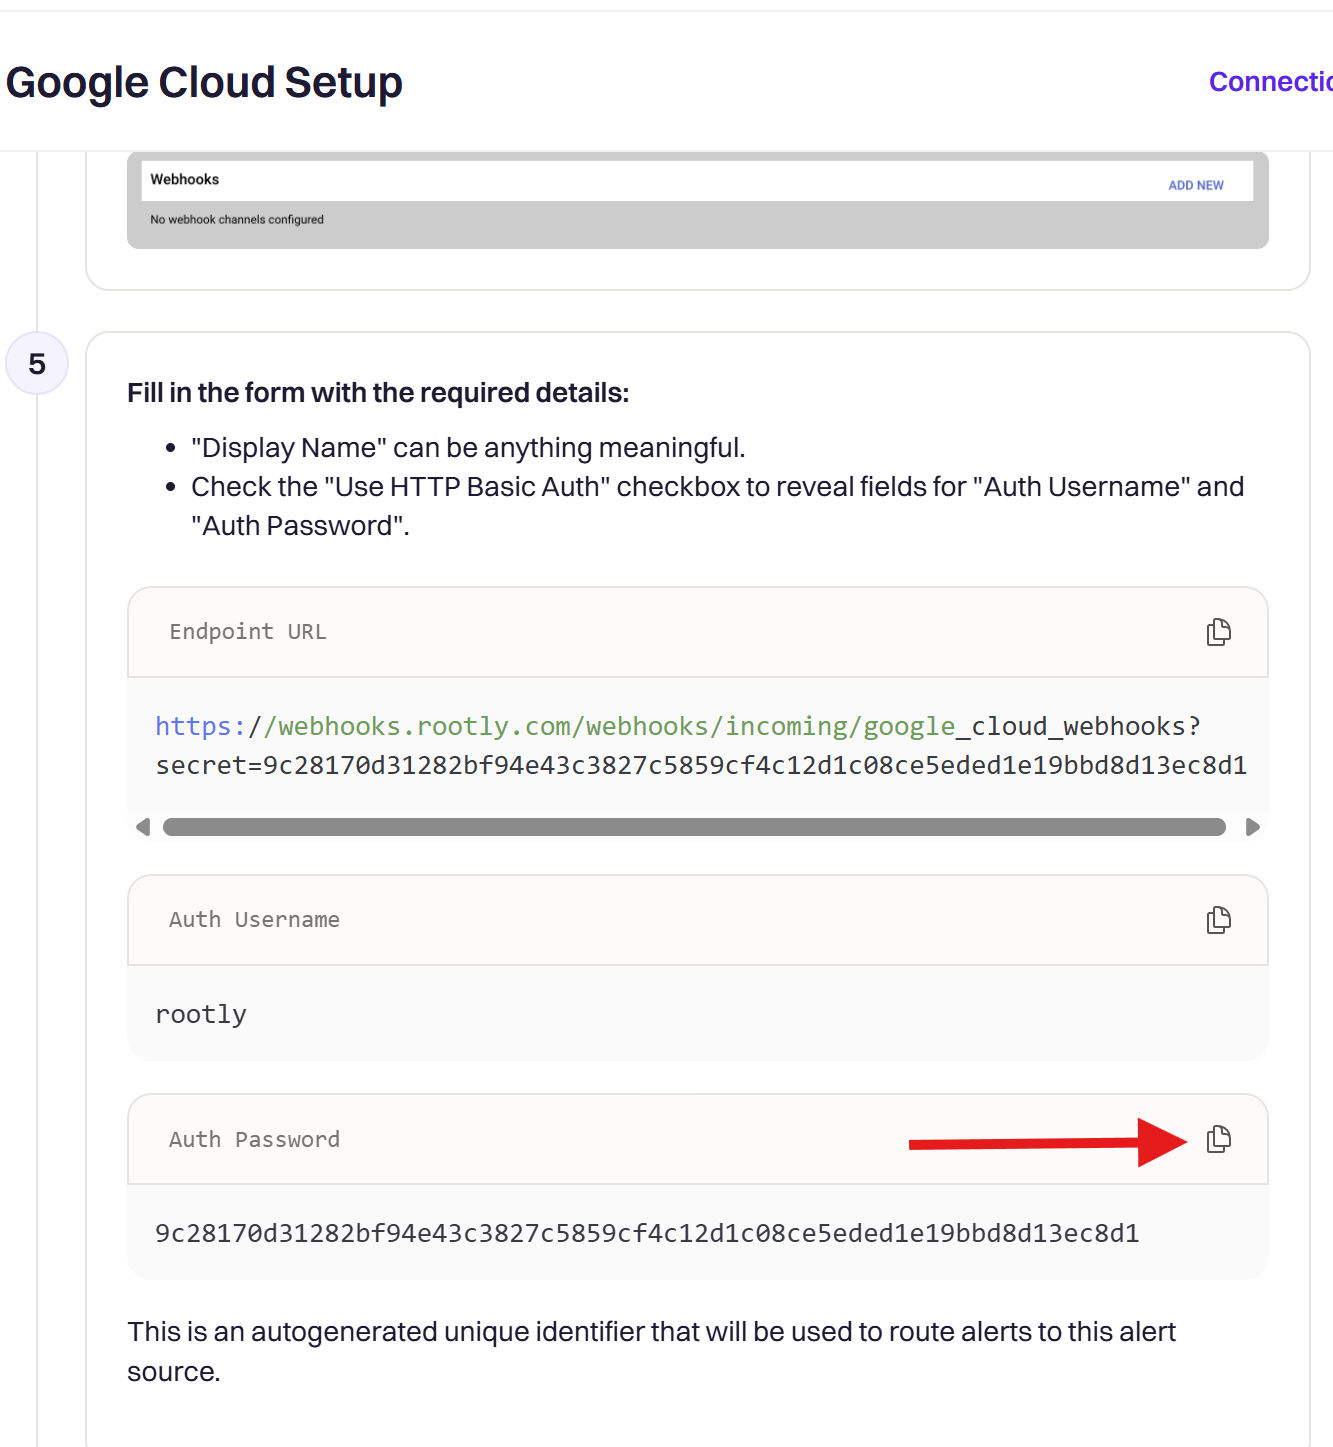
This password authenticates GCP to Rootly. Keep it secure and do not share it publicly.
## Step 3: Create the Webhook Notification Channel in GCP
Now that you have:
* The **Rootly Webhook URL** from [Step 1](#step-1-choose-your-webhook-endpoint)
* The **Auth Password** from [Step 2](#step-2-retrieve-your-auth-password)
You can now use these values to create a Webhook Notification Channel in Google Cloud Monitoring.
In the Google Cloud Console, go to **Monitoring → Alerting**.
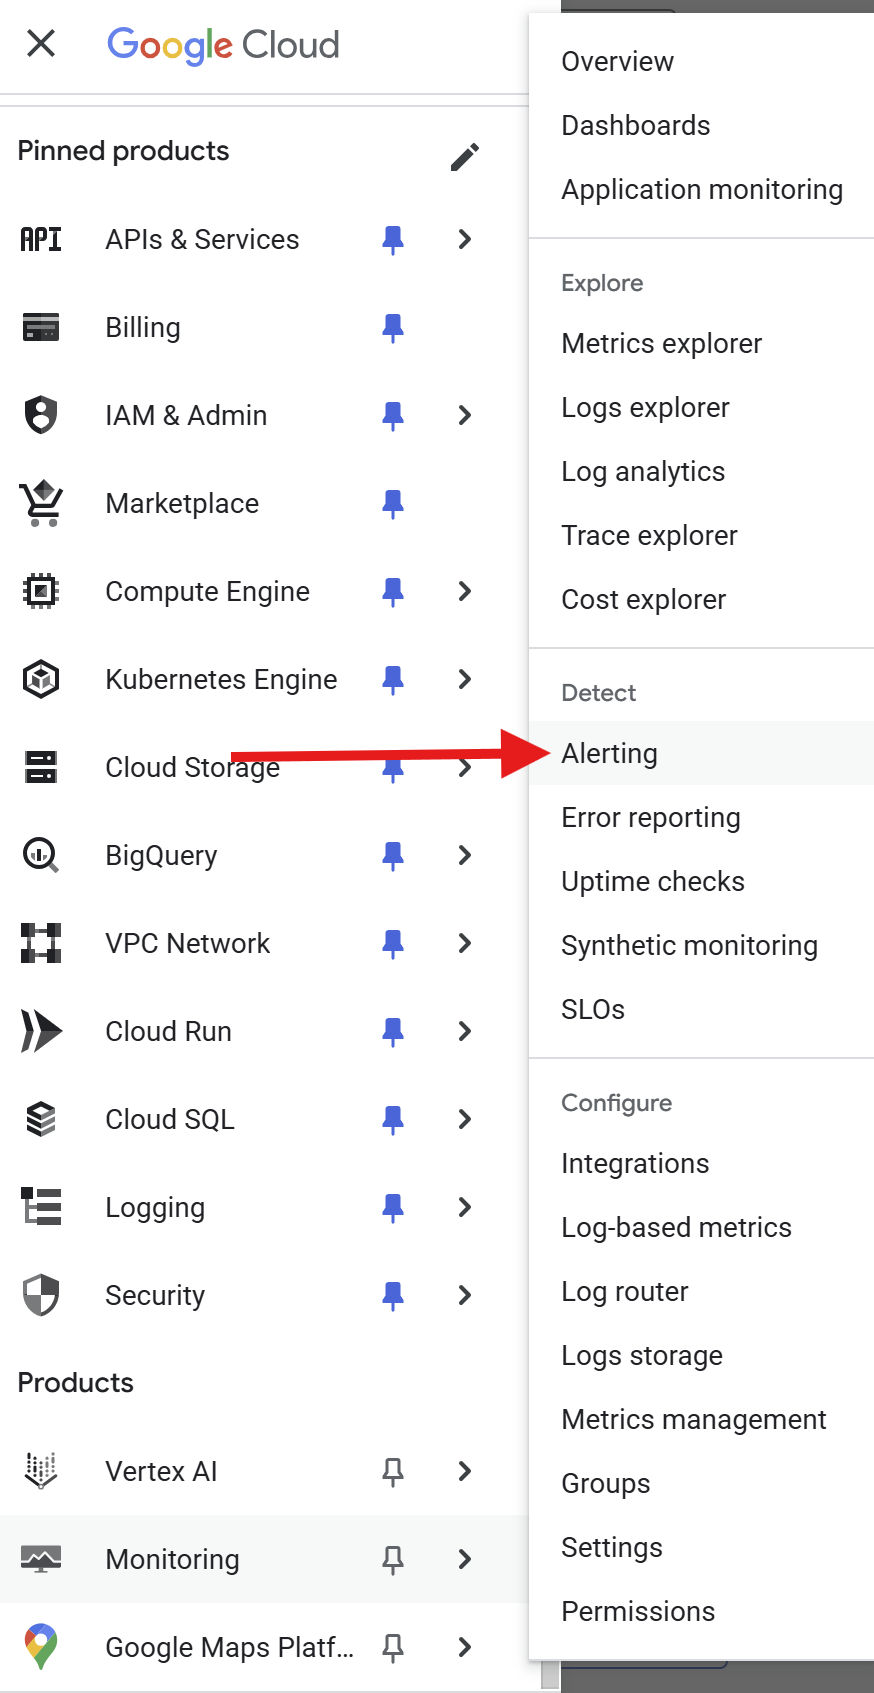
Click **Edit Notification Channels** at the top of the Alerting page.

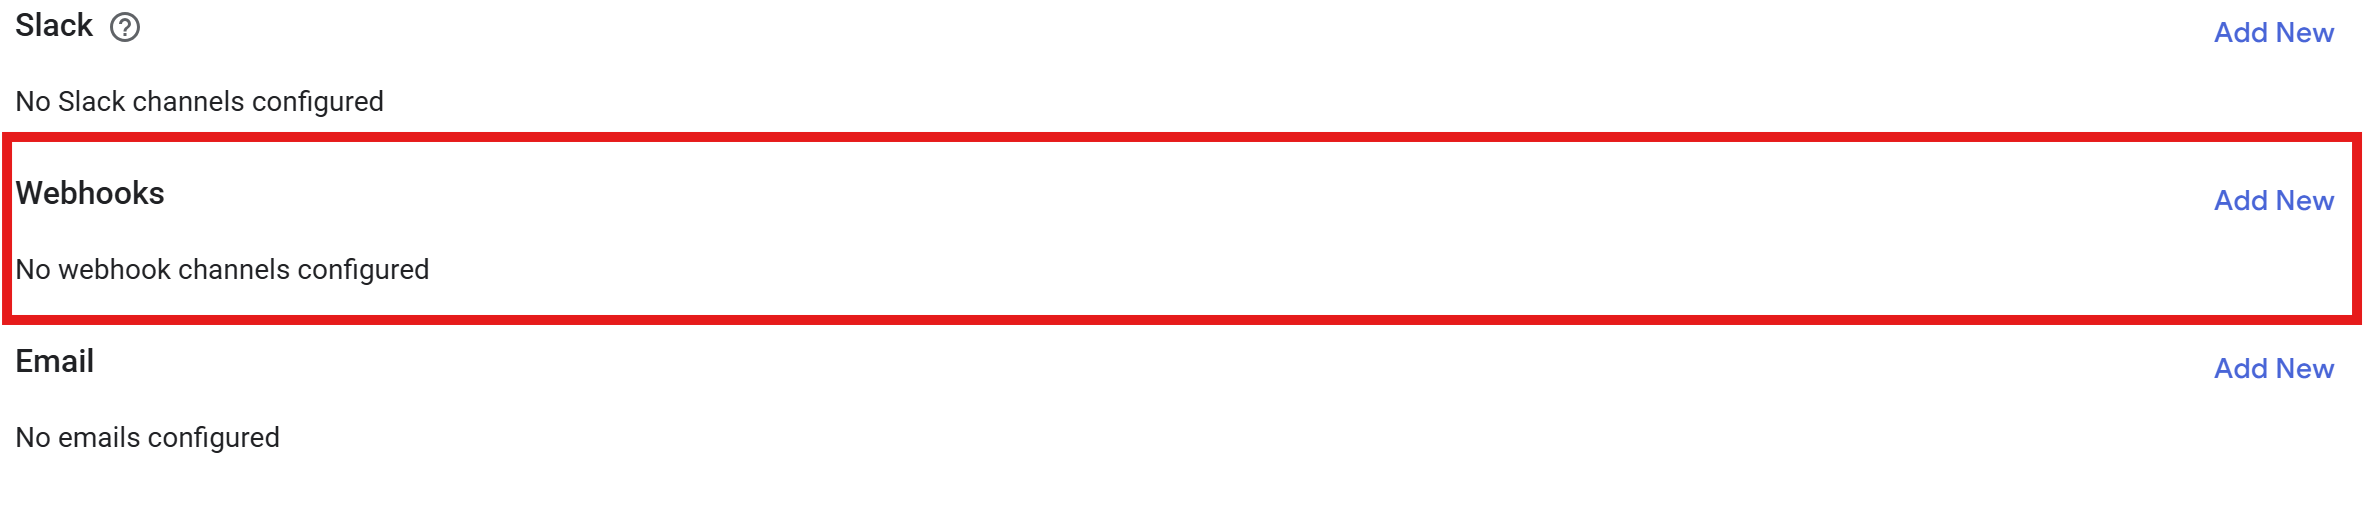
Scroll to the **Webhooks** section and click **Add New**.
Fill in the form using the values gathered in the previous steps:
| Field | Value |
| ----------------------- | -------------------------------------------------------------------------- |
| **Endpoint URL** | The Rootly webhook URL from [Step 1](#step-1-choose-your-webhook-endpoint) |
| **Display Name** | A descriptive name, e.g. `Rootly – Production Alerts` |
| **Use HTTP Basic Auth** | Enabled |
| **Username** | `rootly` |
| **Password** | The Auth Password from [Step 2](#step-2-retrieve-your-auth-password) |
Click **Test Connection** to verify GCP can reach Rootly.
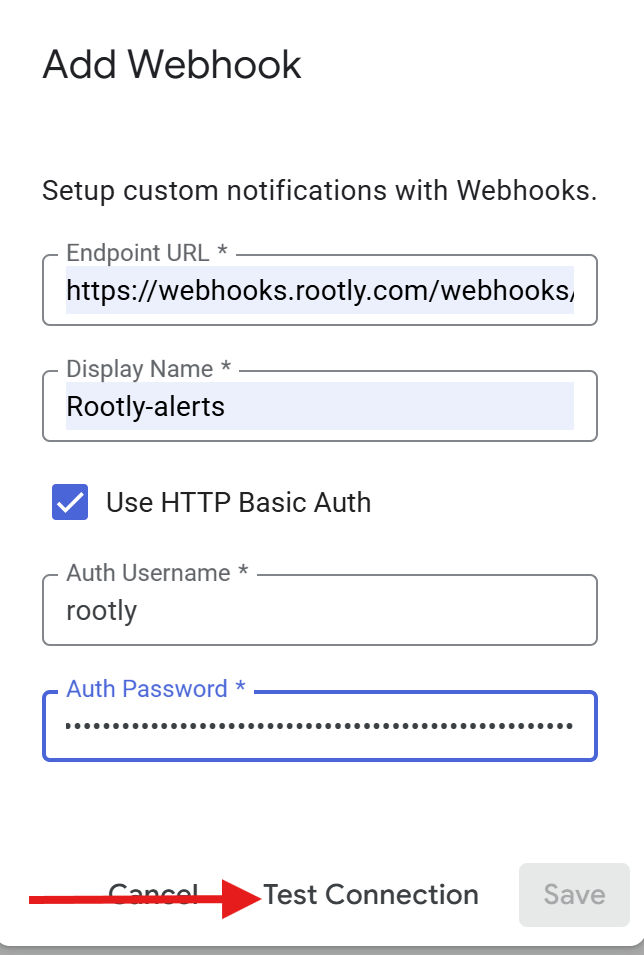
* If successful: click **Save** to create the notification channel.
* If unsuccessful:
* Verify the URL is correct
* Confirm you used `rootly` as the username
* Re-copy the Auth Password from Rootly
Your integration is now active. Alerts from Google Cloud Monitoring will be delivered to Rootly and routed based on your paging or automation configuration.
## Step 4: Verify the Test Alert in Rootly
After running **Test Connection**, a test notification is sent from GCP to Rootly. Confirm it arrived on the [Alerts page](https://rootly.com/account/alerts) in Rootly.
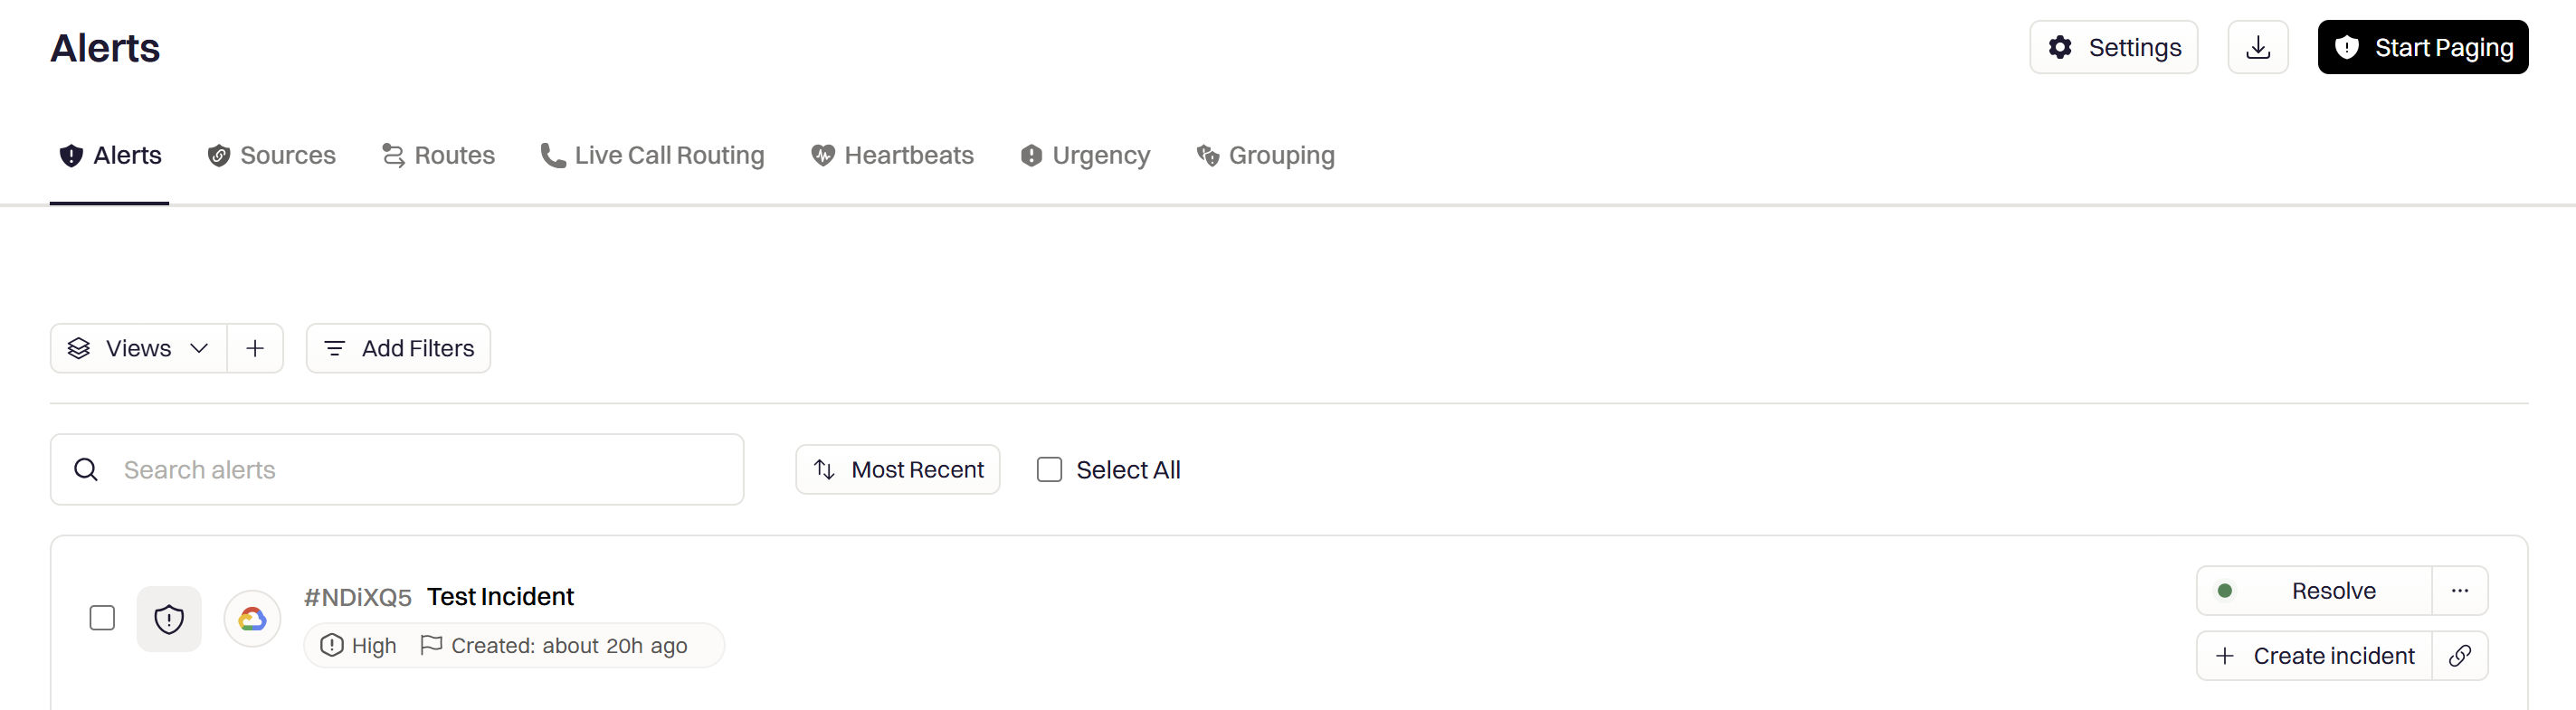
The GCP test payload differs from real alert payloads. Test with actual alerts in your environment to verify end-to-end functionality before relying on this in production.
```json theme={null}
{
"ID": "d7cdb19e-381e-4b72-8066-8691ac011529",
"rootly": {
"title": "Test Incident",
"description": null,
"alert_source_url": "http://www.example.com"
},
"version": "test",
"incident": {
"url": "http://www.example.com",
"state": "OPEN",
"metric": {
"type": "test.googleapis.com/metric",
"labels": { "example": "label" },
"displayName": "Test Metric"
},
"summary": "Test Incident",
"ended_at": 0,
"metadata": {
"user_labels": { "example": "label" },
"system_labels": { "example": "label" }
},
"resource": {
"type": "example_resource",
"labels": { "example": "label" }
},
"condition": {
"name": "projects/12345/alertPolicies/12345/conditions/12345",
"displayName": "Example condition",
"conditionThreshold": {
"filter": "metric.type=\"test.googleapis.com/metric\" resource.type=\"example_resource\"",
"trigger": { "count": 1 },
"duration": "0s",
"comparison": "COMPARISON_GT",
"thresholdValue": 0.5
}
},
"started_at": 0,
"incident_id": "12345",
"policy_name": "projects/12345/alertPolicies/12345",
"condition_name": "Example condition",
"observed_value": "1.0",
"threshold_value": "0.5",
"documentation": {
"content": "TEST ALERT",
"subject": "ALERT - No severity",
"mime_type": "text/markdown"
}
},
"rootly_alert_status": "open"
}
```
## Frequently Asked Questions
Verify the Endpoint URL is correct and matches your intended alert type (paging or non-paging). Confirm the username is exactly `rootly` (lowercase). Re-copy the Auth Password from **Alerts → Sources → Google Cloud Platform → Configure** in Rootly — passwords can change if the source is recreated.
Confirm the webhook notification channel is attached to an active alerting policy in GCP. Check that the alert policy has fired by reviewing **Monitoring → Alerting → Incidents** in GCP. Verify the webhook URL and credentials in the notification channel settings.
Open the resource (User, Team, Escalation Policy, or Service) in Rootly and click **Edit**. The resource ID appears in the URL or in the edit form. Use this ID in the paging URL path.