> ## Documentation Index
> Fetch the complete documentation index at: https://docs.rootly.com/llms.txt
> Use this file to discover all available pages before exploring further.
# Installation
> Connect Google Docs to Rootly for automated document generation, retrospective creation, and incident note management with OAuth and service account support.
Connect Google Docs to Rootly so workflows can automatically generate retrospectives, runbooks, and other incident documents from your templates. Setup takes 2 minutes via OAuth or about 10 minutes via a service account.
## Before You Begin
You must be an **Admin or Owner** in Rootly to install integrations.
* **OAuth:** Requires a Google account with access to Google Drive
* **Service Account:** Requires Google Workspace admin access and a Google Cloud project
Choose your setup method based on your environment:
**Best for:** Testing, evaluation, or personal use
Connects your personal Google account. If that account loses access or the person leaves, the integration breaks.
**Best for:** Teams and production environments
Uses a dedicated service account that isn't tied to any individual. More resilient and easier to manage at scale.
## Quick Setup (OAuth)
OAuth connects your personal Google account in about 2 minutes.
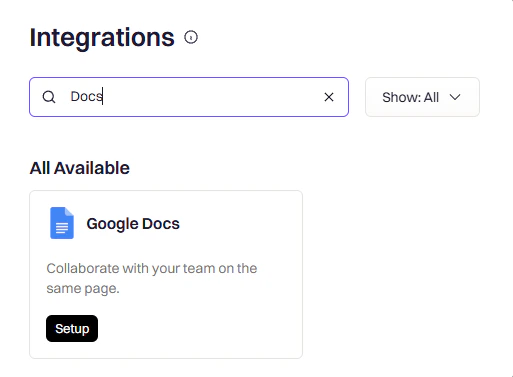
Use the search bar to find **Google Docs** among the available integrations.
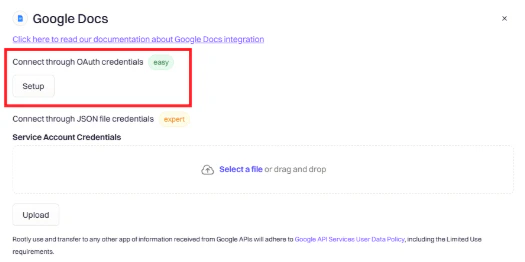 Select the OAuth connection method, then choose which Google account to connect.
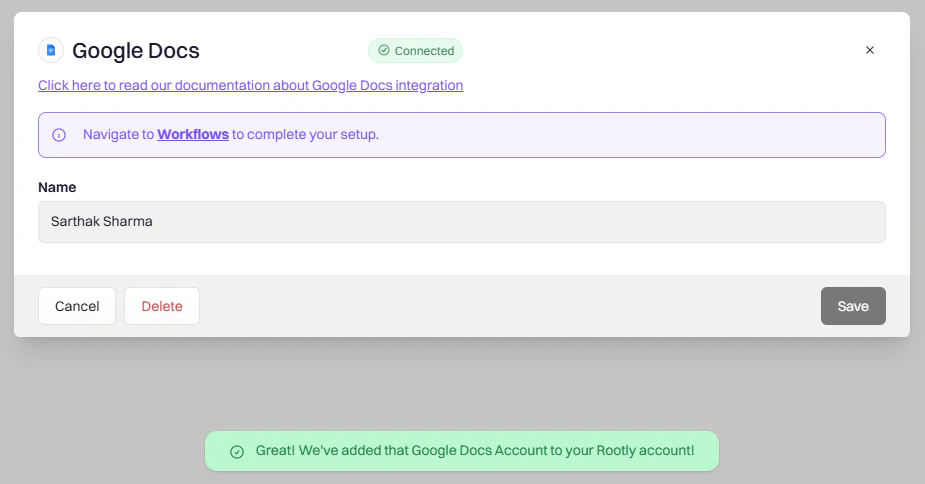 Google will ask Rootly to access Google Drive and Docs on your behalf. Approve to complete the connection.
You'll be redirected back to Rootly once the authorization completes.
Google Docs is now connected. You can create templates and wire them up in workflows — head to the [Workflows](/integrations/google-docs/workflows) page to get started.
## Production Setup (Service Account)
A service account keeps the integration running independent of any individual's Google account. This setup involves creating the account in Google Cloud, uploading its credentials to Rootly, and granting it domain-wide delegation.
If you don't have a project yet, create one first. You'll create the service account inside an existing project.
Google will ask Rootly to access Google Drive and Docs on your behalf. Approve to complete the connection.
You'll be redirected back to Rootly once the authorization completes.
Google Docs is now connected. You can create templates and wire them up in workflows — head to the [Workflows](/integrations/google-docs/workflows) page to get started.
## Production Setup (Service Account)
A service account keeps the integration running independent of any individual's Google account. This setup involves creating the account in Google Cloud, uploading its credentials to Rootly, and granting it domain-wide delegation.
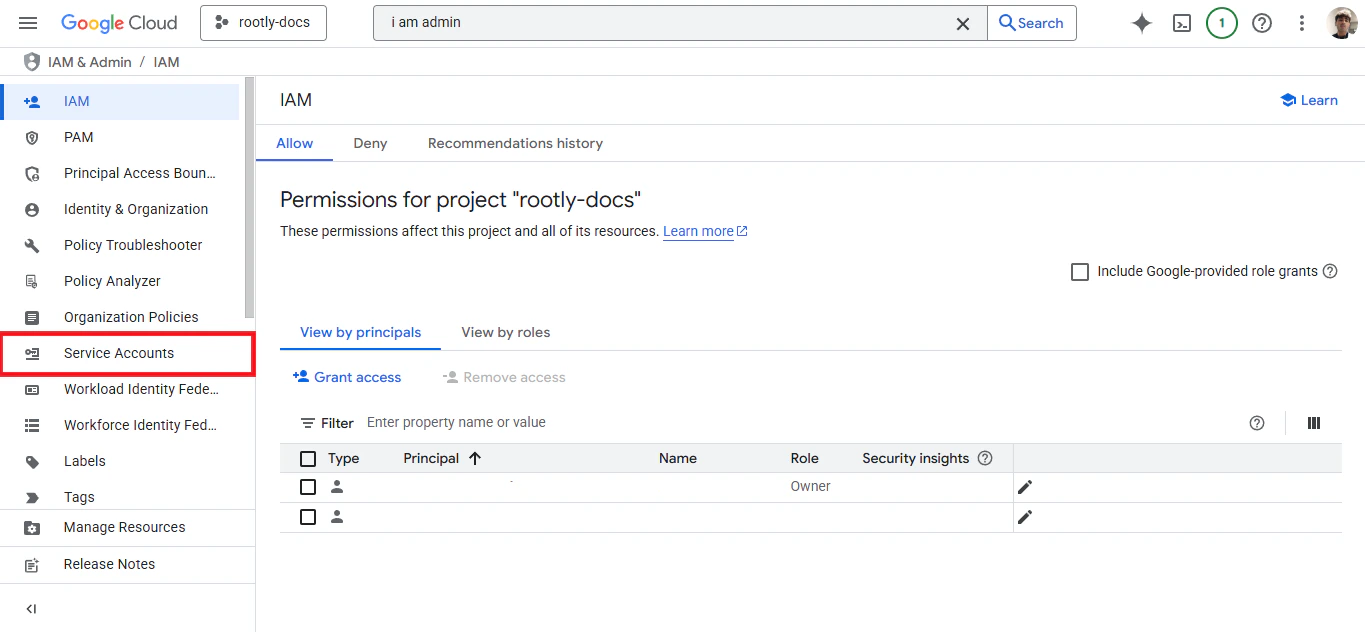
If you don't have a project yet, create one first. You'll create the service account inside an existing project.
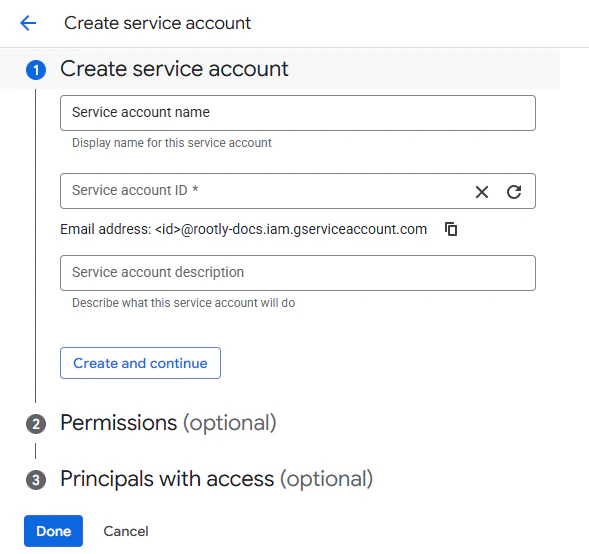
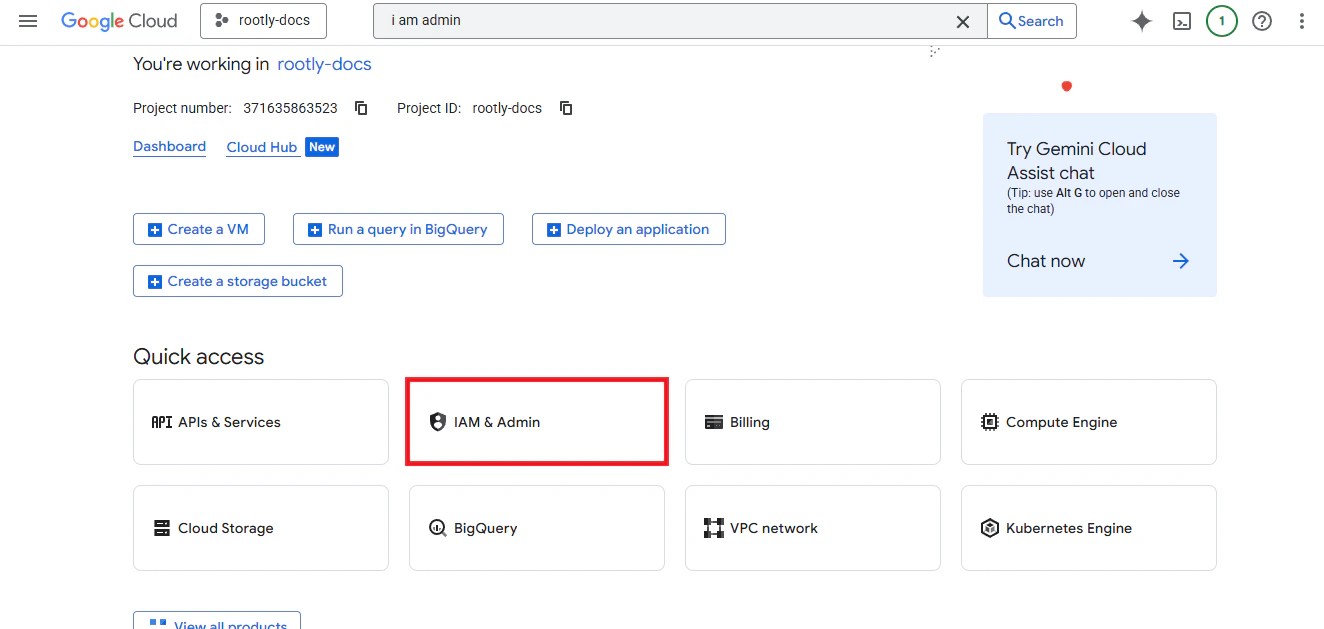 Click **Create Service Account**, fill in a name and description, then click **Done**.
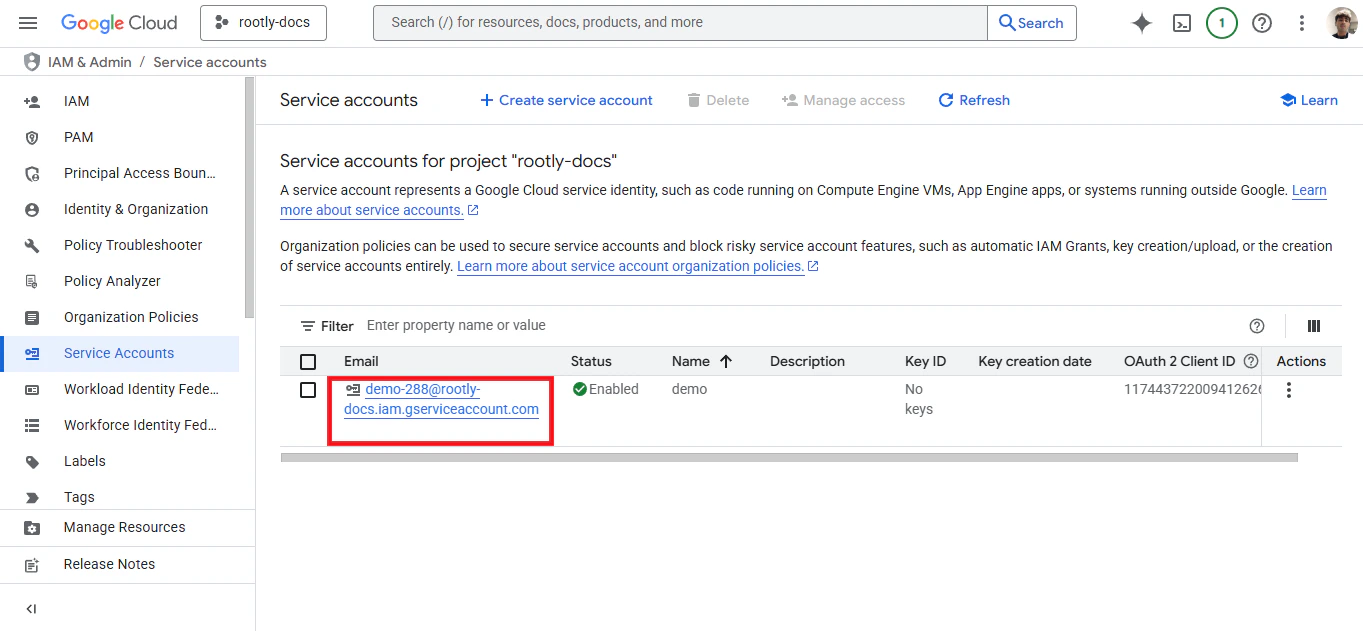
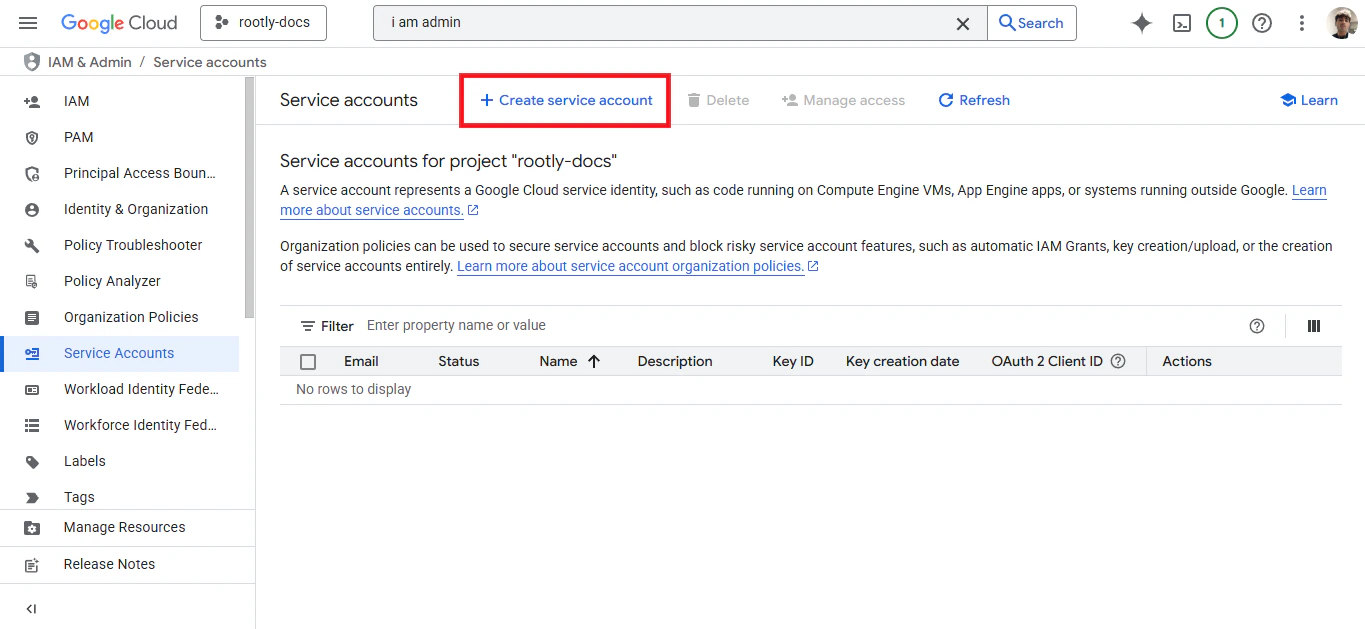 After creating the account, click on its email address to open its details.
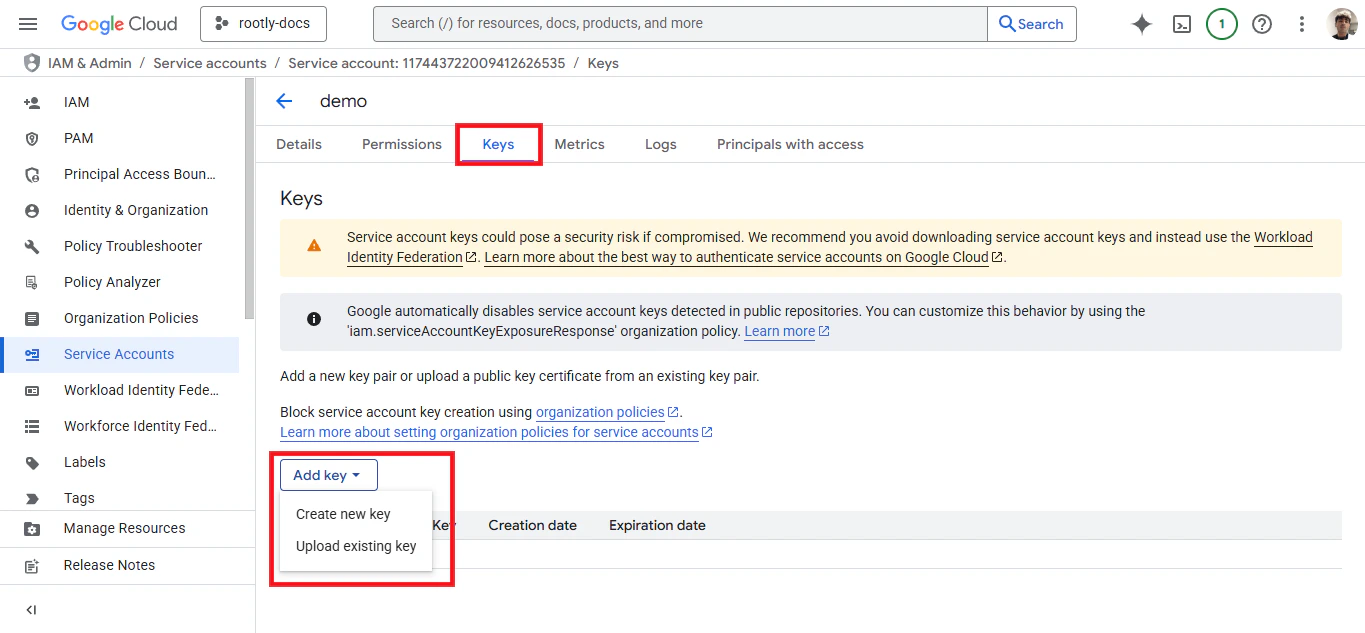
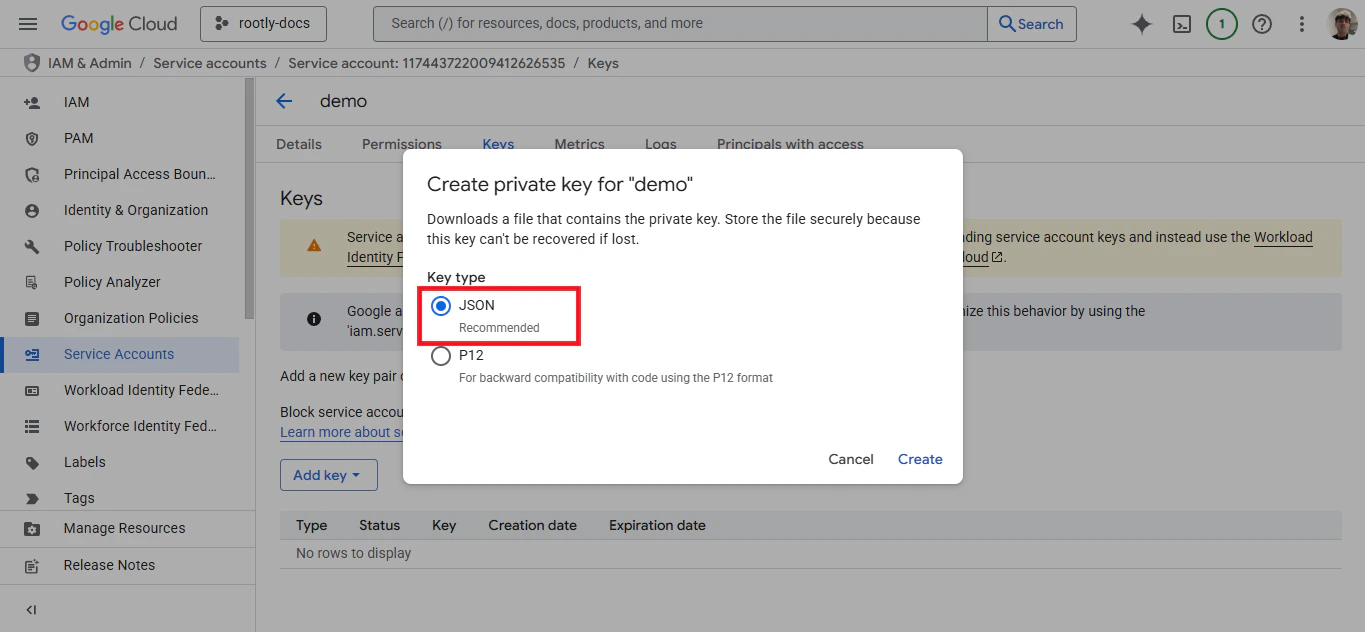
 Go to the **Keys** tab → **Add Key** → **Create new key**. Select **JSON** as the key type and click **Create**.
 A `.json` file will download automatically — keep it safe, you'll need it in the next step.
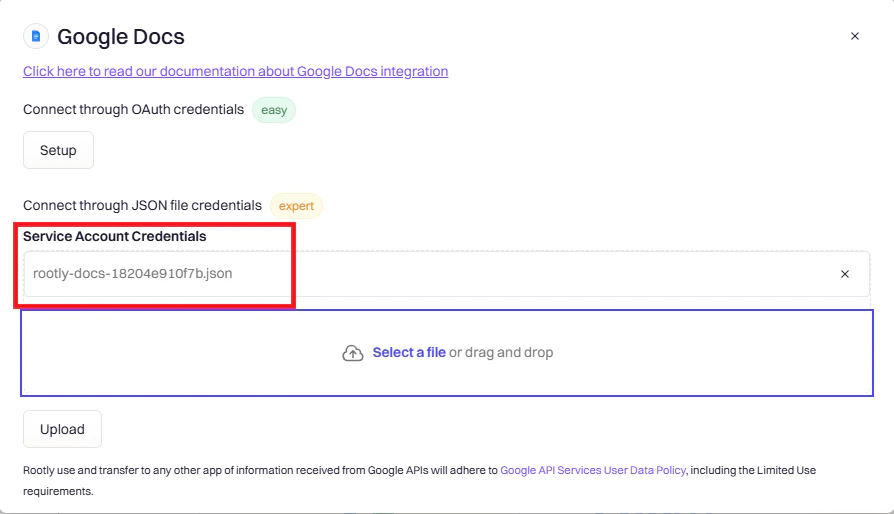
In Rootly, go to **Configuration → Integrations → Google Docs → Setup**. Choose the **Service Account** connection method and upload the JSON file you just downloaded.
A `.json` file will download automatically — keep it safe, you'll need it in the next step.
In Rootly, go to **Configuration → Integrations → Google Docs → Setup**. Choose the **Service Account** connection method and upload the JSON file you just downloaded.
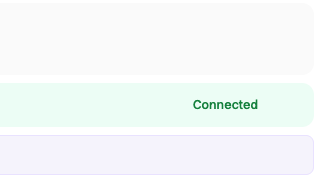
 You should see a success message confirming the integration is active.
The service account needs domain-wide delegation to create documents on behalf of users in your Google Workspace.
In [Google Admin Console](https://admin.google.com), go to **Security → API Controls → Domain-wide Delegation** and click **Add new**. Enter your service account's Client ID (found in GCP Console under the service account details), then add these OAuth scopes:
```
https://www.googleapis.com/auth/drive.file
https://www.googleapis.com/auth/drive.appdata
https://www.googleapis.com/auth/documents
```
Click **Authorize**.
You should see a success message confirming the integration is active.
The service account needs domain-wide delegation to create documents on behalf of users in your Google Workspace.
In [Google Admin Console](https://admin.google.com), go to **Security → API Controls → Domain-wide Delegation** and click **Add new**. Enter your service account's Client ID (found in GCP Console under the service account details), then add these OAuth scopes:
```
https://www.googleapis.com/auth/drive.file
https://www.googleapis.com/auth/drive.appdata
https://www.googleapis.com/auth/documents
```
Click **Authorize**.
 Without domain-wide delegation, the service account can't create documents on behalf of users. If you skip this step, document creation will fail silently in workflows.
## Verify the Connection
Once connected, confirm the integration is working before building templates and workflows.
1. The integration should show **Connected** status with your Google account email
2. Try creating a test document in Google Drive to confirm access is working
1. The integration should show **Connected** status with the service account email
2. Confirm domain-wide delegation is active — changes can take up to 15 minutes to propagate
3. Run a test workflow (see the [Workflows](/integrations/google-docs/workflows) page) to validate end-to-end
## Troubleshooting
**OAuth:** Try signing in again using a different browser or an incognito window.
**Service Account:** Verify the JSON key file is valid and hasn't been corrupted or truncated.
This is almost always a domain-wide delegation issue. Check that:
* The Client ID in Google Admin matches your service account exactly
* All three OAuth scopes are entered as shown (no extra spaces or typos)
* You've waited at least 15 minutes for Google to propagate the changes
**OAuth:** Re-authenticate to refresh your access token.
**Service Account:** Confirm the service account has **Editor** access to the target folder in Google Drive.
***
## Uninstall
To remove the Google Docs integration, go to **Configuration → Integrations**, find **Google Docs**, and click the **Connected** button to reveal the disconnect option.
Without domain-wide delegation, the service account can't create documents on behalf of users. If you skip this step, document creation will fail silently in workflows.
## Verify the Connection
Once connected, confirm the integration is working before building templates and workflows.
1. The integration should show **Connected** status with your Google account email
2. Try creating a test document in Google Drive to confirm access is working
1. The integration should show **Connected** status with the service account email
2. Confirm domain-wide delegation is active — changes can take up to 15 minutes to propagate
3. Run a test workflow (see the [Workflows](/integrations/google-docs/workflows) page) to validate end-to-end
## Troubleshooting
**OAuth:** Try signing in again using a different browser or an incognito window.
**Service Account:** Verify the JSON key file is valid and hasn't been corrupted or truncated.
This is almost always a domain-wide delegation issue. Check that:
* The Client ID in Google Admin matches your service account exactly
* All three OAuth scopes are entered as shown (no extra spaces or typos)
* You've waited at least 15 minutes for Google to propagate the changes
**OAuth:** Re-authenticate to refresh your access token.
**Service Account:** Confirm the service account has **Editor** access to the target folder in Google Drive.
***
## Uninstall
To remove the Google Docs integration, go to **Configuration → Integrations**, find **Google Docs**, and click the **Connected** button to reveal the disconnect option.
 Disconnecting stops Rootly from creating new documents. Documents already generated by Rootly are not affected.
***
## Next Steps
Set up a Liquid template and wire it to a workflow to auto-generate documents on incident events
Browse ready-to-use template examples for retrospectives and executive summaries
Disconnecting stops Rootly from creating new documents. Documents already generated by Rootly are not affected.
***
## Next Steps
Set up a Liquid template and wire it to a workflow to auto-generate documents on incident events
Browse ready-to-use template examples for retrospectives and executive summaries