> ## Documentation Index
> Fetch the complete documentation index at: https://docs.rootly.com/llms.txt
> Use this file to discover all available pages before exploring further.
# Installation
> Connect your Jira Cloud instance to Rootly for bidirectional incident and issue synchronization, custom field mapping, and automatic ticket creation.
Setting up the Jira integration involves two parts: connecting your Jira account via OAuth and configuring a webhook so Jira can send events back to Rootly. Both are required for full bidirectional sync.
## Prerequisites
**Before you start, you'll need:**
* A Rootly account with **Admin** or **Owner** permissions
* A **Jira Cloud** account with admin rights to your instance
## Required Jira Permissions
The Jira account you use to install must have these permissions:
| Permission | Description |
| --------------------- | --------------------------------------------- |
| **Assign issues** | Ability to assign issues to users |
| **Close issues** | Ability to close issues |
| **Create issues** | Ability to create new issues |
| **Delete issues** | Ability to delete issues |
| **Edit issues** | Ability to edit existing issues |
| **Link issues** | Ability to link issues to one another |
| **Transition issues** | Ability to transition issues between statuses |
Learn more about Jira permissions in [Atlassian's documentation](https://confluence.atlassian.com/adminjiraserver073/managing-project-permissions-861253293.html).
## Required OAuth Scopes
Rootly requests these OAuth scopes during installation:
**Read permissions:**
* `read:application-role:jira`
* `read:avatar:jira`
* `read:field-configuration:jira`
* `read:group:jira`
* `read:issue:jira`
* `read:issue-status:jira`
* `read:issue-meta:jira`
* `read:issue-security-level:jira`
* `read:issue-type:jira`
* `read:issue-type-hierarchy:jira`
* `read:issue.changelog:jira`
* `read:issue.transition:jira`
* `read:issue.vote:jira`
* `read:priority:jira`
* `read:project:jira`
* `read:project-category:jira`
* `read:project-version:jira`
* `read:project.component:jira`
* `read:project.property:jira`
* `read:status:jira`
* `read:user:jira`
* `read:user.property:jira`
**Write permissions:**
* `write:attachment:jira`
* `write:comment:jira`
* `write:comment.property:jira`
* `write:issue:jira`
* `write:issue.property:jira`
## Connect Jira to Rootly
The OAuth flow connects your Jira Cloud instance to Rootly. You'll be redirected to Jira to authorize the connection, then returned to Rootly automatically.
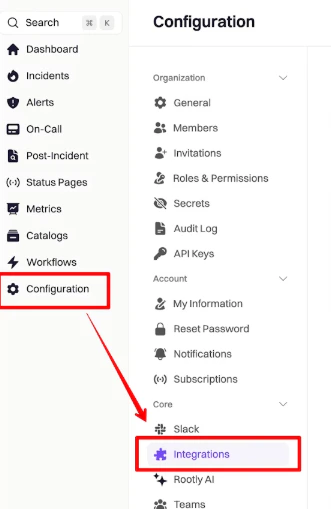
In the Rootly sidebar, click **Configuration → Integrations**.
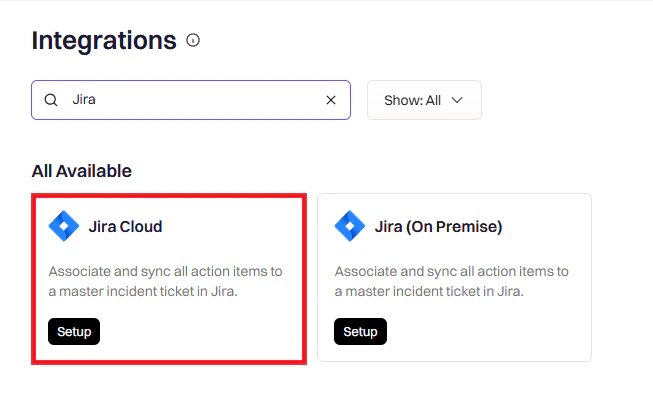
 Search for **Jira Cloud** and click **Setup**.
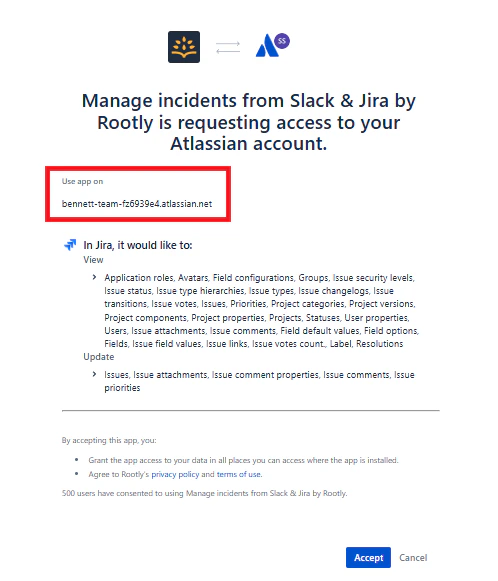
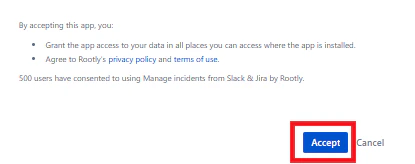
 You'll be redirected to Jira. Verify you're installing on the correct instance, then click **Accept**.
 You'll be redirected back to Rootly with a success message confirming the connection.
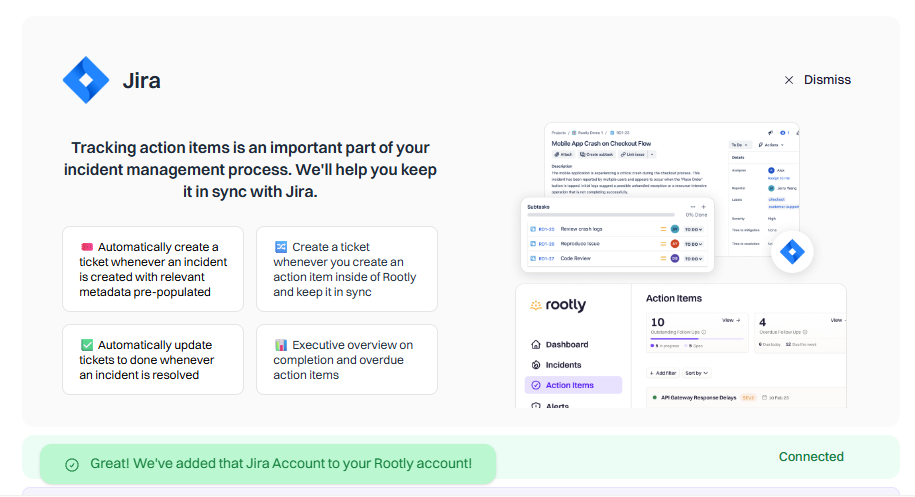 Your Jira Cloud instance is now connected to Rootly.
## Installing Additional Instances
If your organization uses multiple Jira Cloud instances, you can connect them separately.
A Jira Cloud **instance** is not the same as a Jira **project**. An instance is a separate domain (e.g., `company.atlassian.net`). You can have multiple projects within one instance — most organizations have a single instance with multiple projects.
To add another instance:
1. Go to **Integrations** and search for **Jira Cloud**
2. Click **Set up another instance**
3. Follow the same authorization flow
Make sure you're logged into the correct Jira instance in your browser before starting the authorization flow.
## Setting Up the Jira Webhook
To enable **Jira → Rootly sync**, you must configure a webhook in Jira. This allows Rootly to receive events when Jira issues are created or updated. Without this step, changes in Jira won't reflect back in Rootly.
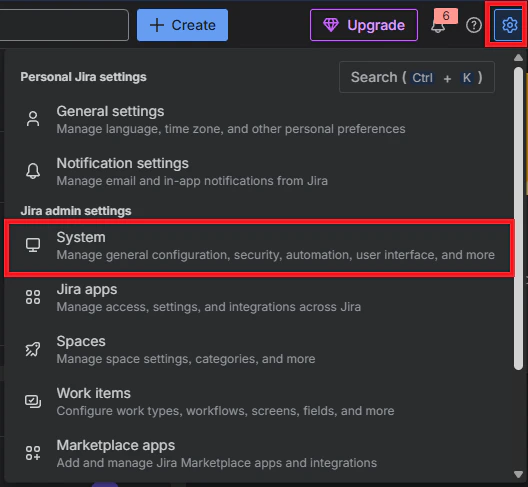
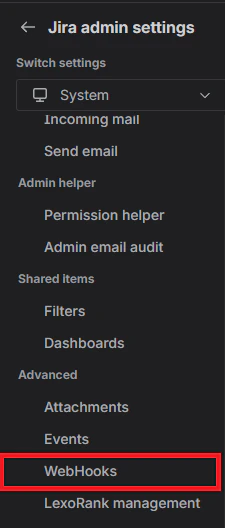
In Jira, navigate to **Settings → System → WebHooks**.
Your Jira Cloud instance is now connected to Rootly.
## Installing Additional Instances
If your organization uses multiple Jira Cloud instances, you can connect them separately.
A Jira Cloud **instance** is not the same as a Jira **project**. An instance is a separate domain (e.g., `company.atlassian.net`). You can have multiple projects within one instance — most organizations have a single instance with multiple projects.
To add another instance:
1. Go to **Integrations** and search for **Jira Cloud**
2. Click **Set up another instance**
3. Follow the same authorization flow
Make sure you're logged into the correct Jira instance in your browser before starting the authorization flow.
## Setting Up the Jira Webhook
To enable **Jira → Rootly sync**, you must configure a webhook in Jira. This allows Rootly to receive events when Jira issues are created or updated. Without this step, changes in Jira won't reflect back in Rootly.
In Jira, navigate to **Settings → System → WebHooks**.
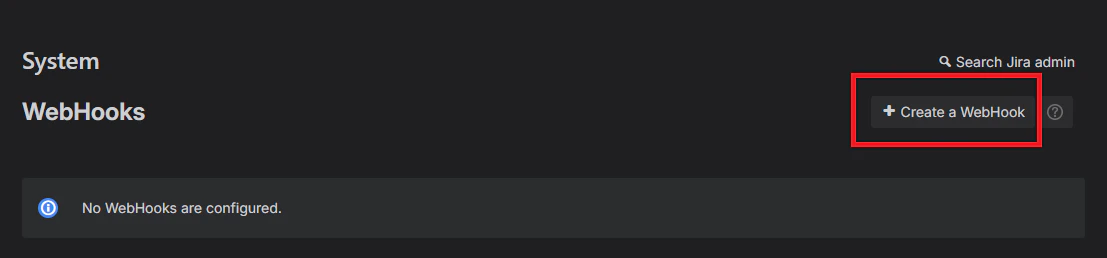
 Click **Create a WebHook**.
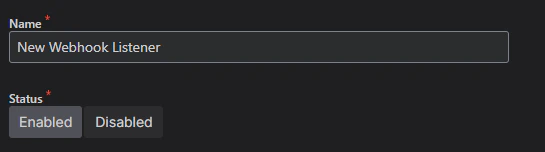
 Give it a descriptive name (e.g., "Rootly Webhook Listener") and ensure the status is set to **Enabled**.
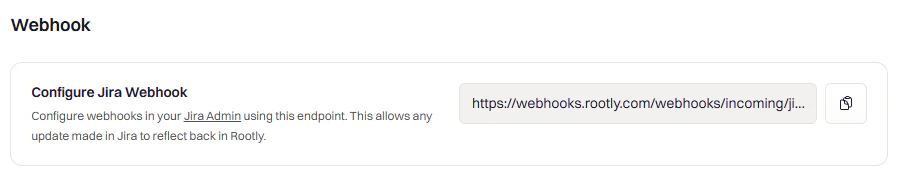
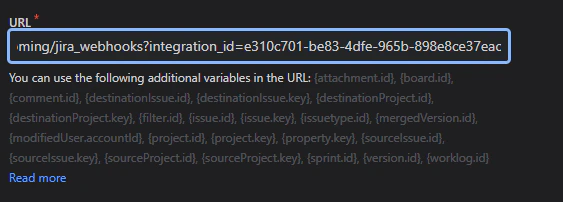
 In Rootly, go to **Integrations → Jira → Configure** and copy the webhook URL. Paste it into the **URL** field in Jira.
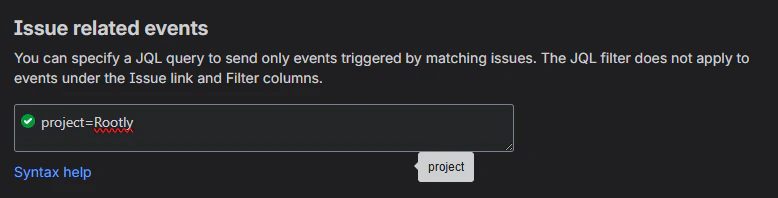
 To limit which projects send events to Rootly, add a JQL filter under **Issue related events**. Leave this blank to receive events from all projects.
 Choose the Jira events you want Rootly to receive — at minimum, select **issue created** and **issue updated**.
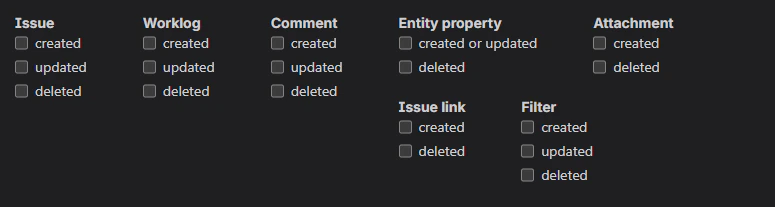 Ensure **Exclude body** is **not** checked. Jira may enable this by default, but Rootly requires the full event payload to process events correctly.
 Click **Create** to save your webhook configuration.
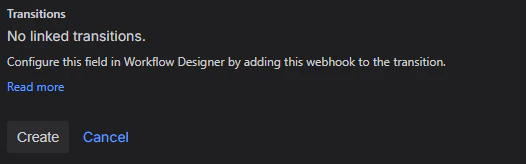
 Your Jira webhook is now configured for bidirectional sync.
## Verify Installation
Once connected, confirm the integration is working end-to-end:
1. **Check integration status** — The Jira tile in Rootly should show **Connected**.
2. **Test Rootly → Jira** — Create a test incident and verify that a Jira issue is created in the expected project.
3. **Test Jira → Rootly** — Create or update a Jira issue, then check the [Alerts page](https://rootly.com/account/alerts) in Rootly to confirm the event arrived.
If events appear on the Alerts page, your webhook is configured correctly.
## Troubleshooting
**Issue:** After completing OAuth, Jira doesn't show under Connected Apps.
**Solutions:**
* Ensure you completed the full OAuth consent flow without navigating away
* Confirm your Jira user has **admin** or **manage apps** permissions
* Log out of other Jira accounts and retry authorization
* Revoke the app in Jira (**Settings → Apps → Manage Apps**) and reconnect
**Issue:** Jira connects but no projects appear in Rootly.
**Solutions:**
* Verify your Jira account has **Browse Projects** permission
* Check project-level permissions for **Create Issues**, **Edit Issues**, and **Add Comments**
* Re-authenticate to refresh your permission scopes
**Issue:** Integration connects but Rootly can't create issues in Jira.
**Solutions:**
* Verify your Jira user has: Create Issues, Edit Issues, Assign Issues, Add Comments
* Check for required custom fields in Jira that aren't being populated by Rootly
* Confirm the issue type exists in the selected project
* Review Jira workflow validators that may block external issue creation
**Issue:** Jira events don't show on Rootly's Alerts page.
**Solutions:**
* Verify the webhook URL in Jira matches the one from Rootly
* Ensure **Exclude body** is NOT checked in the Jira webhook settings
* Confirm the webhook status is **Enabled**
* Check that your JQL filter (if used) includes the project you're testing with
## Uninstall
To remove the Jira integration:
1. Go to **Configuration → Integrations** and find **Jira**
2. Click **Connected** to reveal the disconnect option
3. Click **Disconnect**
Your Jira webhook is now configured for bidirectional sync.
## Verify Installation
Once connected, confirm the integration is working end-to-end:
1. **Check integration status** — The Jira tile in Rootly should show **Connected**.
2. **Test Rootly → Jira** — Create a test incident and verify that a Jira issue is created in the expected project.
3. **Test Jira → Rootly** — Create or update a Jira issue, then check the [Alerts page](https://rootly.com/account/alerts) in Rootly to confirm the event arrived.
If events appear on the Alerts page, your webhook is configured correctly.
## Troubleshooting
**Issue:** After completing OAuth, Jira doesn't show under Connected Apps.
**Solutions:**
* Ensure you completed the full OAuth consent flow without navigating away
* Confirm your Jira user has **admin** or **manage apps** permissions
* Log out of other Jira accounts and retry authorization
* Revoke the app in Jira (**Settings → Apps → Manage Apps**) and reconnect
**Issue:** Jira connects but no projects appear in Rootly.
**Solutions:**
* Verify your Jira account has **Browse Projects** permission
* Check project-level permissions for **Create Issues**, **Edit Issues**, and **Add Comments**
* Re-authenticate to refresh your permission scopes
**Issue:** Integration connects but Rootly can't create issues in Jira.
**Solutions:**
* Verify your Jira user has: Create Issues, Edit Issues, Assign Issues, Add Comments
* Check for required custom fields in Jira that aren't being populated by Rootly
* Confirm the issue type exists in the selected project
* Review Jira workflow validators that may block external issue creation
**Issue:** Jira events don't show on Rootly's Alerts page.
**Solutions:**
* Verify the webhook URL in Jira matches the one from Rootly
* Ensure **Exclude body** is NOT checked in the Jira webhook settings
* Confirm the webhook status is **Enabled**
* Check that your JQL filter (if used) includes the project you're testing with
## Uninstall
To remove the Jira integration:
1. Go to **Configuration → Integrations** and find **Jira**
2. Click **Connected** to reveal the disconnect option
3. Click **Disconnect**
 Disconnecting Rootly does **not** remove the webhook from Jira. To stop Jira from sending events, you must also delete the webhook in Jira under **Settings → System → WebHooks**.