> ## Documentation Index
> Fetch the complete documentation index at: https://docs.rootly.com/llms.txt
> Use this file to discover all available pages before exploring further.
# Installation
> Connect Microsoft Teams to Rootly by authorizing OAuth access and installing the Rootly bot for incident channel creation, notifications, and meetings.
Setting up the Microsoft Teams integration involves two steps that work together. First, you authorize Rootly via OAuth so it can call the Microsoft Teams API on your behalf. Then, you install the Rootly bot directly inside Teams so it can create channels and post messages. Both steps are required — OAuth alone isn't enough to create channels or send messages.
## Prerequisites
**Before you start:**
* Rootly account with Admin permissions
* Microsoft Teams account with access to the workspace you want to connect
* Ability to install apps in your Teams workspace (or admin approval from your Microsoft 365 admin)
We recommend connecting with a **service account** rather than a personal account. This ensures the integration stays active if team members leave your organization.
***
## Part 1: Connect via OAuth
The OAuth flow grants Rootly permission to interact with your Microsoft Teams workspace through the API. You'll be redirected to Microsoft to sign in and approve the required permissions, then returned to Rootly automatically.
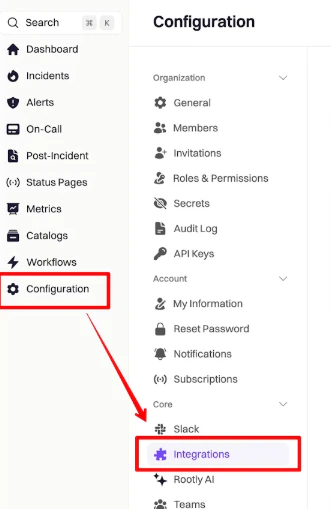
In Rootly, go to **Configuration → Integrations** and search for **Microsoft Teams**.
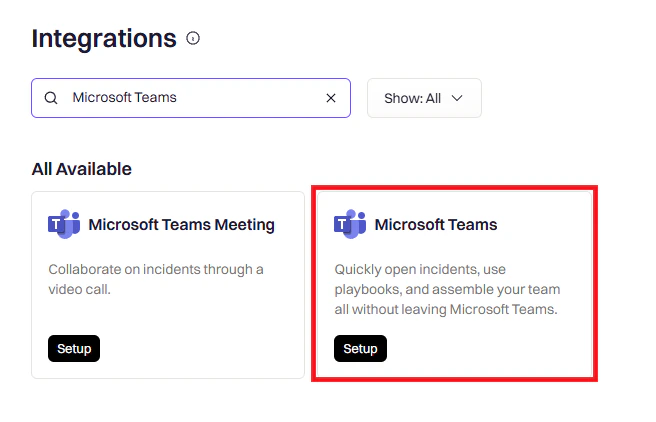
 Click **Setup** on the Microsoft Teams integration to begin the OAuth flow.
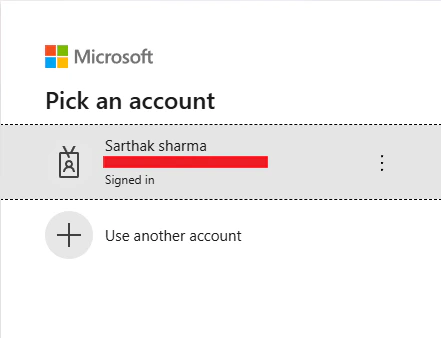
 You'll be redirected to Microsoft. Select your Microsoft 365 work account — this should be the service account you intend to use for the integration.
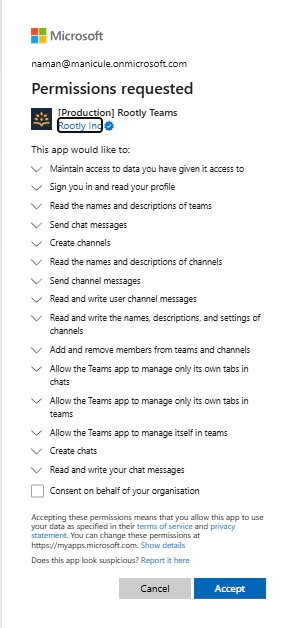
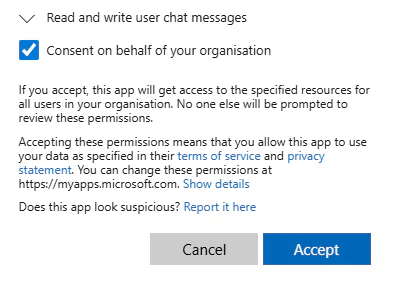
 Microsoft will show you the permissions Rootly is requesting. Review them and click **Accept** to grant access.
 After approving, you'll be redirected back to Rootly. A success message confirms the integration is connected.
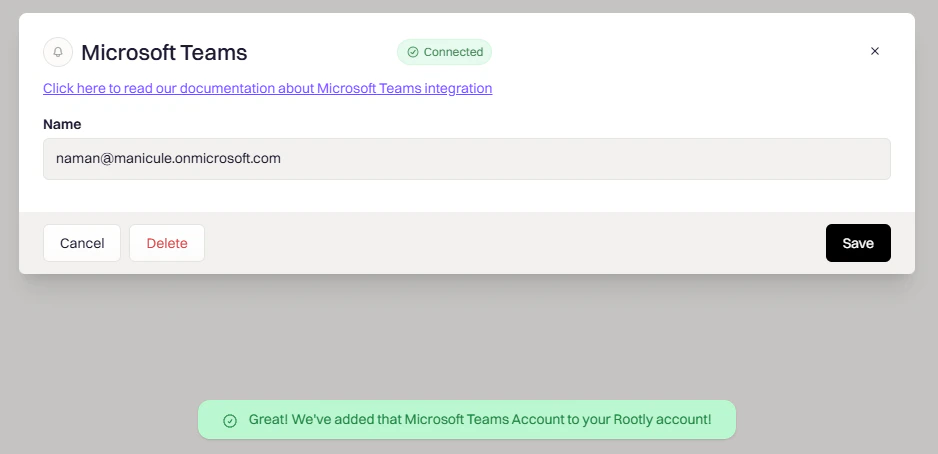 Microsoft Teams is now connected to Rootly.
### Required OAuth Permissions
| Permission | Purpose |
| ------------------------------------------- | ----------------------------------------------------------- |
| `offline_access` | Keeps the Rootly → Teams connection active between sessions |
| `User.Read` | Identifies the account connecting to Rootly |
| `Team.ReadBasic.All` | Lets Rootly see your Teams and channels |
| `ChatMessage.Send` | Rootly can post messages in chats and channels |
| `Channel.Create` | Rootly can create incident channels |
| `Channel.ReadBasic.All` | Read channel names and descriptions |
| `ChannelMessage.Send` | Rootly can send channel messages |
| `ChannelMessage.ReadWrite` | Rootly can update messages it posts |
| `ChannelSettings.ReadWrite.All` | Allows Rootly to manage channel settings |
| `ChannelMember.ReadWrite.All` | Rootly can add and remove users in incident channels |
| `TeamsTab.ReadWriteSelfForChat` | Rootly can install tabs in chats |
| `TeamsTab.ReadWriteSelfForTeam` | Rootly can install tabs in teams |
| `TeamsAppInstallation.ReadWriteSelfForTeam` | Rootly can install itself in teams |
| `TeamsAppInstallation.ReadWriteSelfForChat` | Rootly can install itself in chats |
| `Chat.Create` | Rootly can create group and one-on-one chats |
| `Chat.ReadWrite` | Rootly can read and send messages in chats |
***
## Part 2: Install the Rootly Bot
OAuth gives Rootly API access, but channel creation and messaging also require the Rootly bot to be present inside Microsoft Teams. Without the bot installed, workflows that create channels or send messages will fail. You install it directly from the Teams app store.
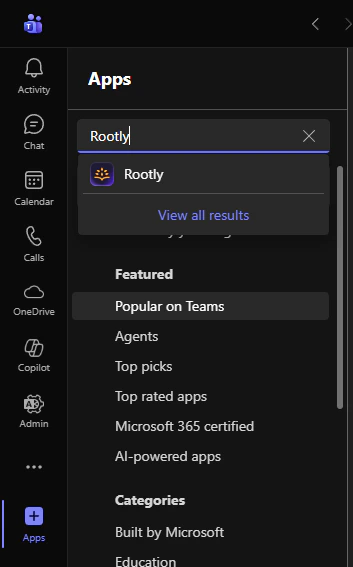
In Microsoft Teams, click **Apps** in the left sidebar and search for **Rootly**.
Microsoft Teams is now connected to Rootly.
### Required OAuth Permissions
| Permission | Purpose |
| ------------------------------------------- | ----------------------------------------------------------- |
| `offline_access` | Keeps the Rootly → Teams connection active between sessions |
| `User.Read` | Identifies the account connecting to Rootly |
| `Team.ReadBasic.All` | Lets Rootly see your Teams and channels |
| `ChatMessage.Send` | Rootly can post messages in chats and channels |
| `Channel.Create` | Rootly can create incident channels |
| `Channel.ReadBasic.All` | Read channel names and descriptions |
| `ChannelMessage.Send` | Rootly can send channel messages |
| `ChannelMessage.ReadWrite` | Rootly can update messages it posts |
| `ChannelSettings.ReadWrite.All` | Allows Rootly to manage channel settings |
| `ChannelMember.ReadWrite.All` | Rootly can add and remove users in incident channels |
| `TeamsTab.ReadWriteSelfForChat` | Rootly can install tabs in chats |
| `TeamsTab.ReadWriteSelfForTeam` | Rootly can install tabs in teams |
| `TeamsAppInstallation.ReadWriteSelfForTeam` | Rootly can install itself in teams |
| `TeamsAppInstallation.ReadWriteSelfForChat` | Rootly can install itself in chats |
| `Chat.Create` | Rootly can create group and one-on-one chats |
| `Chat.ReadWrite` | Rootly can read and send messages in chats |
***
## Part 2: Install the Rootly Bot
OAuth gives Rootly API access, but channel creation and messaging also require the Rootly bot to be present inside Microsoft Teams. Without the bot installed, workflows that create channels or send messages will fail. You install it directly from the Teams app store.
In Microsoft Teams, click **Apps** in the left sidebar and search for **Rootly**.
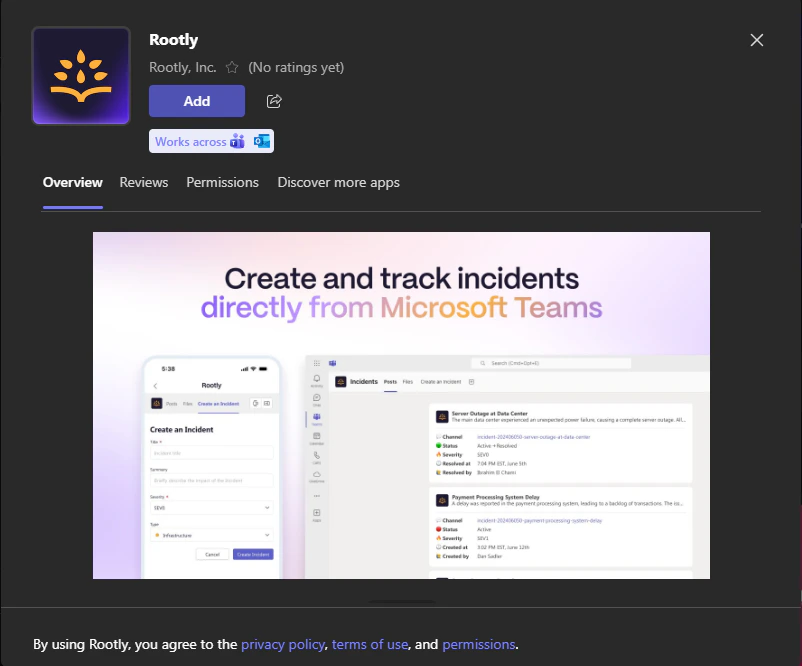
 Click **Add** on the Rootly app listing.
 Select the team where you want to install Rootly. We recommend starting with the General channel of your primary incident response team.
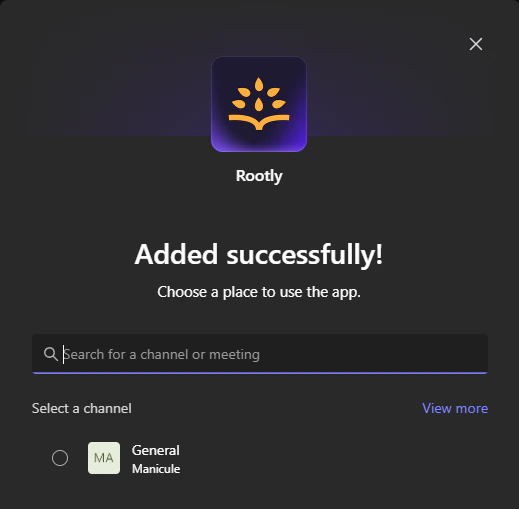 The Rootly bot is now installed in your team and ready to create channels and send messages.
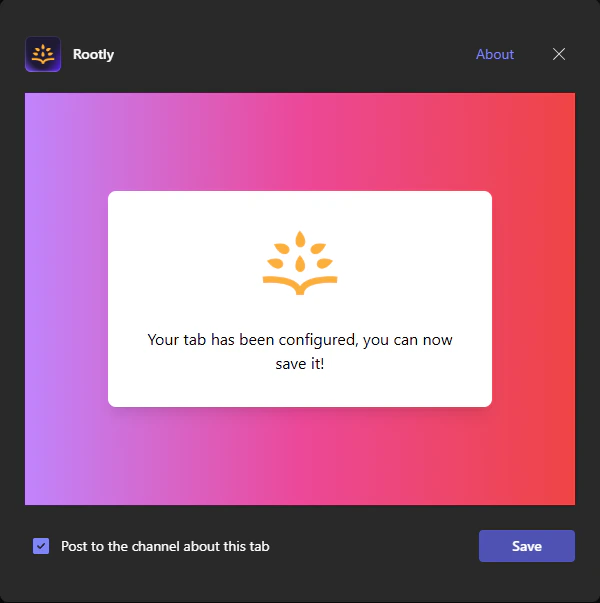 You'll need to repeat the bot installation for each team where you want Rootly to create incident channels. The service account must be a member of each team.
***
## Verify Installation
Once both parts are complete, confirm everything is working before setting up workflows:
1. **Check Rootly** — The integration status shows **Connected** on the integrations page
2. **Check Teams** — The Rootly app appears in your team's installed apps
3. **Test end-to-end** — Create a test incident in Rootly and verify a Teams channel is created automatically
If channels aren't being created, check your workflow configuration first. The bot must be installed in the specific team referenced in the workflow action.
***
## Microsoft Teams Meeting
The **Microsoft Teams Meeting** integration is a separate OAuth connection that enables creating video meetings directly from Rootly incidents. It uses a different set of permissions than the main Teams integration and must be connected independently — even if you've already set up the main Teams integration.
Once connected, a **Create a Microsoft meeting** button appears in the incident header, letting anyone on the response team spin up a live video call with one click.
### Setup
1. Go to **Configuration → Integrations** and search for **Microsoft Teams Meeting**
2. Click **Setup** and sign in with your Microsoft 365 work account
3. Approve the requested permissions
4. Once connected, the **Create a Microsoft meeting** button will appear on every incident
We recommend connecting with a **service account** so the meeting integration stays active if a user leaves your organization.
### Required OAuth Permissions
| Permission | Purpose |
| -------------------------- | -------------------------------------------------------------------------- |
| `offline_access` | Required for OAuth authentication |
| `User.Read` | Identifies the account connecting to Rootly |
| `OnlineMeetings.ReadWrite` | Allows Rootly to create online meetings on behalf of the connected account |
### Uninstall
1. Log into your **Microsoft Teams Meeting** account
2. Click **Manage → Installed Apps** or search for the **Rootly** app
3. Click the **Rootly** app and click **Uninstall**
***
## Uninstall
To remove the main Microsoft Teams integration from Rootly:
1. Go to **Configuration → Integrations** and find **Microsoft Teams**
2. Click **Connected** to reveal the disconnect option
3. Click **Disconnect**
You'll need to repeat the bot installation for each team where you want Rootly to create incident channels. The service account must be a member of each team.
***
## Verify Installation
Once both parts are complete, confirm everything is working before setting up workflows:
1. **Check Rootly** — The integration status shows **Connected** on the integrations page
2. **Check Teams** — The Rootly app appears in your team's installed apps
3. **Test end-to-end** — Create a test incident in Rootly and verify a Teams channel is created automatically
If channels aren't being created, check your workflow configuration first. The bot must be installed in the specific team referenced in the workflow action.
***
## Microsoft Teams Meeting
The **Microsoft Teams Meeting** integration is a separate OAuth connection that enables creating video meetings directly from Rootly incidents. It uses a different set of permissions than the main Teams integration and must be connected independently — even if you've already set up the main Teams integration.
Once connected, a **Create a Microsoft meeting** button appears in the incident header, letting anyone on the response team spin up a live video call with one click.
### Setup
1. Go to **Configuration → Integrations** and search for **Microsoft Teams Meeting**
2. Click **Setup** and sign in with your Microsoft 365 work account
3. Approve the requested permissions
4. Once connected, the **Create a Microsoft meeting** button will appear on every incident
We recommend connecting with a **service account** so the meeting integration stays active if a user leaves your organization.
### Required OAuth Permissions
| Permission | Purpose |
| -------------------------- | -------------------------------------------------------------------------- |
| `offline_access` | Required for OAuth authentication |
| `User.Read` | Identifies the account connecting to Rootly |
| `OnlineMeetings.ReadWrite` | Allows Rootly to create online meetings on behalf of the connected account |
### Uninstall
1. Log into your **Microsoft Teams Meeting** account
2. Click **Manage → Installed Apps** or search for the **Rootly** app
3. Click the **Rootly** app and click **Uninstall**
***
## Uninstall
To remove the main Microsoft Teams integration from Rootly:
1. Go to **Configuration → Integrations** and find **Microsoft Teams**
2. Click **Connected** to reveal the disconnect option
3. Click **Disconnect**
 Disconnecting from Rootly does not remove the Rootly bot from Teams. To fully uninstall, open **Microsoft Teams → Apps → Manage your apps**, find **Rootly**, and click **Uninstall**.
***
## Troubleshooting
After completing OAuth, Rootly doesn't appear as a connected app in Teams.
**Solutions:**
* Verify you completed OAuth using the same email as your Teams account
* Make sure Rootly was installed in a specific team, not just your personal app space
* Try uninstalling and reinstalling the Rootly app from the Teams store
* Check if your organization restricts third-party app installations — a Microsoft 365 admin may need to approve Rootly
Teams shows an error when trying to add Rootly to a team.
**Solutions:**
* Ensure you have owner or admin permissions in the team
* Ask a Team Owner or Microsoft 365 admin to approve the Rootly app
* Verify that third-party app installations are enabled in your Microsoft 365 admin center
Teams reports that the signed-in email isn't linked to a Rootly account.
**Solutions:**
* Verify the OAuth email matches exactly the email registered in Rootly
* Confirm this email exists as a user in Rootly
* Add the email under **Rootly → Organization Settings → Members** if needed
* Disconnect and reconnect the Microsoft Teams integration
Workflows run successfully but no Teams channels appear.
**Solutions:**
* Verify the Rootly bot is installed in the specific team referenced in the workflow action
* Check workflow run logs for errors: **Workflows → Your Workflow → ... → View Runs**
* Confirm the team name in the workflow action exactly matches the team in Teams
Disconnecting from Rootly does not remove the Rootly bot from Teams. To fully uninstall, open **Microsoft Teams → Apps → Manage your apps**, find **Rootly**, and click **Uninstall**.
***
## Troubleshooting
After completing OAuth, Rootly doesn't appear as a connected app in Teams.
**Solutions:**
* Verify you completed OAuth using the same email as your Teams account
* Make sure Rootly was installed in a specific team, not just your personal app space
* Try uninstalling and reinstalling the Rootly app from the Teams store
* Check if your organization restricts third-party app installations — a Microsoft 365 admin may need to approve Rootly
Teams shows an error when trying to add Rootly to a team.
**Solutions:**
* Ensure you have owner or admin permissions in the team
* Ask a Team Owner or Microsoft 365 admin to approve the Rootly app
* Verify that third-party app installations are enabled in your Microsoft 365 admin center
Teams reports that the signed-in email isn't linked to a Rootly account.
**Solutions:**
* Verify the OAuth email matches exactly the email registered in Rootly
* Confirm this email exists as a user in Rootly
* Add the email under **Rootly → Organization Settings → Members** if needed
* Disconnect and reconnect the Microsoft Teams integration
Workflows run successfully but no Teams channels appear.
**Solutions:**
* Verify the Rootly bot is installed in the specific team referenced in the workflow action
* Check workflow run logs for errors: **Workflows → Your Workflow → ... → View Runs**
* Confirm the team name in the workflow action exactly matches the team in Teams