> ## Documentation Index
> Fetch the complete documentation index at: https://docs.rootly.com/llms.txt
> Use this file to discover all available pages before exploring further.
# New Relic
> Connect New Relic to Rootly to ingest alert events and capture metric and chart snapshots during incidents through Genius workflows.
The New Relic integration connects Rootly with your New Relic account in two directions. New Relic alert policies send issue events into Rootly as alerts, and incident workflows capture chart snapshots so responders keep point-in-time visibility into your observability data without leaving the incident.
With the New Relic integration, you can:
* Receive New Relic issue events as Rootly alerts
* Filter and route alerts using workflow conditions on fields like `priority`, `state`, and `workflowName`
* Capture New Relic chart snapshots from Genius workflows during incidents
* Attach snapshot links to incident timelines for post-incident review
## Before You Begin
Before setting up the integration, make sure you have:
* A Rootly account with permission to manage integrations
* A New Relic account with permission to create API keys
* Your New Relic **Account ID**
* Access to configure notification channels in New Relic, if you plan to ingest alerts
Rootly recommends integrating with a dedicated service account so the integration does not break if an individual user leaves your organization.
## Installation
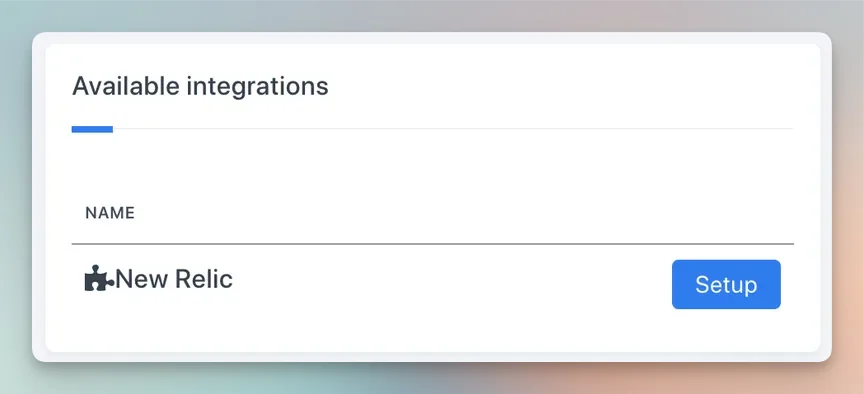
Navigate to the integrations page in Rootly and select **New Relic**.
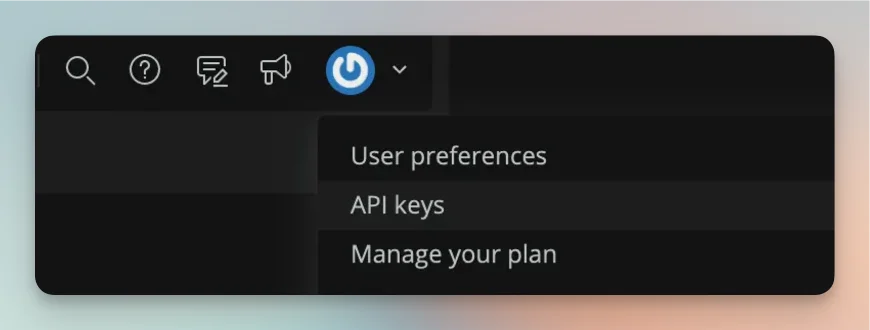
 In New Relic, navigate to your API keys settings.
 Generate a new **User** key and copy it.
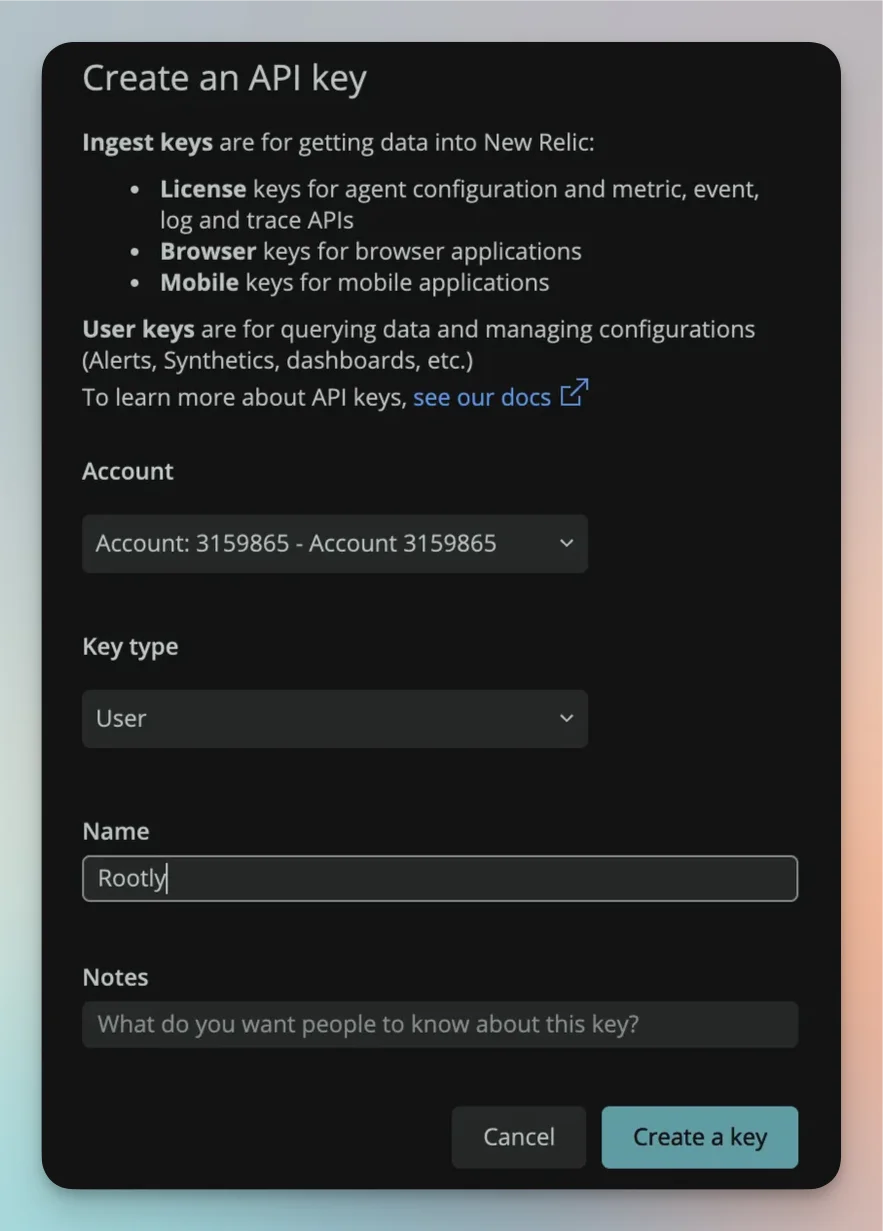 Copy the API key immediately after generating it — New Relic will not show the full key again.
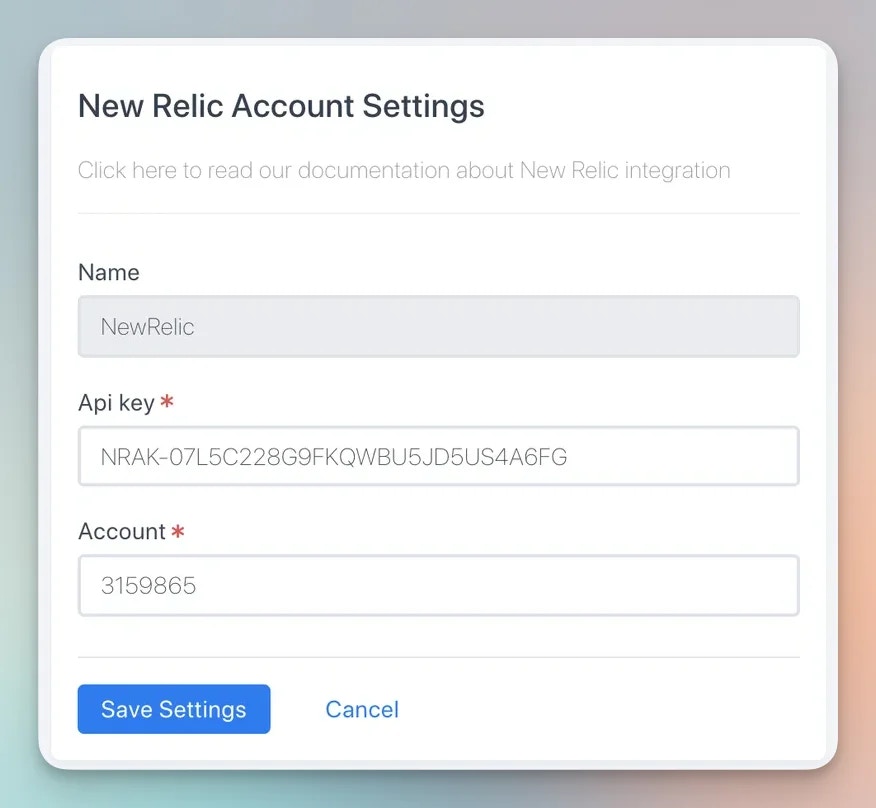
Paste your **API key** and **Account ID** into the New Relic integration settings in Rootly and save.
Copy the API key immediately after generating it — New Relic will not show the full key again.
Paste your **API key** and **Account ID** into the New Relic integration settings in Rootly and save.
 ## Ingest New Relic Alerts
New Relic sends alert events into Rootly through a webhook notification channel. Once alerts are flowing, alert workflows can create incidents, notify Slack channels, or page on-call targets.
Install the integration before setting up the webhook. The bearer token is generated during installation and is required for authentication.
### Configure a Webhook in New Relic
In New Relic, navigate to **Alerts > Notification channels** and create a new channel.
## Ingest New Relic Alerts
New Relic sends alert events into Rootly through a webhook notification channel. Once alerts are flowing, alert workflows can create incidents, notify Slack channels, or page on-call targets.
Install the integration before setting up the webhook. The bearer token is generated during installation and is required for authentication.
### Configure a Webhook in New Relic
In New Relic, navigate to **Alerts > Notification channels** and create a new channel.
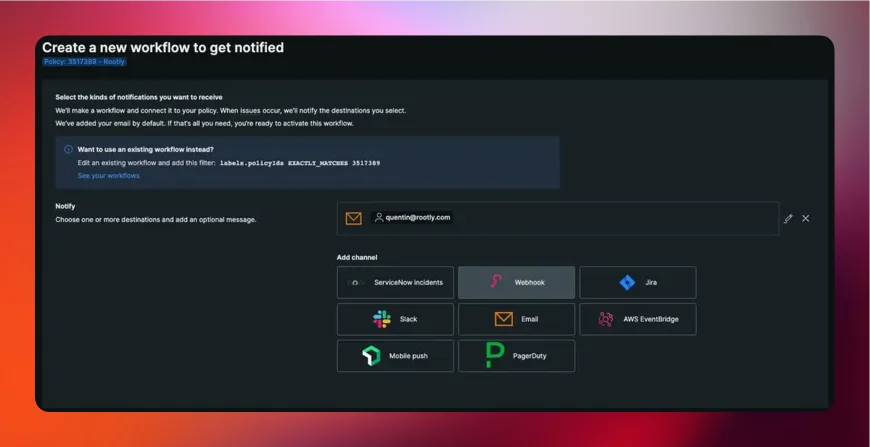 Select **Webhook** as the channel type and configure it with the following values:
* **Webhook URL**: `https://webhooks.rootly.com/webhooks/incoming/new_relic_webhooks`
* **Auth type**: Bearer token
* **Token**: the bearer token shown in your Rootly New Relic integration settings
Select **Webhook** as the channel type and configure it with the following values:
* **Webhook URL**: `https://webhooks.rootly.com/webhooks/incoming/new_relic_webhooks`
* **Auth type**: Bearer token
* **Token**: the bearer token shown in your Rootly New Relic integration settings
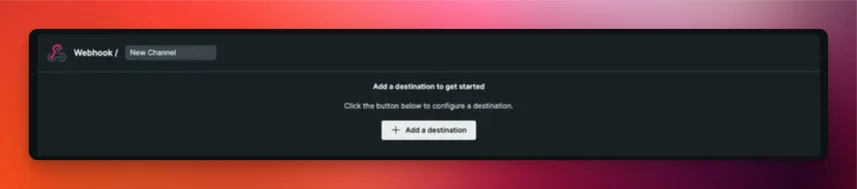
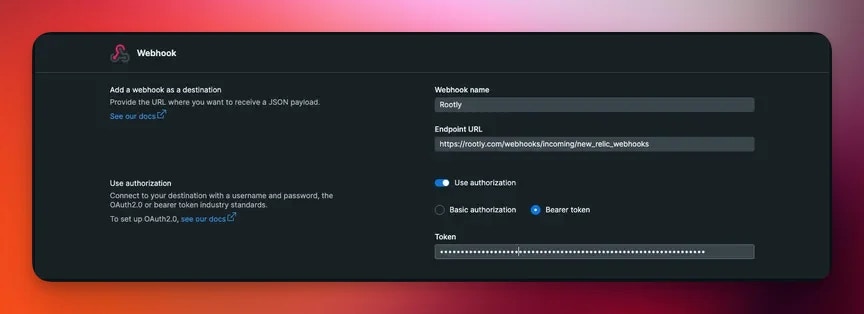 Your bearer token is available in Rootly under **Integrations > New Relic > Configure**.
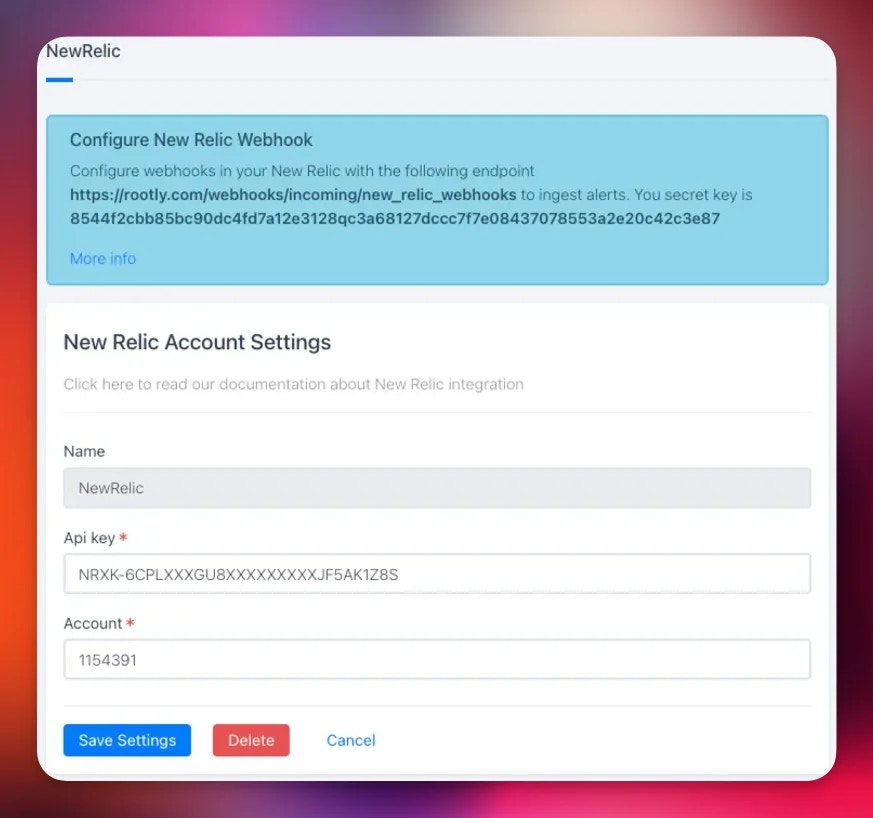 Click **Test Notification** in New Relic. A test alert should appear on your [Rootly Alerts page](https://rootly.com/account/alerts).
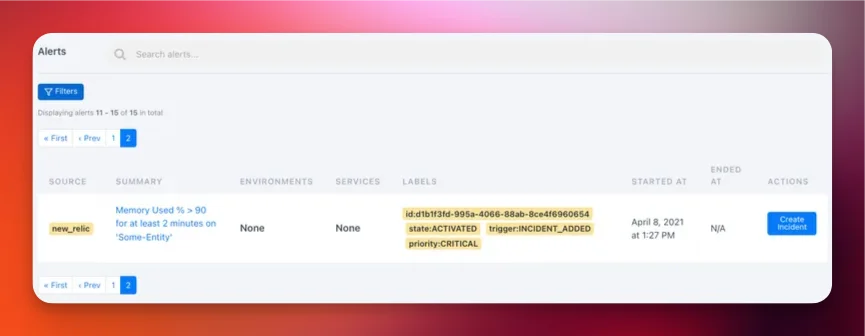 If the test alert appears in Rootly, the integration is working correctly. You can now attach this channel to New Relic alert policies.
### How Alerts Are Mapped
Rootly extracts the following fields from each New Relic alert payload:
* **Summary** — the `title` field from the New Relic issue
* **External ID** — the issue `id`, used to deduplicate alerts
* **External URL** — the `issueUrl`, linking back to the New Relic issue
* **Labels** — `state`, `trigger`, `priority`, and `workflowName` are attached as Rootly alert labels
New Relic `priority` and `state` values are available as alert labels in Rootly. You can use these in workflow run conditions to handle critical vs warning alerts differently.
## Workflow Actions
Once the integration is connected, a new task is available in your Genius workflows to capture New Relic chart snapshots during incidents.
If the test alert appears in Rootly, the integration is working correctly. You can now attach this channel to New Relic alert policies.
### How Alerts Are Mapped
Rootly extracts the following fields from each New Relic alert payload:
* **Summary** — the `title` field from the New Relic issue
* **External ID** — the issue `id`, used to deduplicate alerts
* **External URL** — the `issueUrl`, linking back to the New Relic issue
* **Labels** — `state`, `trigger`, `priority`, and `workflowName` are attached as Rootly alert labels
New Relic `priority` and `state` values are available as alert labels in Rootly. You can use these in workflow run conditions to handle critical vs warning alerts differently.
## Workflow Actions
Once the integration is connected, a new task is available in your Genius workflows to capture New Relic chart snapshots during incidents.
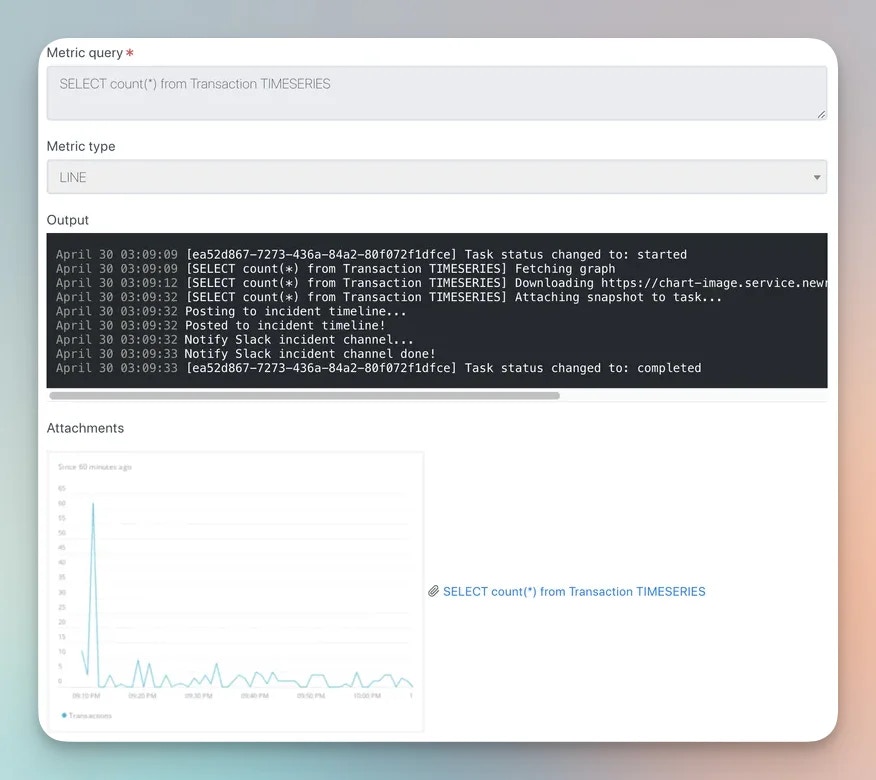 Snapshots are point-in-time captures attached to the incident timeline, so you can reference exactly what your metrics looked like when the incident occurred.
## Troubleshooting
Verify that the webhook URL and bearer token are correct. Use the **Test Notification** button in New Relic to confirm delivery. Ensure the notification channel is attached to the alert policy that fired.
Rootly extracts fields from the standard New Relic issue payload. If your New Relic account uses a customized payload template for the webhook channel, ensure it still includes the standard fields: `title`, `id`, `issueUrl`, `state`, `priority`, and `createdAt`.
Confirm you are using the token from the Rootly New Relic integration settings, not your New Relic API key. These are different credentials — the bearer token is generated by Rootly for authenticating inbound webhooks.
## Uninstall
To remove the New Relic integration, open the integrations panel in Rootly and select **Configure > Delete**.
## Related Resources
* [Alert workflows](/workflows/alert-workflows)
* [Alert routing](/alerts/alert-routing)
* [Integrations overview](/integrations/overview)
Snapshots are point-in-time captures attached to the incident timeline, so you can reference exactly what your metrics looked like when the incident occurred.
## Troubleshooting
Verify that the webhook URL and bearer token are correct. Use the **Test Notification** button in New Relic to confirm delivery. Ensure the notification channel is attached to the alert policy that fired.
Rootly extracts fields from the standard New Relic issue payload. If your New Relic account uses a customized payload template for the webhook channel, ensure it still includes the standard fields: `title`, `id`, `issueUrl`, `state`, `priority`, and `createdAt`.
Confirm you are using the token from the Rootly New Relic integration settings, not your New Relic API key. These are different credentials — the bearer token is generated by Rootly for authenticating inbound webhooks.
## Uninstall
To remove the New Relic integration, open the integrations panel in Rootly and select **Configure > Delete**.
## Related Resources
* [Alert workflows](/workflows/alert-workflows)
* [Alert routing](/alerts/alert-routing)
* [Integrations overview](/integrations/overview)