> ## Documentation Index
> Fetch the complete documentation index at: https://docs.rootly.com/llms.txt
> Use this file to discover all available pages before exploring further.
# Quip
> Connect Quip to Rootly to automatically create and update retrospective documents from incidents using Genius workflows with templates and folder routing.
## Introduction
The Quip integration connects Rootly with your Quip workspace so teams can automatically create and update documents during and after incidents through Genius workflows.
With the Quip integration, you can:
* Automatically create Quip documents from incident workflows using retrospective templates or custom content
* Start documents from an existing Quip template
* Update existing Quip documents as an incident progresses
* Attach created documents directly to the incident record
## Before You Begin
Before setting up the integration, make sure you have:
* A Rootly account with admin permission to manage integrations
* A Quip account with permission to create API keys in the Quip admin portal
* Access to [admin.quip.com](https://admin.quip.com)
We recommend installing with a dedicated service account so the integration does not break if an individual user leaves your organization.
## Installation
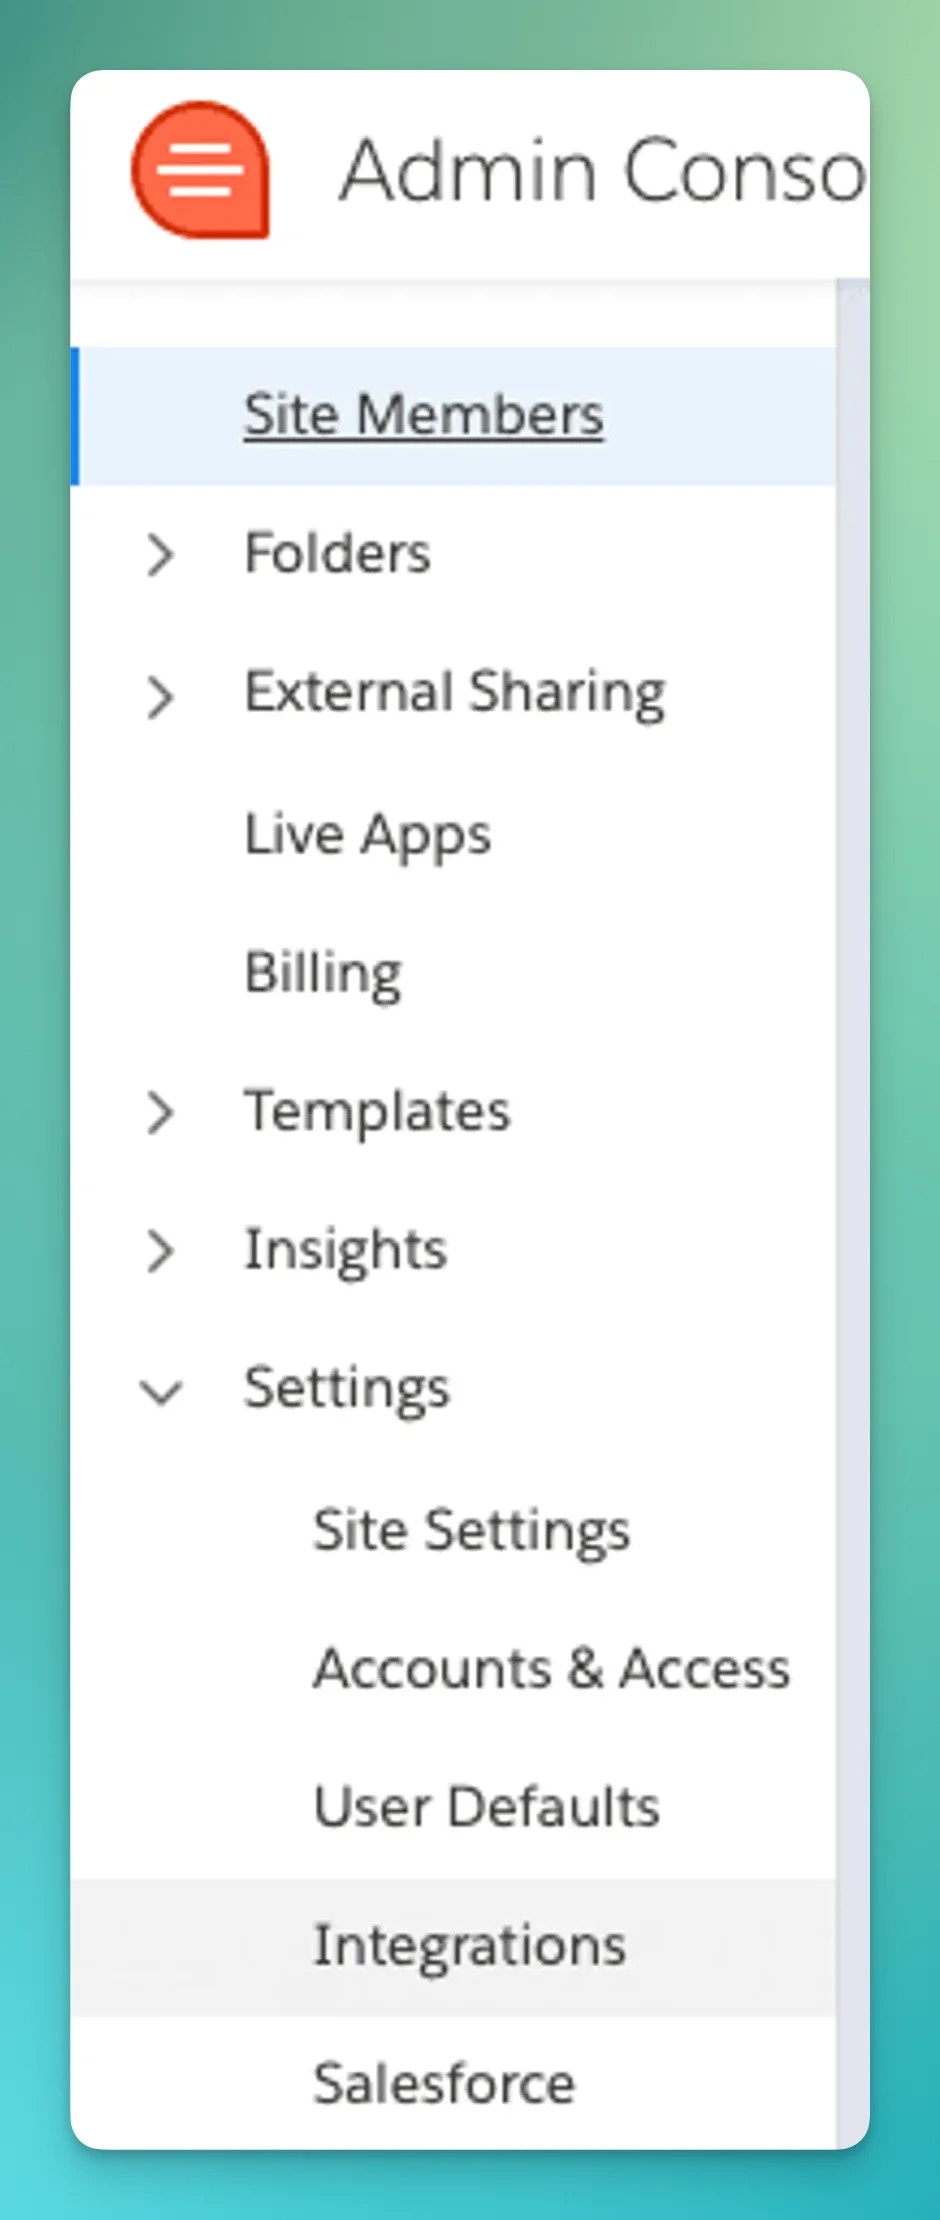
Go to [admin.quip.com](https://admin.quip.com) and navigate to **Settings > Integrations**.
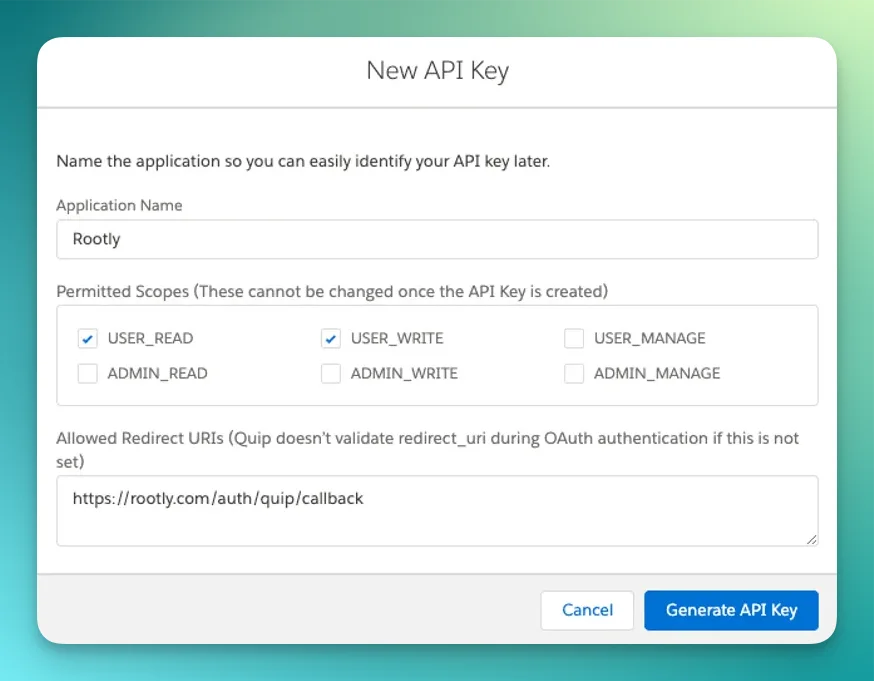
 Create a new API key with the following settings:
* **Permissions**: `USER_READ` and `USER_WRITE`
* **Redirect URI**: `https://rootly.com/auth/quip/callback`
Create a new API key with the following settings:
* **Permissions**: `USER_READ` and `USER_WRITE`
* **Redirect URI**: `https://rootly.com/auth/quip/callback`
 Copy the Client ID and Client Secret after creating the key — you will need both to complete the setup in Rootly.
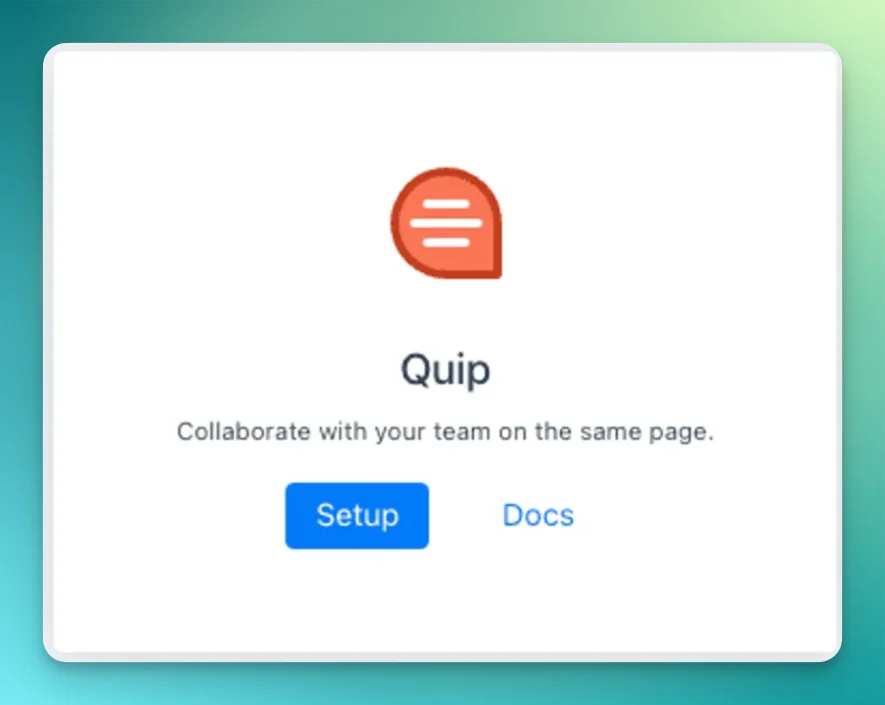
Navigate to the integrations page in Rootly and select **Quip**.
Copy the Client ID and Client Secret after creating the key — you will need both to complete the setup in Rootly.
Navigate to the integrations page in Rootly and select **Quip**.
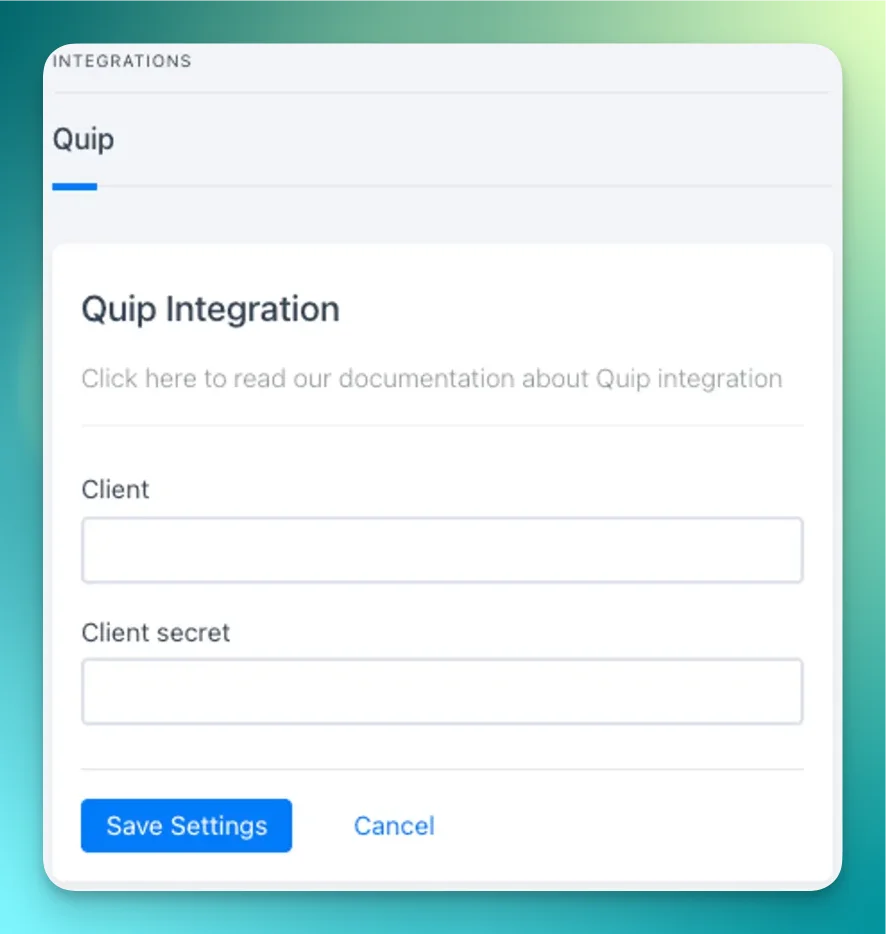
 Paste the **Client ID** and **Client Secret** from Quip into the Rootly integration settings and save.
 Once saved, the **Create a Quip Page** and **Update a Quip Page** workflow actions are available in your Genius workflows.
## Workflow Actions
### Create a Quip Page
This action creates a new Quip document in a specified folder.
**Parent Folder**
The Quip folder where the document will be created. Leave blank to create in your private folder.
**Title**
The title of the Quip document. Defaults to `{{ incident.title }}`. Supports Liquid syntax.
Use the [Incident Variable Explorer](https://rootly.com/account/help/liquid-explorer) to preview what Liquid variables return for your incidents.
**Quip Template**
Optionally select an existing Quip document to use as a starting template. The new document will be based on the content of the selected template.
**Retrospective Template**
Select a predefined Rootly retrospective template to populate the document body. Templates are managed on the [Retrospective Templates page](https://rootly.com/account/retrospective-steps?tab=documents).
If a Retrospective Template is selected, it overrides any content defined in the Custom Content field.
**Custom Content**
Define the document body manually. Supports Liquid syntax. Used when no Retrospective Template is selected.
**Mark Post Mortem as Published**
When enabled, marks the retrospective status as `published` after the document is created. Use this when follow-up notification workflows trigger on published retrospectives.
### Update a Quip Page
This action updates an existing Quip document with new content.
**File ID**
The Quip thread ID of the document to update. Supports Liquid syntax.
When a **Create a Quip Page** action runs, Rootly stores the resulting document ID and URL on the incident record. Reference the file ID in subsequent update actions using Liquid variables.
**Title**
The updated title for the document. Supports Liquid syntax. Leave blank to keep the existing title.
**Content**
Additional content to append to the document. Supports Liquid syntax.
**Quip Template / Retrospective Template**
Re-render the document body using a Quip template or Rootly retrospective template.
## Uninstall
To remove the Quip integration, open the integrations panel in Rootly and select **Configure > Delete**.
Once saved, the **Create a Quip Page** and **Update a Quip Page** workflow actions are available in your Genius workflows.
## Workflow Actions
### Create a Quip Page
This action creates a new Quip document in a specified folder.
**Parent Folder**
The Quip folder where the document will be created. Leave blank to create in your private folder.
**Title**
The title of the Quip document. Defaults to `{{ incident.title }}`. Supports Liquid syntax.
Use the [Incident Variable Explorer](https://rootly.com/account/help/liquid-explorer) to preview what Liquid variables return for your incidents.
**Quip Template**
Optionally select an existing Quip document to use as a starting template. The new document will be based on the content of the selected template.
**Retrospective Template**
Select a predefined Rootly retrospective template to populate the document body. Templates are managed on the [Retrospective Templates page](https://rootly.com/account/retrospective-steps?tab=documents).
If a Retrospective Template is selected, it overrides any content defined in the Custom Content field.
**Custom Content**
Define the document body manually. Supports Liquid syntax. Used when no Retrospective Template is selected.
**Mark Post Mortem as Published**
When enabled, marks the retrospective status as `published` after the document is created. Use this when follow-up notification workflows trigger on published retrospectives.
### Update a Quip Page
This action updates an existing Quip document with new content.
**File ID**
The Quip thread ID of the document to update. Supports Liquid syntax.
When a **Create a Quip Page** action runs, Rootly stores the resulting document ID and URL on the incident record. Reference the file ID in subsequent update actions using Liquid variables.
**Title**
The updated title for the document. Supports Liquid syntax. Leave blank to keep the existing title.
**Content**
Additional content to append to the document. Supports Liquid syntax.
**Quip Template / Retrospective Template**
Re-render the document body using a Quip template or Rootly retrospective template.
## Uninstall
To remove the Quip integration, open the integrations panel in Rootly and select **Configure > Delete**.