Overview
Retrospective workflows (also called post-mortem workflows) automate the work that happens after an incident—capturing learnings, publishing the review, assigning follow-ups, and keeping stakeholders in the loop. In Rootly, each incident can have an associated retrospective object. Retrospective workflows run when that retrospective changes, letting you standardize what “good follow-through” looks like across every team and every incident. This is especially valuable because retrospective work often spans multiple systems (docs, tickets, chat notifications, leadership updates), and the most common failure mode is simple: people forget steps or do them inconsistently. Typical uses include:- Keeping a draft retrospective document in sync as the review evolves
- Publishing a retrospective automatically when it reaches a “Published” state
- Creating action items or tickets and assigning owners when the retrospective is published
- Notifying the right audiences (incident channel, leadership channels, email lists) when a retrospective is ready
Retrospective workflows are triggered by retrospective events, not incident events. You can still use incident fields as conditions (for example, severity, services, teams) to control when the workflow should run—but the trigger itself comes from the retrospective lifecycle.
Supported Triggers
Retrospective workflows support the following trigger events:- Post Mortem Created (
post_mortem_created): fires when a retrospective is created - Post Mortem Updated (
post_mortem_updated): fires when a retrospective is updated (catch-all) - Status Updated (
status_updated): fires when the retrospective status changes - Slack Command (
slack_command): fires when the workflow is manually executed via Slack command
Create a Retrospective Workflow
Step 1: Start a new workflow
Navigate to: Workflows → Create Workflow → Retrospective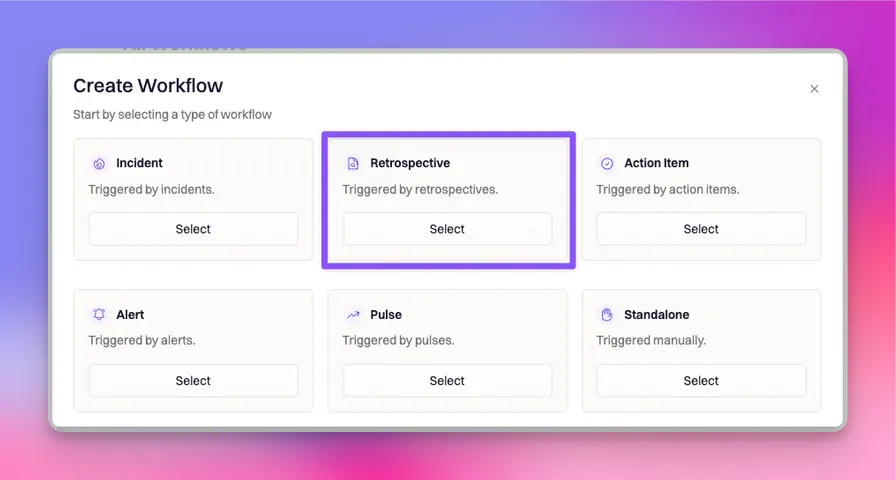
Step 2: Choose trigger event(s)
Select one or more trigger events that should initiate your workflow. In the example below, the workflow initiates when the retrospective status changes: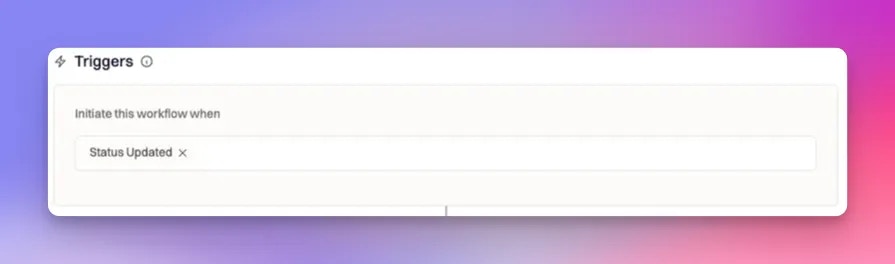
When you see “Status Updated” in a retrospective workflow, it refers to the retrospective status, not the incident status.
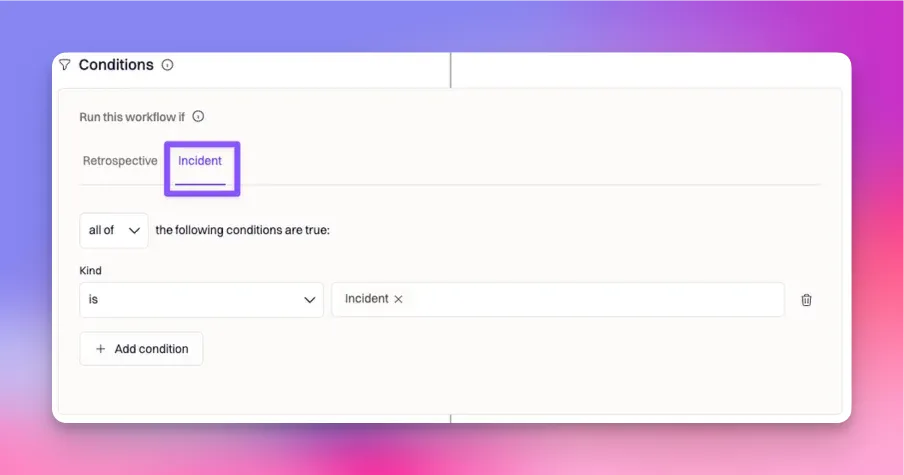
Step 3: Define run conditions
Run conditions let you control which retrospectives (and incidents) the workflow applies to. Retrospective workflows can evaluate both:- Retrospective properties (most importantly: retrospective status)
- Incident properties (severity, services, teams, environments, custom fields, etc.)
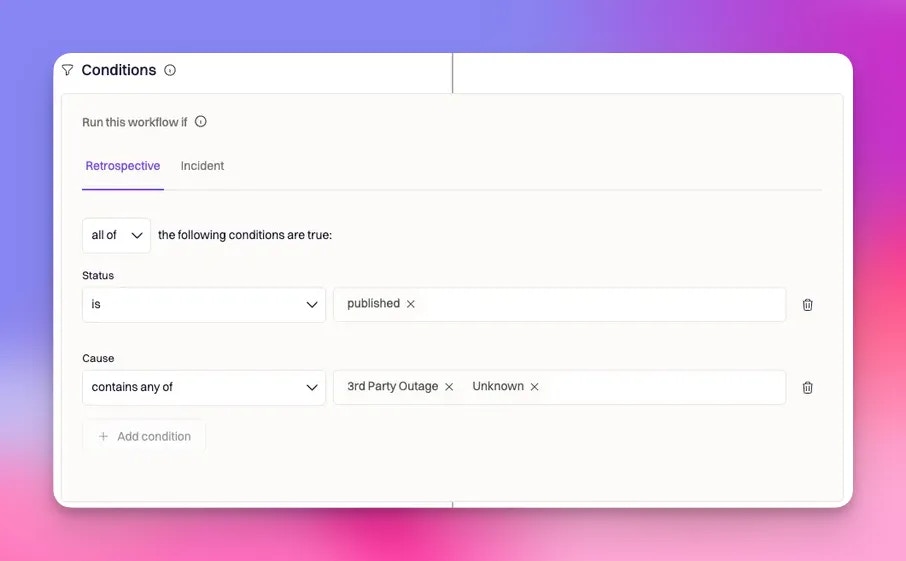
Retrospective status
Retrospective status is typically one of:draftpublished
- Trigger: Status Updated
- Condition: Retrospective status is published
- Actions: publish docs, notify leadership, create follow-ups
Incident-based conditions
Even though the workflow is retrospective-triggered, you can narrow it using incident properties. Examples:- Only run for SEV0/SEV1 incidents
- Only run when a specific service is involved
- Only run when the incident team matches a particular org
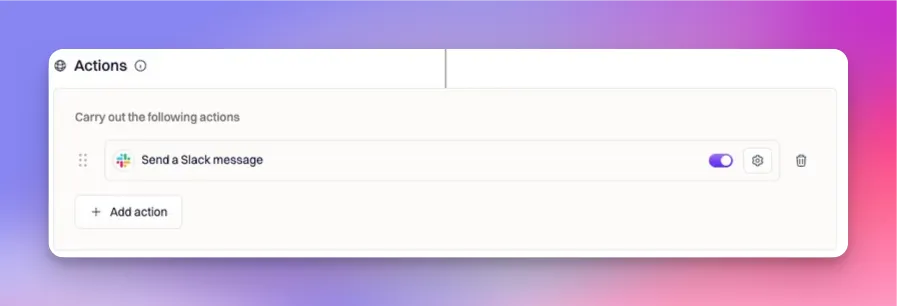
Step 4: Configure actions
Actions are what the workflow actually does once it passes conditions. The available actions depend on your integrations, but retrospective workflows commonly automate:- Document creation and updates (for example, Confluence pages, Google Docs, Notion pages)
- Notifications (Slack messages, Microsoft Teams messages, email)
- Follow-up tracking (create action items, create tickets, assign owners, set due dates)
Some document-creation actions can be configured to publish the retrospective automatically (for example, when creating a Confluence page), which is useful when “publishing” is part of your definition of done.
Best Practices
A retrospective workflow should make your post-incident process more consistent, not noisier. These patterns tend to work well in production:- Trigger on Status Updated, condition on “published.” This gives you a clean “one-time publish event” you can treat as a milestone.
- Use incident severity as a gate. Many organizations only want leadership notifications and full doc automation for higher severities.
- Separate “draft upkeep” from “publish actions.” If you want to keep a doc updated while the review is in progress, put that in a separate workflow from the one that runs when the retrospective is published.
- Make notifications intentional. Use different destinations for different audiences (incident channel vs. a leadership channel vs. email).
- Ensure ownership is created, not implied. If the workflow creates action items or tickets, assign owners and due dates so the follow-up work doesn’t stall.
Frequently Asked Questions
Is a retrospective workflow triggered by incident updates?
Is a retrospective workflow triggered by incident updates?
No. Retrospective workflows trigger from retrospective events (created, updated, status updated, or Slack command). You can still use incident fields as conditions to control whether the workflow should run.
What does “Status Updated” mean here?
What does “Status Updated” mean here?
In a retrospective workflow, “Status Updated” refers to the retrospective status (typically
draft or published), not the incident status.How do I only run actions once when the retrospective is published?
How do I only run actions once when the retrospective is published?
Use Status Updated as the trigger and add a run condition like “retrospective status is published.” This avoids running the workflow on unrelated retrospective changes.
Can I run a retrospective workflow manually?
Can I run a retrospective workflow manually?
Yes. Retrospective workflows support the Slack Command trigger, which lets you run the workflow manually using its configured command.
Why did my workflow run too often?
Why did my workflow run too often?
The most common cause is using Post Mortem Updated (a catch-all trigger) without strict conditions. Add conditions like retrospective status, incident severity, or service/team filters to narrow the workflow to the exact cases you want.
Need help designing retrospective automation that matches your process? Contact Rootly Support at support@rootly.com or reach out to your onboarding/customer success representative.