Adding and editing statuses
Navigate to Configuration > Lifecycle to begin customizing your Rootly statuses. Each substatus requires a name and description to give your responders context on what the lifecycle stage represents. When an incident’s status is updated to reflect a new status, we will mark the date and time of the status change and store it in the status’Marked At field to support any postmortem analyses.
When a new status is added, Rootly will generate a new substatus form for you to customize in the Form configuration section. This allows you to capture incident data at any phase of the incident’s lifecycle.
Lifecycle preferences
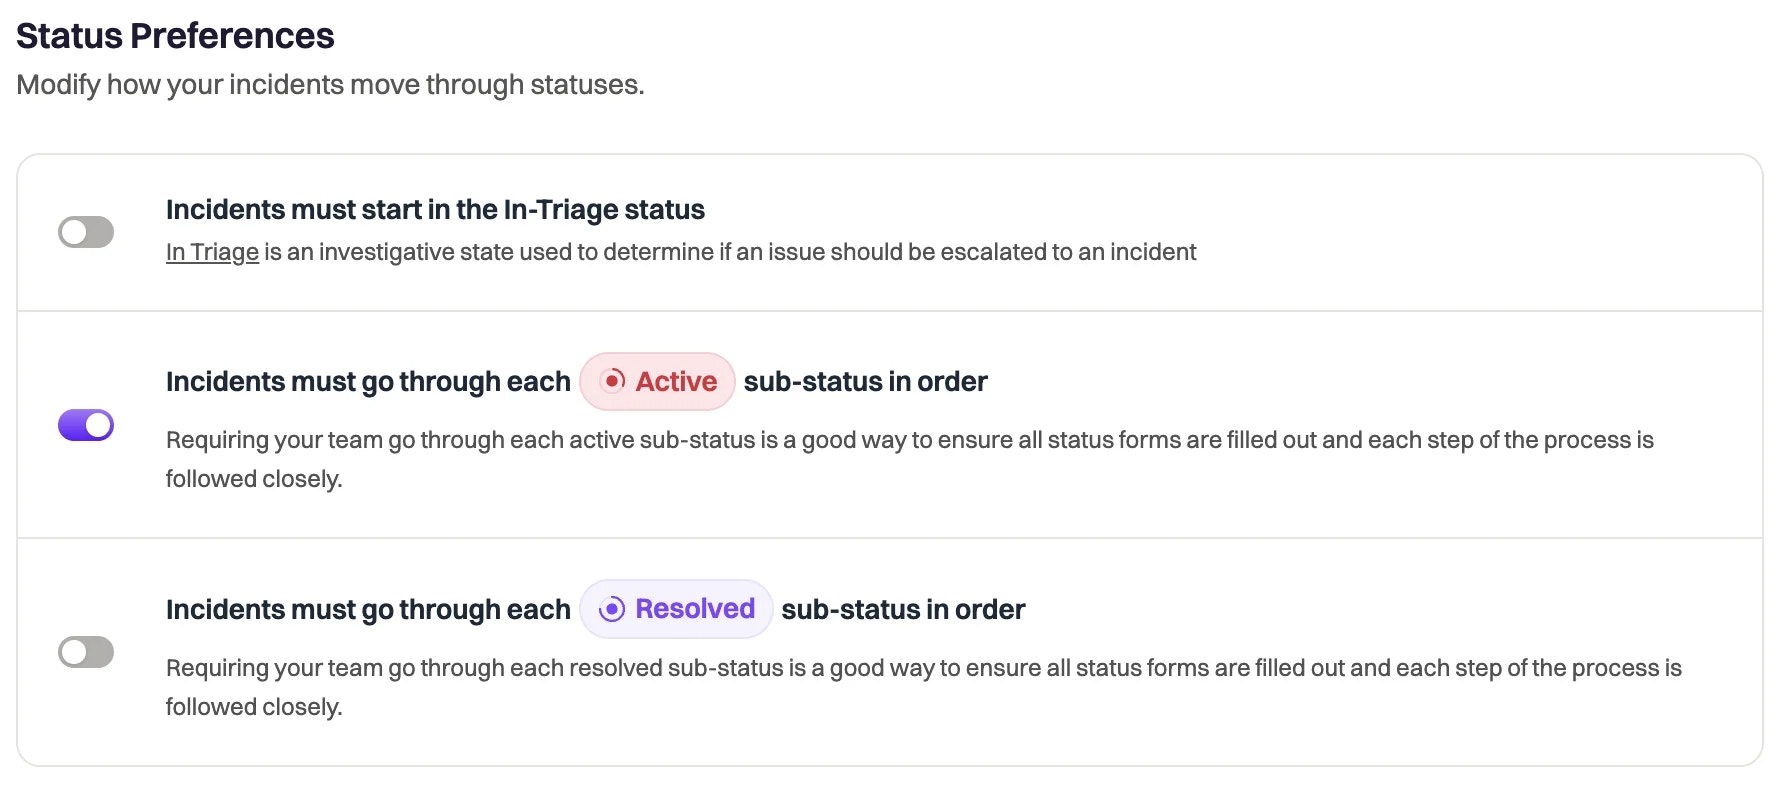
Rootly gives you full control over how your incidents progress through the Lifecycle statuses. Control if your responders are able to move an incident across many statuses at once, or if incidents must progress through every status in a defined order. Navigate to Configuration > Lifecycle > Preferences to update these settings.