Example Use Cases
- Targeted Data Collection: Create a form specifically for the Comms Lead, which only displays fields that are important to the leadership (e.g.
status,summary,severity). This streamlines the communication process by helping teams only focus on the relevant information. - Guided Response: Create various forms that collect specific sets of data at specific points of the incident life cycle. Dynamically display each custom form to guide responders through their response effort.
Create Custom Form
Click on theCreate Form button to initiate the form creation wizard.
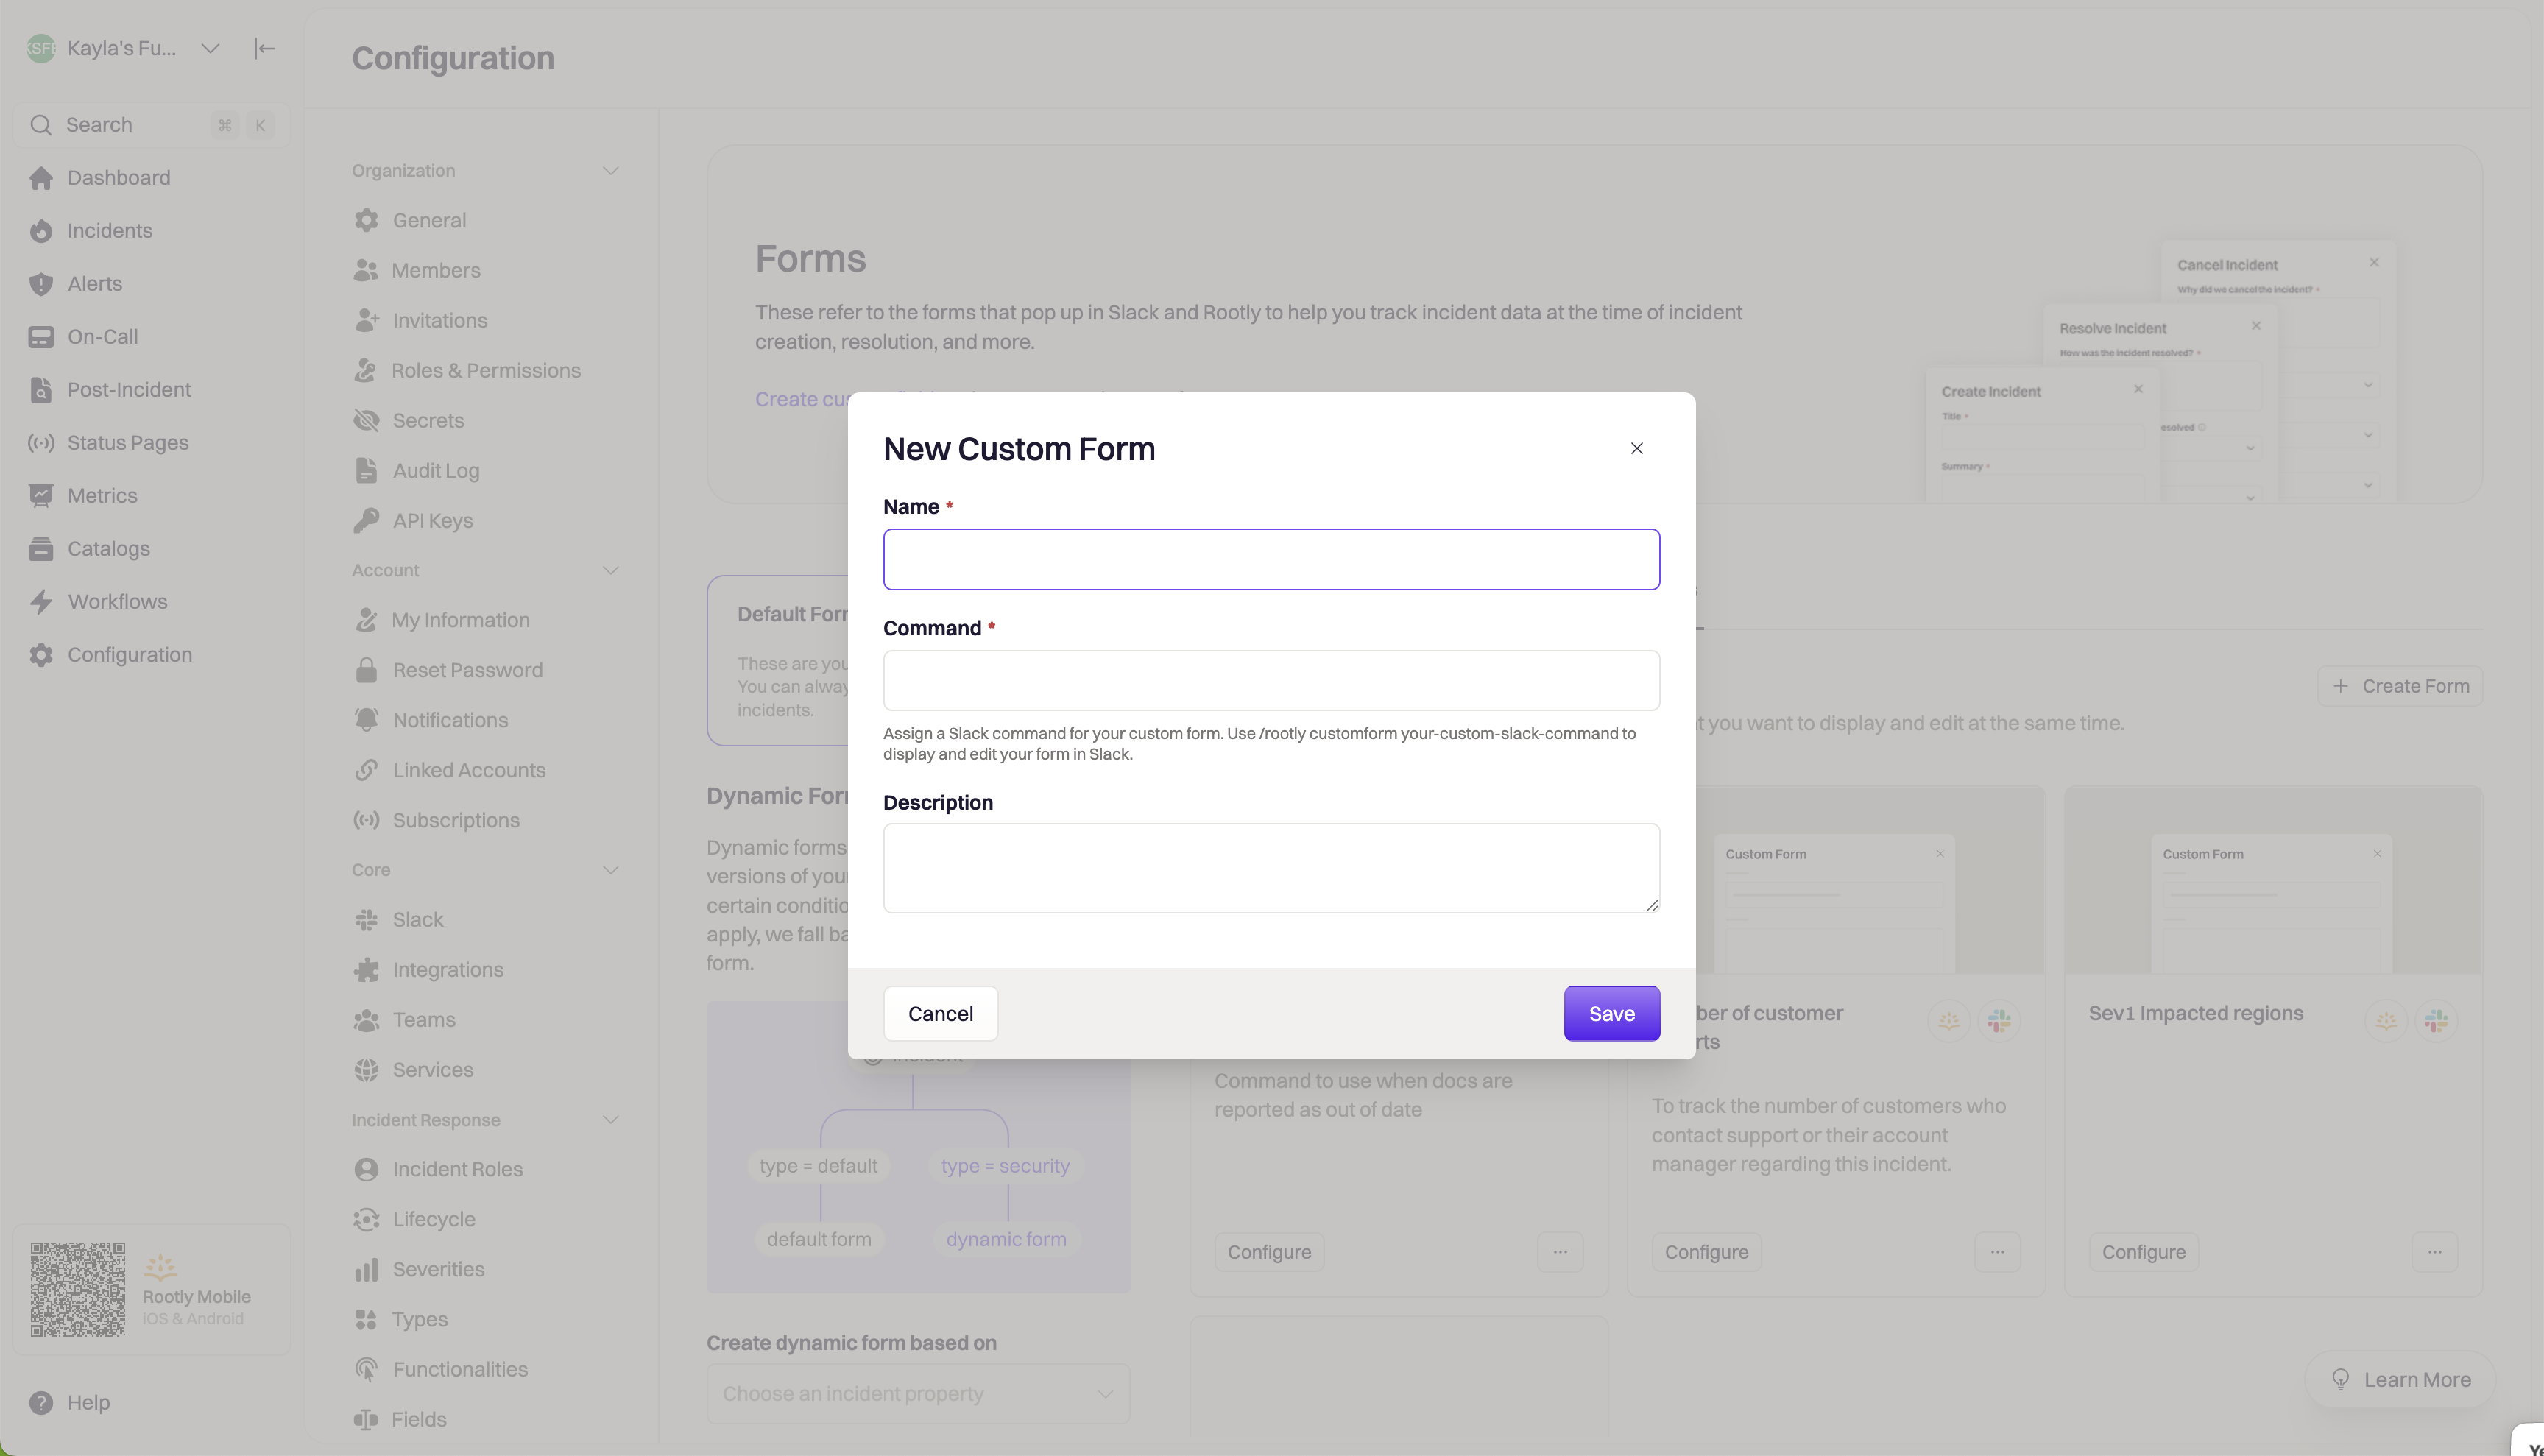
Name
Name
Assign the custom form a name.
Command
Command
Define a Slack command that would prompt to open the form in Slack.
The full command you would enter in Slack is
/rootly customform your-custom-slack-command. You only need to enter the your-custom-slack-command portion in this field.Description
Description
You can provide an optional description for your custom form.After providing the necessary details, click on
Save. You’ll be redirected to the following page where you can begin customizing the new form.Edit Custom Form
To begin editing a form, select the Configure button under the form you’d like to edit. You’ll be navigated to the edit form page of the selected form. The left side of the page is the edit pane where you can edit what fields are displayed and how they are displayed. The right side of the page is the preview of the form.Adding fields to a form
Add new fields to your form by selecting the Add Fields button. Select all of the fields you’d like to add to the form, then Add Fields. Once these fields are added to your form, you can drag and drop them to reorder the form. Remove a field by selecting the minus button on the right hand side of the field.Editing fields on a form
Once a field is added to a form, you can control when the field is displayed and if it is required. Select the edit button on the field that you want to make changes to. If you only want the field to display under certain conditions or be required under certain conditions, select the Conditionally option under Display this field or Require this field. Form fields can be displayed or required conditionally depending on the value of any field set above the field that you’re editing. For example, if the first field on your form called “Teams” is set to a certain value, your second field can be conditionally displayed depending on the team’s value.Preview
The preview on the right-hand side is interactive and generated in real-time. This is a great way to test out the user experience of your form, and ensure behavior of each field is correct.Trigger Custom Form
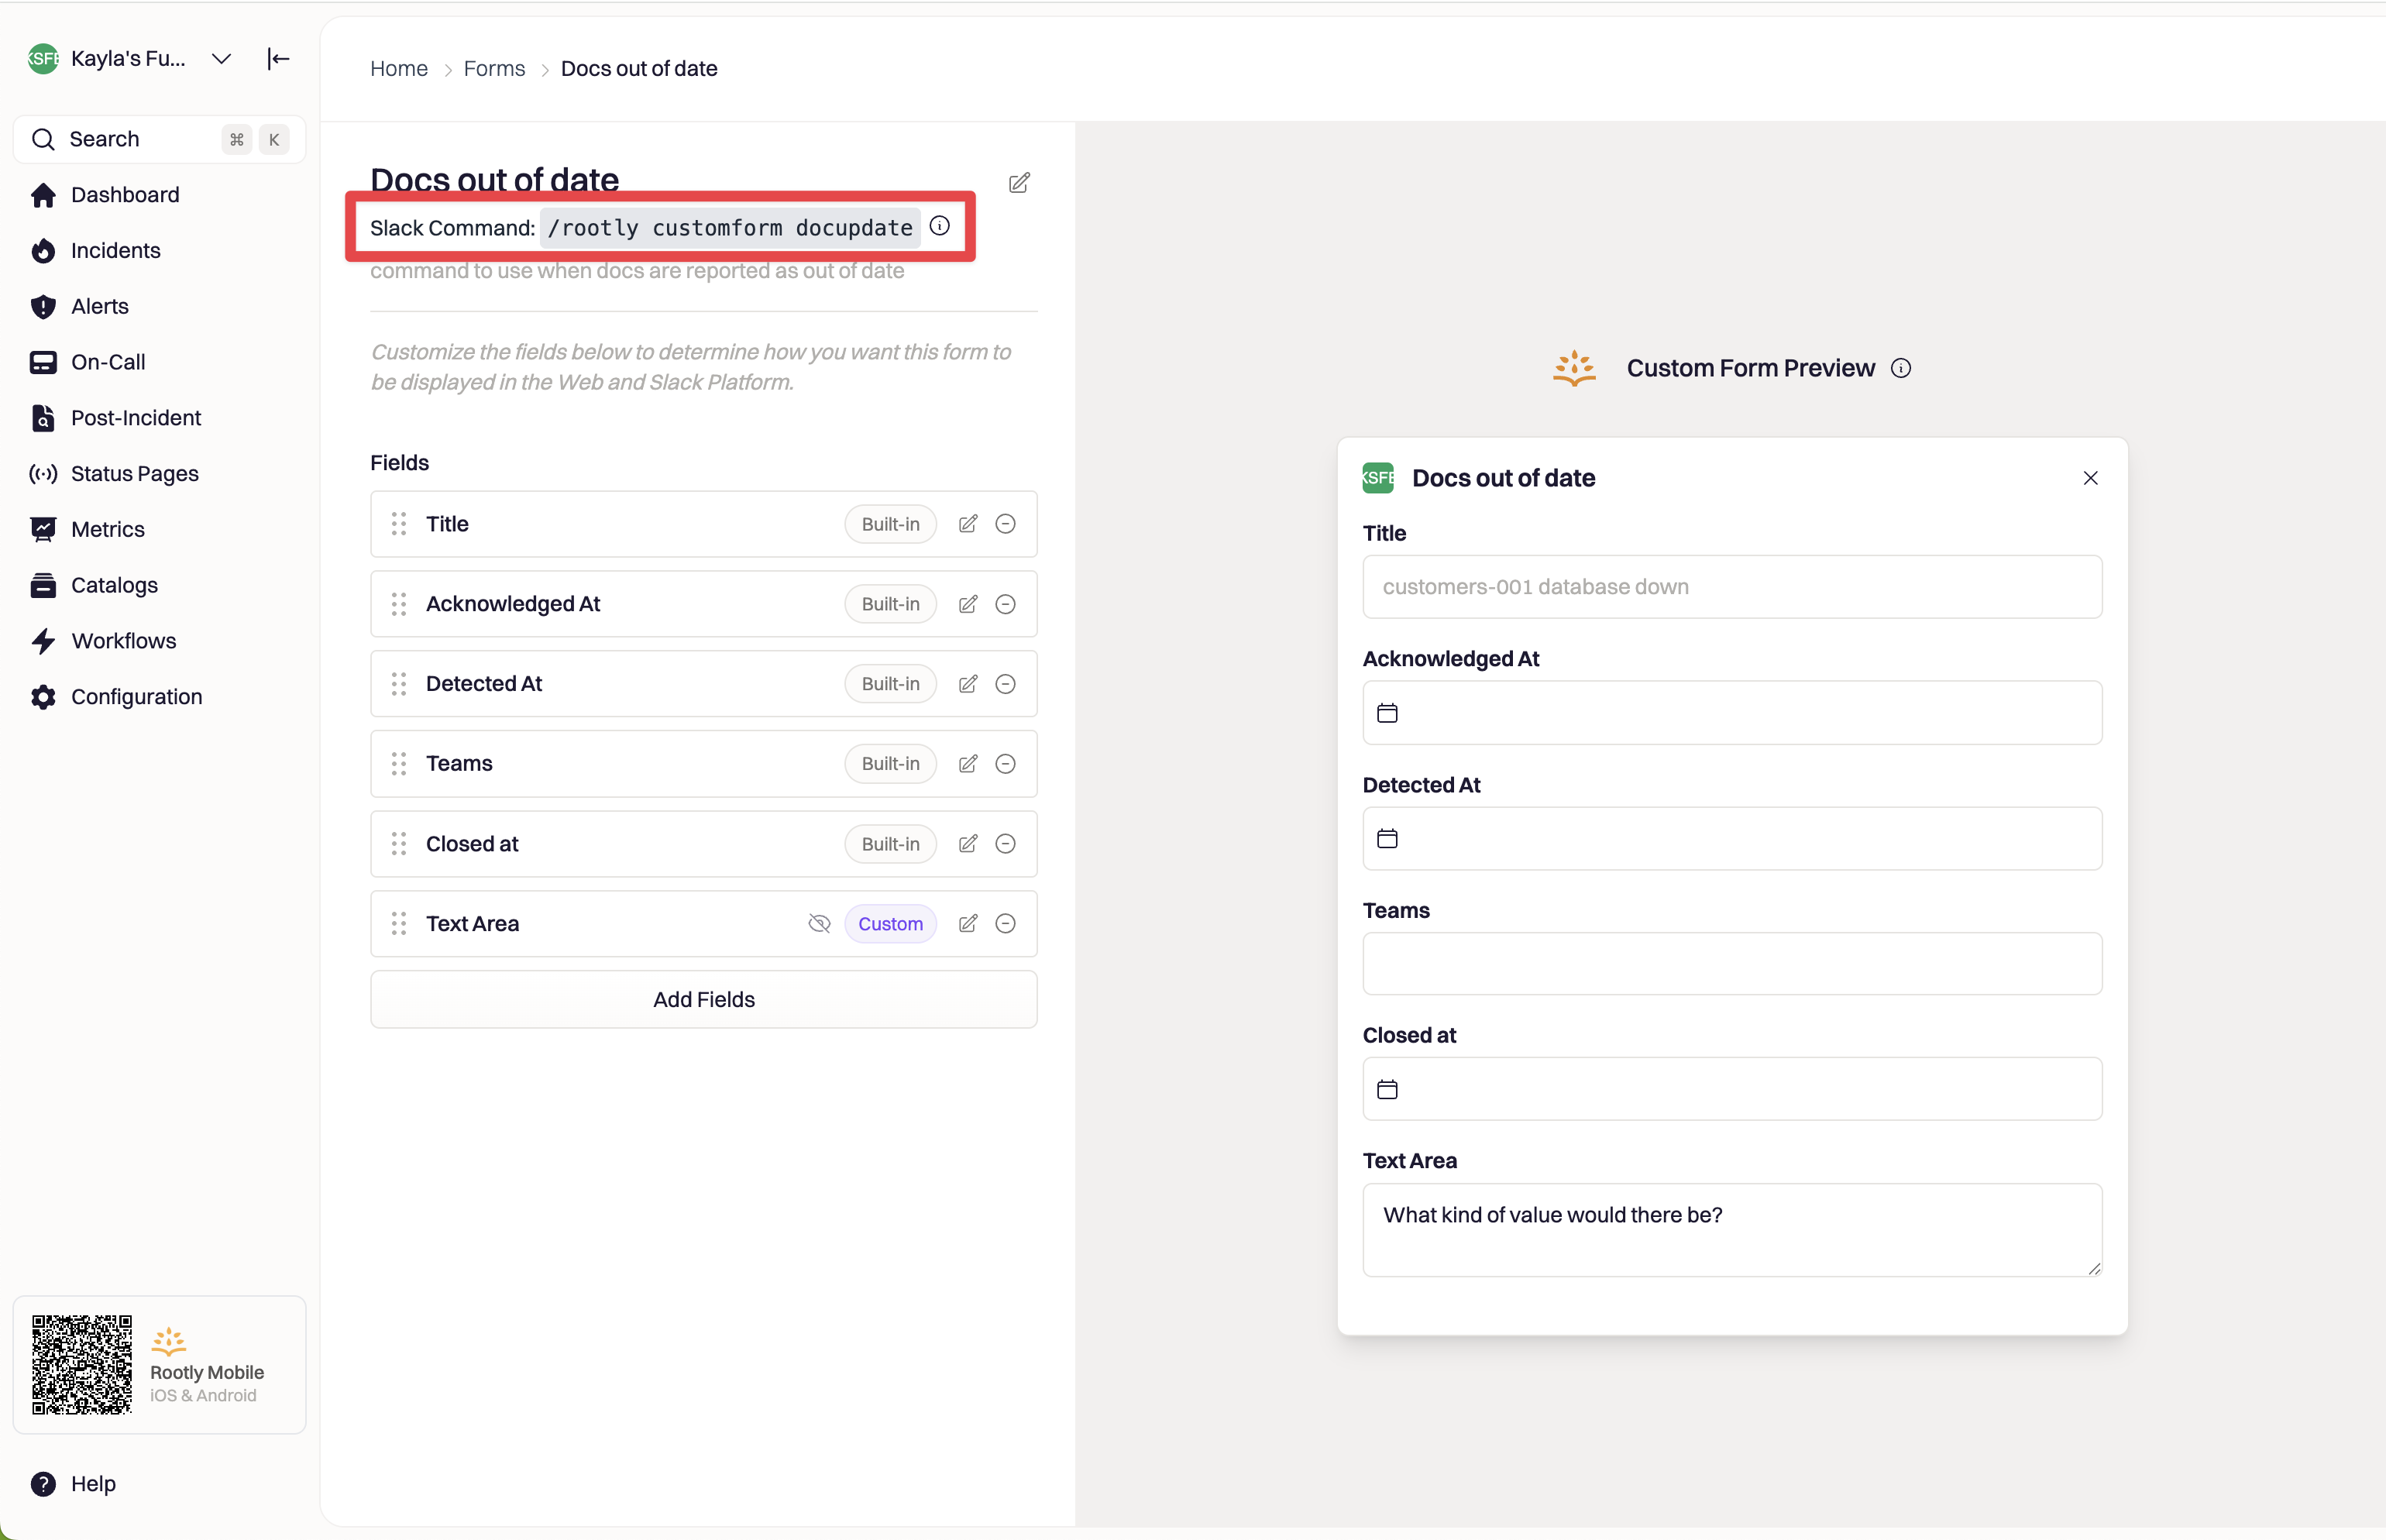
Custom forms can be triggered in various ways: Slack command, custom Slack block, or web UI.Prompt Form via Slack Command
A custom form can be prompted in an incident Slack channel via manual command. The command can be found on the edit screen of the specific form.