What Are On-Call Schedules?
On-call schedules form the foundation of the Rootly On-Call system. They are critical tools that ensure alert responsibility is always clearly assigned and continuously rotating among your team members. These schedules determine who is on-call at any given time and control the rotation of on-call duties across users or teams. In Rootly, schedules are not only useful for defining on-call responsibilities but also for organizing who will respond to incidents. A schedule can be as simple as a single user rotating weekly, or as complex as multiple schedules nested within one another, representing different teams or geographies. However, schedules alone do not trigger notifications or paging—they need to be linked to Escalation Policies to become part of the actual alerting process. Escalation Policies control the process of how and when on-call users are paged.Permissions & Access
Before you can create, edit, or delete schedules, certain permissions are required. Only users with the On-Call Admin or On-Call User roles have the ability to manage schedules. On-Call Observers, on the other hand, have read-only access to schedules and cannot modify them.Creating a Schedule
To create a new on-call schedule in Rootly, follow these simple steps:- Navigate to On-Call → Schedules from the main menu.
- Click on + New Schedule to start the process.
- Enter a Schedule Name (required) and an optional Description that provides more context about the schedule’s purpose.
Engineering Primary, Support - Weekend, or Platform Secondary).
Note: The schedule name must be unique within your team to avoid conflicts. Schedule names should be concise, clear, and follow a consistent naming convention.
Step 1: Define Rotations
Rotations dictate how on-call responsibilities rotate between team members. The rotation defines the order in which members are assigned on-call duties. A rotation is essentially a cycle that determines who is on call and when they will take over the responsibility. Depending on your organization’s needs, you may set up a rotation for a single user or multiple users who rotate through different time slots. When you define a rotation, you’ll need to give it a name that reflects the group or role it pertains to. For example, a rotation for theSecurity Team might simply be called “Security Rotation.”
Step 2: Add Rotation Members
In this step, you will assign users to the rotation. You can add individual users, teams, or other schedules to a rotation. Adding schedules as members allows for nesting, where a team’s schedule can be part of a higher-level schedule. Each member of the rotation will be assigned a time period based on the rules you set in Step 3. For example, if you choose weekly rotation, the on-call duty will shift every week, and the members will rotate in order. To assign members:- You can either search or use the filters to find the users, teams, or schedules you wish to add.
- Once added, the members will rotate based on the order they are listed. You can easily adjust the order by dragging and dropping members within the list.
Note:
A Schedule cannot be part of more than one other schedule’s rotation. This restriction is in place to prevent infinite loops where schedules are circularly dependent on each other.
A Schedule cannot be part of more than one other schedule’s rotation. This restriction is in place to prevent infinite loops where schedules are circularly dependent on each other.
Step 3: Configure Rotation Rules
Now that you’ve set up the members, it’s time to configure the rotation rules. This step is where you define the frequency and timing of the rotation. Rootly provides several options for configuring your rotations:- Rotation Types:
- Daily
- Weekly
- Biweekly
- Monthly
- Custom (e.g., hourly, daily, weekly)
- Active Days:
You can define which days of the week your rotation is active. - Active Hours:
You can specify whether the rotation is active all day or only for specific hours. - Timezone:
Choose the timezone for the rotation, which will follow the time zone set by your team or organization.
Important:
Only one rotation can be active at any given time. If two rotations overlap, Rootly will follow the bottom-most rotation logic.
Only one rotation can be active at any given time. If two rotations overlap, Rootly will follow the bottom-most rotation logic.
Step 4: Add Paging Logic
Once your schedule is set up with rotation rules, you’ll need to link it to an Escalation Policy to ensure that the correct person is paged. An Escalation Policy defines how and when users should be paged. To page the on-call user, you must:- Create an Escalation Policy.
- Assign the schedule to the policy by selecting it as a notification target within the escalation steps.
- Make sure the escalation policy is connected to a service or team for active monitoring.
Reminder:
Without being connected to an Escalation Policy, a schedule will not trigger any alerts. Ensure that you add the schedule to a policy so it becomes part of the alerting flow.
Without being connected to an Escalation Policy, a schedule will not trigger any alerts. Ensure that you add the schedule to a policy so it becomes part of the alerting flow.
Editing a Schedule
If you need to modify a schedule, follow these steps:- Go to On-Call → Schedules.
- Select the schedule you want to edit by clicking the ⋯ menu.
- Click Edit to update the schedule name, description, members, or rotation rules.
Deleting a Schedule
If you need to delete a schedule, here’s how you do it:- Navigate to On-Call → Schedules.
- Find the schedule and click the ⋯ menu.
- Select Delete, and confirm your choice in the dialog window.
Schedule Management Features
The Schedules Page in Rootly provides an overview of all schedules, showing:- Who is currently on-call for each schedule
- The next shift change
- Which Escalation Policy is associated with the schedule
- Filter and search options for easy navigation
Exporting a Schedule to an External Calendar
Rootly allows you to export your on-call schedule to an external calendar so you and your team can view upcoming shifts directly from your preferred calendar app.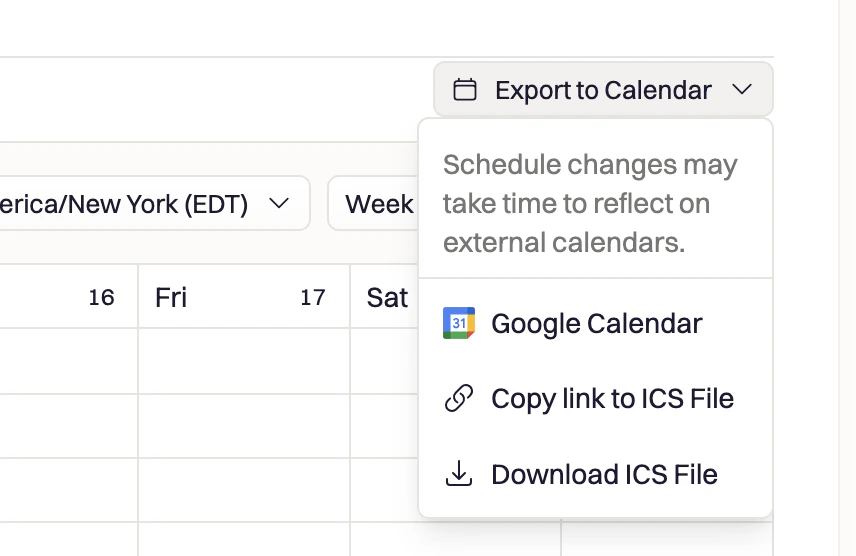
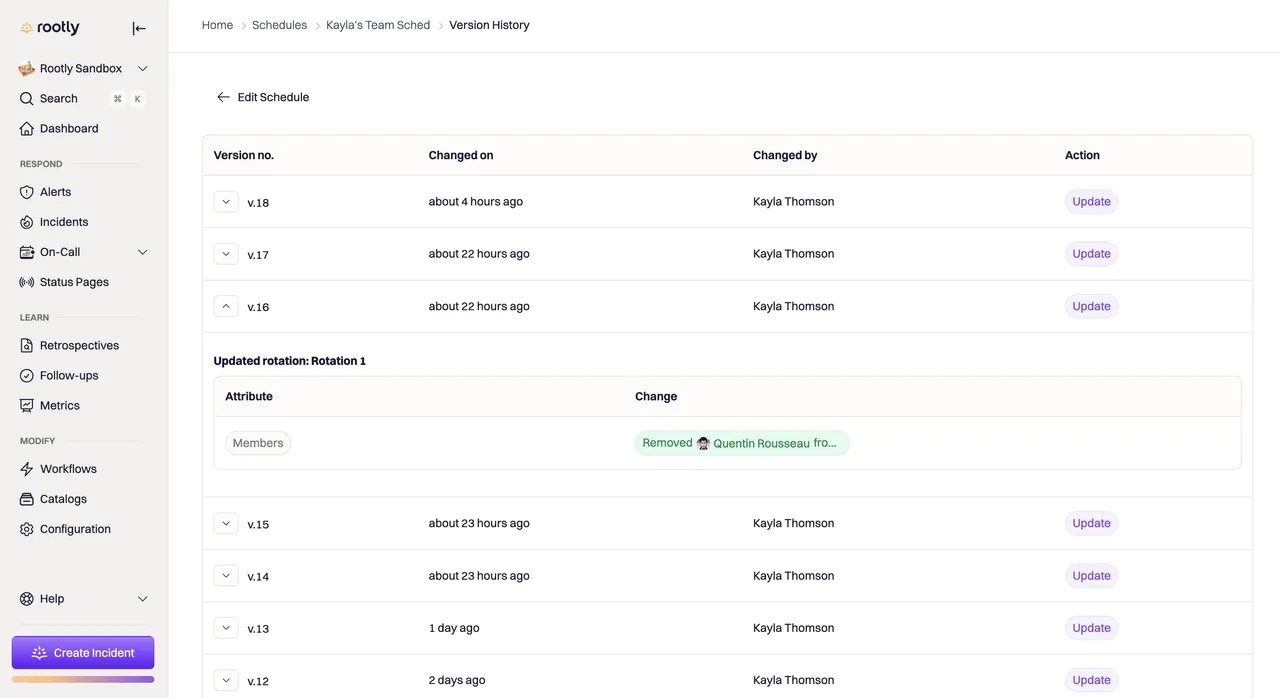
Auditing Schedule Changes
Rootly tracks all changes made to schedules through an audit log. This provides transparency, allowing you to track:- When a schedule was created or modified
- Updates to rotation members or rotation rules
- Changes in shift timings or handoff schedules
Best Practices for Managing Schedules
- Clearly name schedules: Use descriptive names for schedules to make it easy for teams to identify the right schedule at a glance.
- Simplify rotations: Keep rotation cycles simple and clear. Avoid overly complex configurations unless absolutely necessary.
- Use custom rotations when needed: For specific teams or roles that need different rotation types, use the custom option to tailor schedules to your needs.
- Review schedules periodically: Regularly check schedules to ensure there are no overlaps or issues with rotation rules.
- Add schedules to Escalation Policies: Ensure that schedules are linked to the appropriate escalation policies to ensure timely paging.
Frequently Asked Questions (FAQs)
How do I ensure no one misses a shift?
How do I ensure no one misses a shift?
To ensure on-call responders are actually notified, your schedule must be connected to an Escalation Policy.
Schedules by themselves only define who is on call—they do not trigger paging. Once a schedule is added as a notification target in an escalation policy and that policy is assigned to a service or team, Rootly can page the active on-call responder reliably.
Schedules by themselves only define who is on call—they do not trigger paging. Once a schedule is added as a notification target in an escalation policy and that policy is assigned to a service or team, Rootly can page the active on-call responder reliably.
Can I assign a team directly to a schedule?
Can I assign a team directly to a schedule?
No. Schedules can only contain individual users or other schedules.
Teams are not valid members of a schedule rotation. If you want a team to participate in on-call, create a schedule for that team and then nest that schedule inside a higher-level schedule if needed.
Teams are not valid members of a schedule rotation. If you want a team to participate in on-call, create a schedule for that team and then nest that schedule inside a higher-level schedule if needed.
What if I need to pause a schedule instead of deleting it?
What if I need to pause a schedule instead of deleting it?
If you need to temporarily stop a schedule from paging responders, you do not need to delete it.
Instead, remove the schedule from any associated escalation policies or deactivate it. This preserves the schedule configuration while preventing it from triggering alerts.
Instead, remove the schedule from any associated escalation policies or deactivate it. This preserves the schedule configuration while preventing it from triggering alerts.
How do I manage overlapping rotations?
How do I manage overlapping rotations?
Rootly allows multiple rotations within a single schedule, but only one rotation can be active at any given time.
If rotation rules overlap, Rootly automatically prioritizes the bottom-most rotation in the list. To control which logic applies, ensure your rotations are ordered intentionally and reviewed for overlap.
If rotation rules overlap, Rootly automatically prioritizes the bottom-most rotation in the list. To control which logic applies, ensure your rotations are ordered intentionally and reviewed for overlap.
How do I export my schedules for backup or source control?
How do I export my schedules for backup or source control?
There’s no in-product “Download” or “Export” button for schedule configuration today — bulk export is programmatic. (Note: this is different from exporting a schedule to an external calendar, which produces an iCal feed for viewing shifts.) Three paths cover the common needs:
- API.
GET /v1/schedulesreturns every schedule on your account. Walk into each schedule withGET /v1/schedules/{id}/schedule_rotations, thenGET /v1/schedule_rotations/{id}/schedule_rotation_usersand/schedule_rotation_active_daysto capture the full structure. - CLI. The Rootly CLI supports
rootly oncall list --format=jsonto dump every schedule as JSON in one command. - Terraform. Use the Terraform provider with the
rootly_schedule,rootly_schedule_rotation,rootly_schedule_rotation_user,rootly_schedule_rotation_active_day, androotly_override_shiftresources. The Importing Existing Resources workflow pulls your existing schedules into Terraform state so they live in source control going forward.
On-call schedules are central to keeping your team responsive, organized, and ready. Once set up, they enable seamless transitions and ensure that alerts are always addressed in a timely manner, no matter the time zone or time of day.