

Posting is deliberate, not automatic. An incident linked to a component on your page isn’t posted on its own. Someone on your team writes and posts each update, so every message is reviewed before customers see it.
Publishing Updates
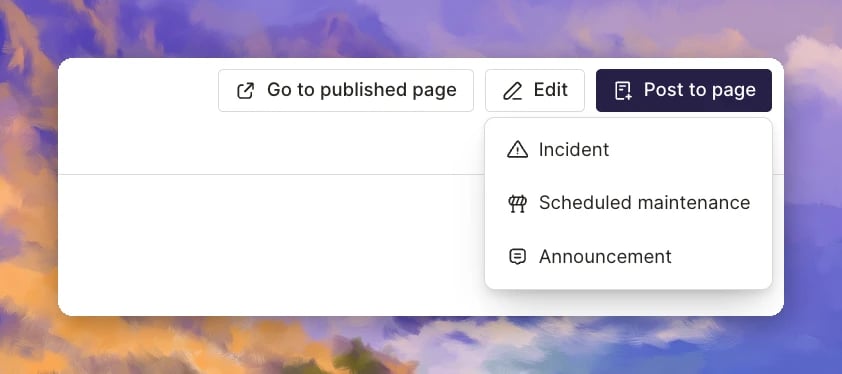
Go to Status Pages, open a page, and click Post to page. Then choose what to post:- Incident: An unplanned issue.
- Scheduled maintenance: Planned work with a start and end time. See Scheduled Maintenance.
- Announcement: A standalone notice. See Announcements.
Publishing Incidents
When you post an incident, the page shows:- The incident title
- Affected components and their impact levels
- A timeline of updates
- The incident’s current status
Post an Incident Update from the Web
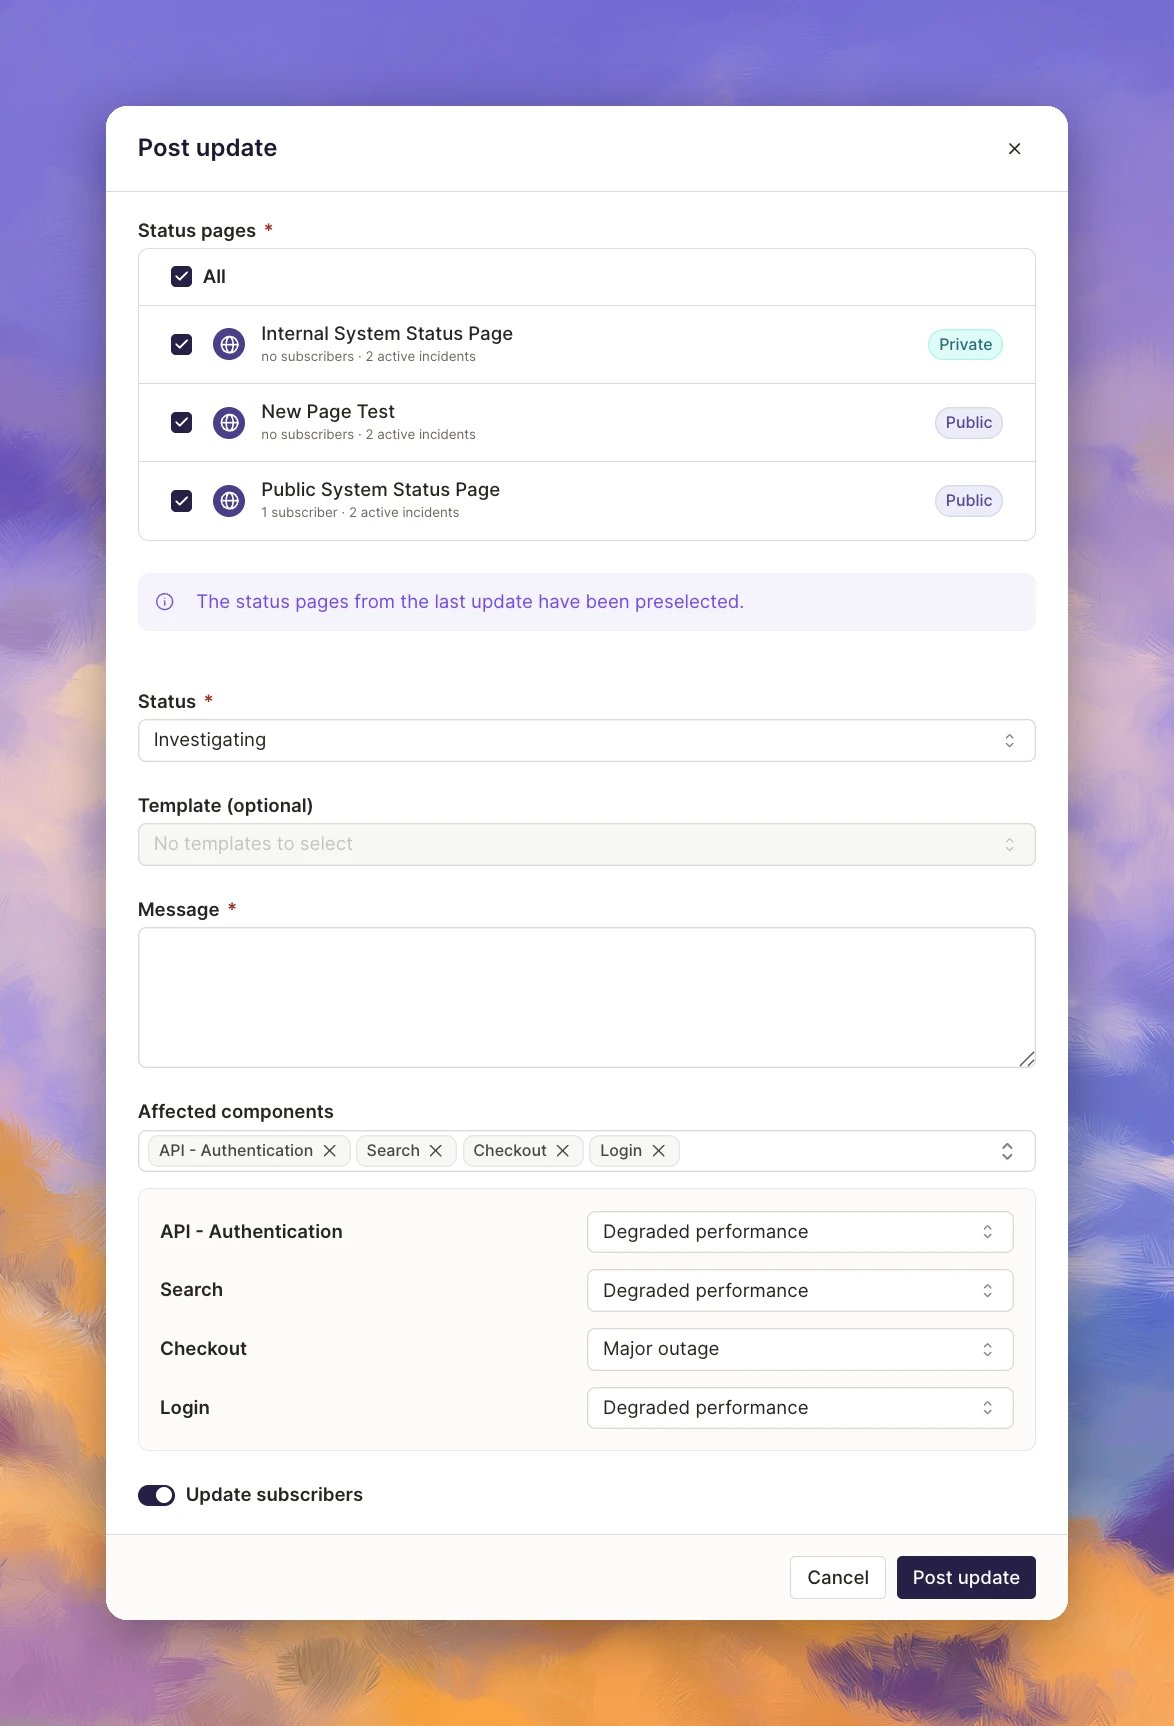
You can start from the status page with Post to page → Incident, or from the incident’s Status Page tab.- Choose the incident to post about, or choose Create new incident. A new incident is only created when you post.
- Under Status pages, pick the pages to update. The pages from your last update are preselected, or check All.
- Pick a Status: Investigating, Identified, Monitoring, or Resolved.
- Choose a Template (optional), or write the Message.
- Under Affected components, add the affected components and set an impact level for each.
- Leave Update subscribers on to let subscribers know.
- Click Post update.
Update and Resolve an Incident
As the incident moves along, keep posting updates from the same place so customers see progress.- Post each new update with the latest status and message.
- When the incident is over, post a final update with the status set to Resolved, so customers know it’s fixed.
Post from Slack
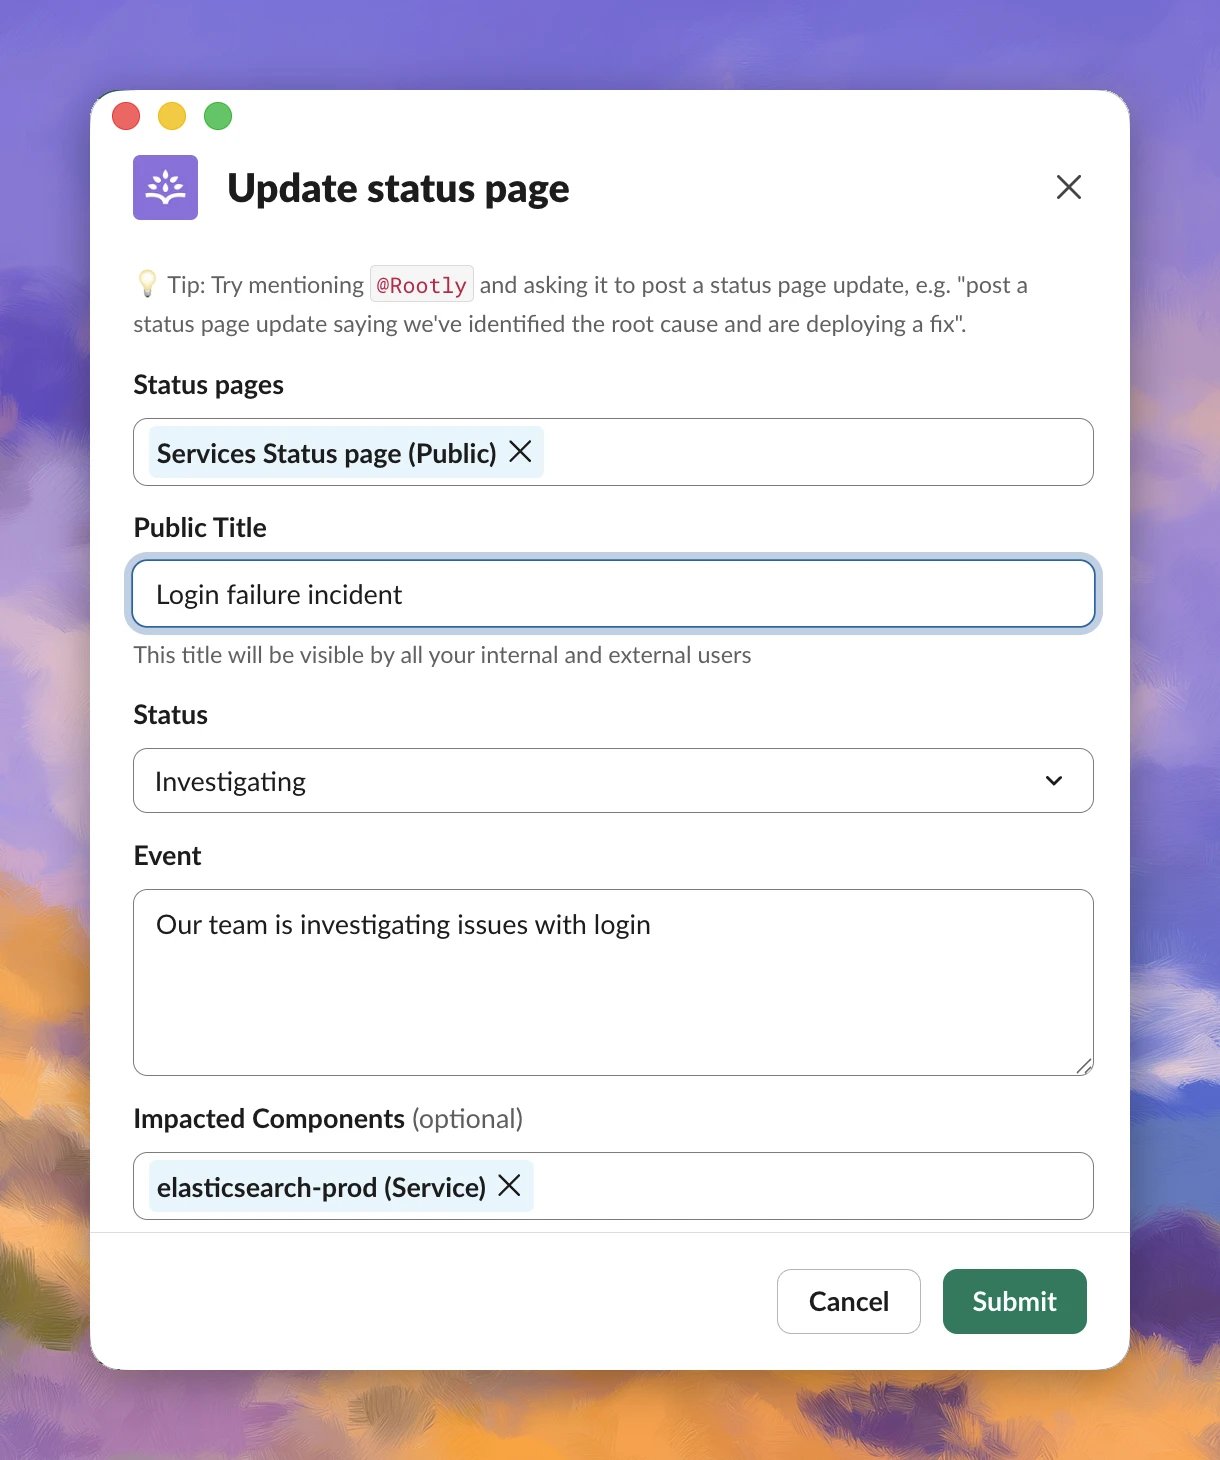
Post updates without leaving the incident channel, so responders can keep customers informed while they work. Slack supports incident updates and announcements.- In the incident’s Slack channel, type
/rootly statuspage. The Update status page modal opens. - Under Status pages, pick one or more pages.
- Add a Public Title. Everyone who can see the page sees this title.
- Pick a Status: Investigating, Identified, Monitoring, or Resolved.
- In Event, write what’s happening.
- Under Impacted Components (optional), add the affected components. An impact level appears for each one, so you can set how badly it’s affected.
- Click Submit.
How it behaves
- Components linked to the incident are preselected, and components you don’t select keep their current status.
- Posting to several pages is all or nothing, and every selected page gets the same update.
Ask @Rootly to post
Tell @Rootly what to post in plain language. It sets up the update from the incident, asks you for the message, and waits for your confirmation before anything goes live.- In the incident’s Slack channel, mention
@Rootlywith your request. For example: “Post an Investigating update to the public status page”, “Post a Monitoring update to the US and EU pages, mark Auth Service as degraded”, or “Resolve this on all status pages”. - @Rootly fills in the pages, status, and affected components from your request and the incident.
- It asks you for the message to post.
- Review the update, then click Confirm in the thread to post it.
- You approve every update. Nothing is posted until you click Confirm.
- Incidents and announcements. Scheduled maintenance is web only.
- It works where the incident runs. Write actions only work inside incident channels. The Slack side pane and DMs are read-only.
- It respects your role. @Rootly can only take actions your Rootly user has permission to perform.
- It can post to several pages and include affected components.
- It requires @Rootly in Slack to be turned on for your team. See Getting Started with Rootly AI in Slack.
Publishing Scheduled Maintenance
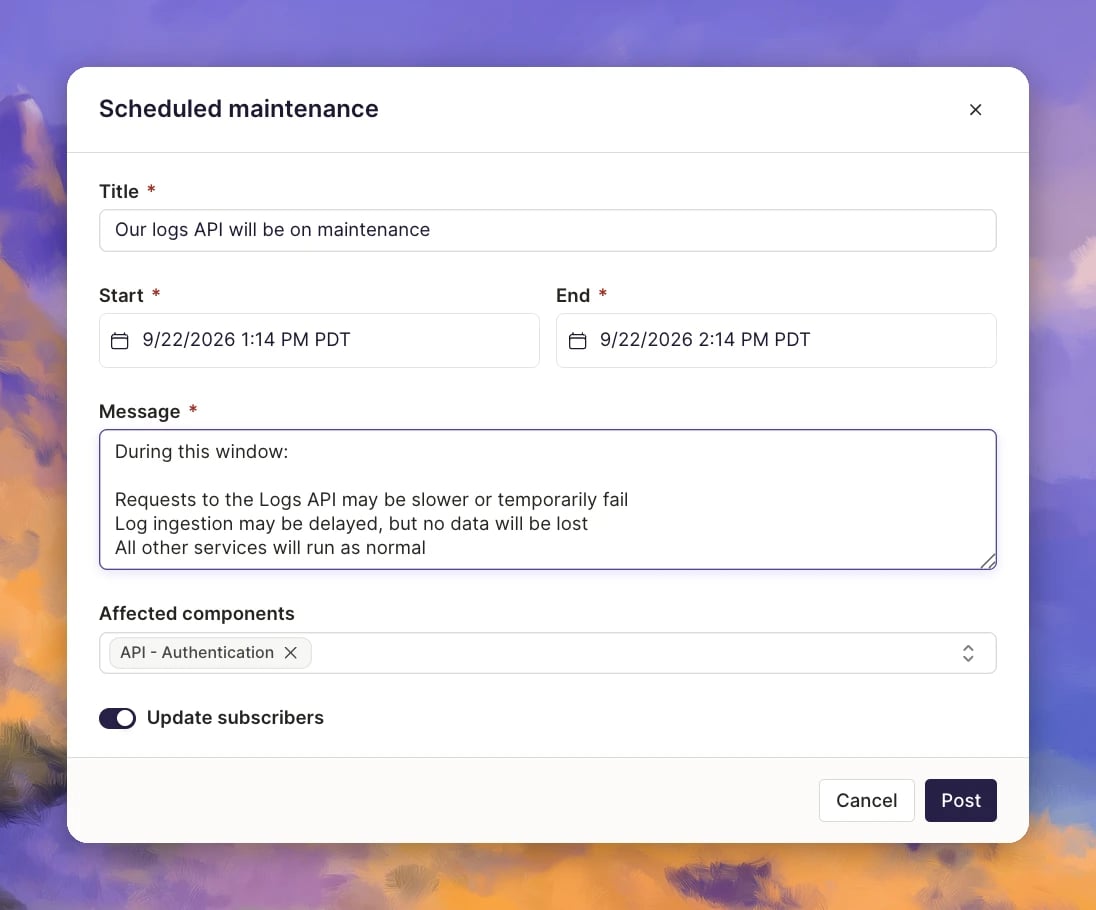
Let customers know about planned work before it happens, so nobody mistakes it for an outage. Scheduled maintenance is posted from the web.- Go to Status Pages and open a page.
- Click Post to page → Scheduled maintenance. The Scheduled maintenance form opens.
- Add a Title, plus the Start and End times.
- Write the Message. Tell customers what to expect during the window.
- Under Affected components, add the components the work touches.
- Leave Update subscribers on to let subscribers know.
- Click Post.
How It Behaves
- Auto-resolve is on by default, so the maintenance is marked complete when the end time passes.
- Maintenance posts to the page you open it from.
Publishing Announcements
Share planned changes, notices, or general updates on your status page without opening an incident. Customers get the news in the same place they already check for service health.When to Use Announcements
- New features, policy updates, region migrations, general notices, and deprecation notices
- Information that affects customers but isn’t an outage
- Messages that should stay off the incident timeline and out of incident metrics
Post an Announcement from the Web
- Go to Status Pages and open a page.
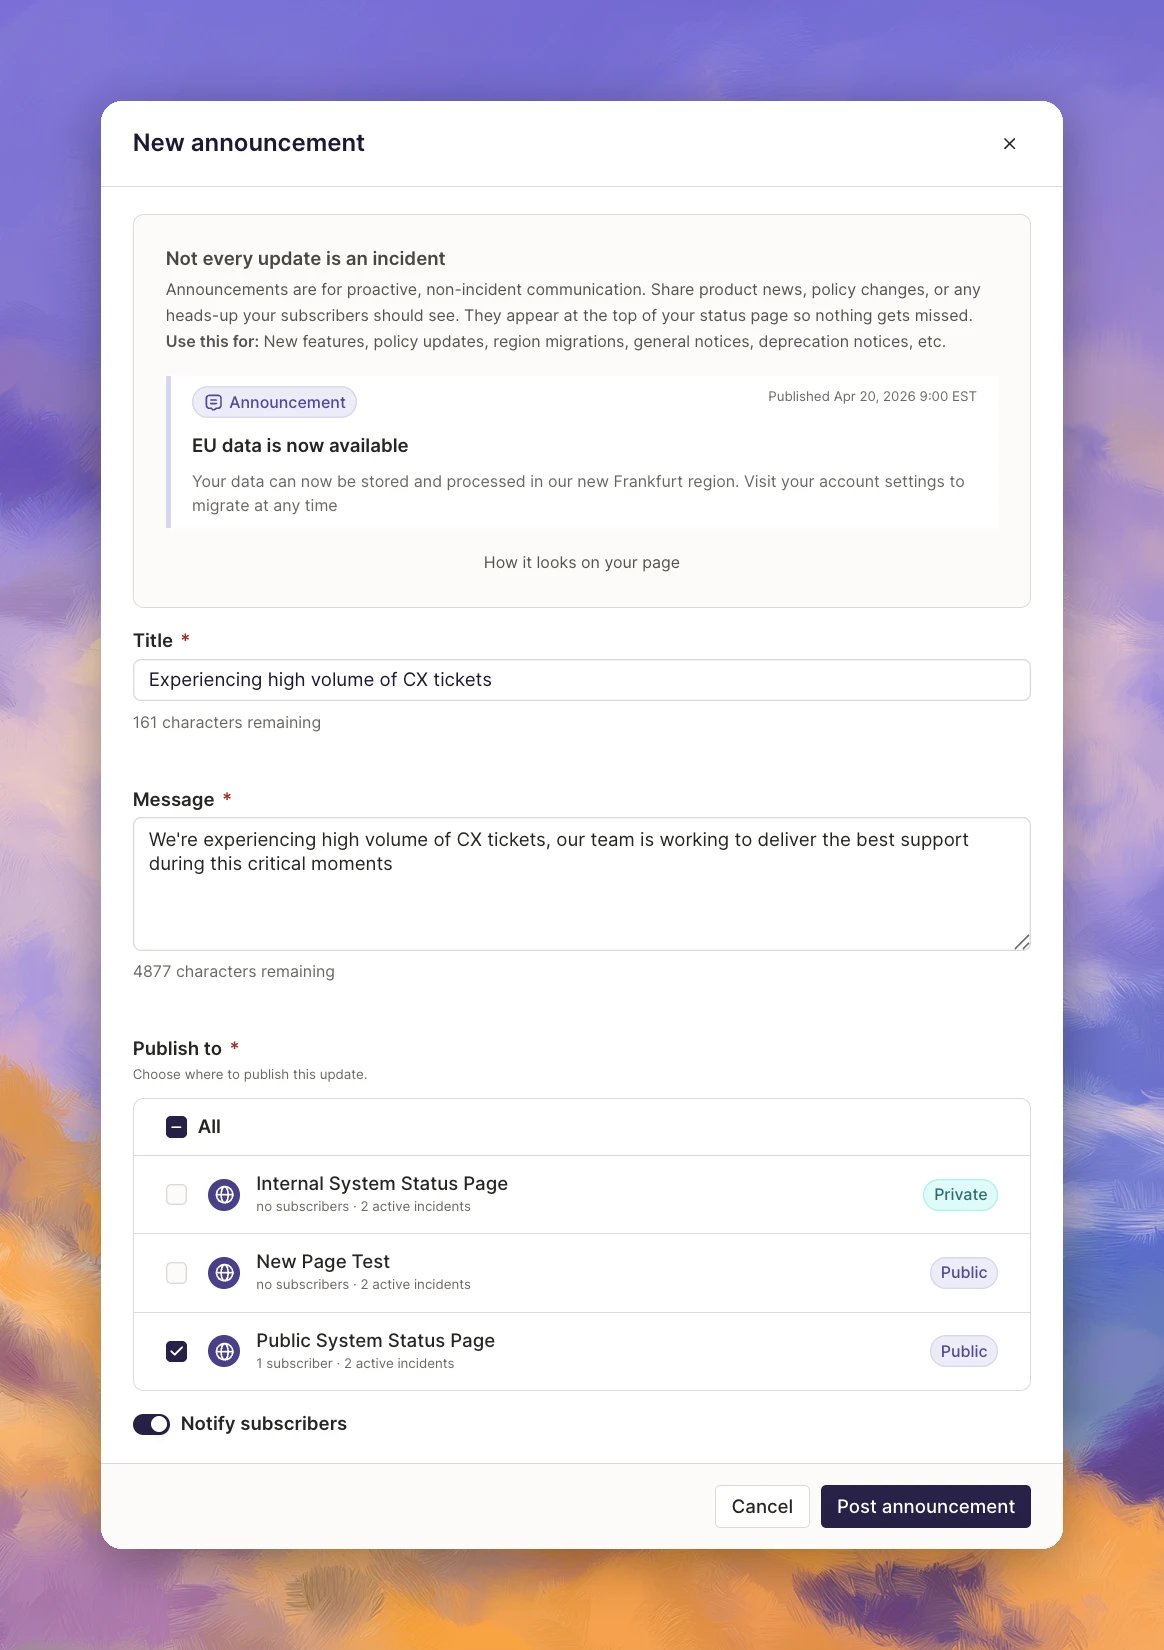
- Click Post to page → Announcement. The New announcement form opens.
- Add a Title and Message.
- Under Publish to, check the pages to post on, or check All.
- Leave Notify subscribers on to let subscribers know, or turn it off to post quietly.
- Click Post announcement.
- An announcement is a standalone post. It isn’t tied to an incident or maintenance window.
- It shows as a banner at the top of the status page.
- It doesn’t change any component status.
- You can post it to several pages at once.
- After posting, you can edit or remove it.
Publishing to Multiple Pages
Send one update to every page that needs it, instead of repeating the same update page by page. This matters most for teams running regional, brand, or per-customer pages.- Open the Post update form from a status page with Post to page → Incident, or from the incident’s Status Page tab.
- Under Status pages, check each page you want to update, or check All. The pages from your last update are preselected.
- Pick the status, write the message, and set the affected components.
- Click Post update.
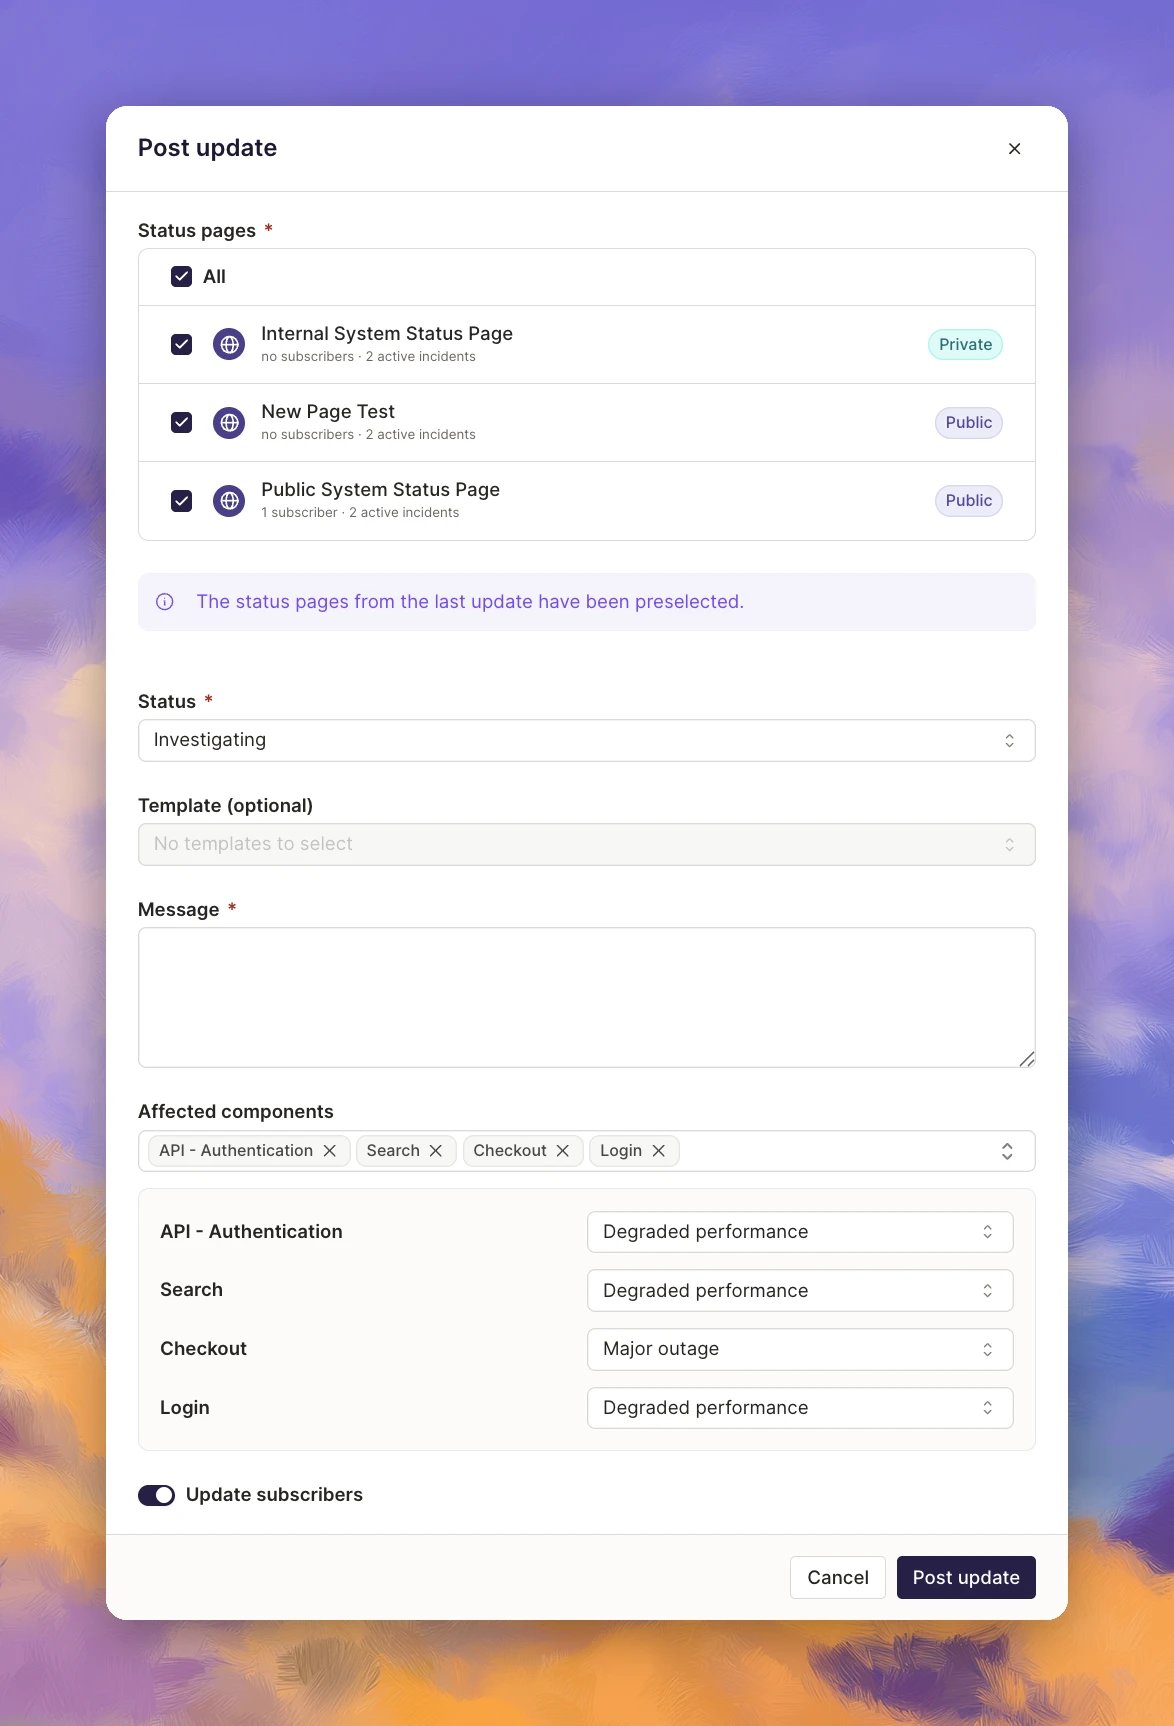
- Every selected page gets the same status, message, and affected components.
- Works for incidents and announcements, on the web and in Slack. Scheduled maintenance posts to one page at a time.
Related Pages
Status Pages
The umbrella concept — where published incidents actually show up.
Creating a Status Page
Set up the page before you can publish updates to it.
Incident Timeline
Where published-update events surface inside the incident record.