Overview
The Rootly web interface provides a full-featured way to configure and manage incident roles.From the Incident Roles settings page, you can create new roles, edit existing ones, define responsibilities, and control which users can perform specific actions during an incident. These role definitions become available across your organization and determine which roles appear in Slack and in the incident detail page.
Role configuration is a workspace-level setting. Any changes you make here apply to all incidents going forward.
Manage Roles in the Web Interface
1
Open Incident Role Configuration
Navigate to:Configuration → Incident RolesThis page lists all existing roles in your workspace.
2
Create or Edit a Role
Click: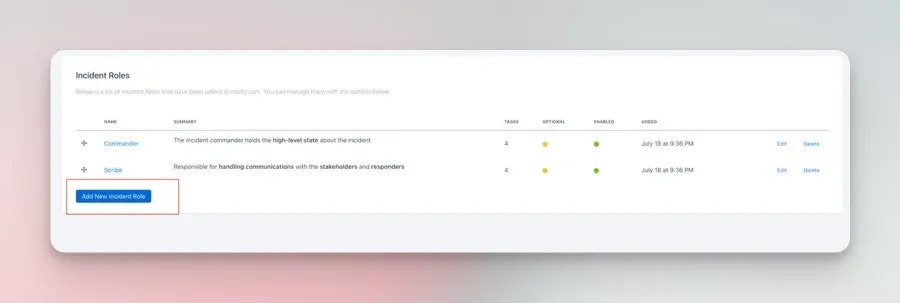
- New Incident Role to create a new role, or
- The edit (pencil) icon next to an existing role to modify it.
3
Configure Role Details
Within the role editor, you can set:
- Name – The title of the role (e.g., “Incident Commander”).
- Summary – A short description shown in lists.
- Responsibilities – A longer description outlining expectations for this role.
- Optional Role – Specify whether this role must be assigned for every incident.
- Allow Multiple Assignees – Enable if more than one user can hold this role at the same time.
- Permission Set – Determine what actions assignees are allowed to perform on an incident (e.g., update status, manage roles, modify properties).
4
Save Changes
Click Save to apply your updates.Your new or updated role will now appear across all incident workflows and Slack role assignment modals.
Best Practices
-
Use clear, action-oriented role names
Roles like Incident Commander, Communications Lead, or Ops Owner help responders quickly understand responsibilities. -
Limit multi-assignee roles
Multi-user roles can be useful, but restricting some roles to a single owner helps maintain accountability. -
Document responsibilities thoroughly
Clear written expectations improve consistency across incidents and make onboarding easier. -
Review role definitions periodically
As your response process matures, update roles to reflect clearer responsibilities or new workflows. -
Keep roles aligned with permissions
Ensure each role’s permission set reflects what responders actually need to do during an incident.
Troubleshooting
I don’t see the Incident Roles page
I don’t see the Incident Roles page
You may not have access to configuration settings.
Only workspace admins or users with the appropriate configuration permissions can view this page.
Only workspace admins or users with the appropriate configuration permissions can view this page.
A role will not delete
A role will not delete
Roles that are referenced by workflows or required by the workspace cannot be deleted until dependencies are removed.
Why can’t I assign multiple users to a role?
Why can’t I assign multiple users to a role?
The role must have Allow Multiple Assignees enabled in the role configuration.
My role changes aren’t appearing in Slack
My role changes aren’t appearing in Slack
Slack surfaces the latest role definitions, but cached pinned blocks may refresh only after certain lifecycle actions.
Running
Running
/rootly assign will always fetch updated roles.