Slack is often where incident response actually happens, so Rootly lets you assign and manage incident roles directly inside the incident channel, without switching back to the web interface.This includes:
Assigning yourself to a role
Assigning or removing other responders
Editing all incident roles in one modal
Adding roles that aren’t yet part of this incident
Role management in Slack only works inside an incident channel and requires permission to assign incident roles.
For private incidents, users must also have update permission for private incidents.
Navigate to the Slack channel for the incident.
Slack commands and buttons rely on the channel’s mapping to an active incident.
2
Open the Role Assignment Modal
You can open the Assign Roles modal in two ways:Option A: Use the Assign Roles buttonWhen an incident is created, the pinned incident summary includes an :firefighter: Assign Roles button.
Assign Roles button in the Slack incident summary
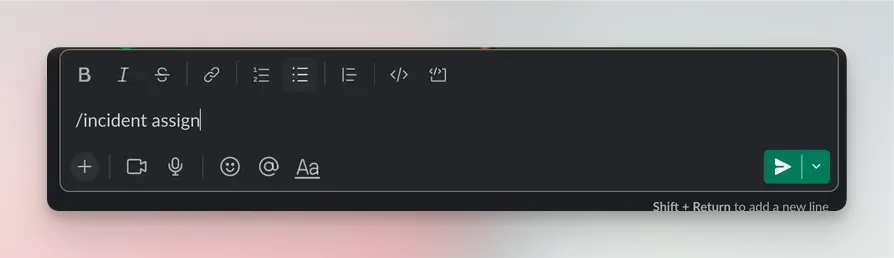
Option B: Use the slash commandRun the command inside the incident channel:
/rootly assign
You may also use the aliases:
/rootly role
/rootly roles
Using /rootly assign to open the modal
3
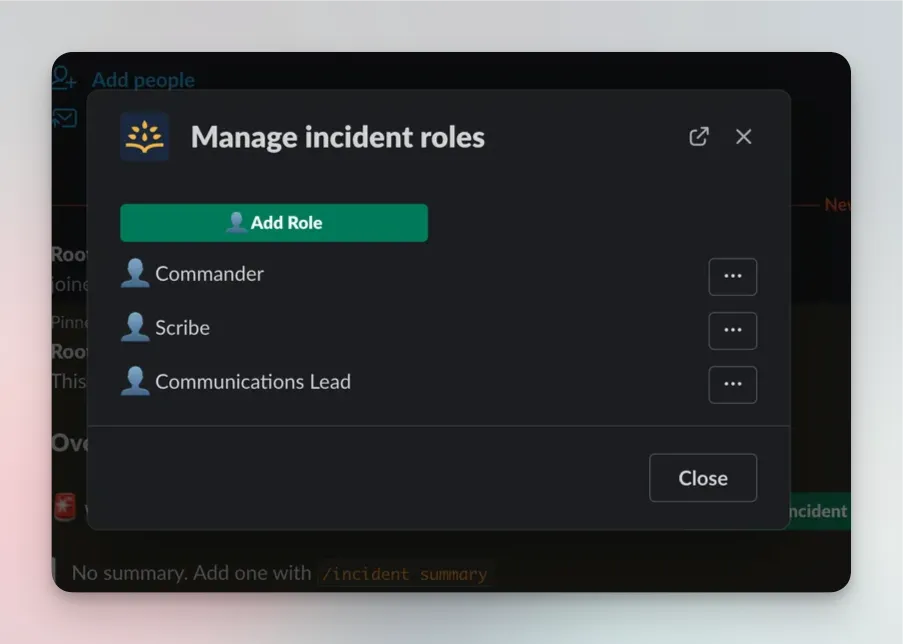
Assign or Remove Incident Roles
The modal displays every role available for this incident.
Each role has an associated menu or selector depending on how it was configured.Common actions include:
Assign Myself
Quickly take ownership of a role.
Edit Assigned Users
Add or remove specific responders.
Remove Myself
Step out of a role you previously held.
Editing assigned users in the Slack modal
If the role supports multiple assignees, you’ll see a multi-select.
If the role only allows one assignee, you’ll see a single-select dropdown.
Some roles may display a notice like: “Only users with an Incident Response seat can be assigned.”
This appears when your organization enforces seat restrictions.
4
Add Missing Roles (Optional)
If your team has defined incident roles that are not yet added to this specific incident, you’ll see an Add Roles banner.These roles must be added before responders can be assigned to them.
5
Save Your Changes
Click Update to apply all role assignments.
Rootly updates the incident immediately and posts relevant timeline entries.
Assign roles early in the incident
Clear ownership improves coordination and communication.
Use multi-assignee roles intentionally
For example, an “On-call Engineer” role may allow multiple users, while “Incident Commander” should be single-assignee.
Review roles during major status transitions
As the incident escalates, mitigation begins, or communications ramp up, ensure the right responders are assigned.
Use role automation where appropriate
Workflows can auto-assign on-call responders, service owners, or leadership roles when an incident begins or severity increases.
Keep roles aligned with your process
Customize roles in the web UI to match how your incident response team operates.