You can create an “On-Call Ready” checklist for your Teams Catalog, specifying that every Team must have an escalation policy, a goalie, and a support tier defined. You then kick off an audit to check all of your teams at once — any team that’s missing information will show up as incomplete, with a clear owner responsible for filling in the gaps.
Key concepts
- Checklist: A definition of the properties that must be filled out on a Catalog entity for it to be considered complete. You give it a name, a description, and select the specific properties it covers.
- Checklist owner: The person responsible for completing the checklist for a given entity. This can be a specific user, or dynamically determined from a property on the entity (e.g., the entity’s assigned Goalie or Owning Team’s admin).
- Audit: An instance of a checklist created for each entity in a Catalog. Triggering an audit kicks off a checklist for every entity at once.
- Audit status: Tracks where each entity stands in the review process: Not Started, In Progress, or Complete.
Creating a checklist
You can create checklists on both built-in Catalogs (like Services and Teams) and any custom Catalogs you’ve defined. For now, you can only create one checklist per Catalog.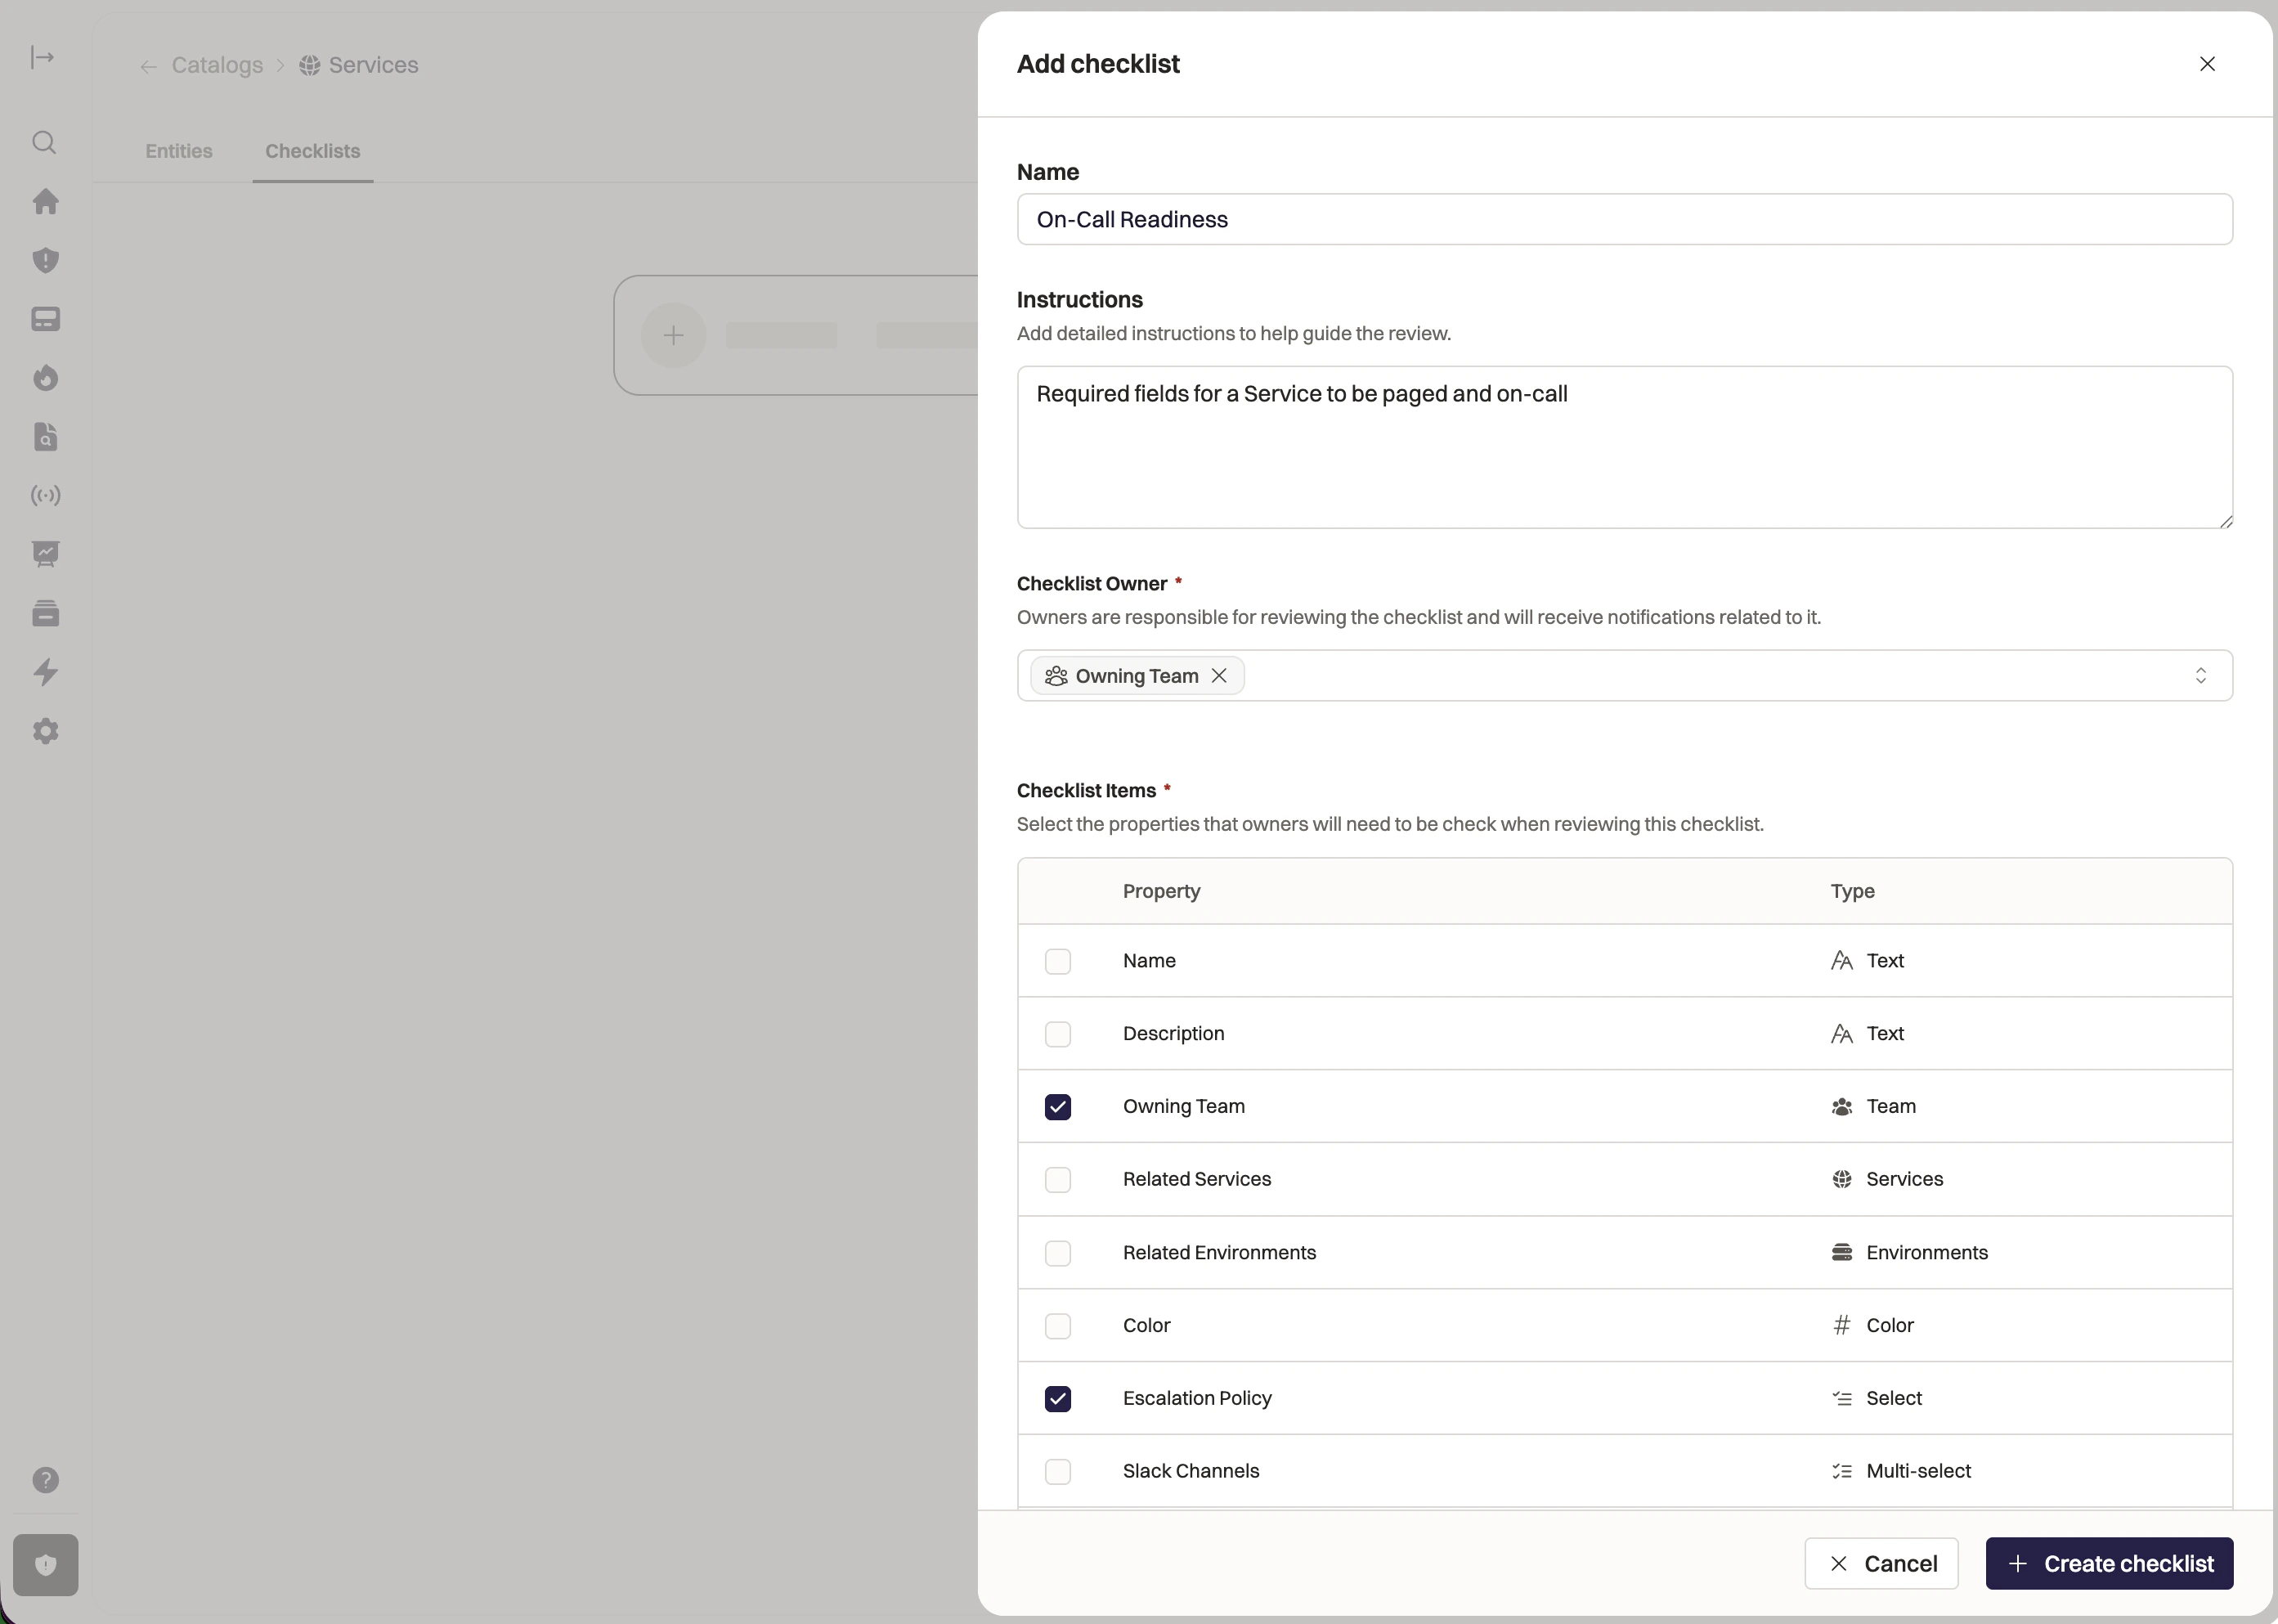
- Navigate to your Catalog and open the Checklists tab, and click Add checklist.
- Give it a name (e.g., “On-Call Ready”) and optional instructions so others know what it covers.
- Optionally, assign a checklist owner (see below for more details).
- Select the properties from that Catalog that must be filled out for an entity to pass the checklist.
- Save the checklist.
Assigning a checklist owner
The checklist owner is the person responsible for completing the checklist for each entity. You have a few options for how ownership is determined:- A specific user: One person is responsible for completing the checklist for every entity in the Catalog.
- A team property on the entity: The owner is the admin of the team associated with the entity. For example, if each Service has an “Owning Team” property, the checklist owner would be the admin of that team.
Editing a checklist definition
As your Catalog evolves (for example, if you add a new “Tier” property to your Services), you can edit an existing checklist to include the new property: you don’t need to create a brand new checklist.Deleting a checklist
You can delete a checklist at any time. When you do, Rootly retains any historical references to it and any active audits will continue and can still be completed. The checklist itself will no longer be available for future audits.Triggering and managing audits
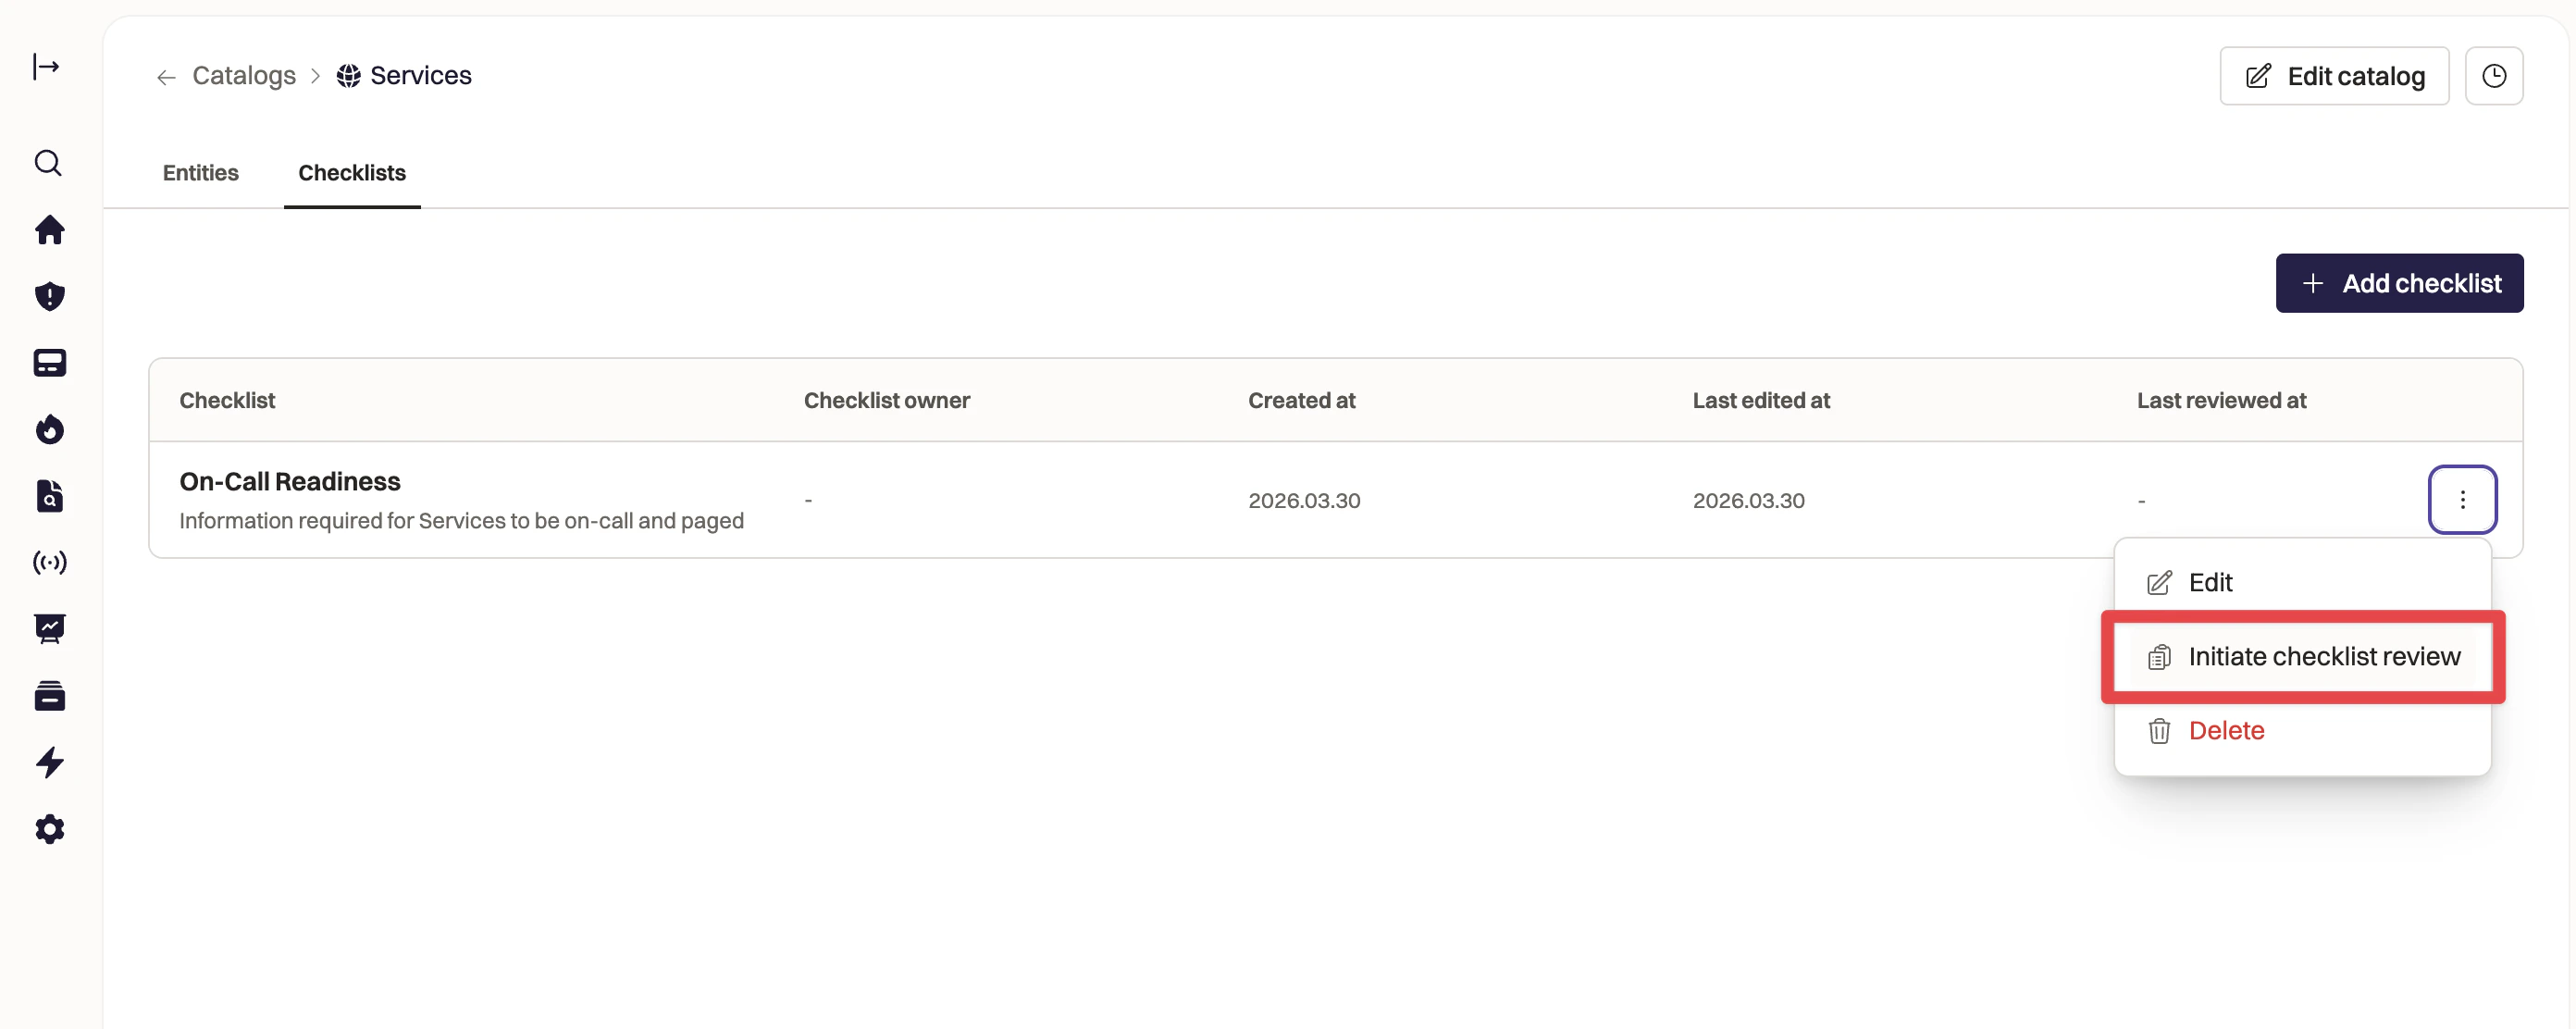
When it’s time to review and validate all entities in your Catalog, you can kick off an audit! An audit creates a fresh checklist for every entity in a Catalog at once. If you defined a checklist owner, they are all responsible for completing the audit of their entities. To trigger an audit:- Open the Catalog you want to audit. Click the Checklists tab from the overview page to see the available checklists.
- Select the checklist you want to run.
- Click Initiate checklist review.
Completing an audit
Once an audit has been triggered for your entity, you’ll find it in the Catalog on that entity’s page. Here’s how to work through it.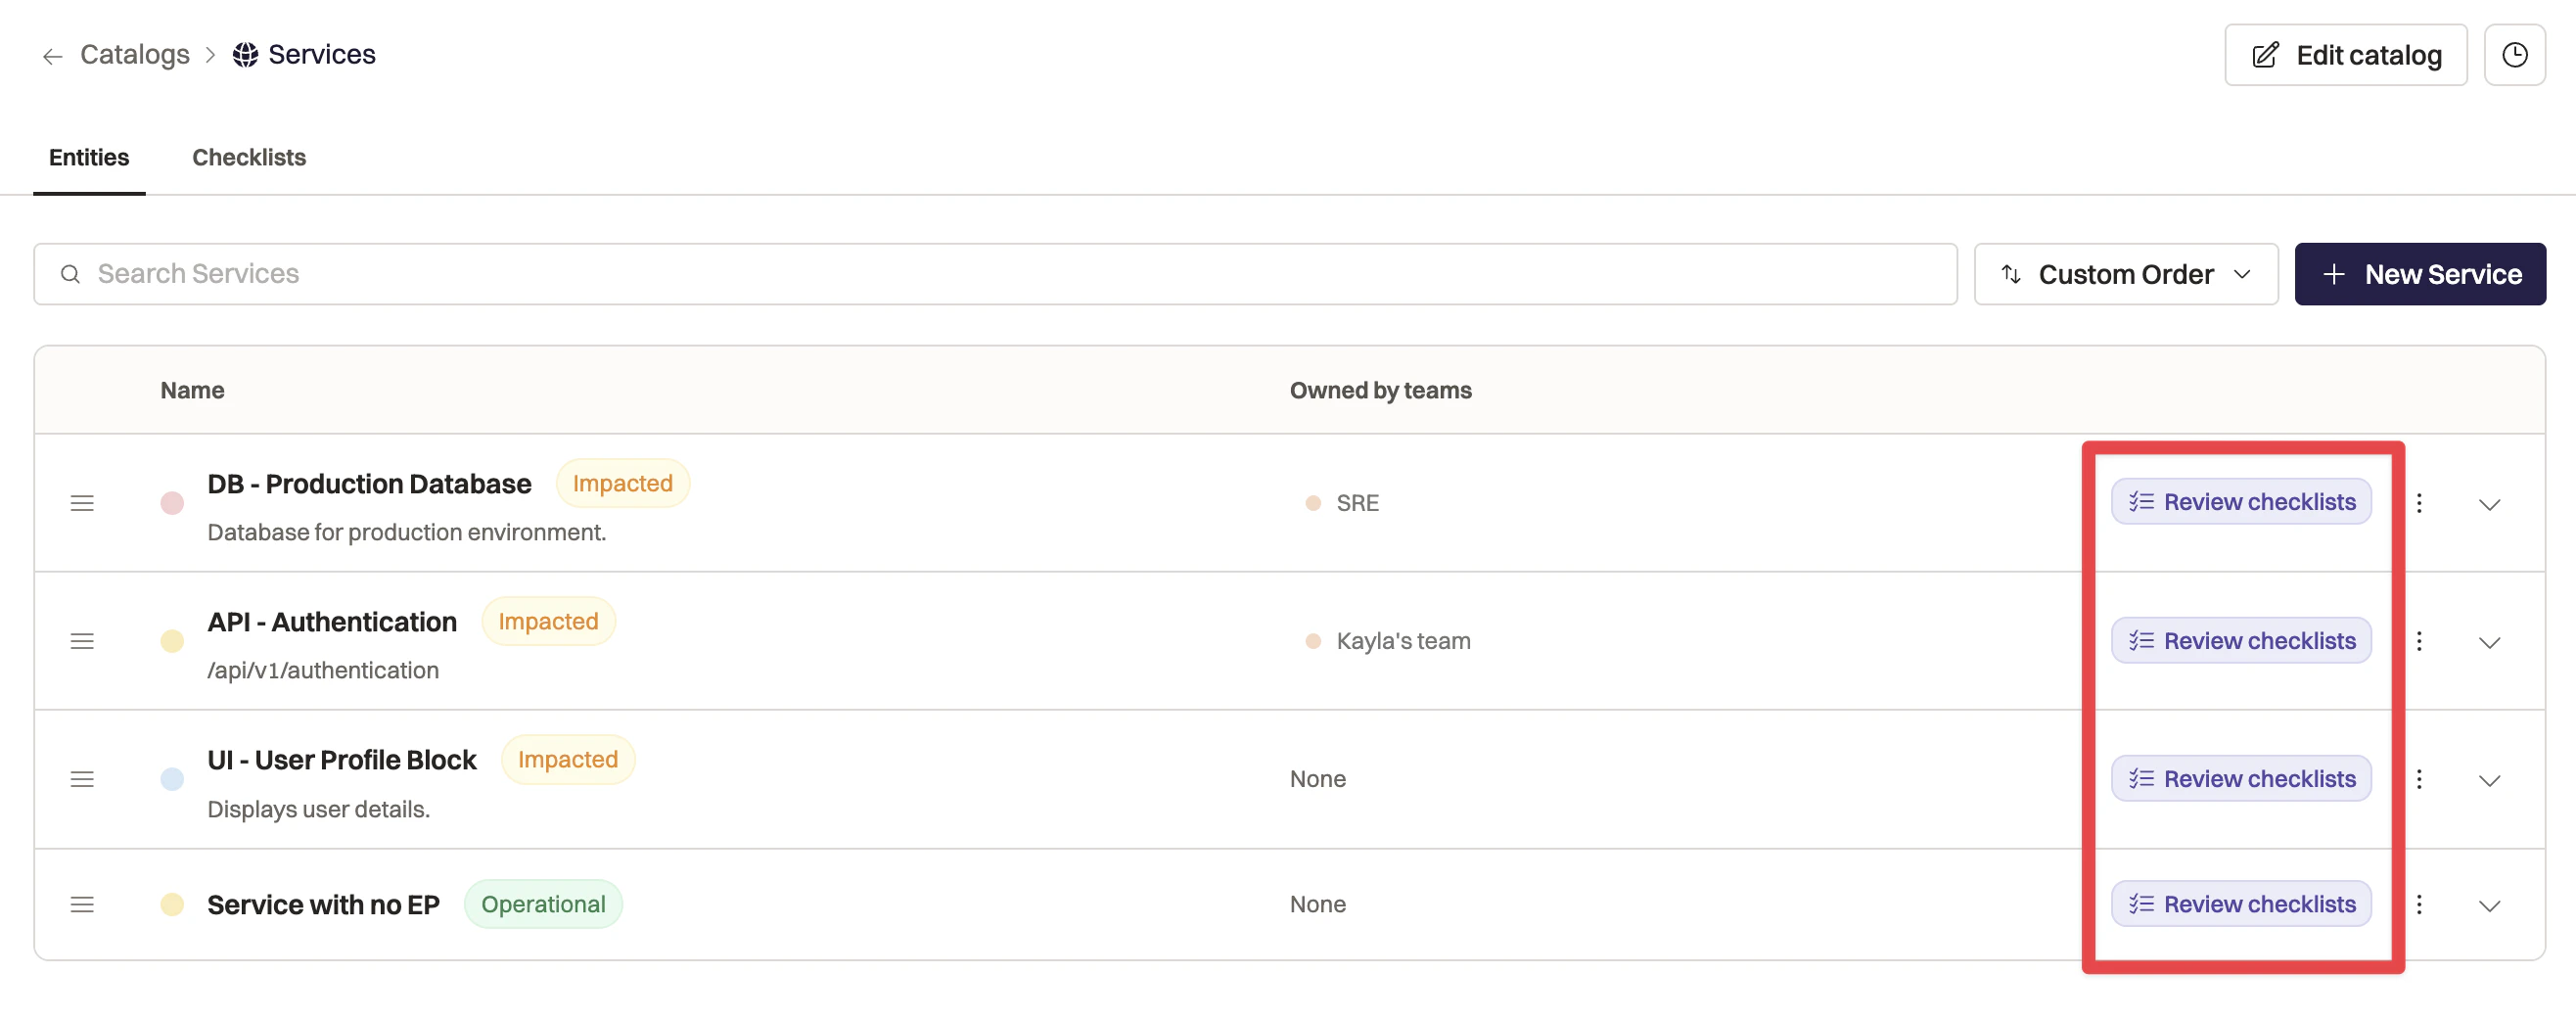
Viewing audit statuses
On the Catalog’s overview page, you can see the audit status for every entity at a glance. Entities that haven’t been started show a “Start Review” prompt; entities in progress show an “In Progress” indicator.Reviewing and checking off items
Each item in the audit corresponds to a property from the checklist definition. For each item, you’ll see the current value of that property on the entity.- Review the current value for each property. If the value is correct, check it off. Rootly records who checked it off and what the value was at the time.
- If the value needs to be updated, make the change to the entity and then check off the item.
- You can save your progress at any point and come back to finish later.
- Once every item is checked off, click “Complete” to finalize the audit.
Multiple people working on the same audit
More than one person can work on the same audit at the same time. Rootly tracks who checks off each individual item, so you’ll have a clear record of who reviewed what, even when the work is shared across a team.Tracking audit progress
Audits can have the following statuses:- Not Started: The audit has been created but no items have been reviewed yet.
- In Progress: At least one item has been reviewed and checked off.
- Complete: All items have been checked off and the audit has been finalized.
Viewing audit history
Rootly keeps a record of every completed audit for each entity. In the entity’s audit history, you can see:- Who triggered the audit and when it was started.
- Which properties were included in the checklist at the time of the audit.
- The values those properties had when each item was checked off.
- Who checked off each item, and when.
- Who completed the audit, and when.