Catalogs are the foundation of everything else. This section walks through how to create them, customize them, and link them together.

Creating a new Catalog

To create a new Catalog, navigate to Catalog in your Rootly settings and click + New catalog. Give it a name that reflects what it represents, for example, “Product Areas” or “Supported Regions”. Add a description to your Catalog so teammates know what it’s for and when to use it.
Clean Shot2026 03 30at15 41 53@2x
Properties let you describe what makes each entity unique. For example, a “Region” Catalog might have a “Cluster” property that tells you which infrastructure clusters belong to that region. To add properties, open a Catalog and click Edit catalog, and click Add Property. You can choose from several property types, including text, boolean, and importantly references to other Catalogs.
Clean Shot2026 03 30at20 17 36@2x
One of the most powerful things you can do in Catalog is connect different Catalogs to each other. This lets you capture real-world relationships between your business entities. For example:
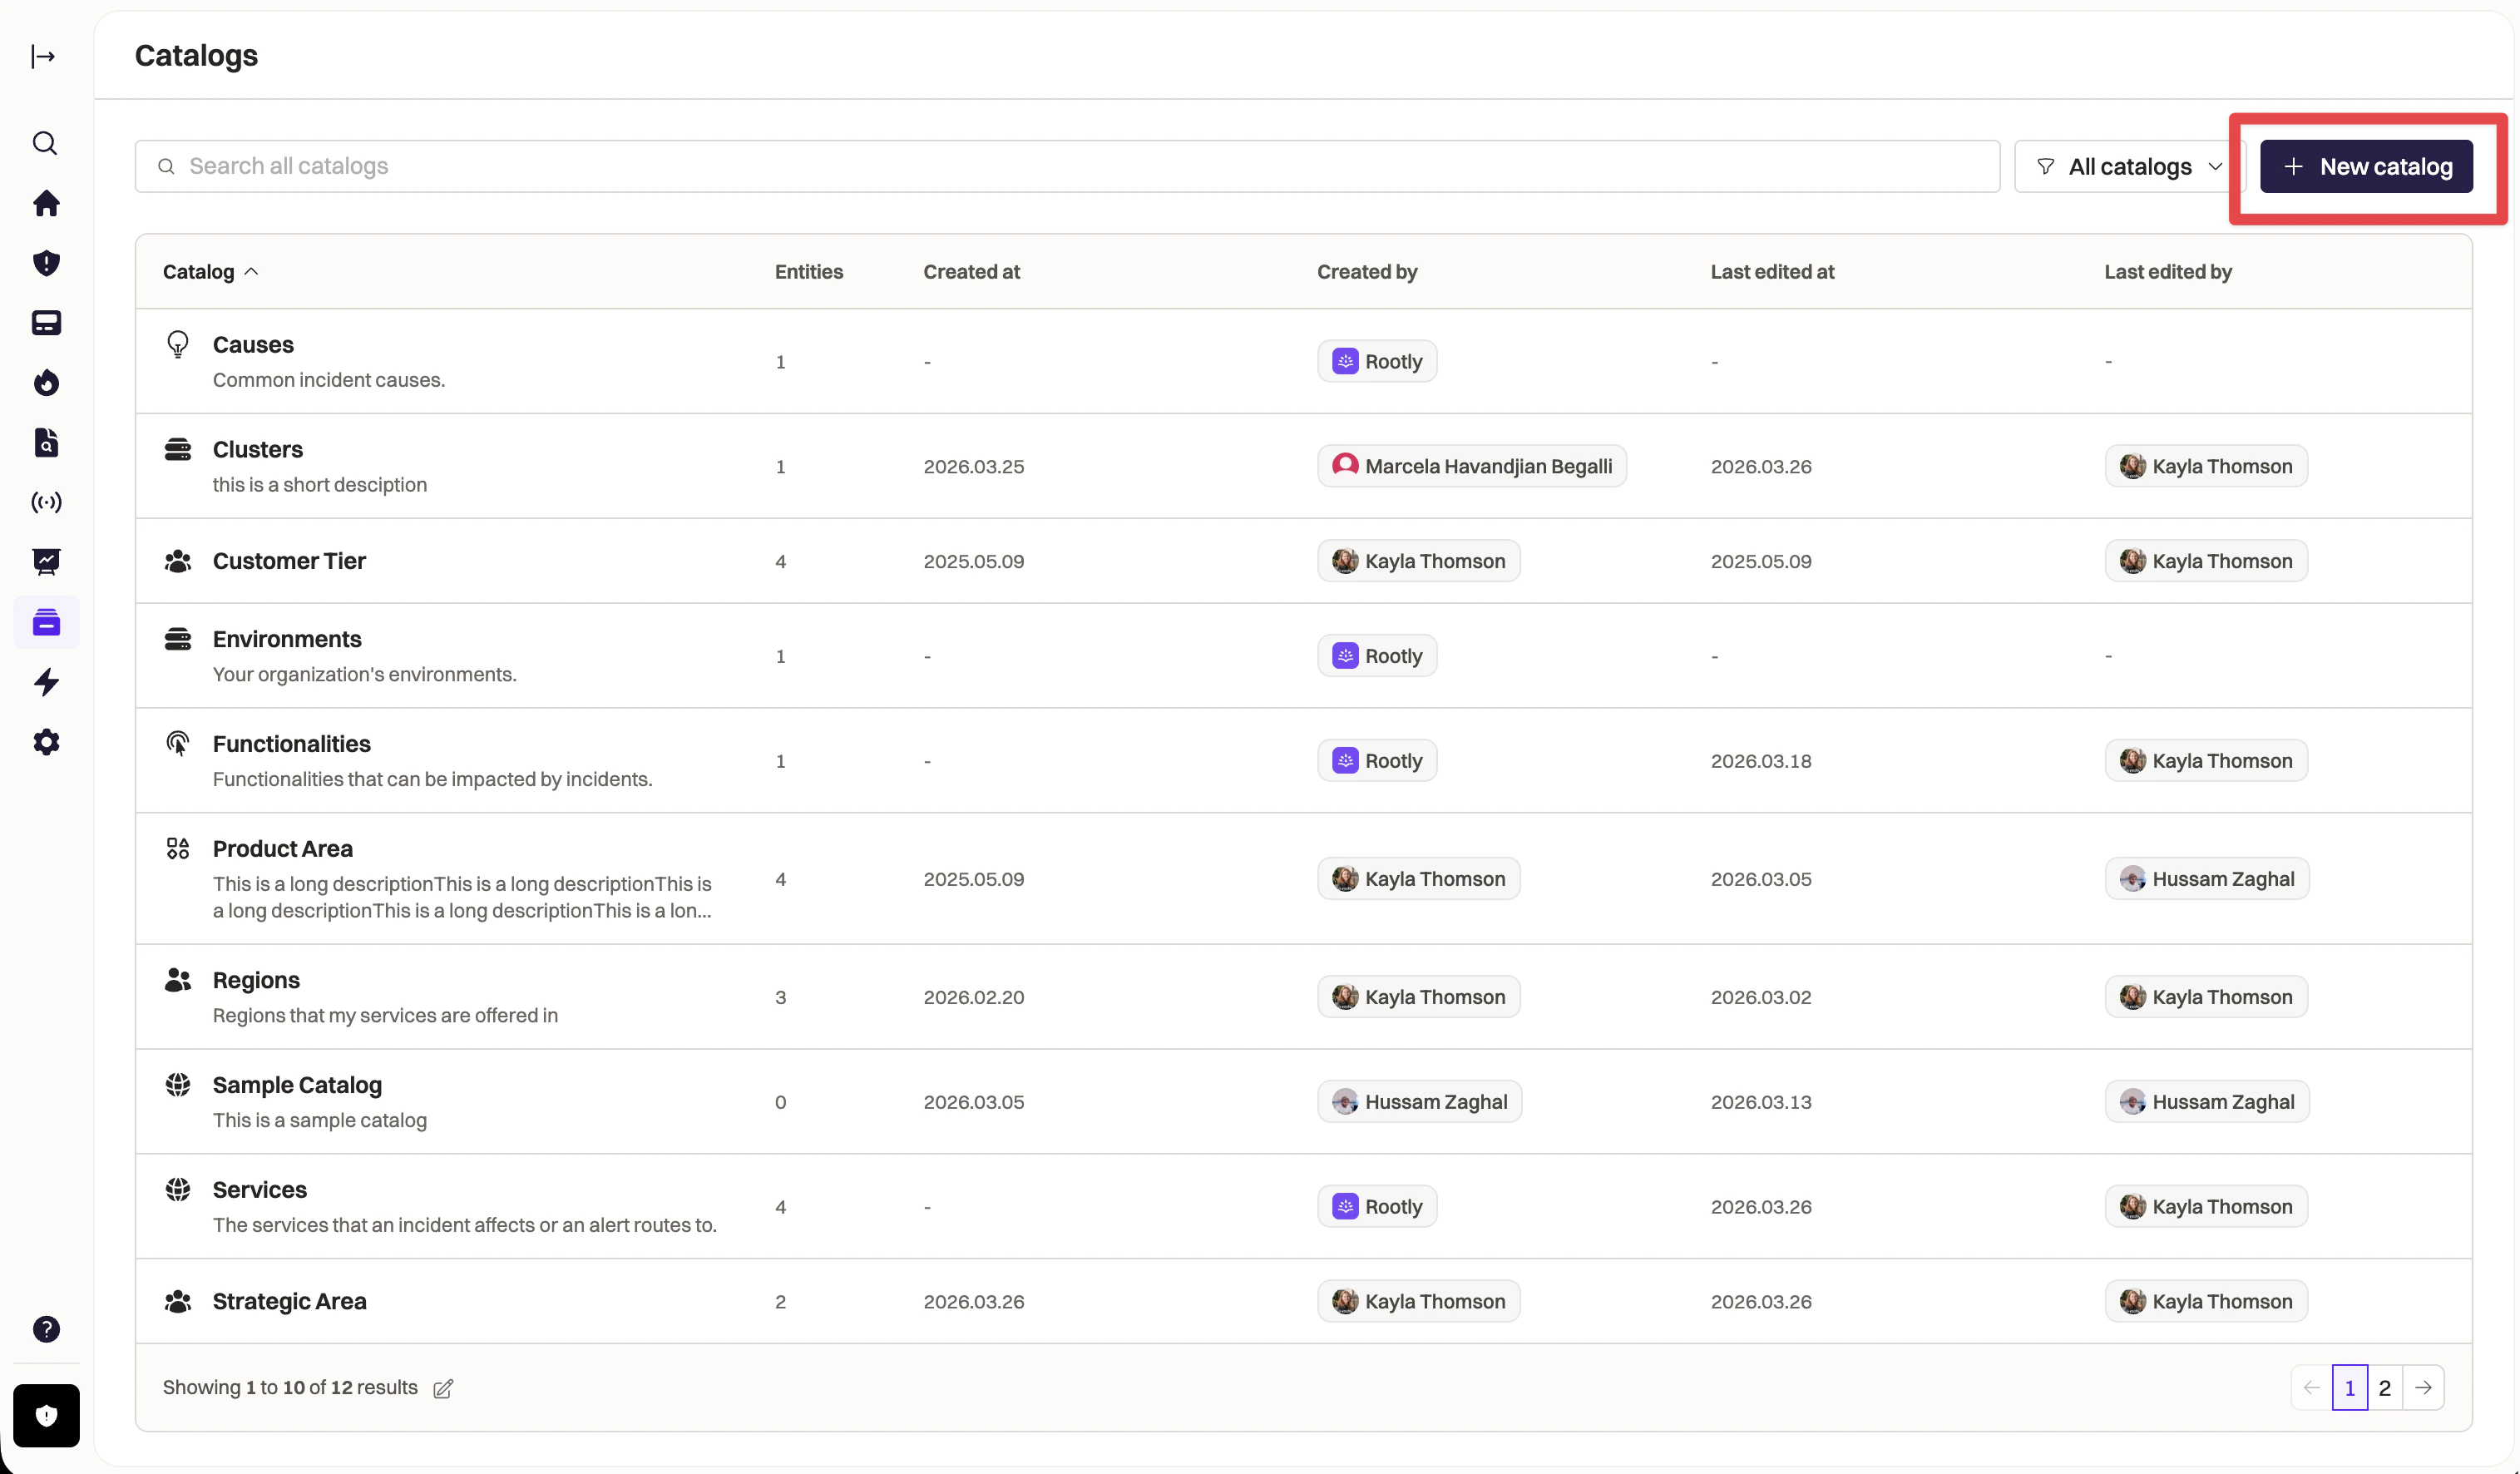
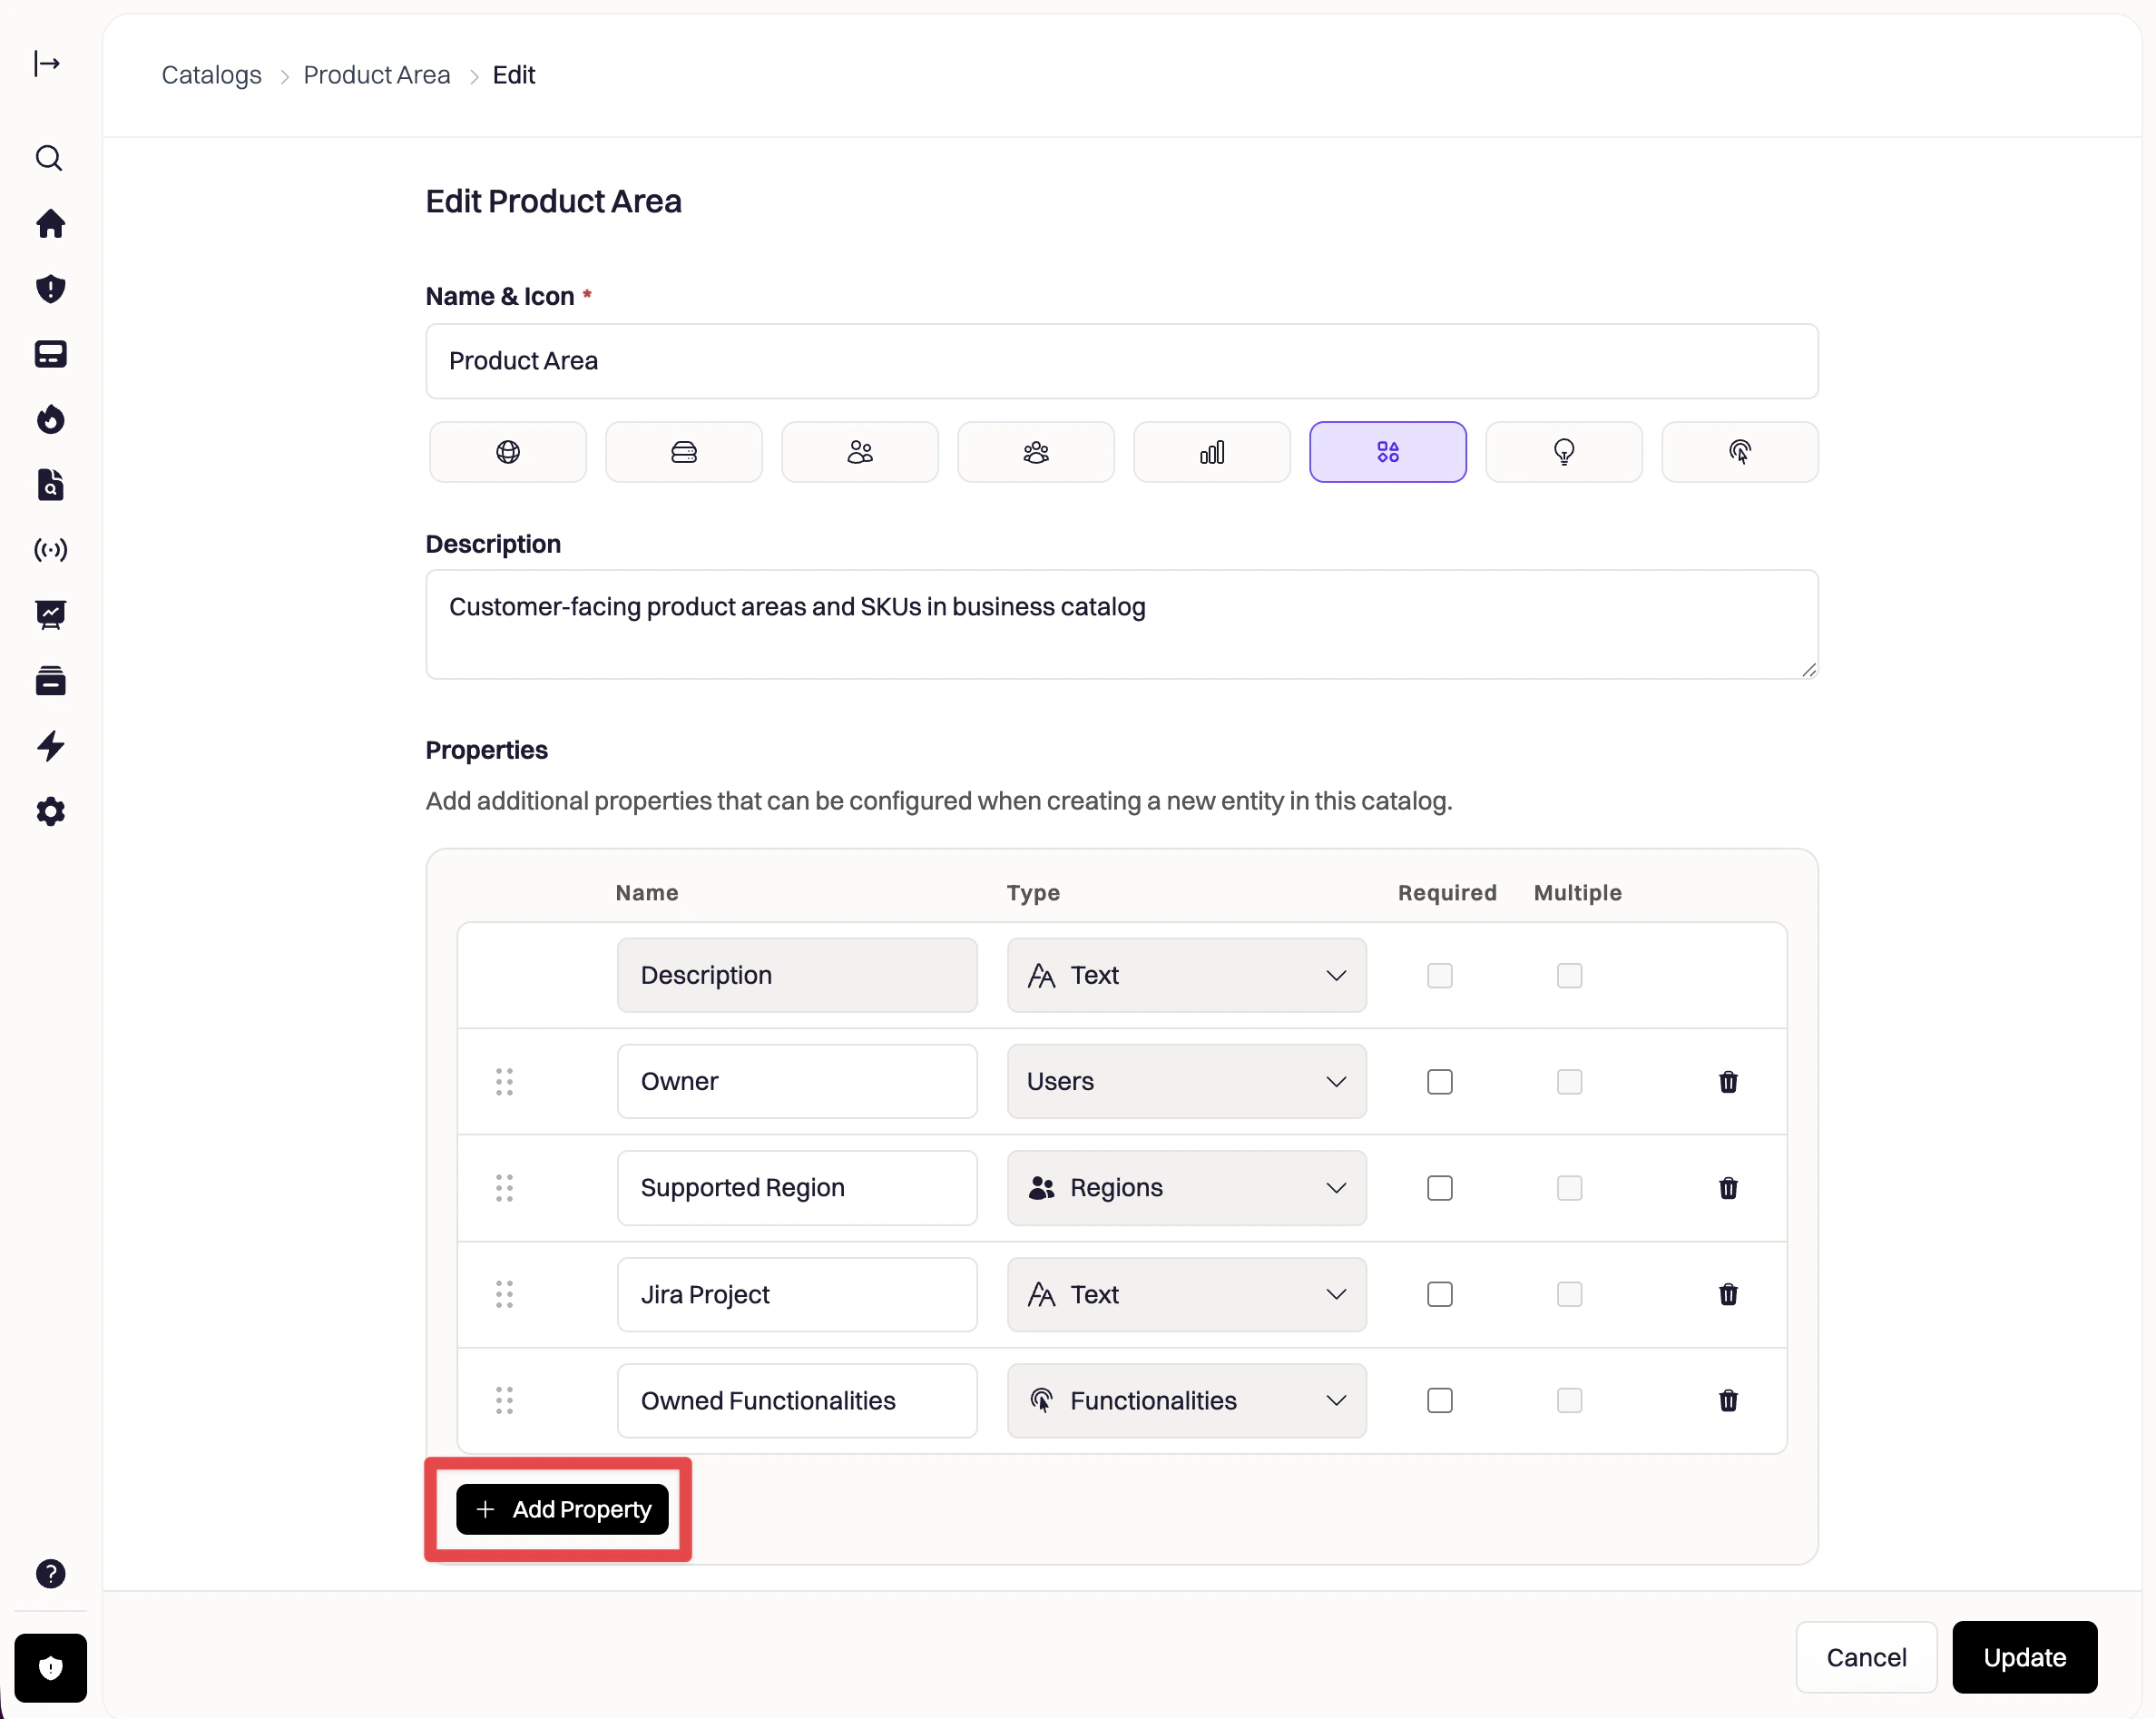
  • A “Teams” Catalog can have a property for “Owned Services”, where each value is drawn from your “Services” Catalog.
  • A “Customer Tier” Catalog can include a “Related Products” property that references your “Product Areas” Catalog.
To link Catalogs, add a new property to your Catalog and choose the other Catalog as the property type. Once linked, you’ll be able to select entities from that Catalog when filling in property values.

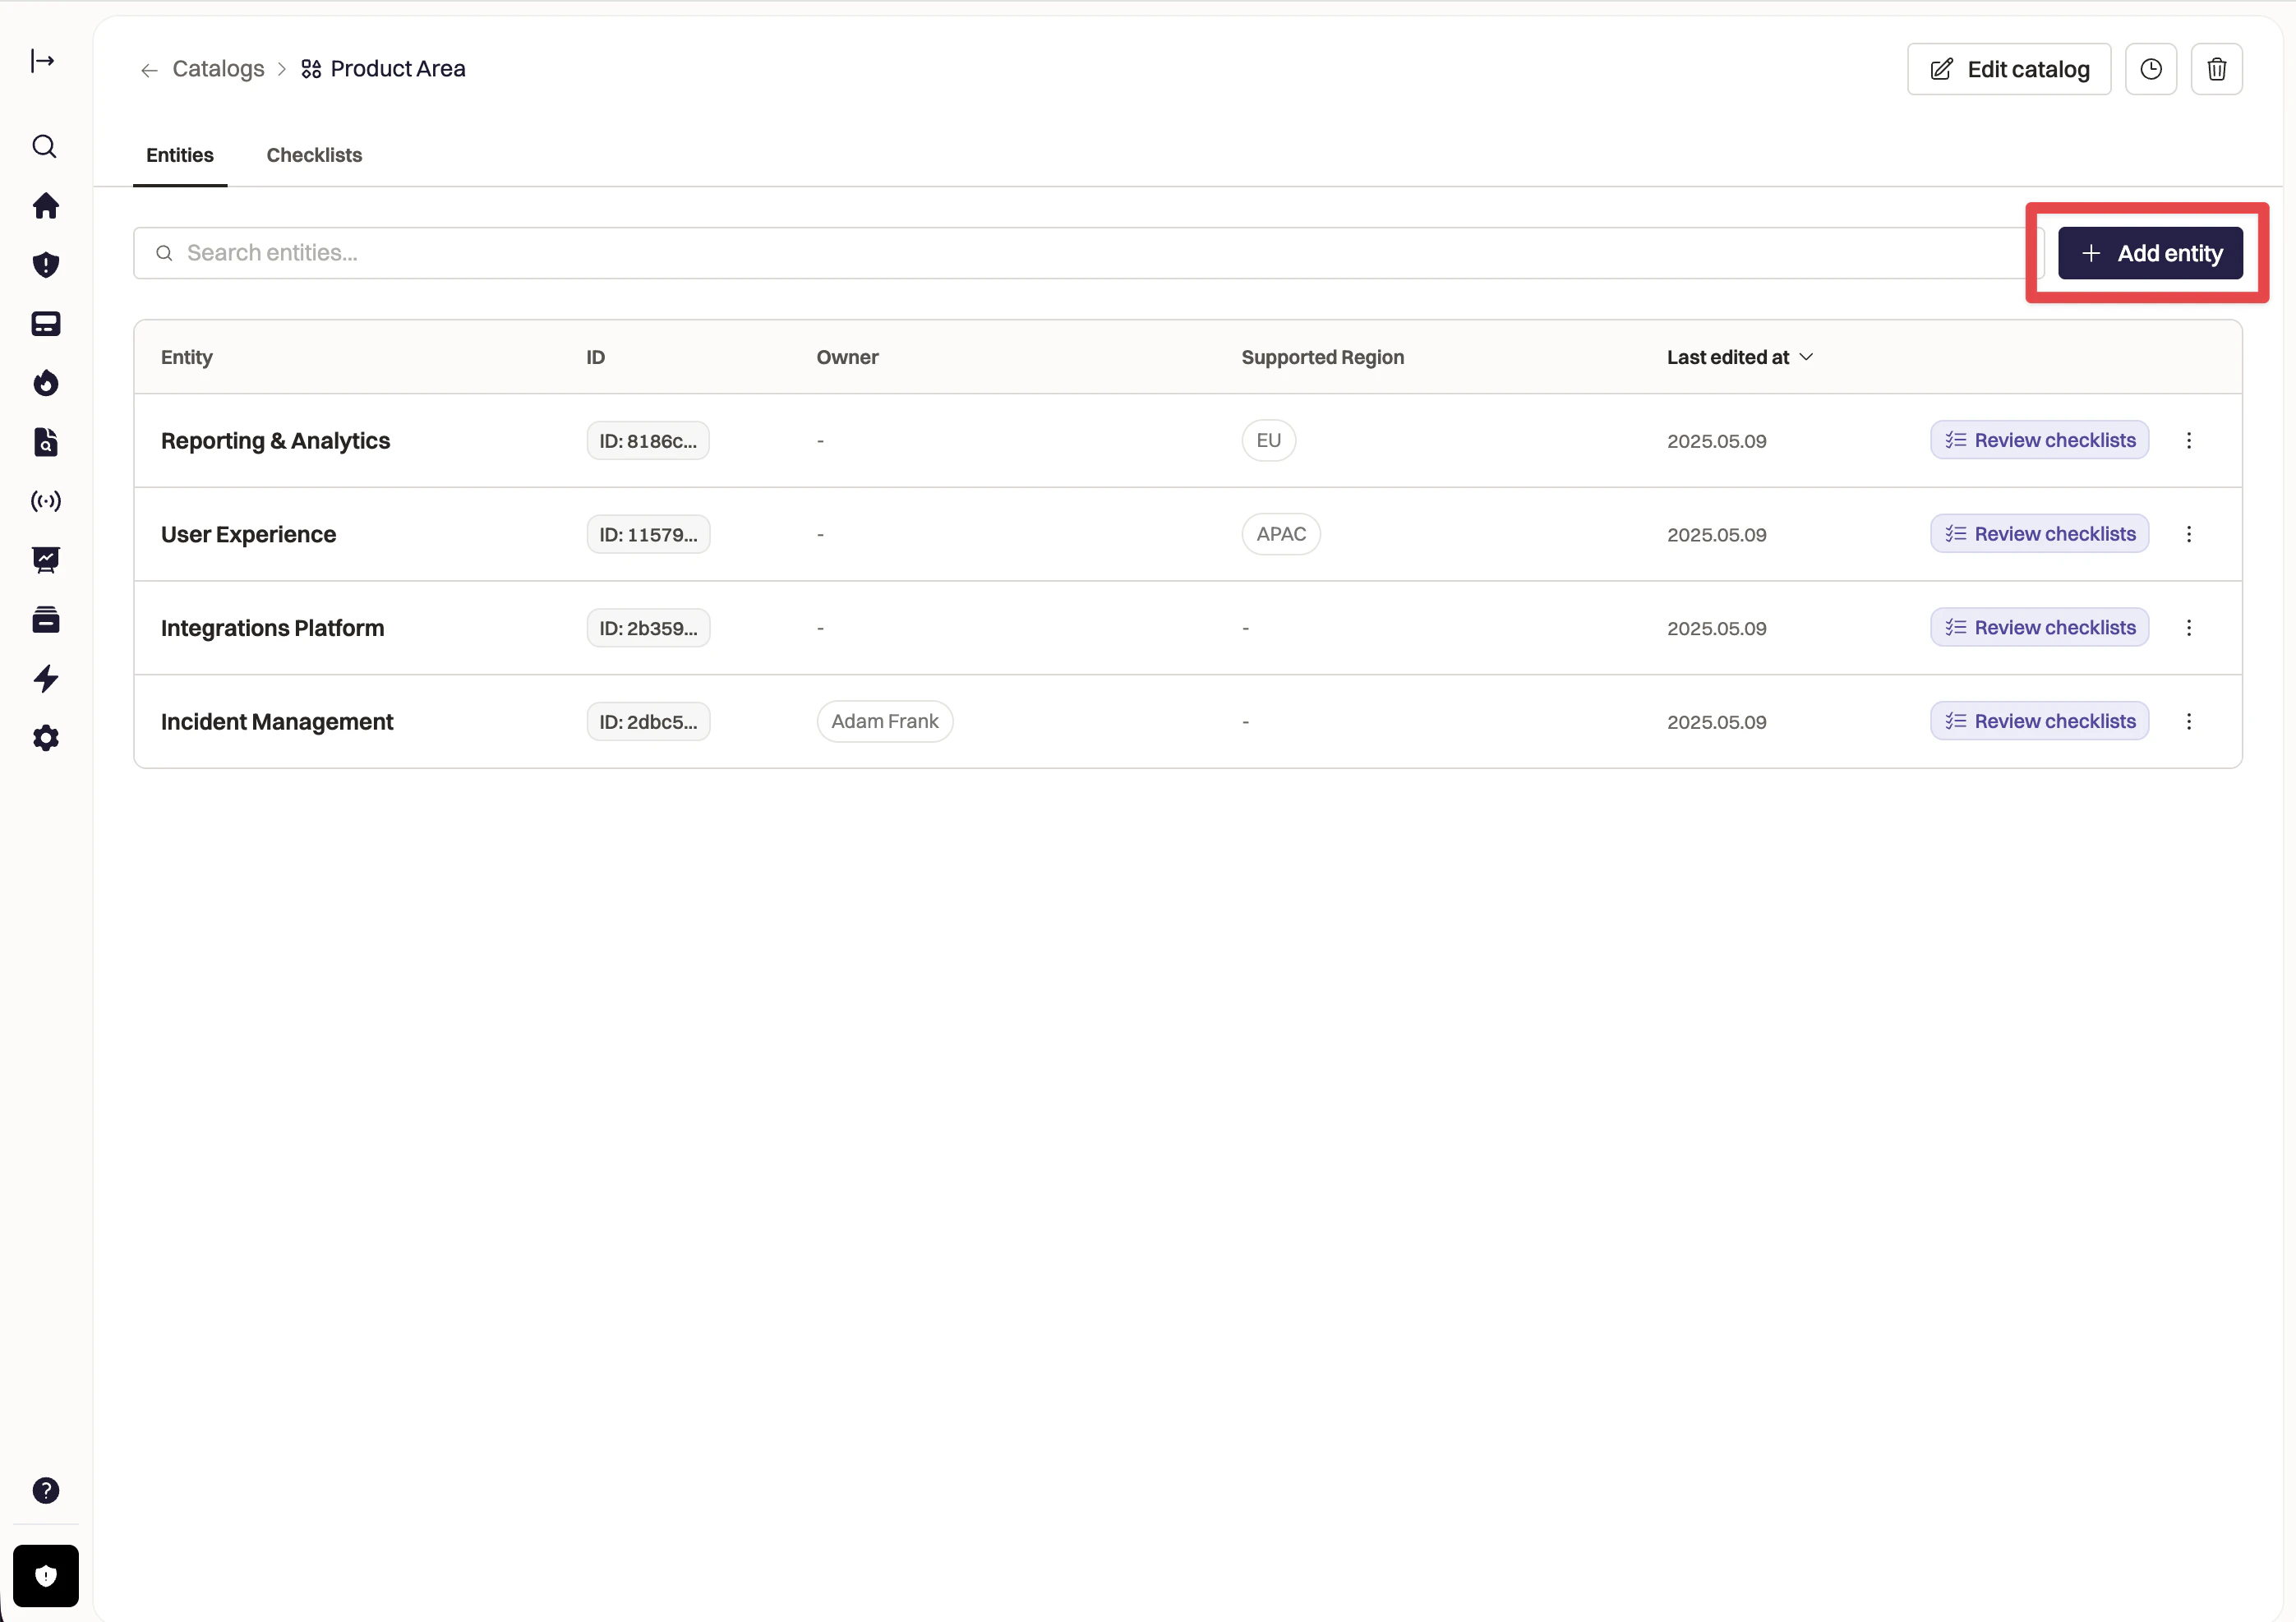
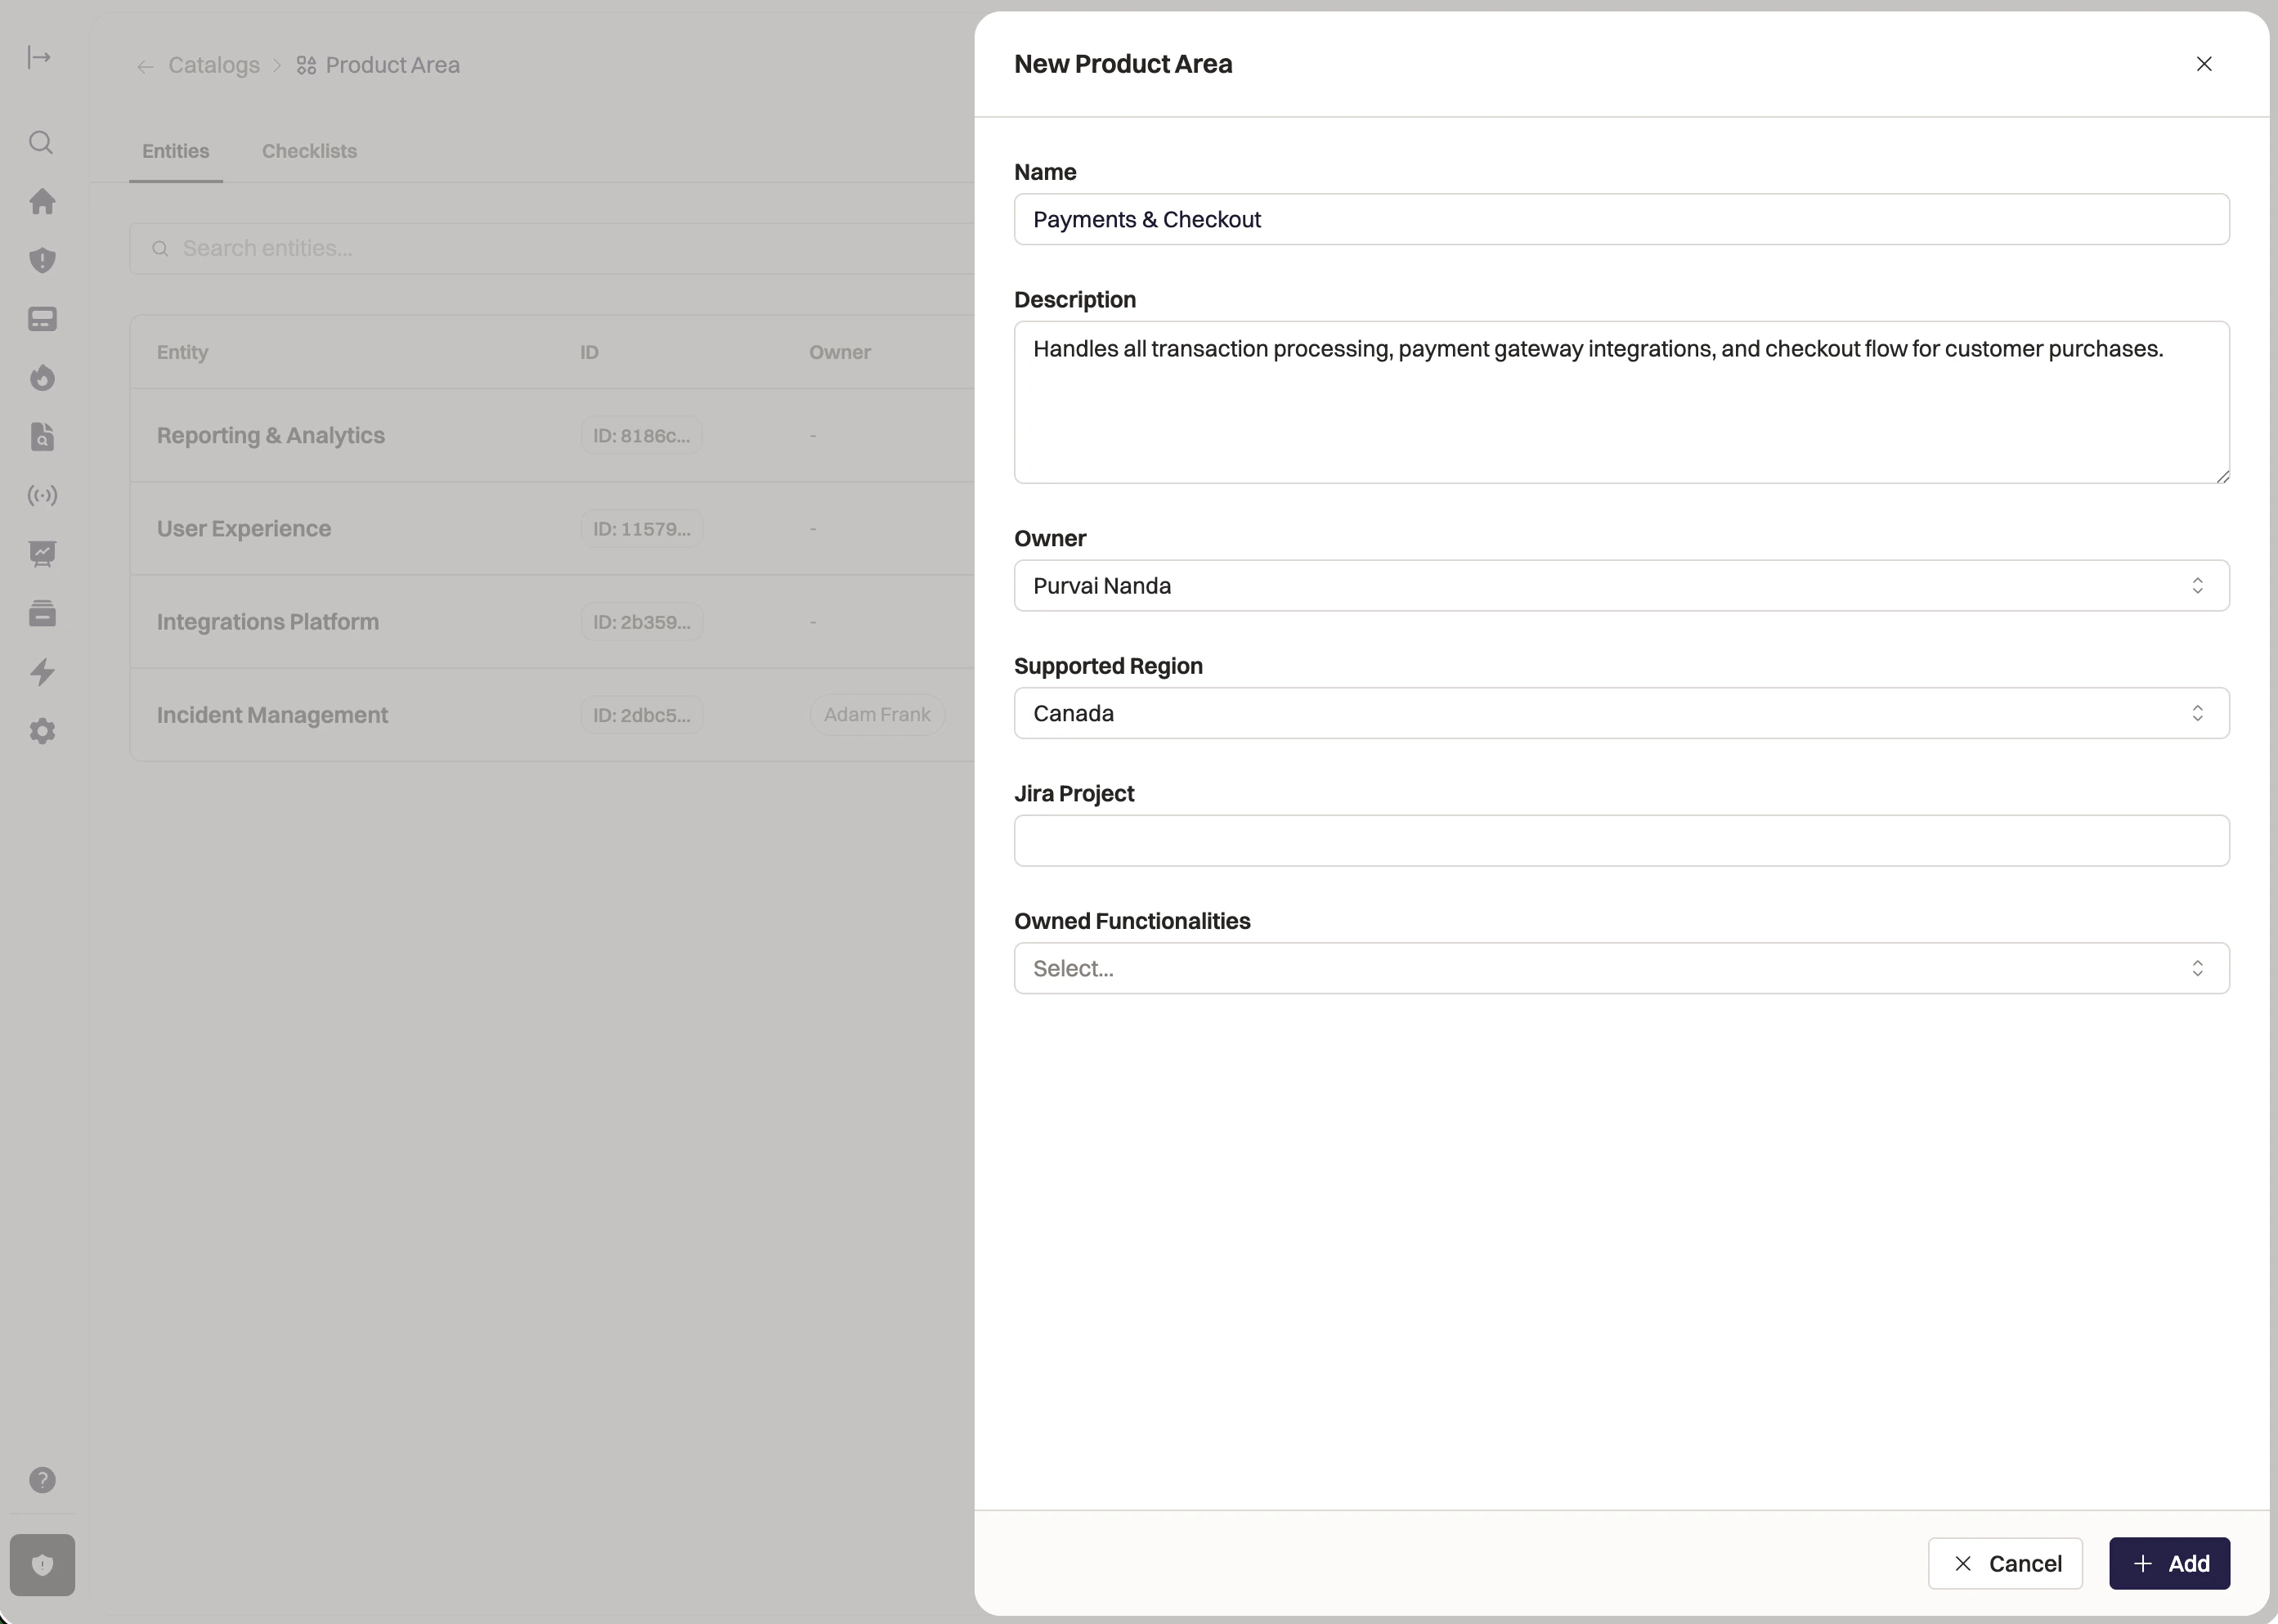
Adding entities to a Catalog

Once your Catalog is set up, start populating it with entities. Each entity represents one specific item in that category: for example, “Payments API” in your Services Catalog.
Clean Shot2026 03 30at20 22 00@2x
For each entity, fill in the properties you’ve defined. If a property references another Catalog, you’ll select the relevant entity from a dropdown of what’s already in that Catalog.
Clean Shot2026 03 30at20 25 07@2x