Introduction
The HashiCorp Vault integration lets Rootly securely read secrets from your Vault cluster and make them available in workflow actions via Liquid templating. Instead of hardcoding sensitive values — API keys, tokens, passwords — in your workflow configurations, you define named secret references that are resolved at runtime from Vault.Rootly only supports the KV Secrets Engine version 2. KV v1 and other secret engines (AWS, PKI, Transit, etc.) are not currently supported.
Before You Begin
Before setting up the HashiCorp Vault integration, make sure you have:- A Rootly account with owner or admin permissions
- A running HashiCorp Vault cluster accessible over HTTPS (or HTTP for internal deployments)
- An AppRole configured in Vault with a
role_idandsecret_id— Rootly authenticates exclusively via the AppRole auth method - The namespace your AppRole is configured in (enterprise Vault deployments)
- The mount path and path of the KV v2 secrets you want to expose to Rootly
Only the AppRole auth method is supported. If you need another auth method (token, Kubernetes, AWS IAM, etc.), contact support@rootly.com.
Installation
Open the integrations page in Rootly
Navigate to the integrations page in your Rootly workspace and select HashiCorp Vault.
Enter your Vault credentials
Fill in the following fields: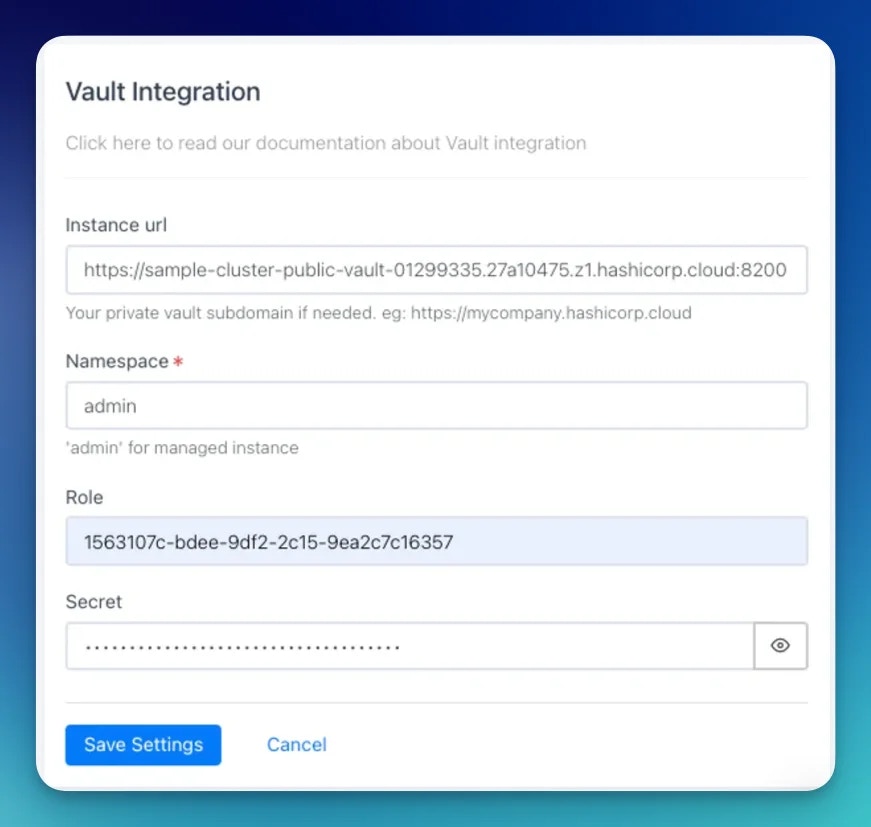
Integration connected
Your HashiCorp Vault integration is active. You can now define named secrets under Account > Secrets and reference them in any workflow action.
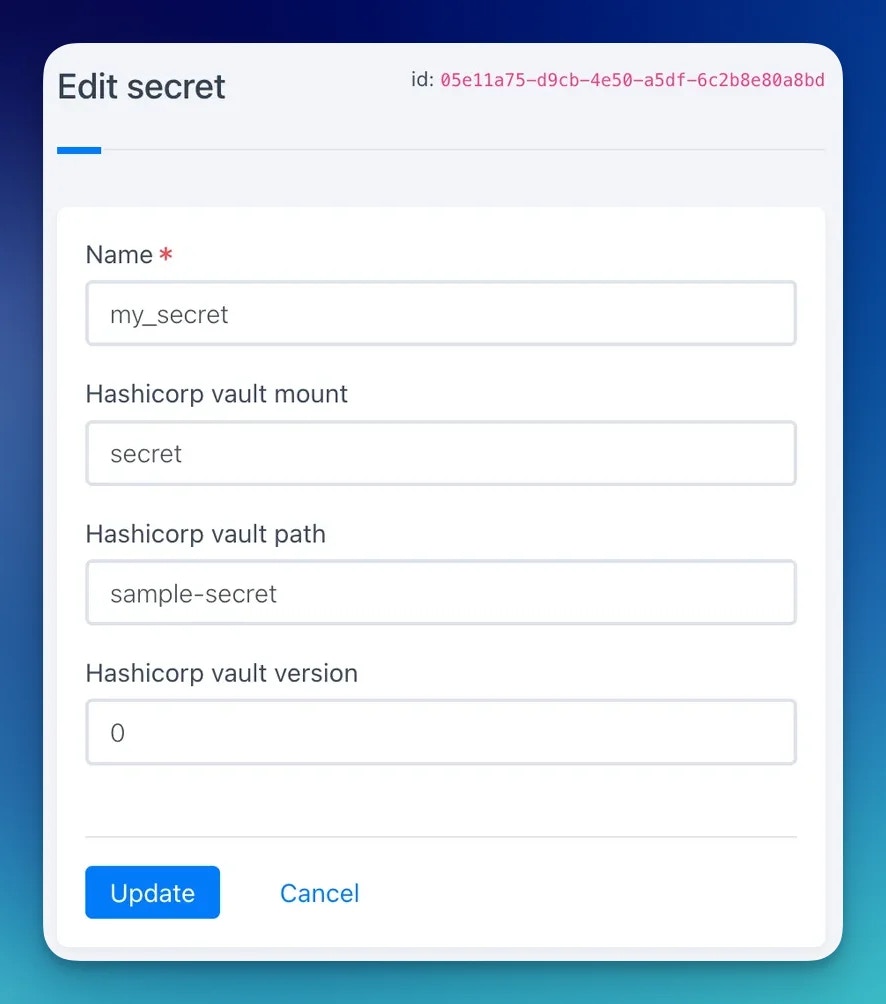
Defining Secrets
Once the Vault integration is connected, you create named secret references in Rootly that point to specific paths in your Vault KV store. These references are what you use in Liquid templates — Rootly fetches the actual secret value from Vault at workflow runtime.By default, only Rootly owners and admins can create and manage secret definitions. You can adjust this via Rootly’s RBAC settings.
Using Secrets in Workflows
Once a secret is defined, you can reference it in any workflow action that supports Liquid templating using the following syntax:SECRET_NAME is the name you gave the secret in Rootly, and KEY_NAME is the key within the Vault secret JSON.
For example, given a Vault secret at integrations/pagerduty containing:
Troubleshooting
Credentials are rejected on save
Credentials are rejected on save
Rootly validates credentials by attempting an AppRole login at
{instance_url}/v1/auth/AppRole/login. Confirm that:- The instance URL is reachable from Rootly’s servers (check any firewall or allowlist rules)
- The namespace is correct — for HCP Vault, this is typically
admin - The
role_idandsecret_idare both valid and haven’t expired or been rotated - The AppRole auth method is enabled at the path
auth/AppRolein Vault
Secret value is empty or null at runtime
Secret value is empty or null at runtime
Check that:
- The mount and path in the Rootly secret definition match the actual path in Vault
- The version is set to
0(latest) or a specific version that exists - The AppRole has a policy granting
readaccess to the secret path in KV v2 format:secret/data/your/path - The KV engine is version 2 — KV v1 paths have a different structure and are not supported
Nested key is not resolving
Nested key is not resolving
Rootly uses dot notation to traverse JSON secret values. Ensure the key path in your Liquid template matches the JSON structure exactly, including case. For example,
{{ secrets.my_secret.nested.foo }} requires a JSON structure of {"nested": {"foo": "value"}}.Secret access is denied by Vault policy
Secret access is denied by Vault policy
The AppRole’s attached Vault policy must explicitly grant
read capability on the KV v2 data path. KV v2 paths follow the pattern secret/data/<path> (not secret/<path>). A minimal policy granting read access looks like:I cannot create or see secrets in Rootly
I cannot create or see secrets in Rootly
Secret definitions are restricted to Rootly owners and admins by default. If you have a lower permission level, ask an admin to create the secret reference for you, or ask an admin to adjust the RBAC settings to allow your role to manage secrets.
Uninstall
To disconnect the integration, navigate to the integrations panel, open the Vault integration, and click Configure > Delete.Related Pages
Incident Workflows
Use Vault secrets in workflow actions to authenticate with external systems during incidents.
Liquid Variables
Reference for all Liquid variables available in workflow actions alongside secrets.
Terraform
Manage Rootly resources as infrastructure as code with the Rootly Terraform provider.