Incident Channels
Automatically create dedicated Teams channels for each incident with responders invited
Real-time Updates
Post incident status changes, severity updates, and key events to Teams channels
Video Meetings
Create Microsoft Teams meetings for live incident collaboration with one click
Custom Notifications
Control which events trigger Teams notifications using workflow conditions
How It Works
1
Connect Microsoft Teams
Authorize Rootly to access your Teams workspace via OAuth.
2
Install the Rootly Bot
Add the Rootly app to your Teams workspace to enable channel creation and messaging.
3
Configure Workflows
Set up workflows to automatically create channels, send messages, or start meetings when incidents occur.
Before You Begin
Rootly recommends connecting with a service account rather than a personal account. This ensures the integration stays active if team members leave your organization.
Installation
Setting up the Microsoft Teams integration involves two steps that work together. First, you authorize Rootly via OAuth so it can call the Microsoft Teams API on your behalf. Then, you install the Rootly bot directly inside Teams so it can create channels and post messages. Both steps are required — OAuth alone isn’t enough to create channels or send messages.Part 1: Connect via OAuth
The OAuth flow grants Rootly permission to interact with your Microsoft Teams workspace through the API. You’ll be redirected to Microsoft to sign in and approve the required permissions, then returned to Rootly automatically.1
Open Integrations
In Rootly, go to Configuration → Integrations and search for Microsoft Teams.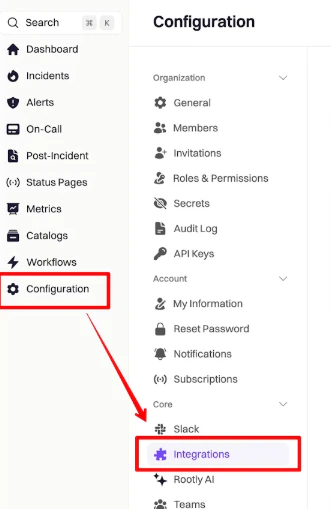
2
Start Setup
Click Setup on the Microsoft Teams integration to begin the OAuth flow.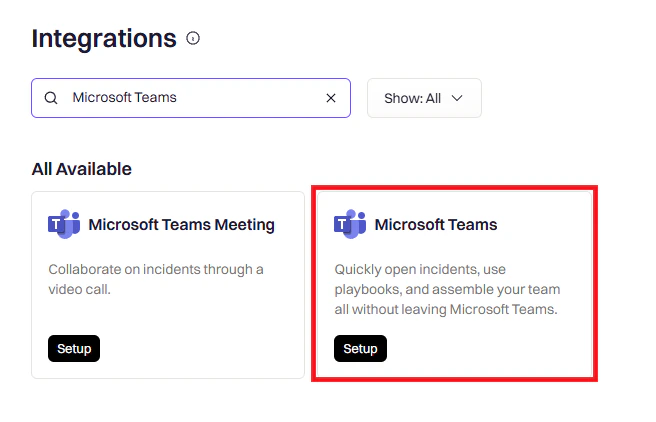
3
Sign in to Microsoft
You’ll be redirected to Microsoft. Select your Microsoft 365 work account — this should be the service account you intend to use for the integration.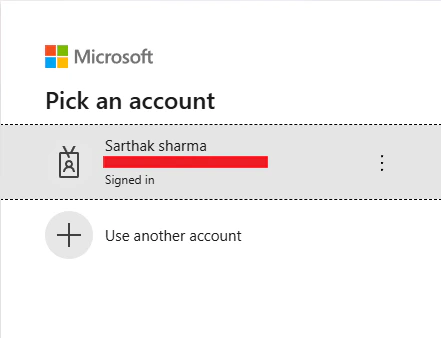
4
Review and approve permissions
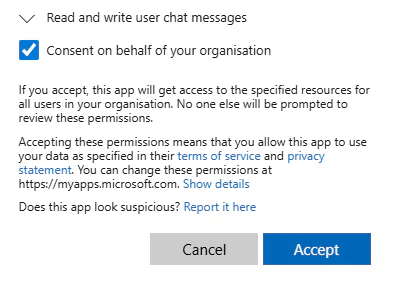
Microsoft will show you the permissions Rootly is requesting. Review them and click Accept to grant access.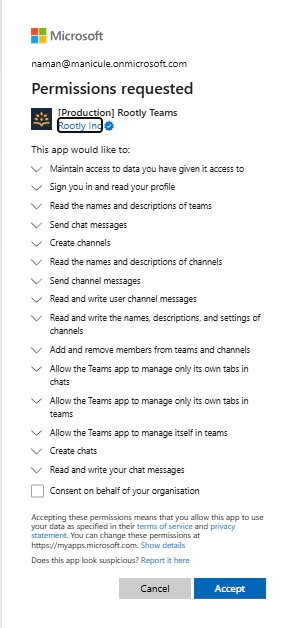
5
Confirm connection
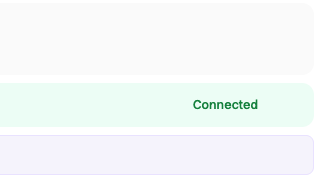
After approving, you’ll be redirected back to Rootly. A success message confirms the integration is connected.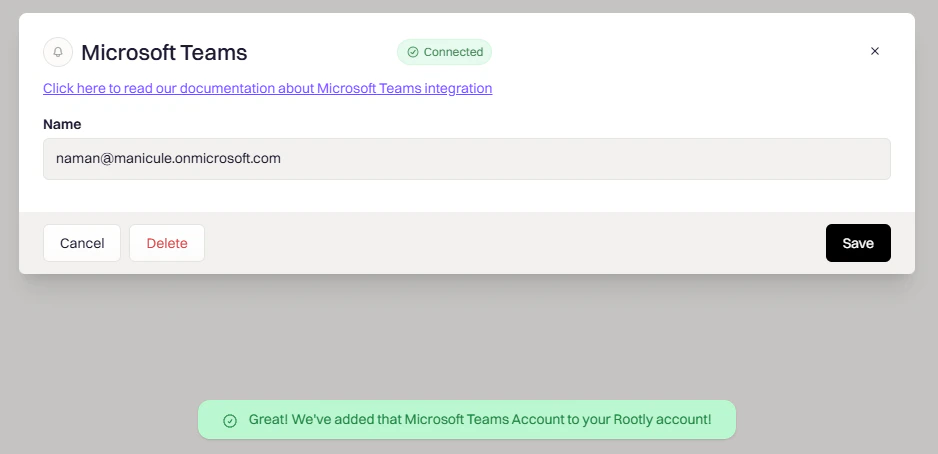
Microsoft Teams is now connected to Rootly.
Required OAuth Permissions
View all OAuth scopes
View all OAuth scopes
Part 2: Install the Rootly Bot
OAuth gives Rootly API access, but channel creation and messaging also require the Rootly bot to be present inside Microsoft Teams. Without the bot installed, workflows that create channels or send messages will fail. You install it directly from the Teams app store.1
Open Apps in Teams
In Microsoft Teams, click Apps in the left sidebar and search for Rootly.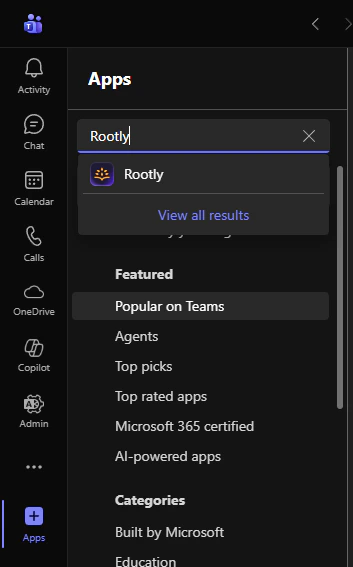
2
Add Rootly
Click Add on the Rootly app listing.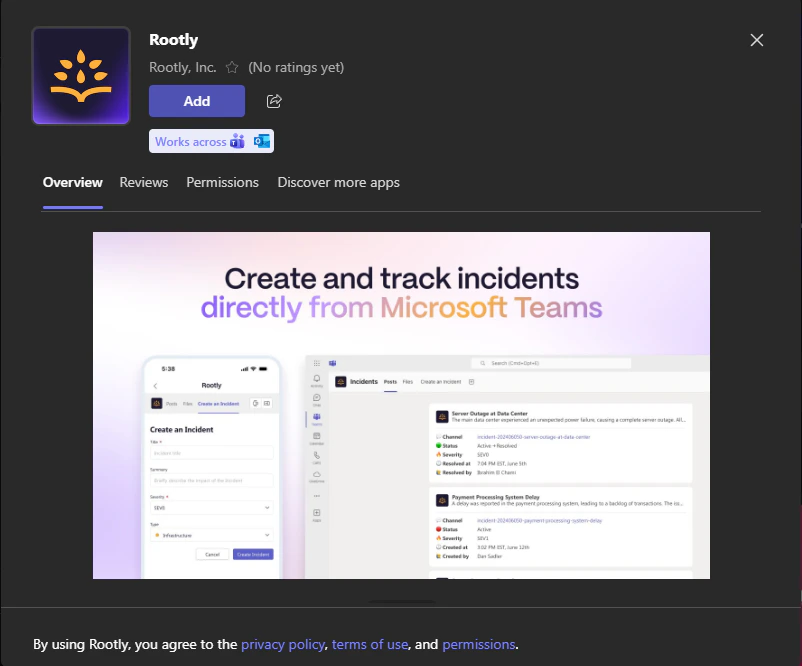
3
Choose a team
Select the team where you want to install Rootly. Rootly recommends starting with the General channel of your primary incident response team.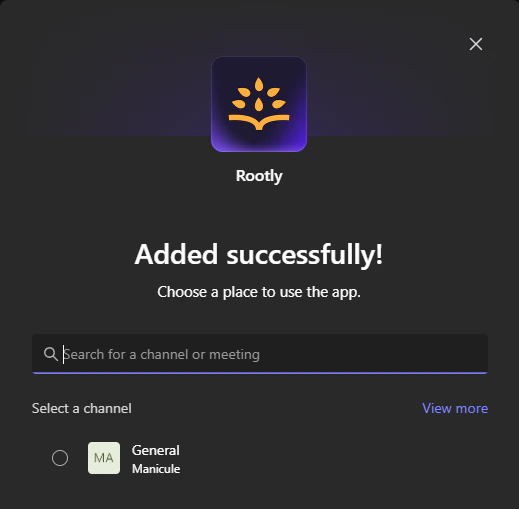
4
Installation complete
The Rootly bot is now installed in your team and ready to create channels and send messages.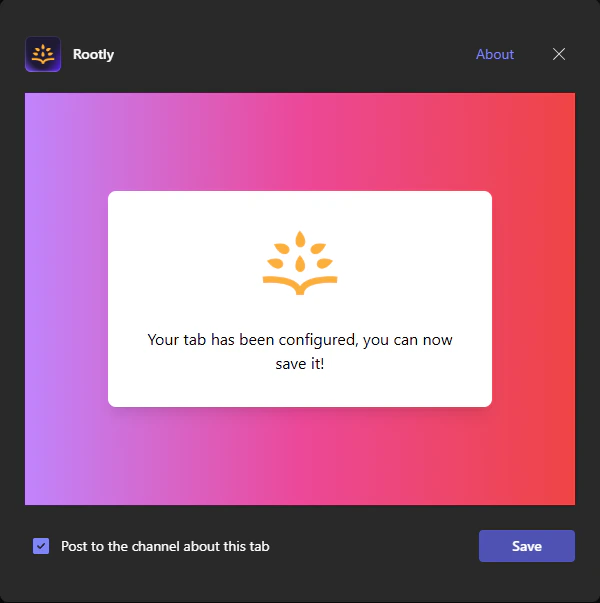
You’ll need to repeat the bot installation for each team where you want Rootly to create incident channels. The service account must be a member of each team.
Verify Installation
Once both parts are complete, confirm everything is working before setting up workflows:- Check Rootly — The integration status shows Connected on the integrations page
- Check Teams — The Rootly app appears in your team’s installed apps
- Test end-to-end — Create a test incident in Rootly and verify a Teams channel is created automatically
Microsoft Teams Meeting
The Microsoft Teams Meeting integration is a separate OAuth connection that enables creating video meetings directly from Rootly incidents. It uses a different set of permissions than the main Teams integration and must be connected independently — even if you’ve already set up the main Teams integration. Once connected, a Create a Microsoft meeting button appears in the incident header, letting anyone on the response team spin up a live video call with one click.Setup
- Go to Configuration → Integrations and search for Microsoft Teams Meeting
- Click Setup and sign in with your Microsoft 365 work account
- Approve the requested permissions
- Once connected, the Create a Microsoft meeting button will appear on every incident
Rootly recommends connecting with a service account so the meeting integration stays active if a user leaves your organization.
Required OAuth Permissions
Uninstall the Meeting Integration
- Log into your Microsoft Teams Meeting account
- Click Manage → Installed Apps or search for the Rootly app
- Click the Rootly app and click Uninstall
Workflows
Smart Defaults
Auto-create Teams channels at incident start using built-in settings
Custom Workflows
Build workflows with triggers, conditions, and multiple Teams actions
Available Actions
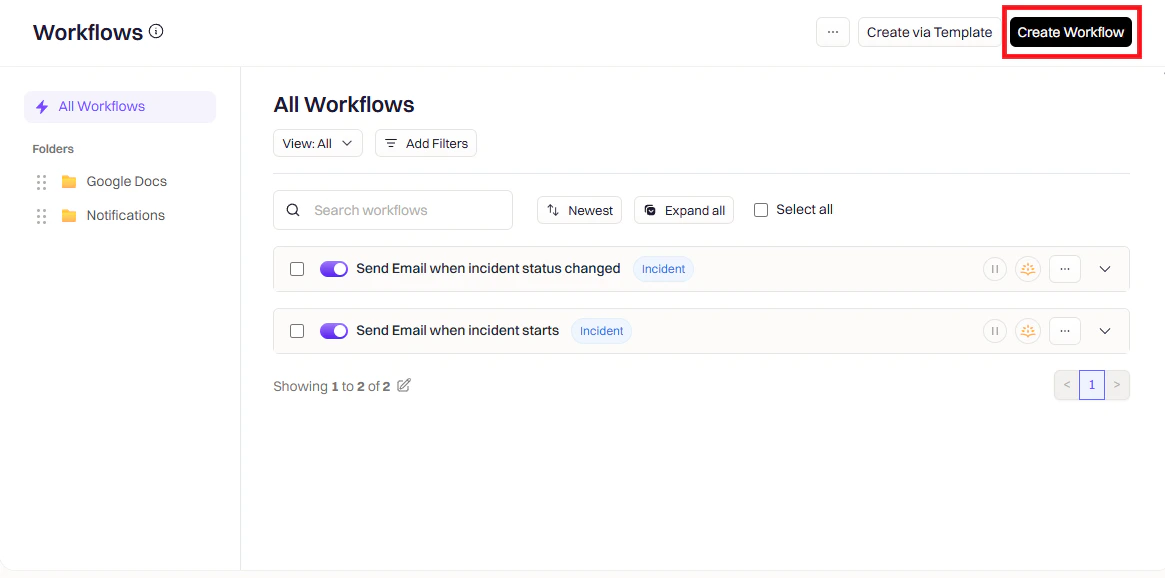
Create a Workflow
1
Open Workflows
Go to Rootly → Workflows → Create Workflow.
2
Choose workflow type
Select the workflow type that matches your use case (for example, Incident, Retrospective, or Pulse).
3
Configure triggers
Triggers define when this workflow runs.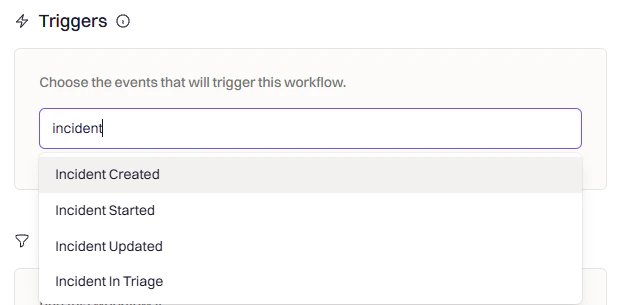
4
Add conditions (optional)
Conditions filter when the workflow should run after it’s been triggered — keeping Teams activity focused on the incidents that matter.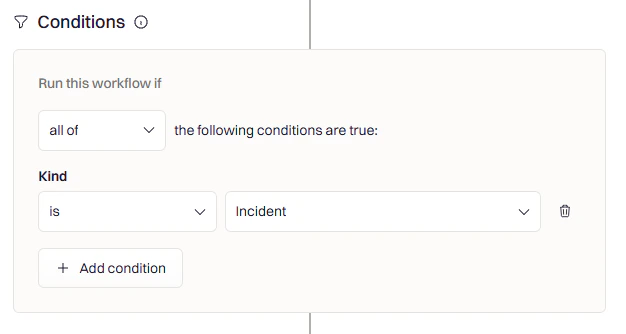
- Only for SEV-1 or SEV-2 incidents
- Only for specific teams or services
- Only for production environments
5
Add a Microsoft Teams action
Click Add Action and search for Microsoft Teams to see all available actions.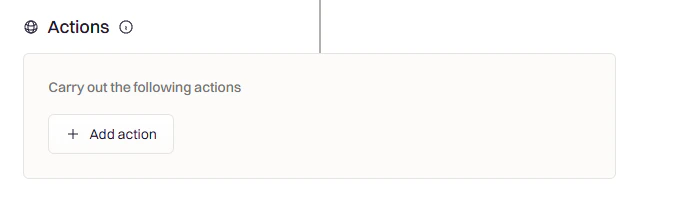
Action Reference
Create Microsoft Teams Channel
Create Microsoft Teams Channel
Creates a dedicated Teams channel for the incident. Use this as your first action when an incident opens to give responders a central place to coordinate.
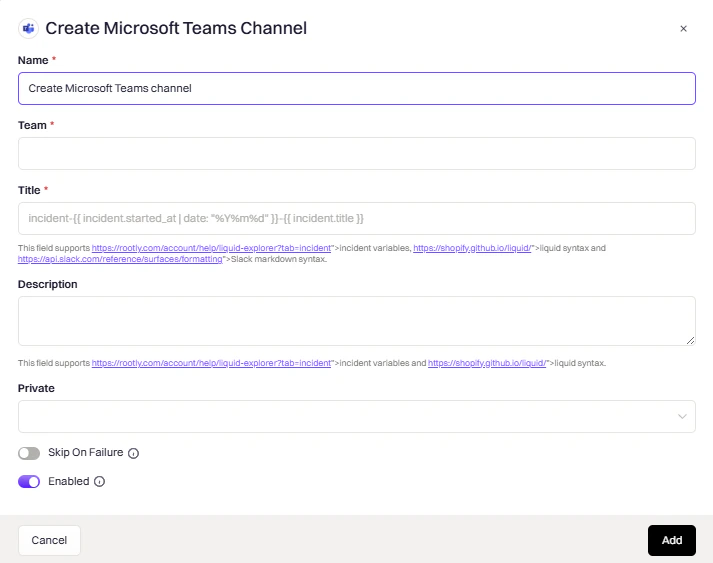
select
The Microsoft Teams workspace where the channel will be created.
string
The channel name. Supports Liquid syntax (for example,
{{ incident.title }}).Channel names are automatically lowercased, parameterized, and truncated to 50 characters.
string
An optional description for the channel. Supports Liquid syntax.
select
Controls channel visibility:
- auto — Private for private incidents, public for non-private incidents
- true — Always private
- false — Always public
If the incident already has a Teams channel, this action skips creation to avoid duplicates.
Create Microsoft Teams Chat
Create Microsoft Teams Chat
Creates a group or one-on-one chat for the incident. Once created, the chat ID and URL are stored on the incident for use in subsequent actions.
select
- group — Creates a group chat with multiple members and an optional topic
- oneOnOne — Creates a one-on-one chat between exactly two members
string
A topic for the chat. Only used for group chats. Supports Liquid syntax.
string
A JSON array of members to add. Each member requires an
email field. Supports Liquid syntax.Group chats require at least three members (including the service account). One-on-one chats require exactly two.
Add Microsoft Teams Tab
Add Microsoft Teams Tab
Adds a tab to the incident Teams channel. Use this to give responders quick access to dashboards, runbooks, or the Rootly incident page directly within the channel.
select
The team that contains the channel.
string
The channel to add the tab to. Use
{{ incident.microsoft_teams_channel_id }} to target the incident’s channel.string
The display name shown on the tab. Supports Liquid syntax.
string
The URL the tab should point to. Supports Liquid syntax.
select
Optionally select a playbook to add as a dedicated playbook tab. When a playbook is selected, the tab renders only the playbook checklist — it is a distinct tab type and does not include the Rootly incident dashboard. Leave this empty to use the Title and Link fields to add a URL-based tab, such as a link to the incident page or an external runbook.
The Rootly app must be installed in the target team for this action to work.
Archive Microsoft Teams Channel
Archive Microsoft Teams Channel
Archives the incident channel when it’s no longer needed. Keeps the workspace clean while preserving conversation history.Common trigger: Incident Status Changed to “Closed”
select
The team that contains the channel.
string
The channel(s) to archive. Use
{{ incident.microsoft_teams_channel_id }} to target the incident’s channel.Rename Microsoft Teams Channel
Rename Microsoft Teams Channel
Renames an existing Teams channel. Use this to reflect status changes — for example, prefixing resolved incidents with Common trigger: Incident Resolved
[RESOLVED].select
The team that contains the channel.
string
The channel to rename. Use
{{ incident.microsoft_teams_channel_id }} to target the incident’s channel.string
The new channel name. Supports Liquid syntax.
Invite Users to Microsoft Teams Channel
Invite Users to Microsoft Teams Channel
Invites users to a private incident channel by email. Use this to automatically add on-call responders when they’re assigned a role.Common triggers: Incident Created, Incident Commander Assigned
select
The team that contains the channel.
string
The private channel to invite users to. Supports Liquid syntax.
string
Comma-separated list of email addresses to invite. Supports Liquid syntax.
Send Microsoft Teams Channel Message
Send Microsoft Teams Channel Message
Posts a message to a Teams channel using the Rootly bot. Use Liquid variables to include dynamic incident details in the message.Common triggers: Incident Created, Incident Updated, Status Changed
select
The channel(s) to post to. Supports Liquid syntax.
string
The message content. Supports Liquid variables.
If the message text is empty, the action will be skipped.
Send Microsoft Teams Attachments
Send Microsoft Teams Attachments
Sends Adaptive Card attachments to one or more Teams channels. Use this to send richly formatted, interactive content such as structured incident summaries.
select
The channel(s) to send the attachments to. Supports Liquid syntax.
string
A JSON payload defining the Adaptive Card content. Supports Liquid syntax. Follows the Microsoft Adaptive Card schema.
Create Microsoft Teams Meeting
Create Microsoft Teams Meeting
Creates a Microsoft Teams video meeting for live incident collaboration. The meeting link is automatically stored on the incident.Common trigger: Incident Created (for high-severity incidents)
This action requires the Microsoft Teams Meeting integration to be installed separately.
string
The meeting title. Supports Liquid syntax (for example,
{{ incident.title }}).Liquid Variables
Incident Variables
Microsoft Teams Variables
Troubleshooting
Rootly not showing in Microsoft Teams
Rootly not showing in Microsoft Teams
After completing OAuth, Rootly doesn’t appear as a connected app in Teams.Solutions:
- Verify you completed OAuth using the same email as your Teams account
- Make sure Rootly was installed in a specific team, not just your personal app space
- Try uninstalling and reinstalling the Rootly app from the Teams store
- Check if your organization restricts third-party app installations — a Microsoft 365 admin may need to approve Rootly
Cannot add Rootly to a team
Cannot add Rootly to a team
Teams shows an error when trying to add Rootly to a team.Solutions:
- Ensure you have owner or admin permissions in the team
- Ask a Team Owner or Microsoft 365 admin to approve the Rootly app
- Verify that third-party app installations are enabled in your Microsoft 365 admin center
Email not associated with account
Email not associated with account
Teams reports that the signed-in email isn’t linked to a Rootly account.Solutions:
- Verify the OAuth email matches exactly the email registered in Rootly
- Confirm this email exists as a user in Rootly
- Add the email under Rootly → Organization Settings → Members if needed
- Disconnect and reconnect the Microsoft Teams integration
Channels not being created
Channels not being created
Workflows run successfully but no Teams channels appear.Solutions:
- Verify the Rootly bot is installed in the specific team referenced in the workflow action
- Check workflow run logs for errors: Workflows → Your Workflow → … → View Runs
- Confirm the team name in the workflow action exactly matches the team in Teams
Uninstall
To remove the main Microsoft Teams integration from Rootly:- Go to Configuration → Integrations and find Microsoft Teams
- Click Connected to reveal the disconnect option
- Click Disconnect