Overview
The AWS EventBridge integration allows Rootly to publish incident and alert lifecycle events directly to your AWS account through the EventBridge partner event source model. Events are delivered in near real-time as incidents and alerts progress through their lifecycle, enabling you to build event-driven automations entirely within AWS. Once configured, Rootly creates a partner event source in your AWS account. You associate this event source with an event bus in the EventBridge console, then create rules to route events to any EventBridge target — Lambda functions, Step Functions, SQS queues, SNS topics, API Gateway endpoints, and more.This integration uses the AWS EventBridge partner event source model. Rootly pushes events to your account — no polling or webhook configuration is required on your side.
Looking to send AWS events into Rootly to trigger alerts? Route EventBridge events to an SNS topic subscribed to Rootly’s AWS SNS alert source. Use an EventBridge input transformer to format events into the required payload schema. For CloudWatch alarms specifically, use the dedicated AWS CloudWatch alert source instead.
Supported Event Types
You can subscribe to any combination of the following event types per integration: Alert Events:| Event Type | Description |
|---|---|
alert.created | A new alert was created |
alert.updated | Alert properties were changed |
alert.acknowledged | An alert was acknowledged by a responder |
alert.resolved | An alert was resolved |
| Event Type | Description |
|---|---|
incident.created | A new incident was started |
incident.updated | Incident properties were changed |
incident.mitigated | An incident was mitigated |
incident.resolved | An incident was resolved |
Prerequisites
Before configuring the integration, ensure that you have:- A Rootly account with admin or owner permissions
- An AWS account ID (12-digit number)
- Access to the AWS EventBridge console in your target region
Setup Instructions
Create the integration in Rootly
Navigate to Settings → Integrations → AWS EventBridge and click Add Integration.Fill in the following fields:
- Integration Name: A friendly name (e.g., “Production Events”)
- AWS Account ID: Your 12-digit AWS account ID
- AWS Region: The region where your event bus will be created
- Event Source Name: A unique identifier (e.g., “production”, “staging”)
- Event Subscriptions: Select which event types to stream (leave empty for all)
Associate the event source in AWS
Open the AWS EventBridge console in the region you selected.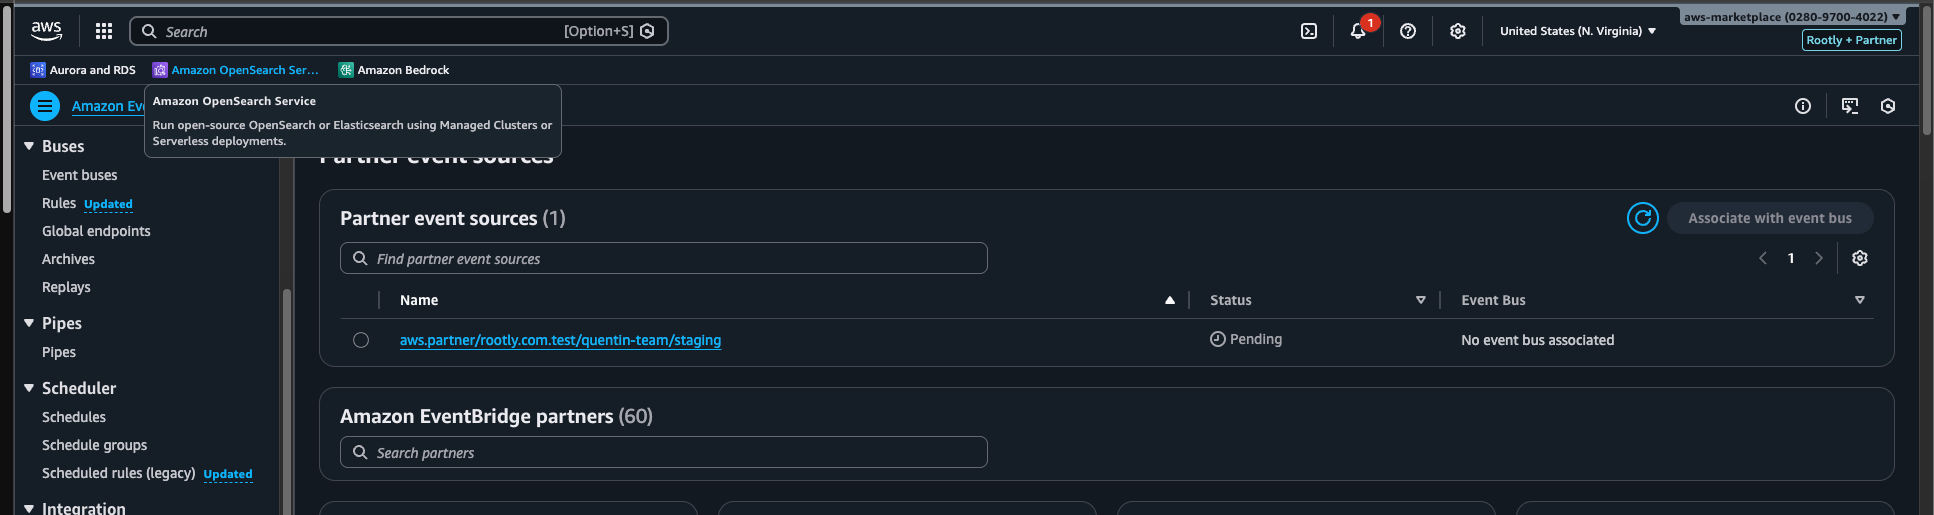
- Go to Partner event sources in the left navigation
- Find your event source — it will be named
aws.partner/rootly.com/<your-team-slug>/<event-source-name> - Select the event source and click Associate with event bus
- Confirm the association
Activate the integration in Rootly
Return to Rootly and edit your EventBridge integration. Check Mark as Active and save.You can also configure Event Subscriptions to select which event types to stream.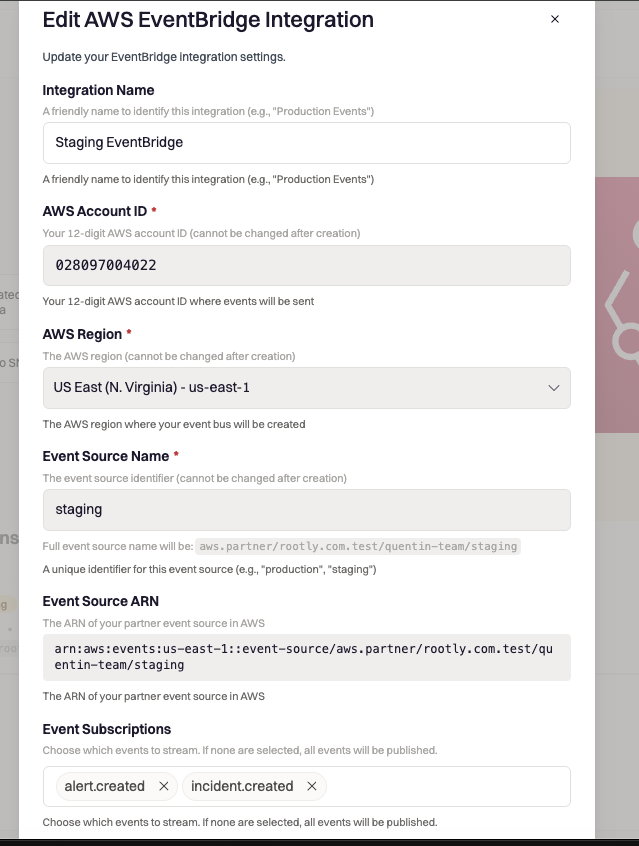
The integration must be activated after associating the event source in AWS. Events are only published to active integrations.
Create EventBridge rules
In the AWS EventBridge console, navigate to Rules and select your partner event bus.Create rules to route events to your targets. Use event patterns to filter by event type:Or match all Rootly events:
Event Payload Structure
Events are published using the EventBridge event format. Each event contains:| Field | Description |
|---|---|
source | The full partner event source name |
detail-type | The event type (e.g., incident.created) |
detail | JSON object containing the entity data |
time | ISO 8601 timestamp of when the event was published |
resources | Array containing the resource ARN |
Incident Event Detail
Alert Event Detail
Multiple Integrations
You can create multiple EventBridge integrations for the same team. This is useful for:- Multi-region delivery: Stream events to different AWS regions
- Multi-account delivery: Send events to separate AWS accounts (e.g., production vs. staging)
- Selective subscriptions: Send only alert events to one bus and only incident events to another
Managing Integrations
Editing
You can update the integration name, event subscriptions, and active status at any time. AWS Account ID, Region, and Event Source Name are locked after creation.Deleting
Deleting an integration in Rootly stops event delivery. The partner event source remains in your AWS account and can be cleaned up from the EventBridge console.Troubleshooting
Events are not appearing in EventBridge
Events are not appearing in EventBridge
- Verify the integration is marked as Active in Rootly
- Confirm the partner event source is Associated in the AWS EventBridge console
- Check that the event type is included in the integration’s subscriptions (or that subscriptions are empty for all events)
- Verify your EventBridge rules are targeting the correct partner event bus
Partner event source not found in AWS
Partner event source not found in AWS
Ensure you are looking in the correct AWS region. The event source is created in the region selected when configuring the integration. Also verify the AWS Account ID is correct.
Some event types are missing
Some event types are missing
Check the Event Subscriptions setting on your integration. If specific events are selected, only those events will be published. Clear all subscriptions to receive all event types.
Events are delayed
Events are delayed
Events are published asynchronously via background jobs. Under normal conditions, events are delivered within a few seconds. If you observe persistent delays, contact Rootly Support.
Best Practices
- Use event subscriptions to limit events to only what you need, reducing noise and cost
- Create separate integrations for different environments or AWS accounts
- Use EventBridge rules for fine-grained filtering beyond what subscriptions provide
- Monitor delivery using EventBridge metrics in CloudWatch
- Test in staging first by creating a separate integration pointed at a non-production AWS account