Introduction
Google Directory Sync provides automatic user and group provisioning from Google Workspace into Rootly. Unlike SCIM (which relies on push events from an identity provider), Google Directory Sync periodically polls the Google Admin Directory API — approximately every 30 minutes — to keep your Rootly organization in sync with your Google Workspace directory. With Google Directory Sync, Rootly automatically:- Provisions users — New Google Workspace users are added as Rootly members with first name, last name, email, phone numbers, profile photo, and timezone
- Updates users — Name and contact changes in Google Workspace are reflected in Rootly
- Deprovisions users — Users suspended or deleted in Google Workspace are soft-deleted in Rootly
- Syncs groups — Google Groups are mapped to Rootly Groups, with membership kept up to date
- Assigns roles — Rootly roles and on-call roles are assigned based on Google Group membership and Google role (Owner, Manager, Member)
- Protects against mass deletion — A configurable safeguard (default: 20%) prevents accidental bulk deprovisioning if the API returns partial results
Before You Begin
Before setting up Google Directory Sync, make sure you have:- A Google Workspace account with super admin access
- One of the following authentication methods:
- OAuth — Recommended for smaller organizations. Uses a familiar Google sign-in flow.
- Service account with domain-wide delegation — Recommended for enterprises with strict admin policies.
Installation
Navigate to Integrations in your Rootly dashboard, find Google Directory Sync, and click Setup.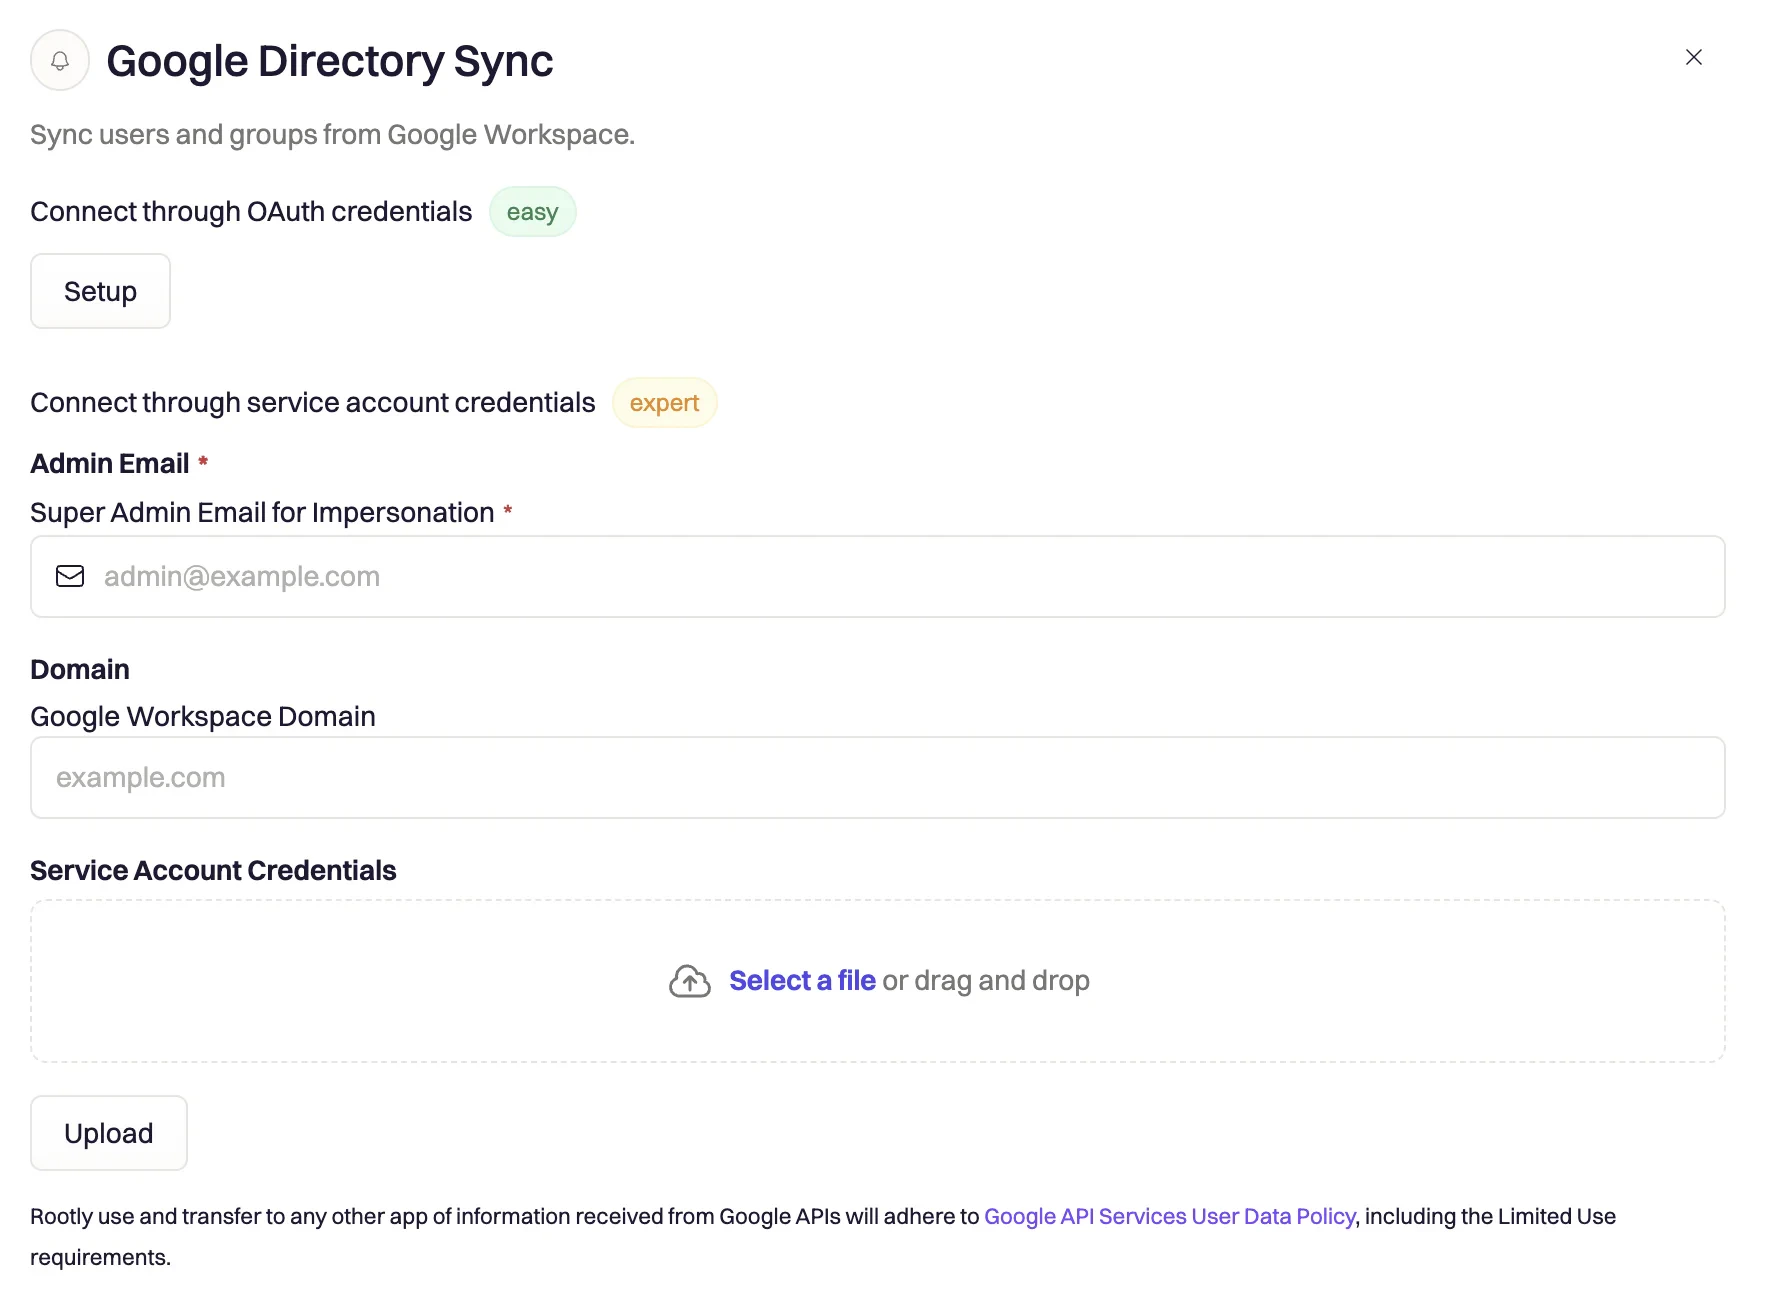
Option A: OAuth Authentication
Connect with Google
Click Sign in with Google and authenticate with a Google Workspace super admin account. Grant the following permissions when prompted:
admin.directory.user.readonlyadmin.directory.group.readonlyadmin.directory.group.member.readonly
Integration connected
You’ll be redirected back to Rootly with the integration active. The first sync will run within 30 minutes, or you can click Sync Now to trigger it immediately.
Option B: Service Account Authentication
Use this method if your organization requires service accounts or restricts OAuth consent flows.Create a service account
In Google Cloud Console, go to IAM & Admin > Service Accounts. Click Create Service Account, name it (e.g.,
rootly-directory-sync), and click Done. Then open the service account, go to Keys > Add Key > Create new key > JSON, and download the key file.Enable domain-wide delegation
In the service account details page, expand Advanced Settings and copy the Client ID. In Google Admin Console, navigate to Security > Access and data control > API controls > Domain-wide delegation, click Add new, and enter the Client ID with the following scopes:Click Authorize.
Configure in Rootly
In Rootly, select Service Account as the authentication method, upload the JSON key file, and enter the impersonation email — the email address of a Google Workspace super admin.You must also provide the domain — your Google Workspace primary domain (e.g.,
yourcompany.com). Click Save to validate the connection.What Gets Synced
User Field Mappings
When Rootly provisions or updates a user, it maps the following fields from the Google Directory:
New users provisioned by Google Directory Sync receive the organization’s configured default SSO role and default SSO on-call role. You can adjust these under your team’s SSO settings.
User Deprovisioning
When a Google Workspace user is suspended, archived, or deleted, their Rootly membership is soft-deleted. If the user has no other Rootly team memberships, the user record itself is also soft-deleted. This is reversible — if the user is reactivated in Google Workspace, they will be re-provisioned on the next sync cycle.Configuring Group Sync
Open the Groups tab
Navigate to Integrations > Google Directory Sync and click the Groups tab.
Choose a sync mode
Select one of two modes: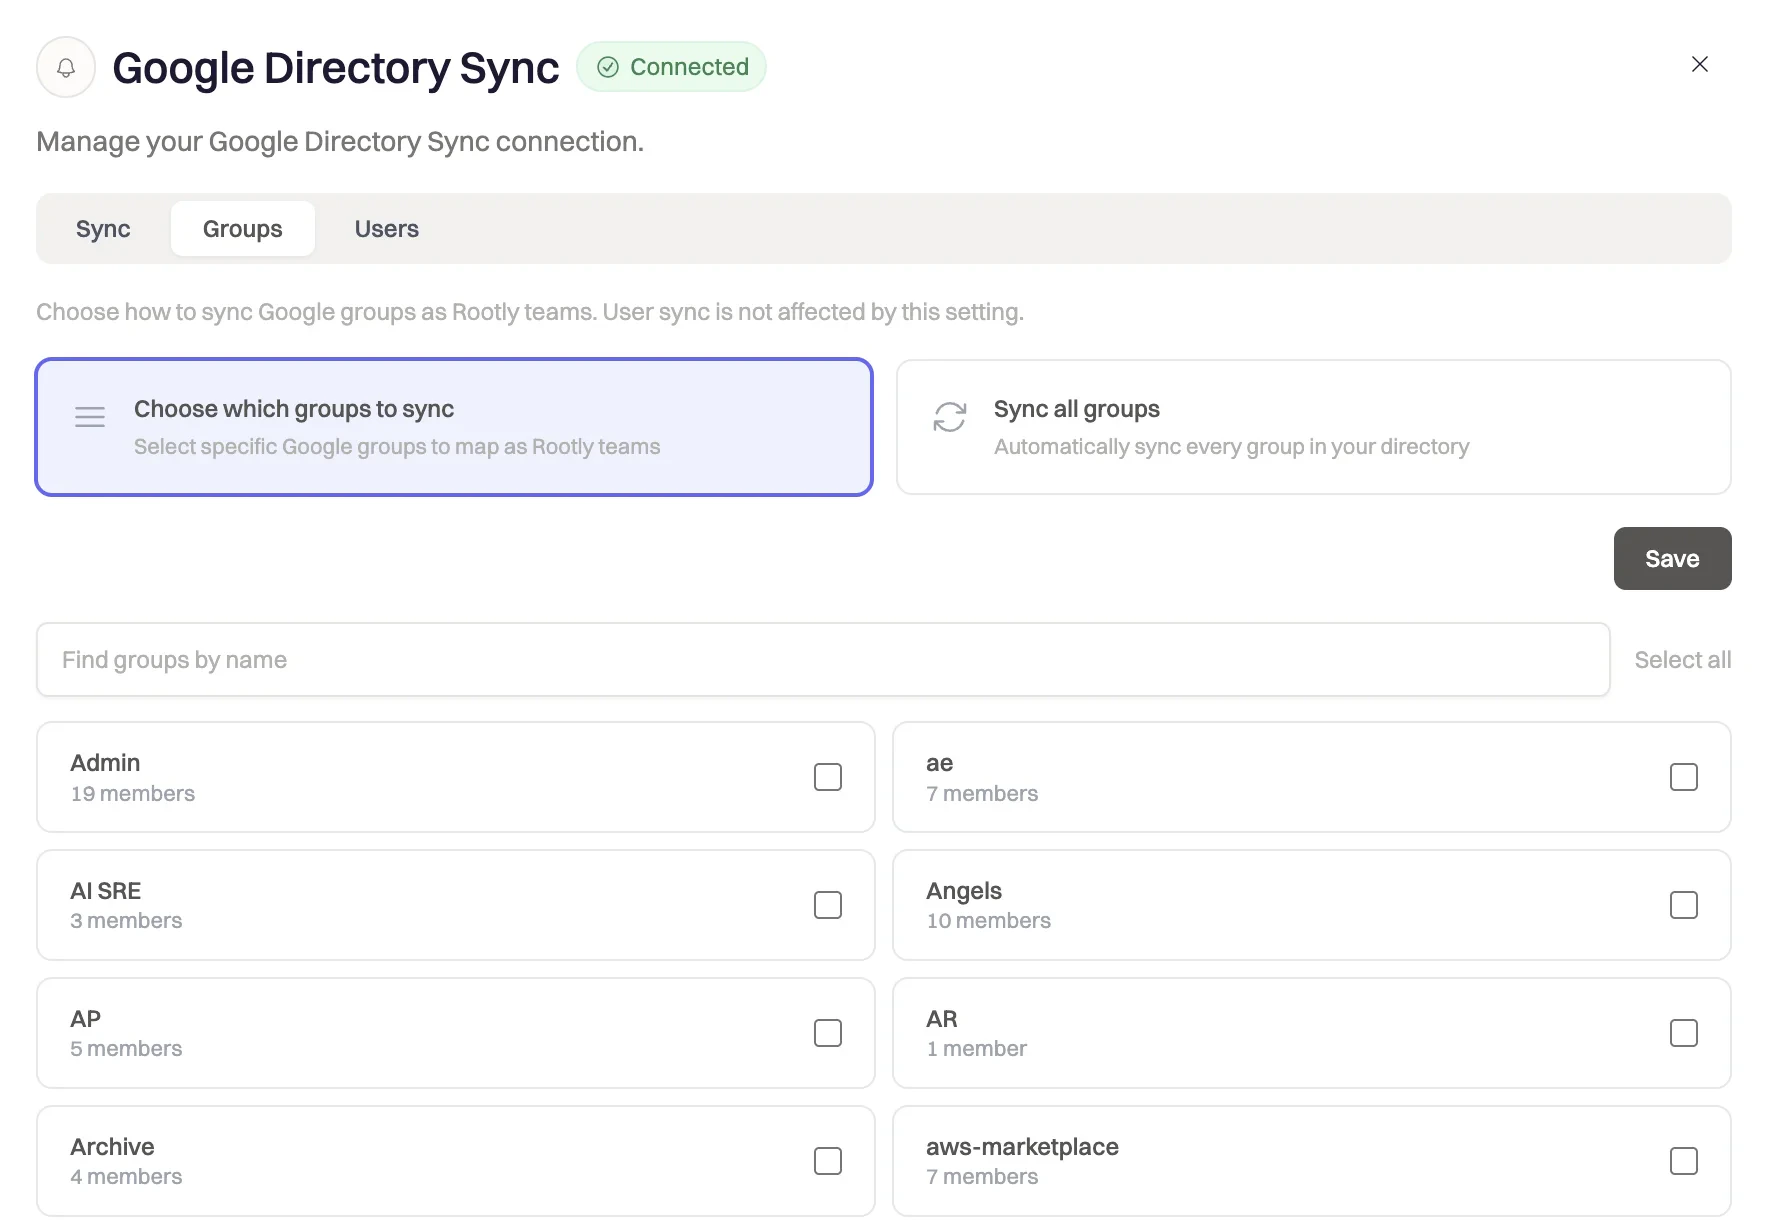
- Sync all groups — All Google Groups in your directory are automatically mapped to Rootly Groups. Mappings are kept up to date as groups are added or removed in Google Workspace.
- Sync selected groups — Only the groups you explicitly select are synced. Use the search box to find groups by name.
Configure per-group role mapping
For each synced group, you can configure how Google Group roles map to Rootly group admin status:
- Map Owners as admins (default: on) — Google group OWNER role → Rootly group admin
- Map Managers as admins (default: on) — Google group MANAGER role → Rootly group admin
- Google group MEMBER role always maps to a regular group member
Sync Status & Monitoring
The Sync tab shows the current status for both user and group sync, including last sync time, counts of users created/updated/deprovisioned, and any per-user or per-group errors.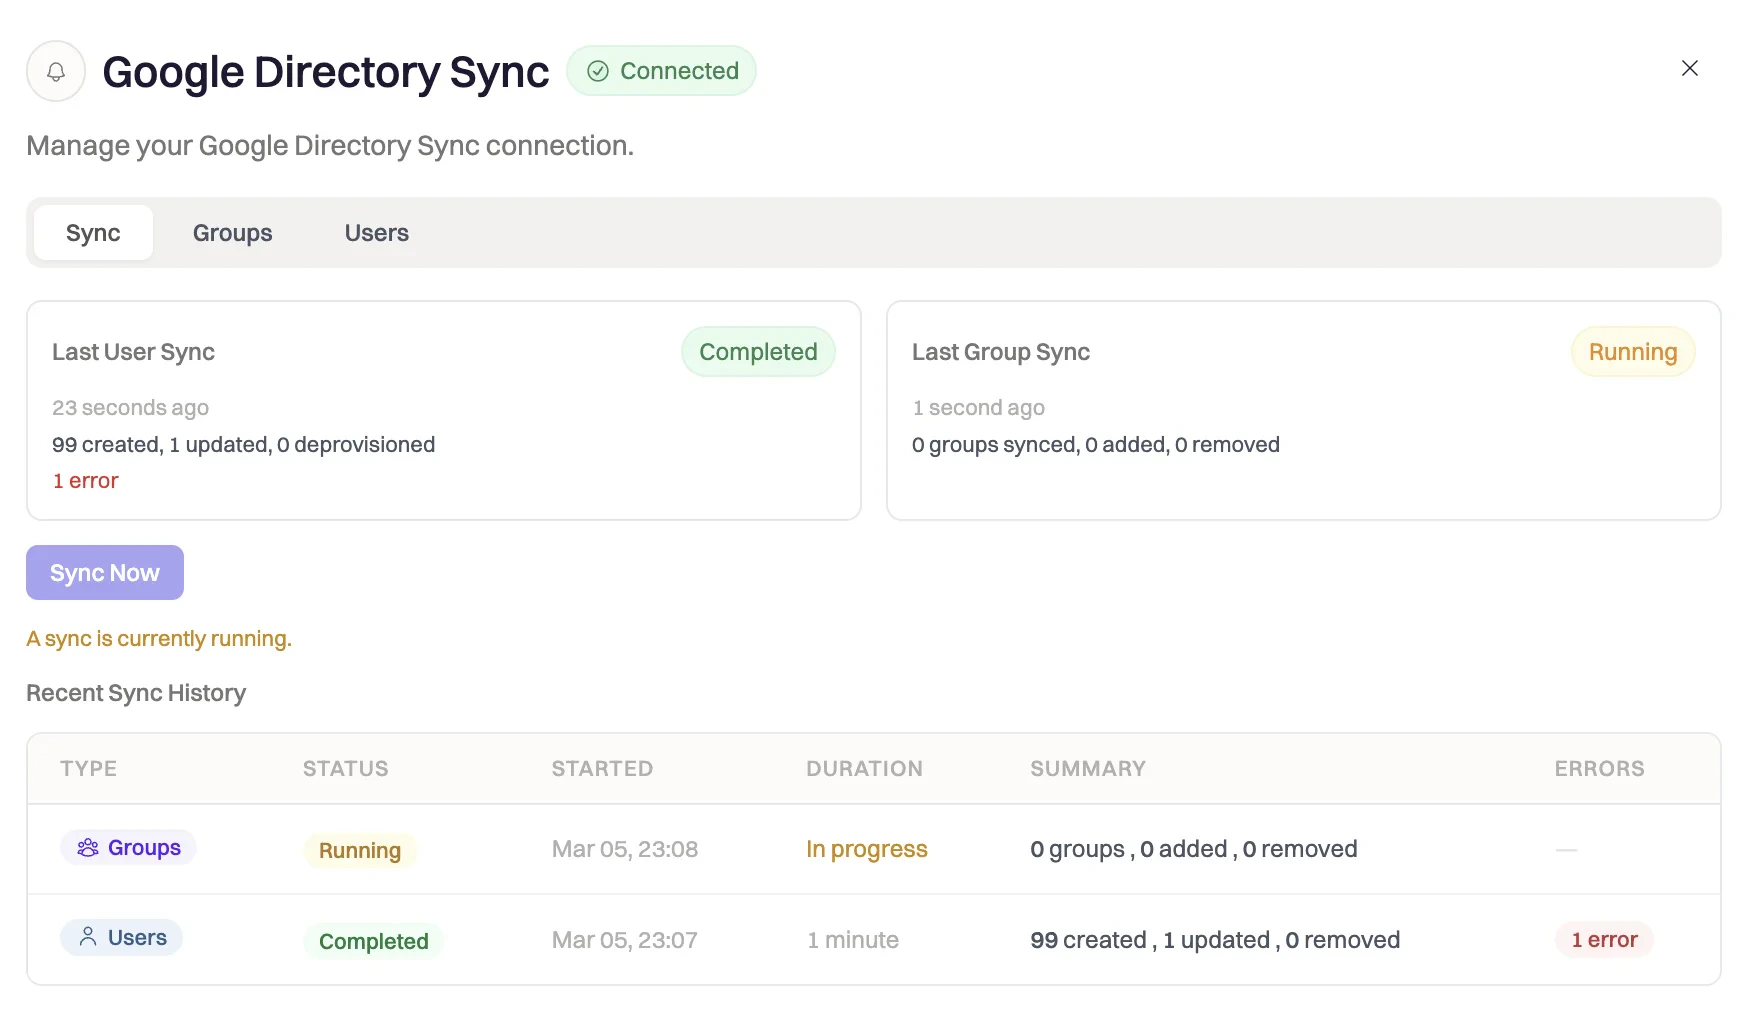
- Start and completion timestamps
- Counts: users created, updated, deprovisioned; group members added, updated, removed
- Per-item error details for any failures (individual failures do not abort the overall sync)
Mass Deletion Safeguard
Rootly includes a configurable safeguard to prevent accidental bulk deprovisioning. By default, if a single sync cycle would deprovision more than 20% of your current Rootly members, or remove more than 20% of a group’s members, the deletions are skipped and logged as errors rather than executed. All sync operations are logged and visible under the sync history section. Each log entry includes:- Timestamp
- Operation type (user created, user removed, group updated, etc.)
- Affected user or group
- Success or error status
Troubleshooting
403 Forbidden error during setup or sync
403 Forbidden error during setup or sync
For service account auth, the impersonation email must belong to an active super admin with Google Directory access. For OAuth, confirm you authenticated with a super admin account. Also verify that domain-wide delegation is configured with all three required scopes in Google Admin Console.
Sync shows 0 users
Sync shows 0 users
The service account scopes may not be properly delegated. Re-check the domain-wide delegation settings in Google Admin Console and confirm all three required scopes are authorized for the service account’s Client ID. Also ensure the
domain field in Rootly matches your primary Google Workspace domain exactly.Users from secondary domains are not syncing
Users from secondary domains are not syncing
By default the integration queries by primary domain. If your organization has multiple domains, contact Rootly support — the integration may need to be configured to query by
customer parameter instead of domain.Mass deletion safeguard triggered
Mass deletion safeguard triggered
A single sync cycle attempted to remove more than 20% of your members or group membership, which exceeded the safety threshold. Check Google Workspace API status and verify the sync results are complete. If the removals are intentional (e.g., after a large offboarding), contact Rootly support to bypass the threshold for your organization.
Phone numbers are not syncing
Phone numbers are not syncing
Confirm that users have phone numbers set in their Google Workspace profiles. Rootly reads from the
phones array in the Google Directory response — if this field is empty, no phone number will be synced. Phone numbers are normalized with US as the default country code; numbers in other formats may need to include a country code prefix.Groups are not appearing in the group selector
Groups are not appearing in the group selector
The group list is fetched via the Google Directory API. Confirm the connected account (OAuth user or service account impersonation target) has permission to view groups in your directory. Groups are paginated at 200 per request — all pages are fetched automatically.
Sync stopped working after an admin account change
Sync stopped working after an admin account change
For service account auth, syncing stops if the impersonation email belongs to a user who is suspended, deleted, or had their admin role removed. Update the impersonation email in the integration settings to a current active super admin.
Related Pages
SCIM
Push-based provisioning from Okta, Entra, and other SCIM-compatible identity providers.
SSO
Configure SAML 2.0 single sign-on — required before enabling SCIM provisioning.
On-Call Schedules
Manage on-call schedules once users and groups are synced from Google Workspace.