Before You Begin
We recommend integrating with a service account rather than a personal account. This ensures the integration continues to work even if a user leaves your organization.
OAuth Setup
Best for quick testing or evaluating Rootly before a full organizational rollout.1
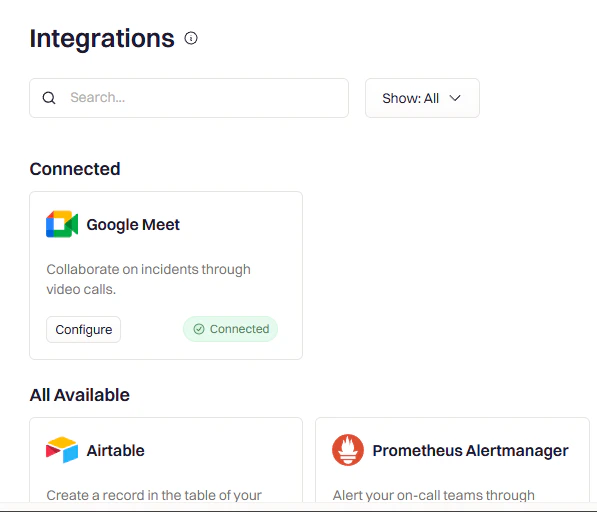
Open the Integrations Catalog
Navigate to Configuration → Integrations in the Rootly sidebar.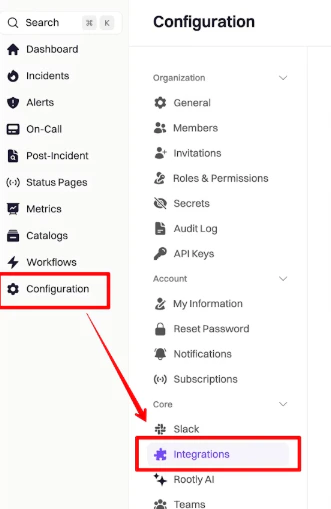
2
Find and Set Up Google Meet
Search for Google Meet and click Setup.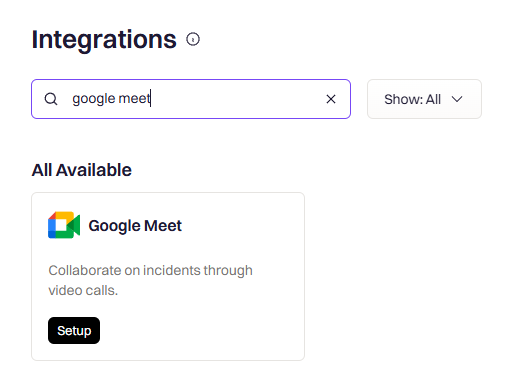
3
Choose OAuth and Select Your Google Account
Select OAuth as your connection method, then choose the Google account you want to connect.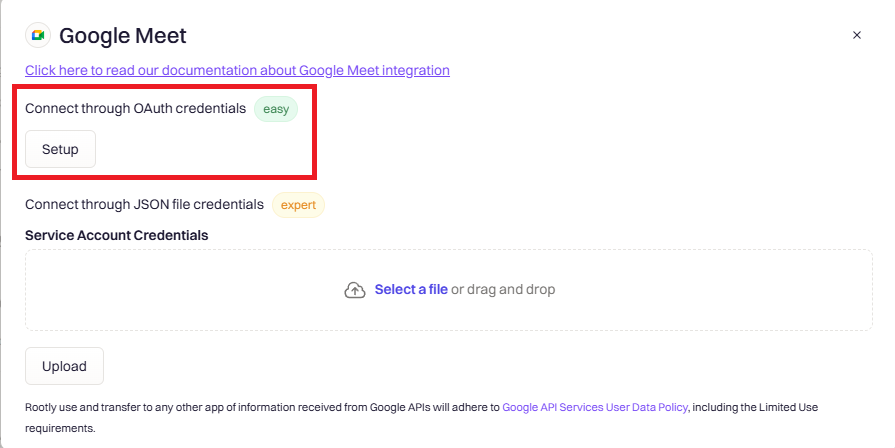
4
Grant Permissions and Complete Setup
Approve the requested permissions. You’ll be redirected back to Rootly once the connection is established.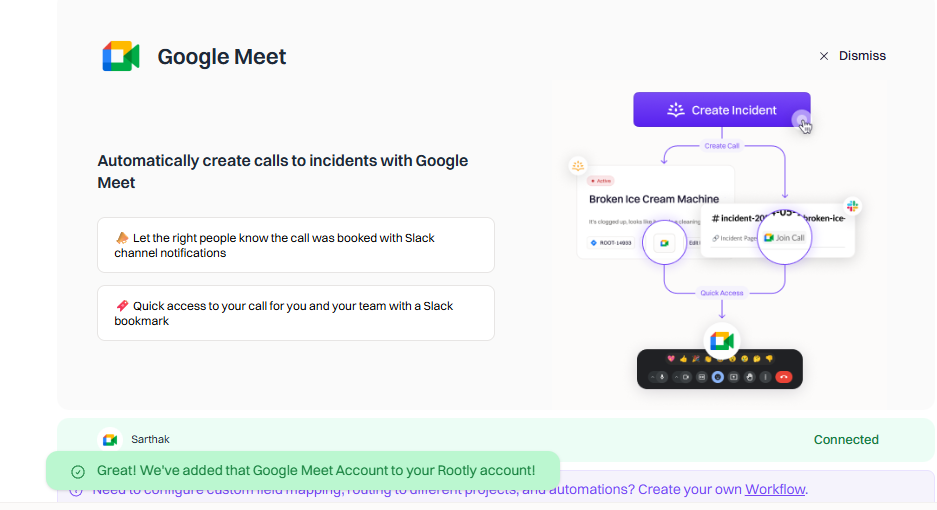
Your Google Meet account is now connected. Head to the Workflows page to configure automated meeting creation.
Service Account Setup
Use a Google Cloud Service Account if you’re connecting on behalf of your entire organization. This method ensures the integration keeps running even if a user leaves the company.1
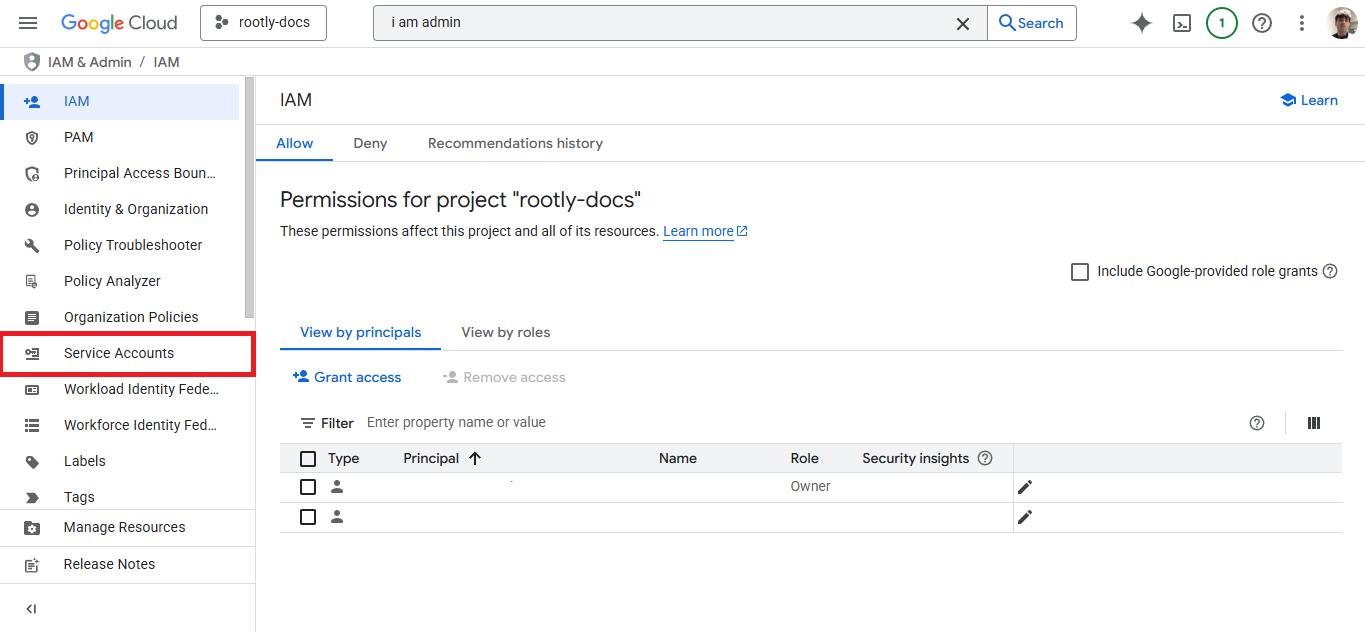
Create a Service Account in Google Cloud Console
In Google Cloud Console, navigate to IAM & Admin → Service Accounts and click Create Service Account.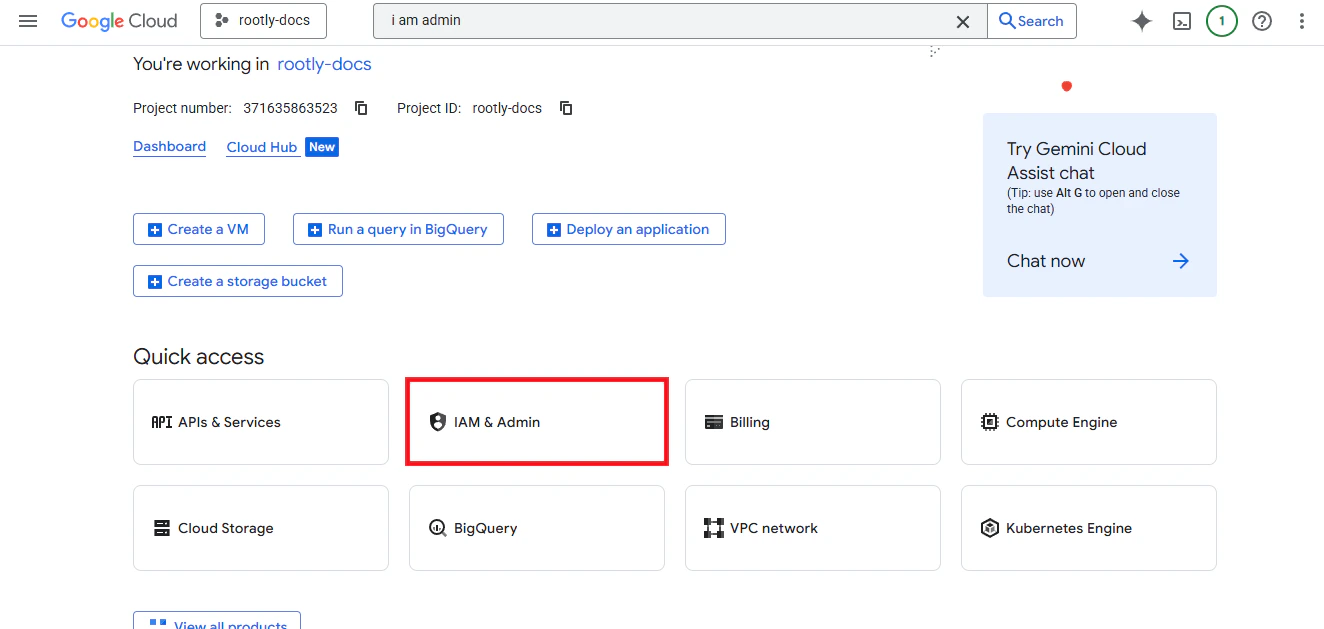
2
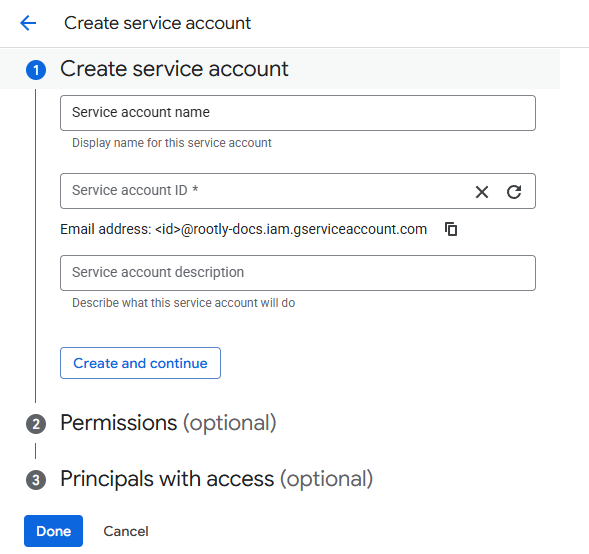
Fill In Service Account Details
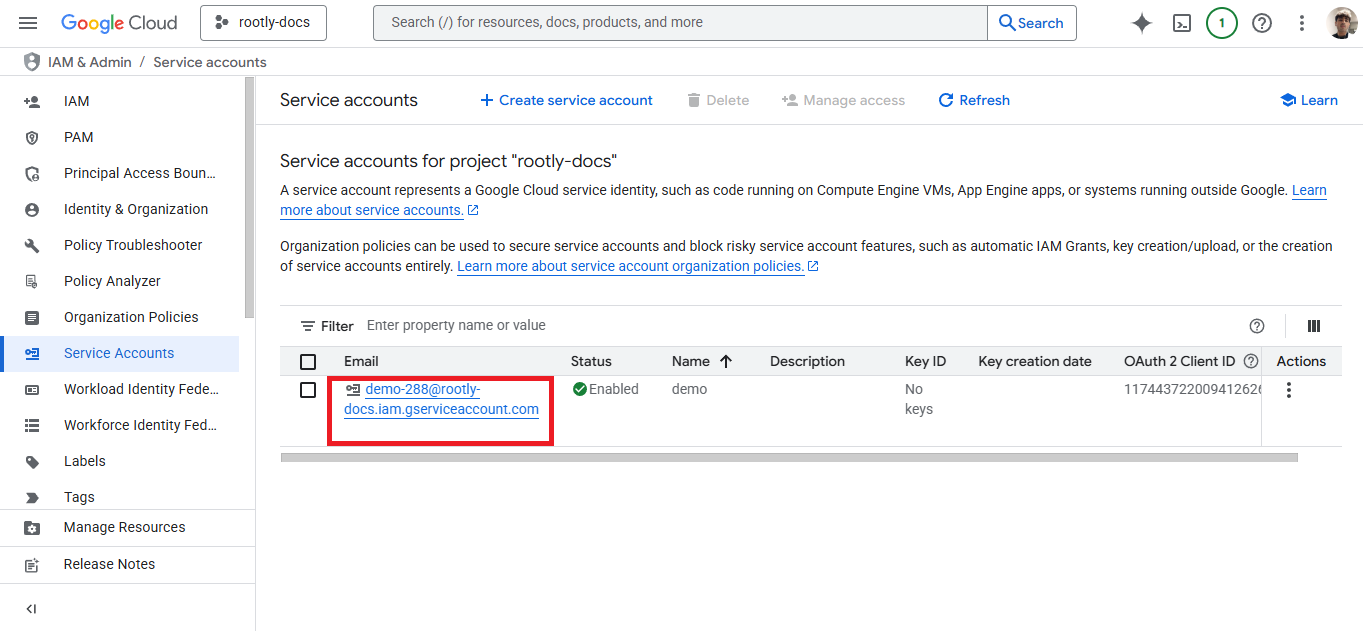
Enter the service account name and ID. Click Done to create the account, then click on the new account’s email to open its details.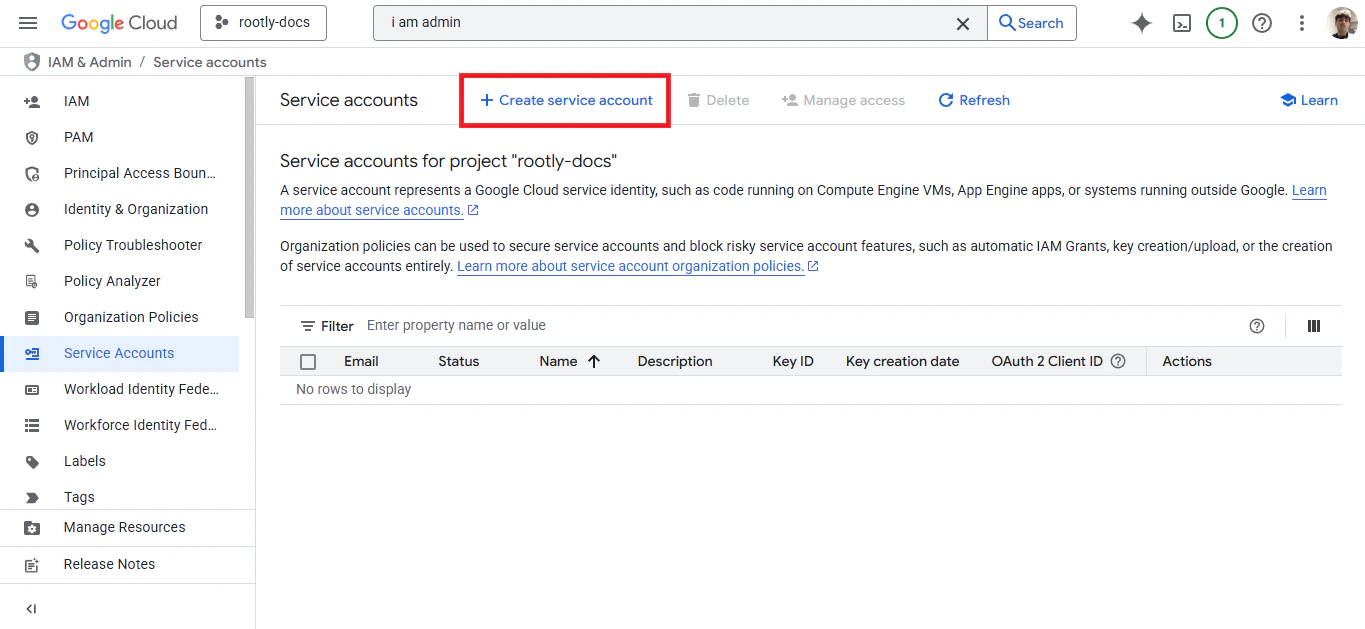
3
Generate a JSON Key
Navigate to the Keys tab and click Add Key → Create New Key. Select JSON as the key type and click Create. A 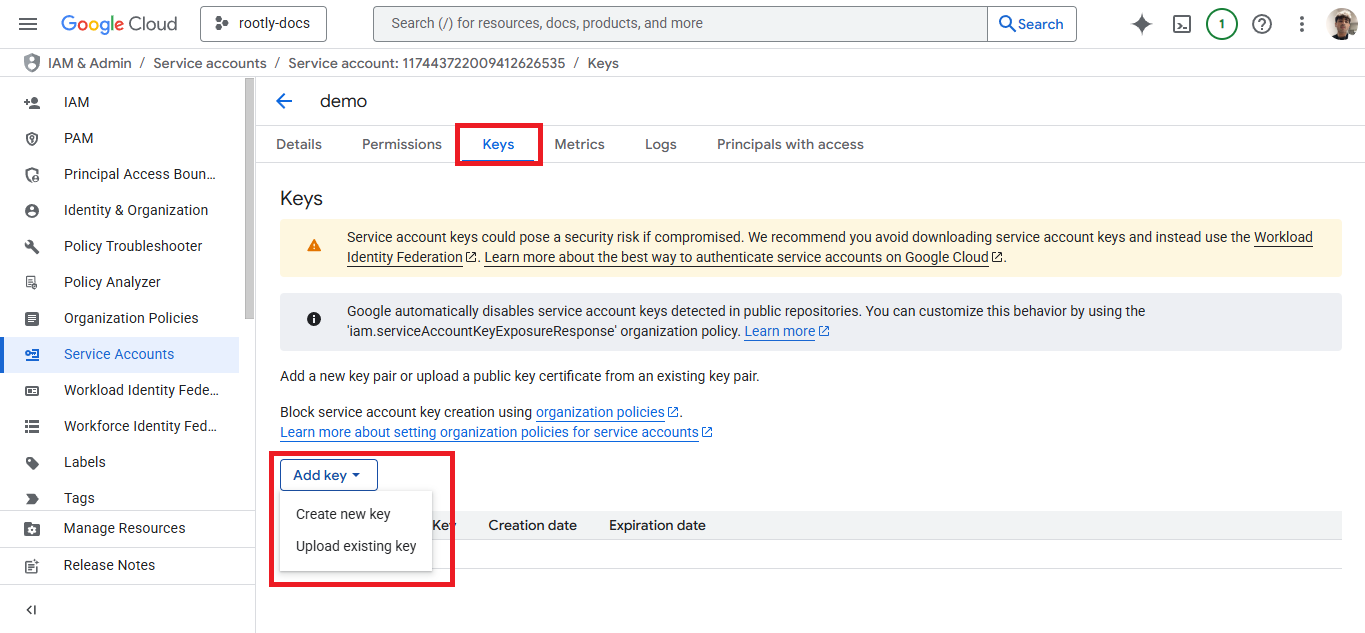
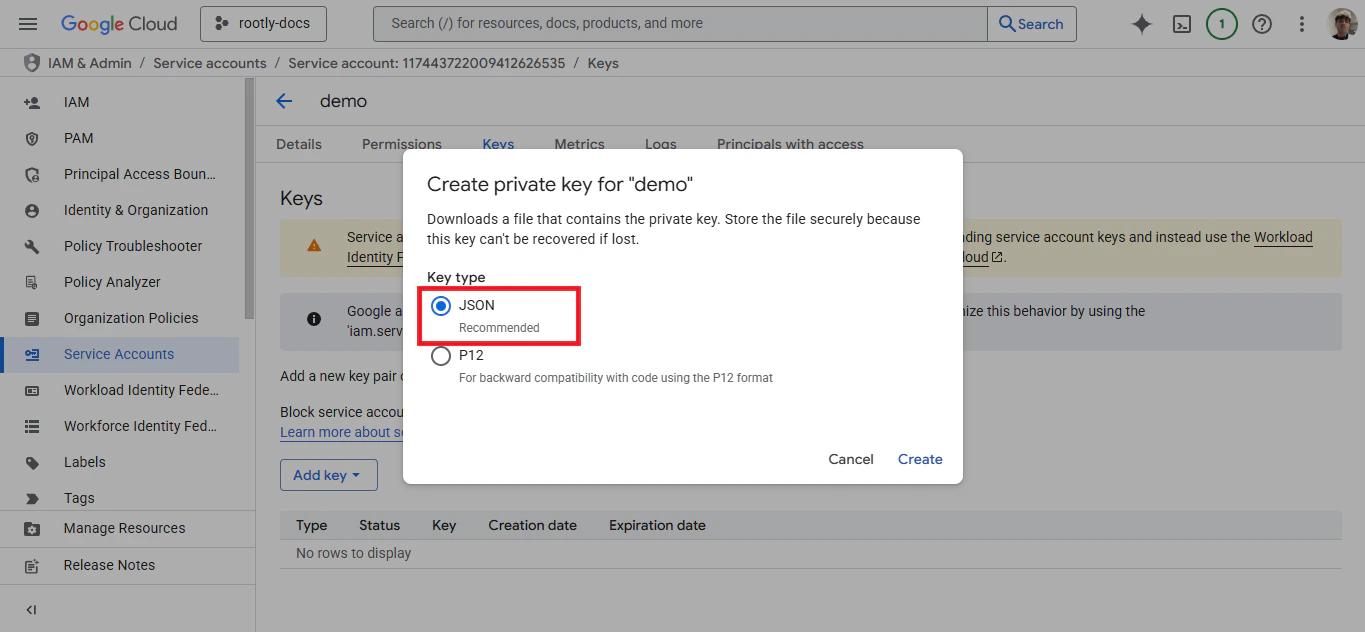
.json file will be downloaded — keep this safe.4
Upload the JSON Key to Rootly
Return to Rootly’s Google Meet setup screen and upload the 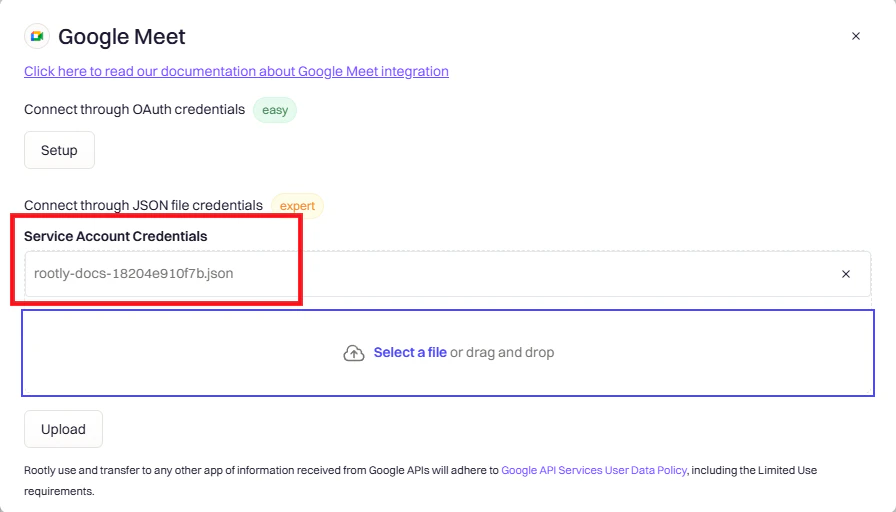
.json file you just downloaded.5
Configure Domain-Wide Delegation
In Google Admin Console, go to Security → API Controls → Domain-wide Delegation. Select your service account and add a new API client.Enter your service account’s Client ID (found in GCP Console under the service account’s details) and add the following OAuth scopes:
The calendar scopes are required for creating calendar events with Meet links attached.
6
Authorize Domain-Wide Delegation
Click Authorize to save the configuration. Changes may take 10–15 minutes to propagate through Google’s systems.
Your Google Meet integration is now fully configured. Head to the Workflows page to set up automated meeting creation.
Troubleshooting
Authentication Failed
Authentication Failed
Error: “Failed to authenticate with Google”
- Verify you’re using the correct Google account
- Check that your account has Google Meet enabled
- For OAuth: Try incognito mode to avoid account conflicts
- For Service Account: Verify the JSON key file is valid and not expired
403 Forbidden — Insufficient Permissions
403 Forbidden — Insufficient Permissions
Error: “API requests fail with 403 error”
- Verify domain-wide delegation is enabled in Google Admin Console
- Confirm all three OAuth scopes are added exactly as shown
- Check the Client ID matches your service account
- Ensure the subject email belongs to your domain
- Wait 10–15 minutes for Google to propagate changes
Service Account Key Invalid
Service Account Key Invalid
Error: “Invalid JSON key file”
- Ensure you downloaded the JSON (not P12) format
- Check the file hasn’t been modified or corrupted
- Verify the service account still exists in GCP Console
- Generate a new key if the current one is older than 90 days
Cannot Find Client ID
Cannot Find Client ID
Error: “Where to find Client ID for domain delegation”
- Go to Google Cloud Console
- Select your project
- Navigate to IAM & Admin → Service Accounts
- Click on your service account
- Find Unique ID or Client ID in the details section
Integration Shows Connected But Doesn't Work
Integration Shows Connected But Doesn't Work
Error: “Setup complete but workflows fail”
- For Service Account: Domain delegation is likely missing or incomplete
- For OAuth: Re-authenticate and ensure all permissions were granted
- Check that Google Meet is enabled in your Google Workspace
- Verify the integration shows Active status in Rootly
Uninstall
To remove the Google Meet integration:- Go to Configuration → Integrations and find Google Meet
- Click the Connected button to reveal the disconnect option
- Click Disconnect