

Features
Auto-Create Pages
Retrospective pages are created automatically when incidents resolve or retrospectives begin.
Timeline and Action Items
Incident timeline and follow-up action items are included in every page.
Custom Templates
Use your own retrospective templates with Liquid variables for dynamic content.
Update Pages
Re-generate pages with the latest incident data at any point via workflows.
Before You Begin
Installation
To connect Notion to Rootly, you will authorize via OAuth and select which Notion pages Rootly is allowed to access. Rootly can only create pages within the pages you explicitly grant access to during this step.1
Open Rootly Integrations
In Rootly, navigate to Settings → Integrations and search for Notion.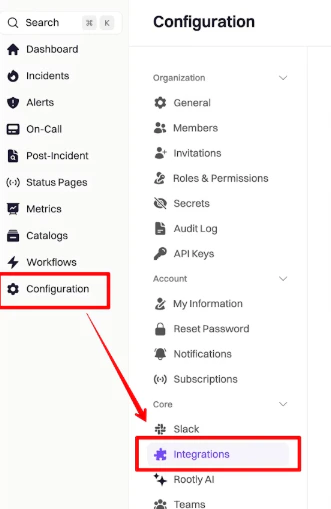
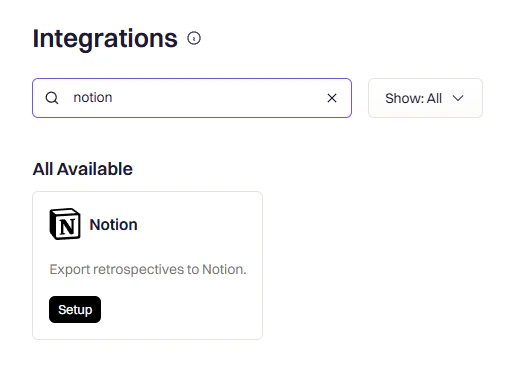
2
Authorize in Notion
Click Setup. You will be redirected to Notion. Click Select pages to choose which pages Rootly can access.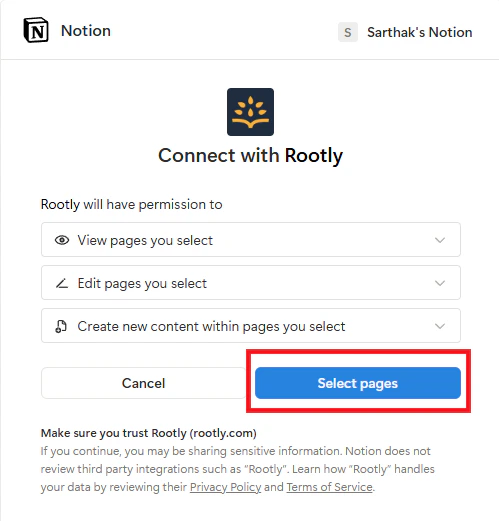
3
Select Pages
Choose the parent pages where you want Rootly to create incident retrospective pages, then click Allow access.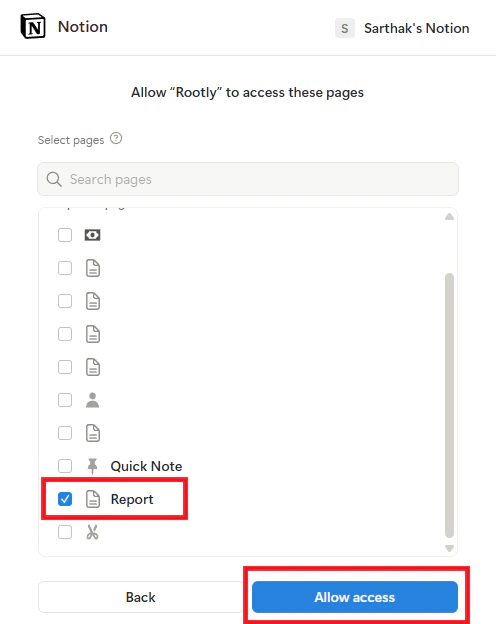
4
Confirm Connection
You will be redirected back to Rootly with a success message confirming the integration is connected.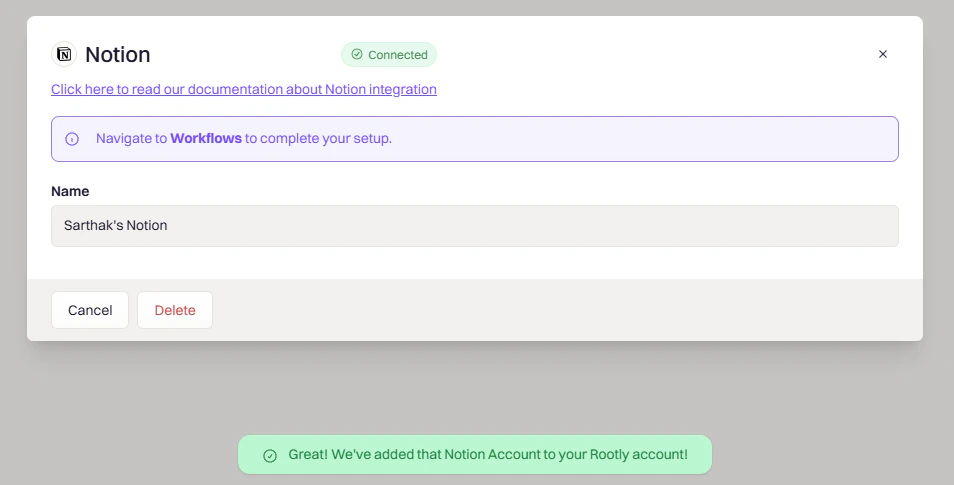
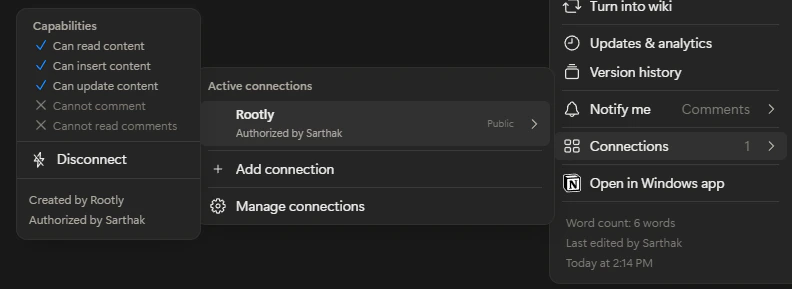
Your Notion workspace is now connected. You can verify the connection in Notion under Settings and Members → Connections — Rootly should appear in the list.
Verify the Connection
After connecting, confirm in Notion that Rootly has been granted access:- Open the parent page you selected during authorization
- Click the ⋯ menu → Connections
- Confirm Rootly appears in the list
Workflow Actions
Workflows let you automate Notion page creation and updates for incident retrospectives. You can trigger page creation when an incident resolves or a retrospective begins, and populate the page with timeline data, action items, and custom template content using Liquid variables.Create a Workflow
1
Open Workflow Creation
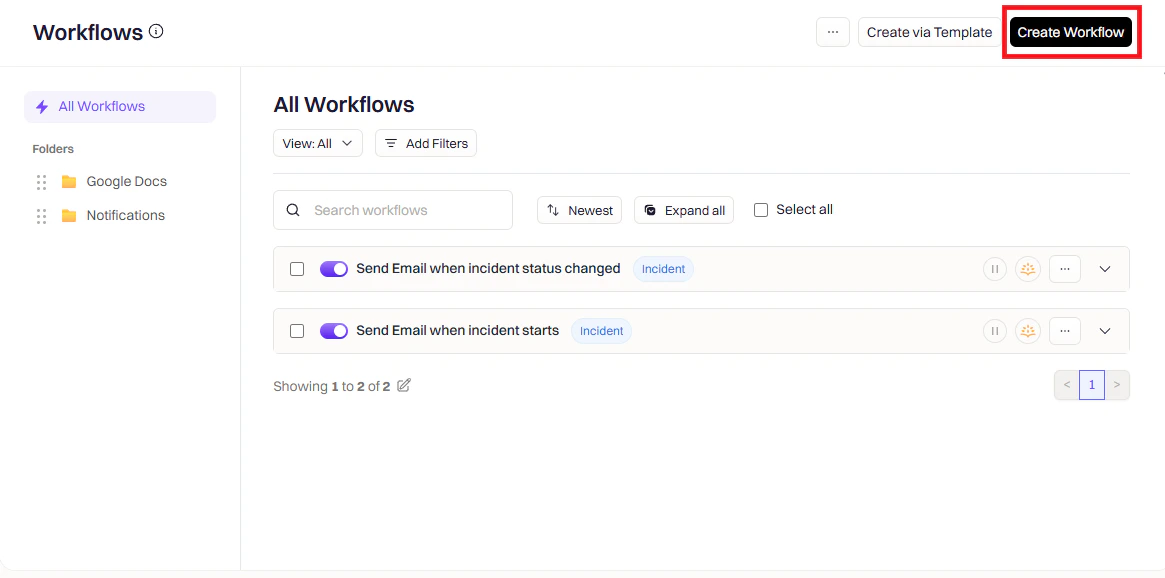
Navigate to Workflows in Rootly and click Create Workflow.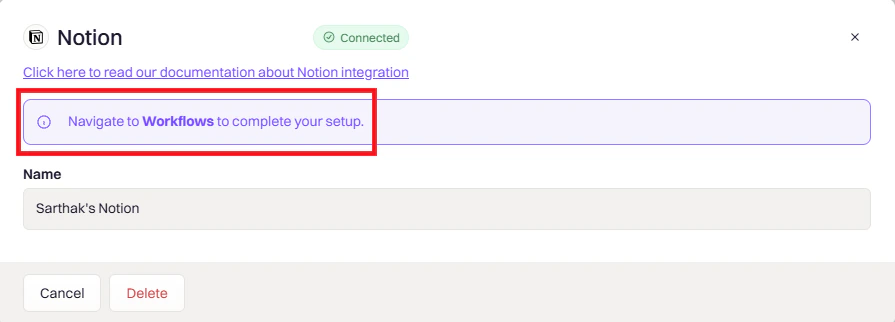
2
Choose Workflow Type
Select the workflow type that matches your use case — Incident, Retrospective, or Pulse.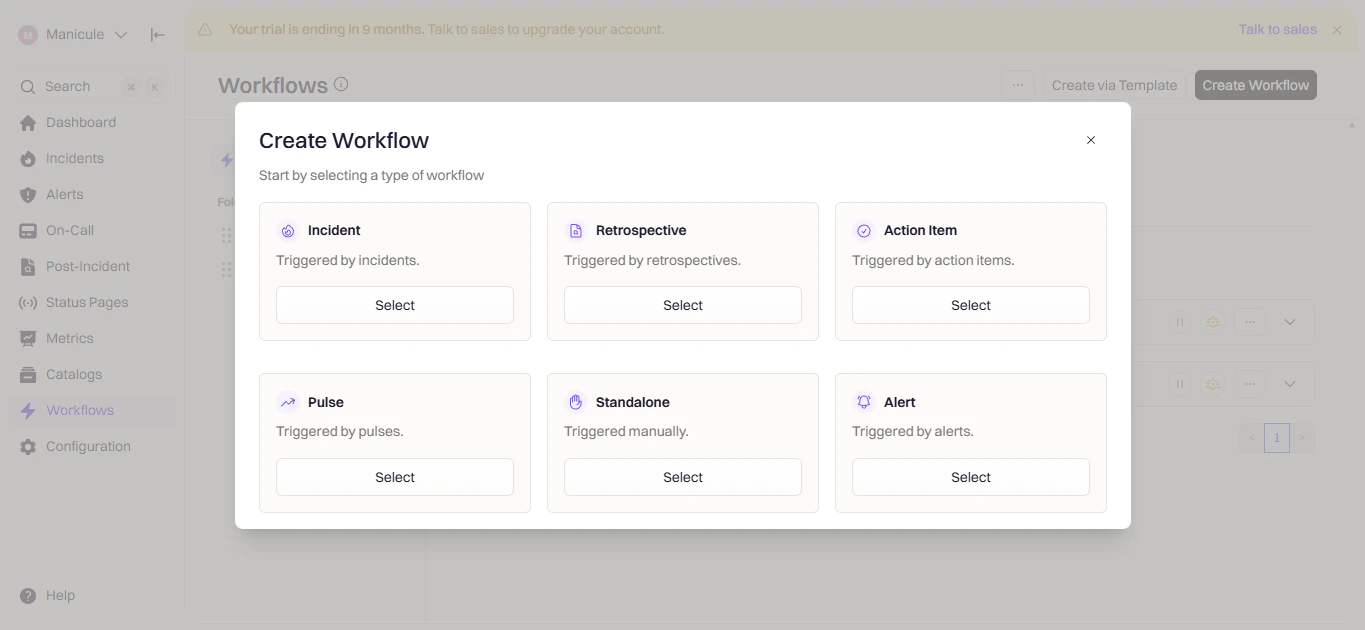
3
Configure Triggers
Triggers define when the workflow runs. Choose the event that should kick off page creation.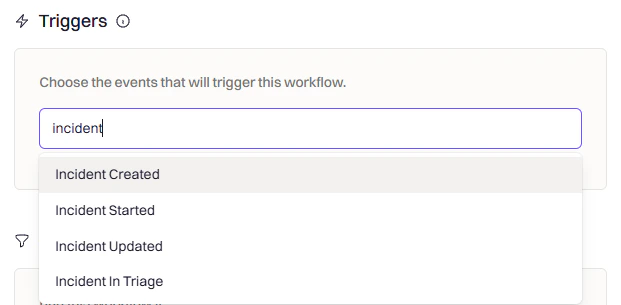
4
Add Conditions (Optional)
Use conditions to control when the workflow fires after the trigger. For example, only create a Notion page for SEV-1 or SEV-2 incidents, or only for specific teams or environments.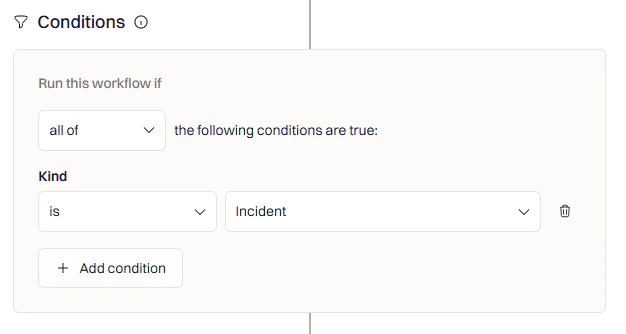
5
Add the Notion Action
Click Add Action and search for Notion.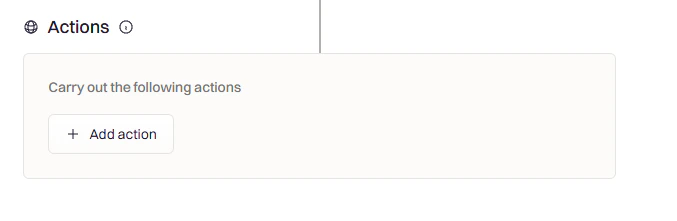
Create Notion Page
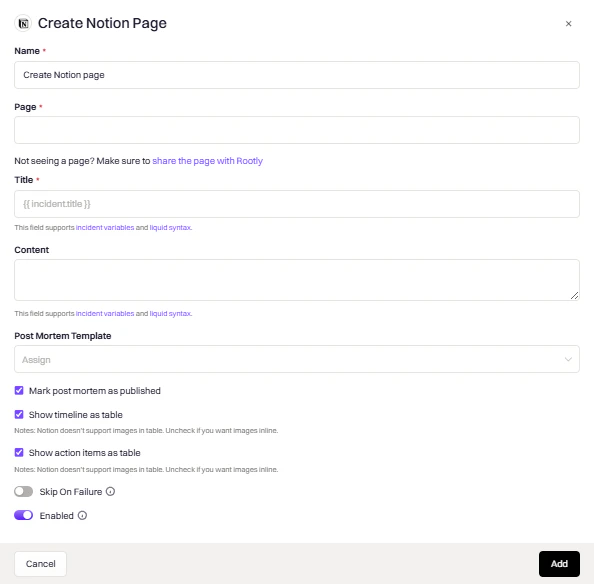
Use this action to create a new retrospective page in Notion for an incident. The page is created under a parent page you select and is populated using the template and fields you configure.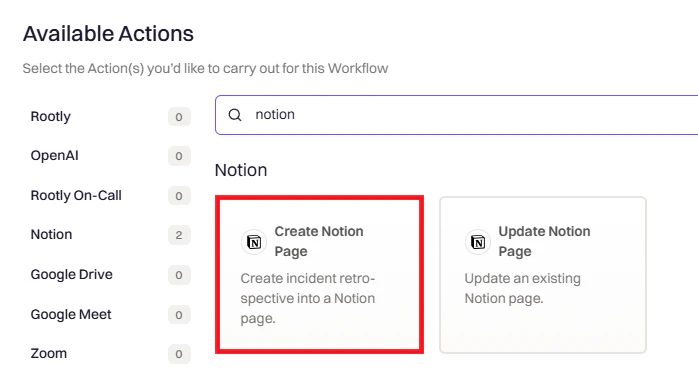
Update Notion Page
Use this action to overwrite an existing Notion page with the latest incident data. This is useful for keeping the retrospective page current as the incident progresses.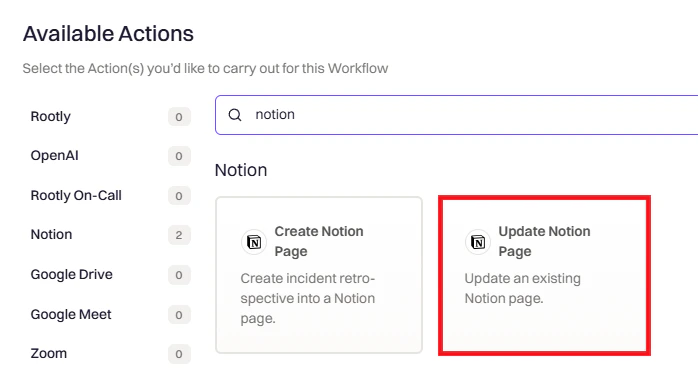
Variable Reference
Use these variables in page titles and templates. Use the Liquid Variable Explorer to test variables with real incident data.Incident Variables
Notion Variables
Uninstall
In Rootly:- Go to Settings → Integrations and find Notion
- Click the Connected button to reveal the disconnect option
- Click Delete
- Go to Settings and Members → Connections
- Find Rootly and click Disconnect
Disconnecting from Rootly does not remove existing Notion pages created by Rootly. Those pages remain in your Notion workspace.
Frequently Asked Questions
Rootly is not showing in Notion Connections
Rootly is not showing in Notion Connections
Ensure you granted access to the specific page during OAuth. Go to Settings and Members → Connections in Notion to confirm Rootly is listed. If missing, disconnect and reconnect the integration in Rootly. Also check that the page is not in a private or restricted workspace.
No pages are available during setup
No pages are available during setup
Notion only shows pages you have Editor or Owner access to. If the workspace has restricted pages, an admin must grant you access first. Try expanding parent pages in the selector to see nested pages, then restart the authorization flow.
Pages are not being created after running a workflow
Pages are not being created after running a workflow
Verify the parent page selected in the workflow action is one you granted access to during installation. Check workflow run logs under Workflows → Your Workflow → View Runs for error details. Re-authorize the integration if the connection has expired.
Workflow Questions
The workflow ran but no Notion page was created
The workflow ran but no Notion page was created
Check the workflow run log under Workflows → Your Workflow → View Runs for error details. Confirm the parent page selected in the action is one Rootly was granted access to during installation. Re-authorize the integration if the connection has expired.
Manual edits to my Notion page keep getting overwritten
Manual edits to my Notion page keep getting overwritten
The Update Notion Page action is a full overwrite. If you need to preserve manual edits, disable any workflows that trigger an update on that page, or add conditions to prevent them from running after a certain point in the incident lifecycle.
Can I use custom Liquid templates for the page content?
Can I use custom Liquid templates for the page content?
Yes — define a custom retrospective template in Retrospective Templates and select it in the Post Mortem Template field. Use the Liquid Variable Explorer to build and test your template.
Why are images not appearing in the timeline?
Why are images not appearing in the timeline?
Notion does not support images inside tables. Uncheck Show Timeline as Table to render the timeline inline, which will allow images to display correctly.