Overview
Once Datadog is connected to Rootly, you can forward monitor alerts to Rootly via a webhook. Alerts received in Rootly can be routed to a Slack channel, used to page on-call responders, or trigger incident workflows automatically.Step 1: Set Up the Webhook in Datadog
1
Install the Webhooks integration
In Datadog, navigate to Integrations, search for Webhooks, and click Install.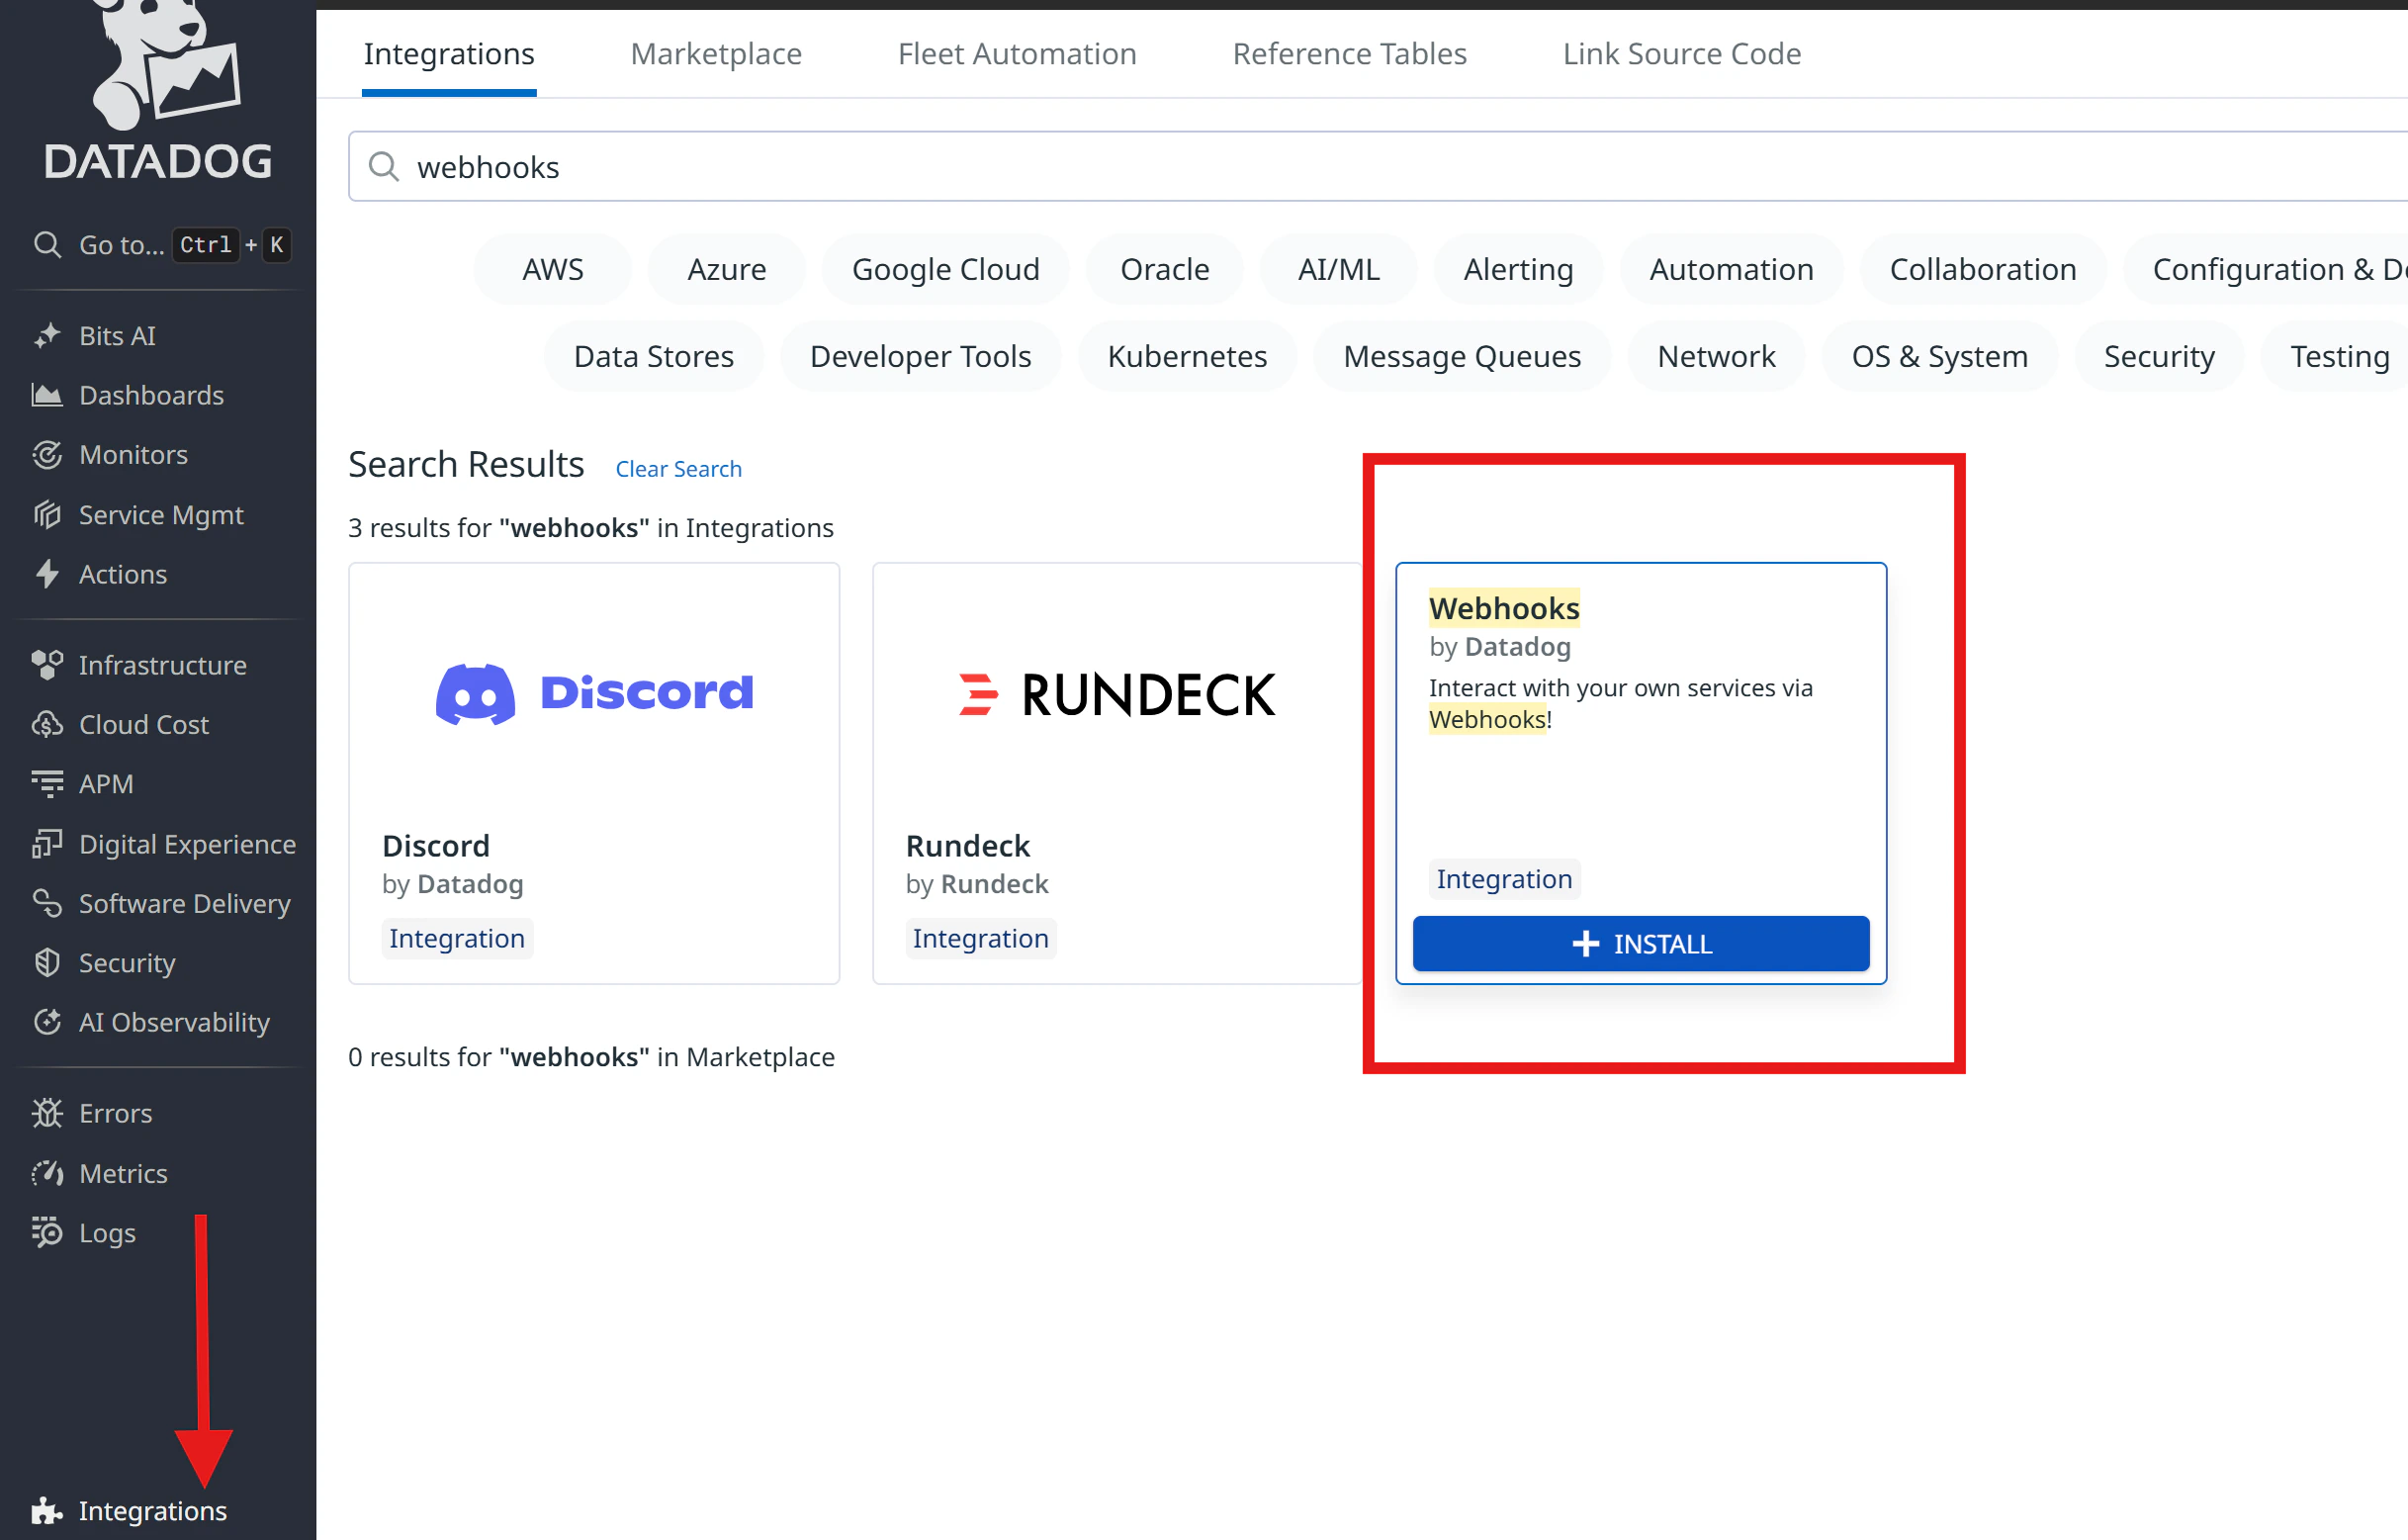
2
Create a new webhook
Switch to the Configuration tab and click + New to add a webhook.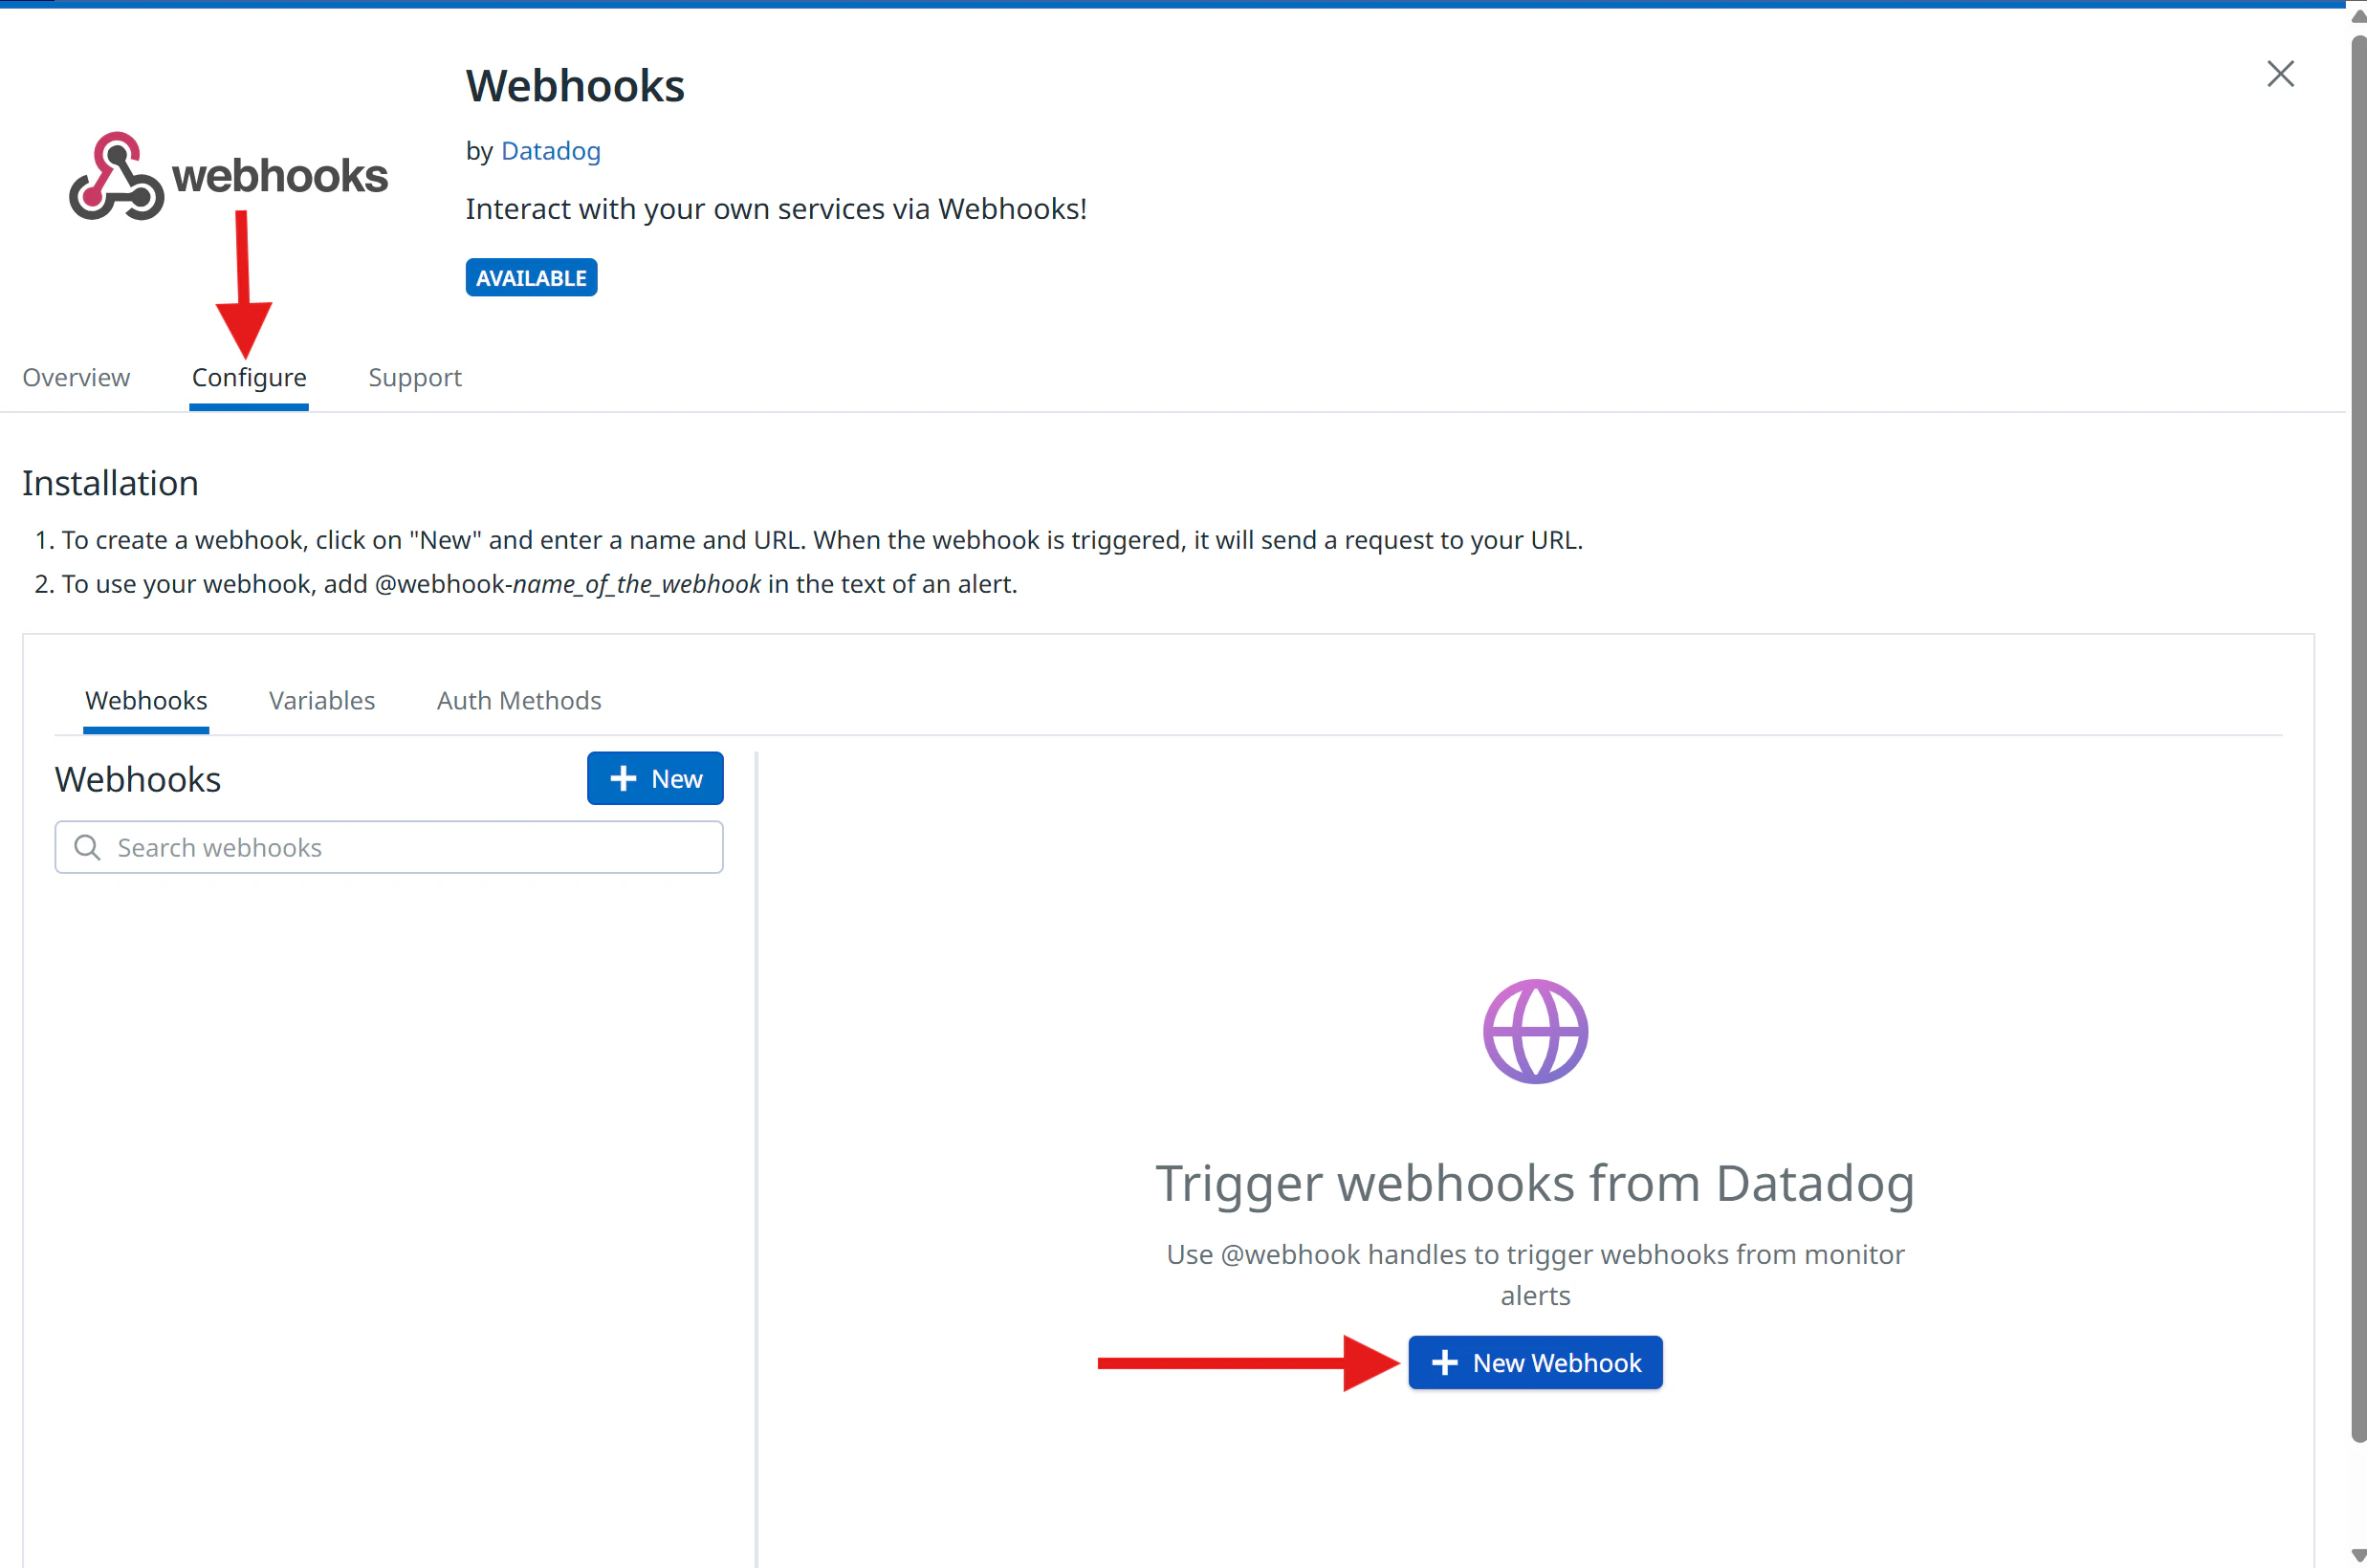
3
Configure the webhook
Fill in the following fields:Name — give the webhook a descriptive name (e.g., Payload — choose based on your use case:
Rootly_Alerts)URL — enter:- General Alert
- Page On-Call
Use this payload for standard alerts that appear in Rootly’s Alerts page without paging anyone.
The only difference between these payloads is the
notification_target object. Including it tells Rootly who to page when the alert is received.4
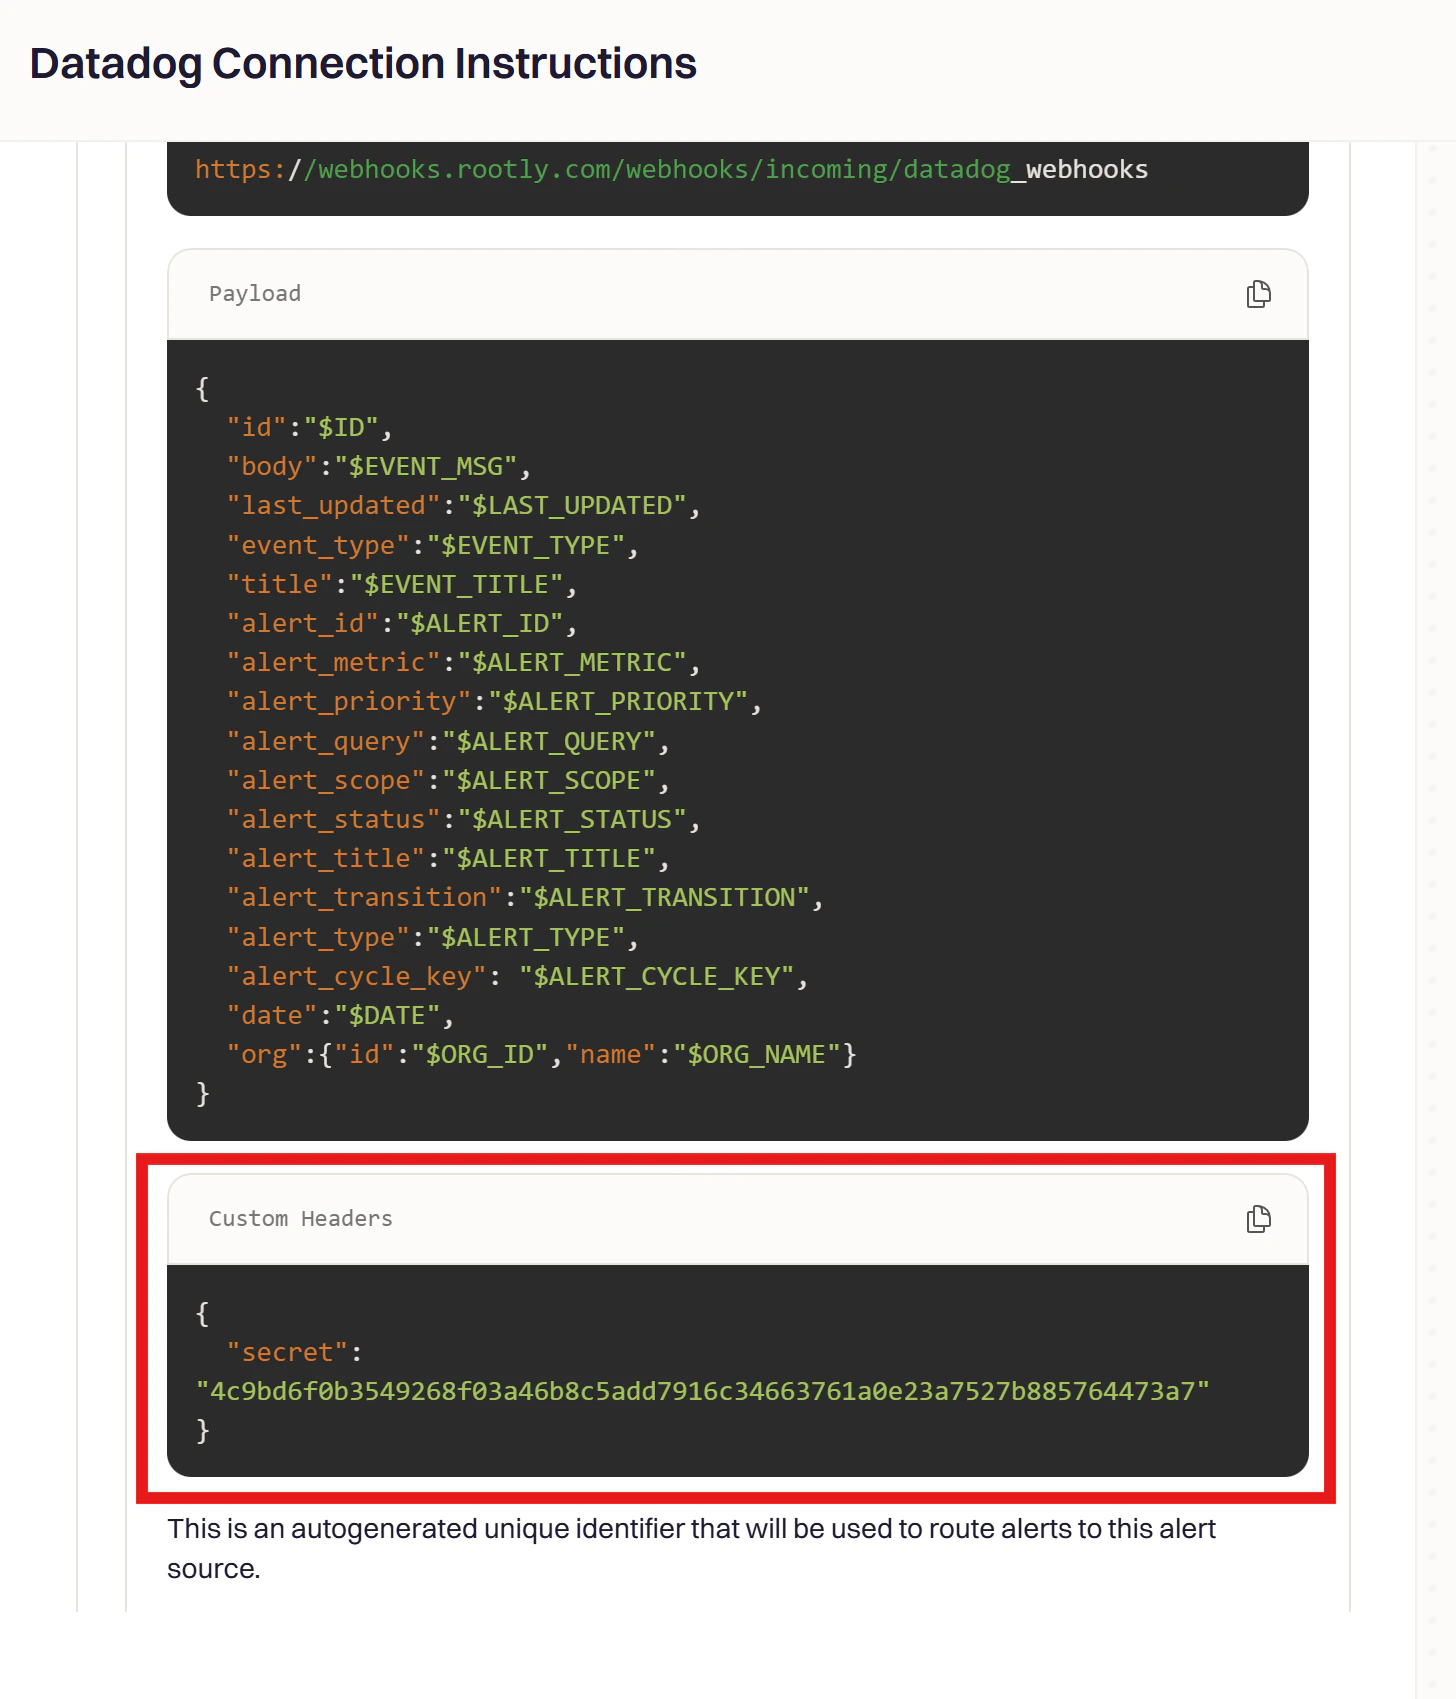
Add the custom header
Check the Custom Headers box and add the following, replacing the value with your Rootly webhook secret:To find your secret: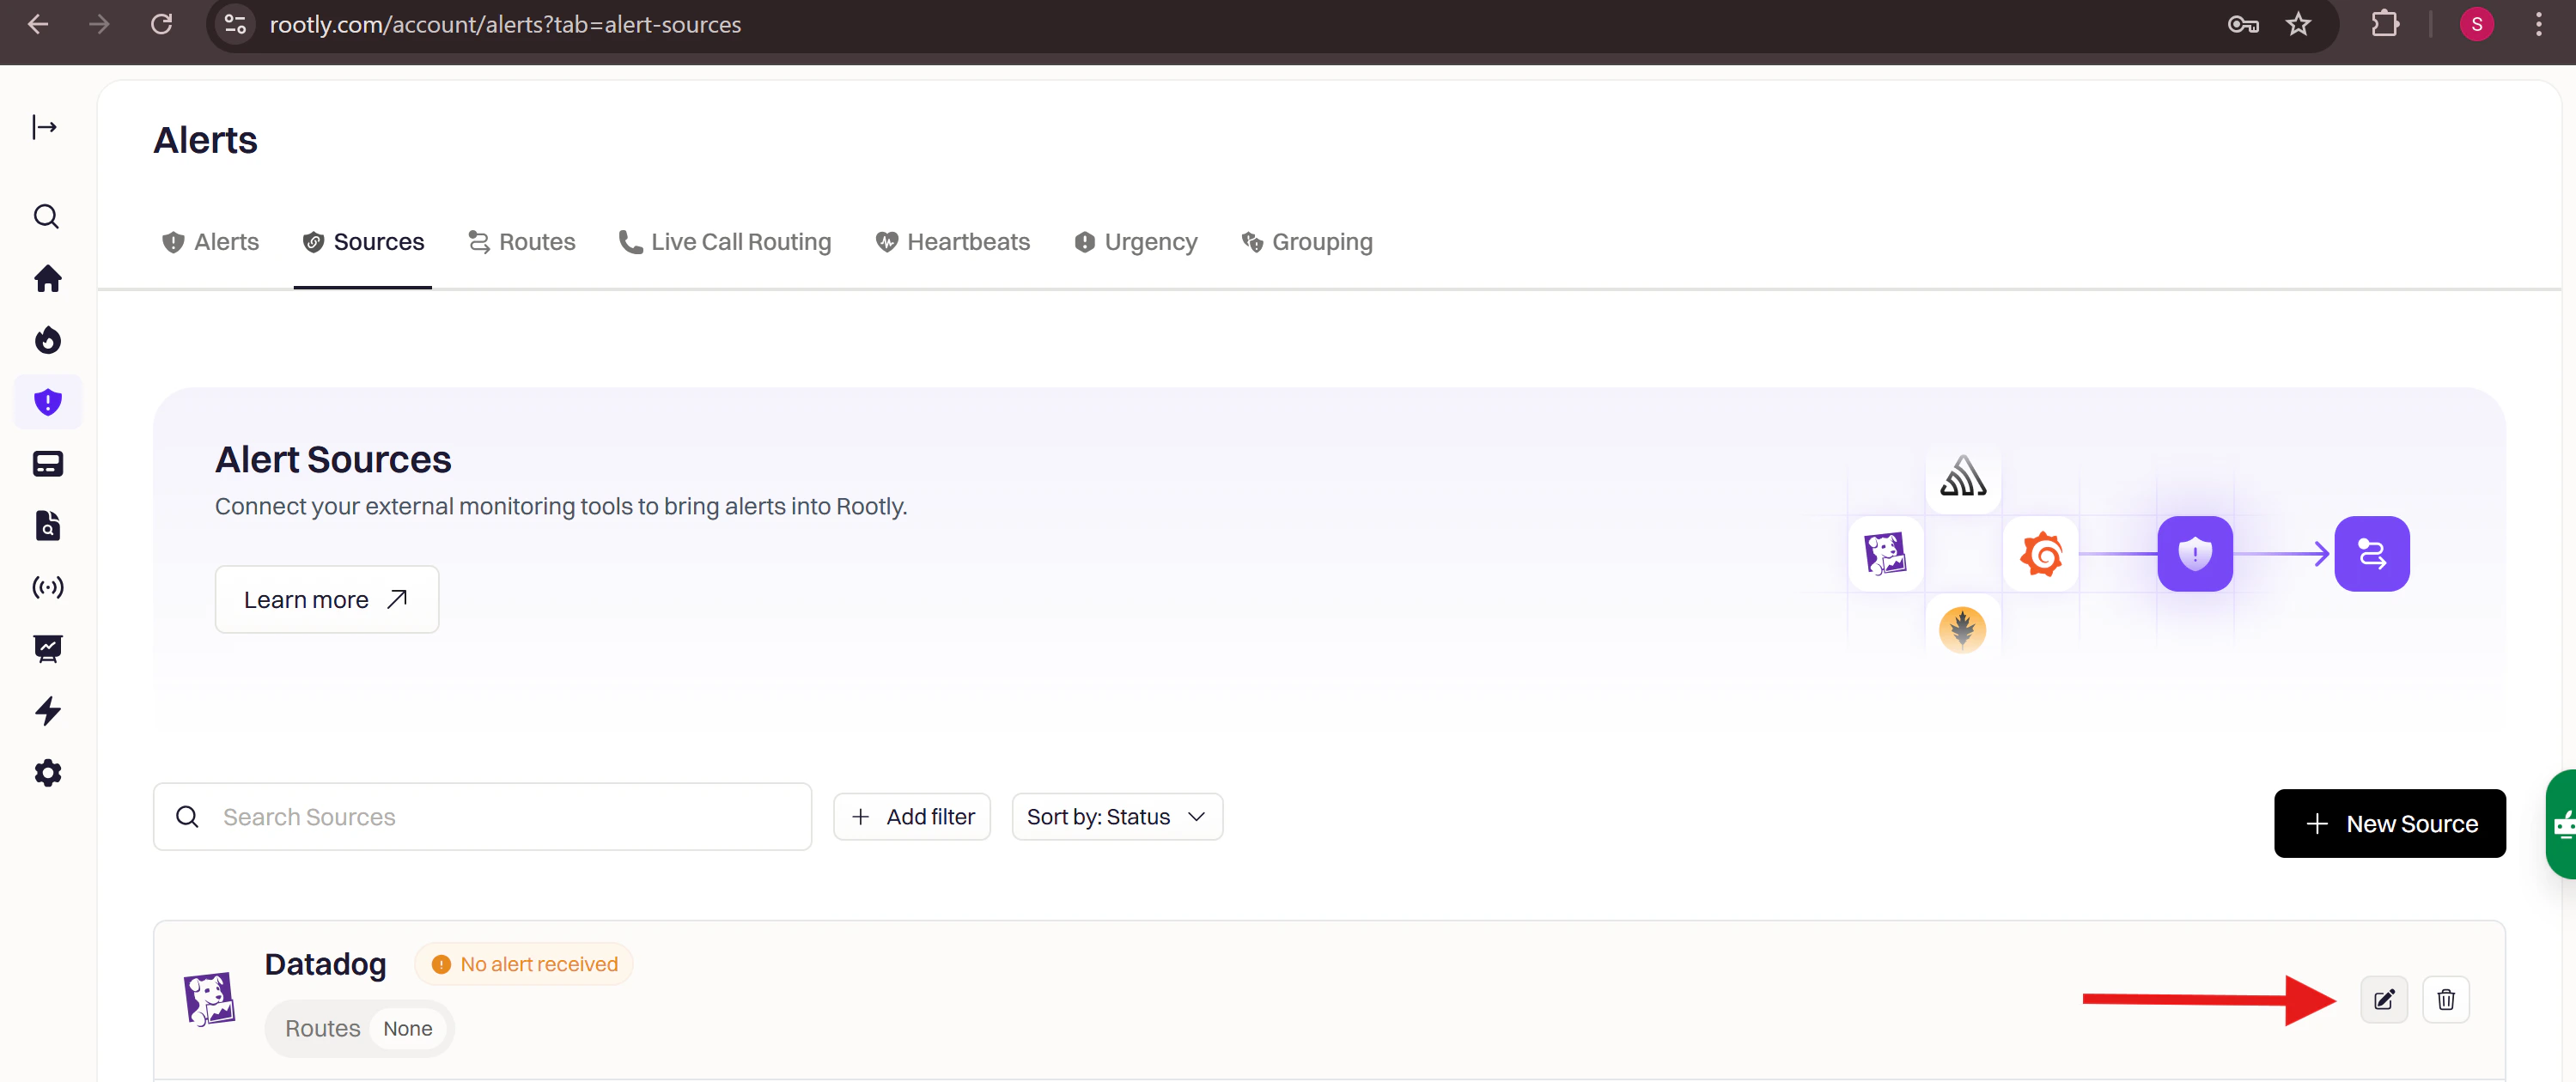
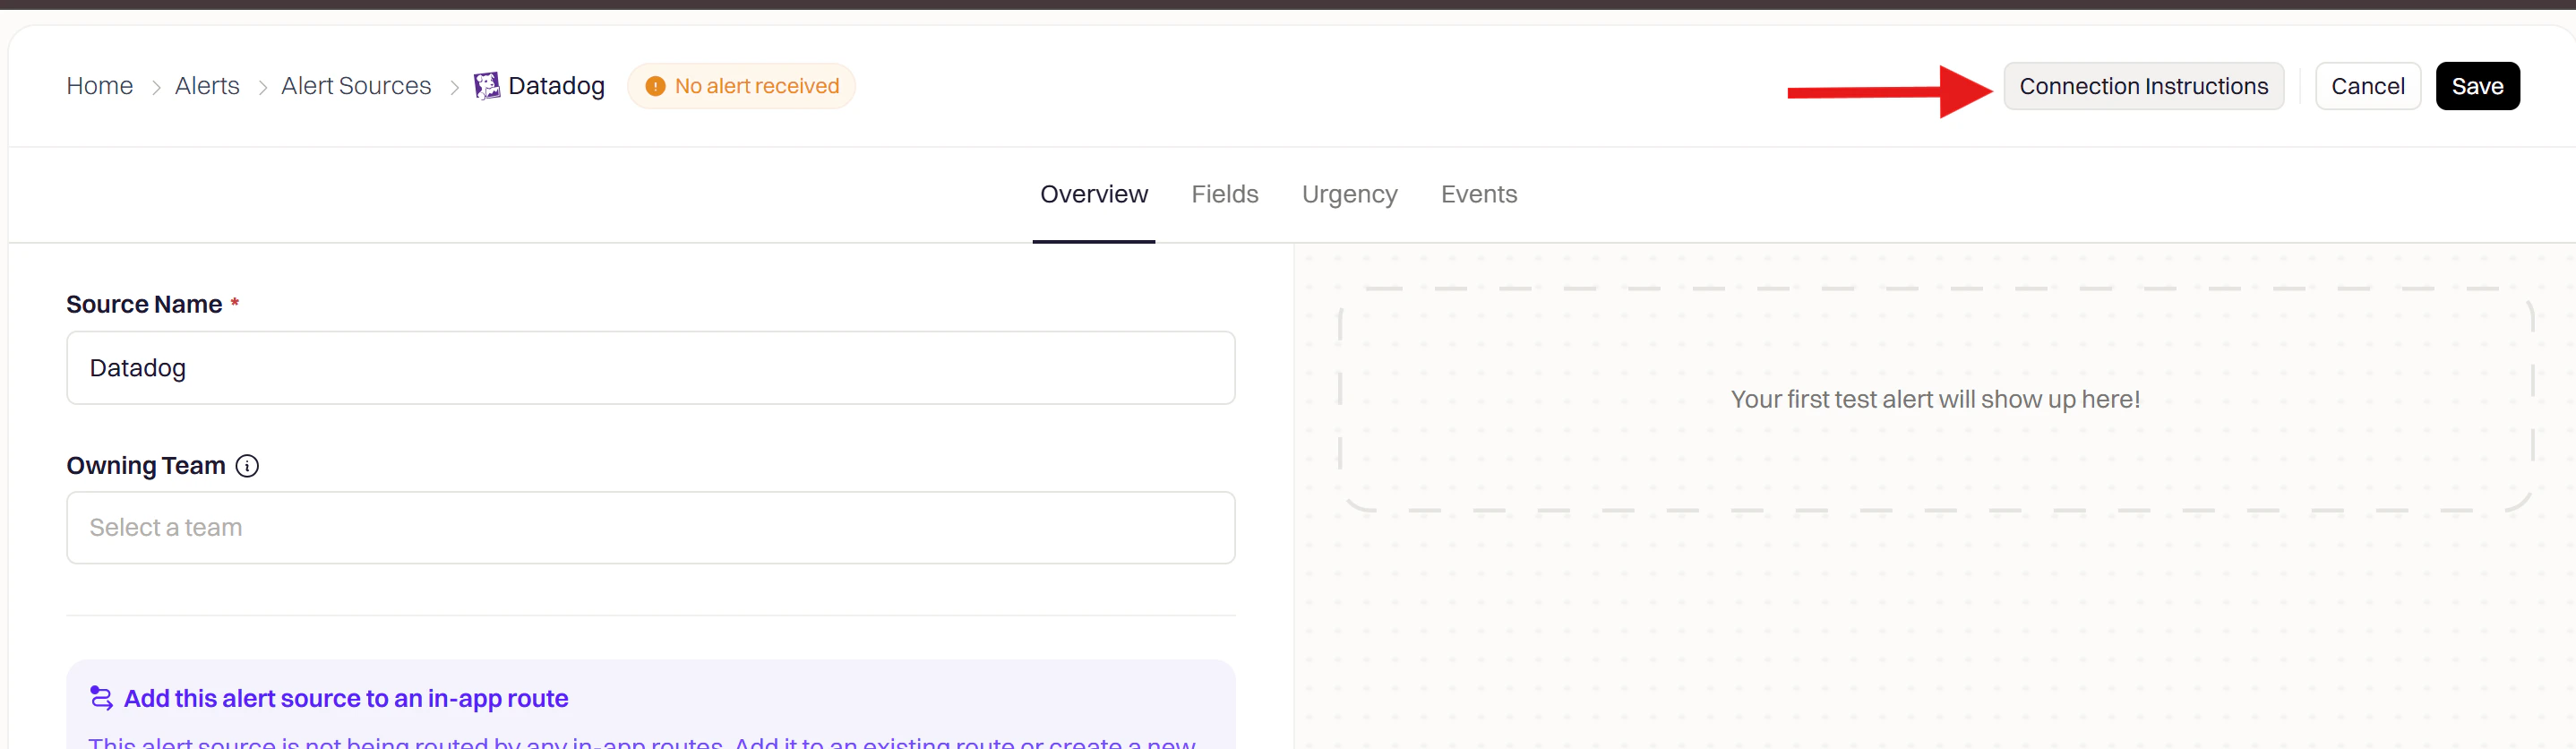
- In Rootly, go to Alerts → Sources → Datadog and click Configure
- Find the Connection Instructions panel on the right
- Copy the secret value from the Custom Headers section
5
Save the webhook
Click Save.
Step 2: Attach the Webhook to a Monitor
1
Open a monitor
In Datadog, navigate to Monitors → New Monitor and choose a monitor type, or open an existing monitor to edit it.
2
Add the webhook to notifications
In the Configure notifications and automations section, reference your webhook using
@webhook-<WEBHOOK_NAME> syntax (e.g., @webhook-Rootly_Alerts).3
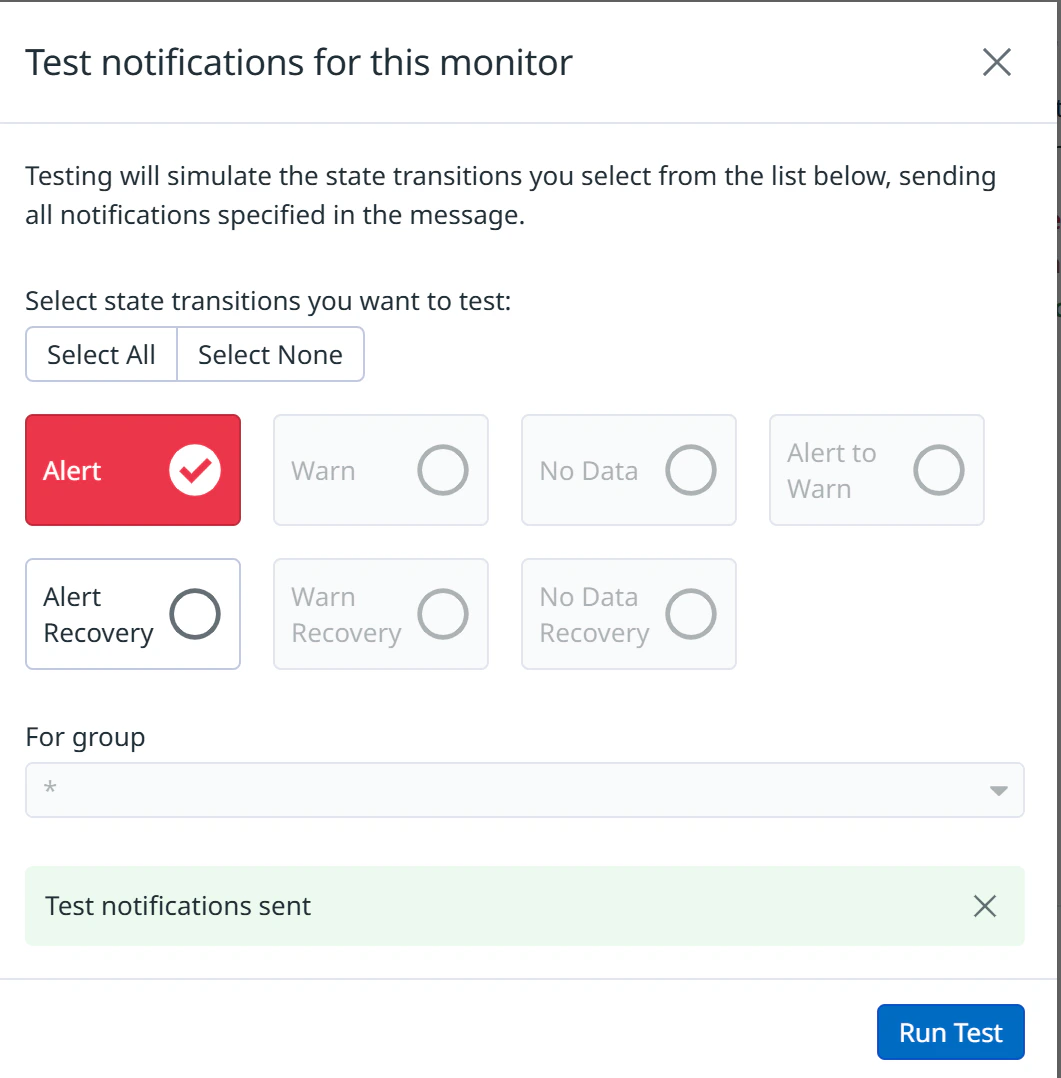
Test and save
Click Test Notifications to confirm the alert reaches Rootly, then save the monitor.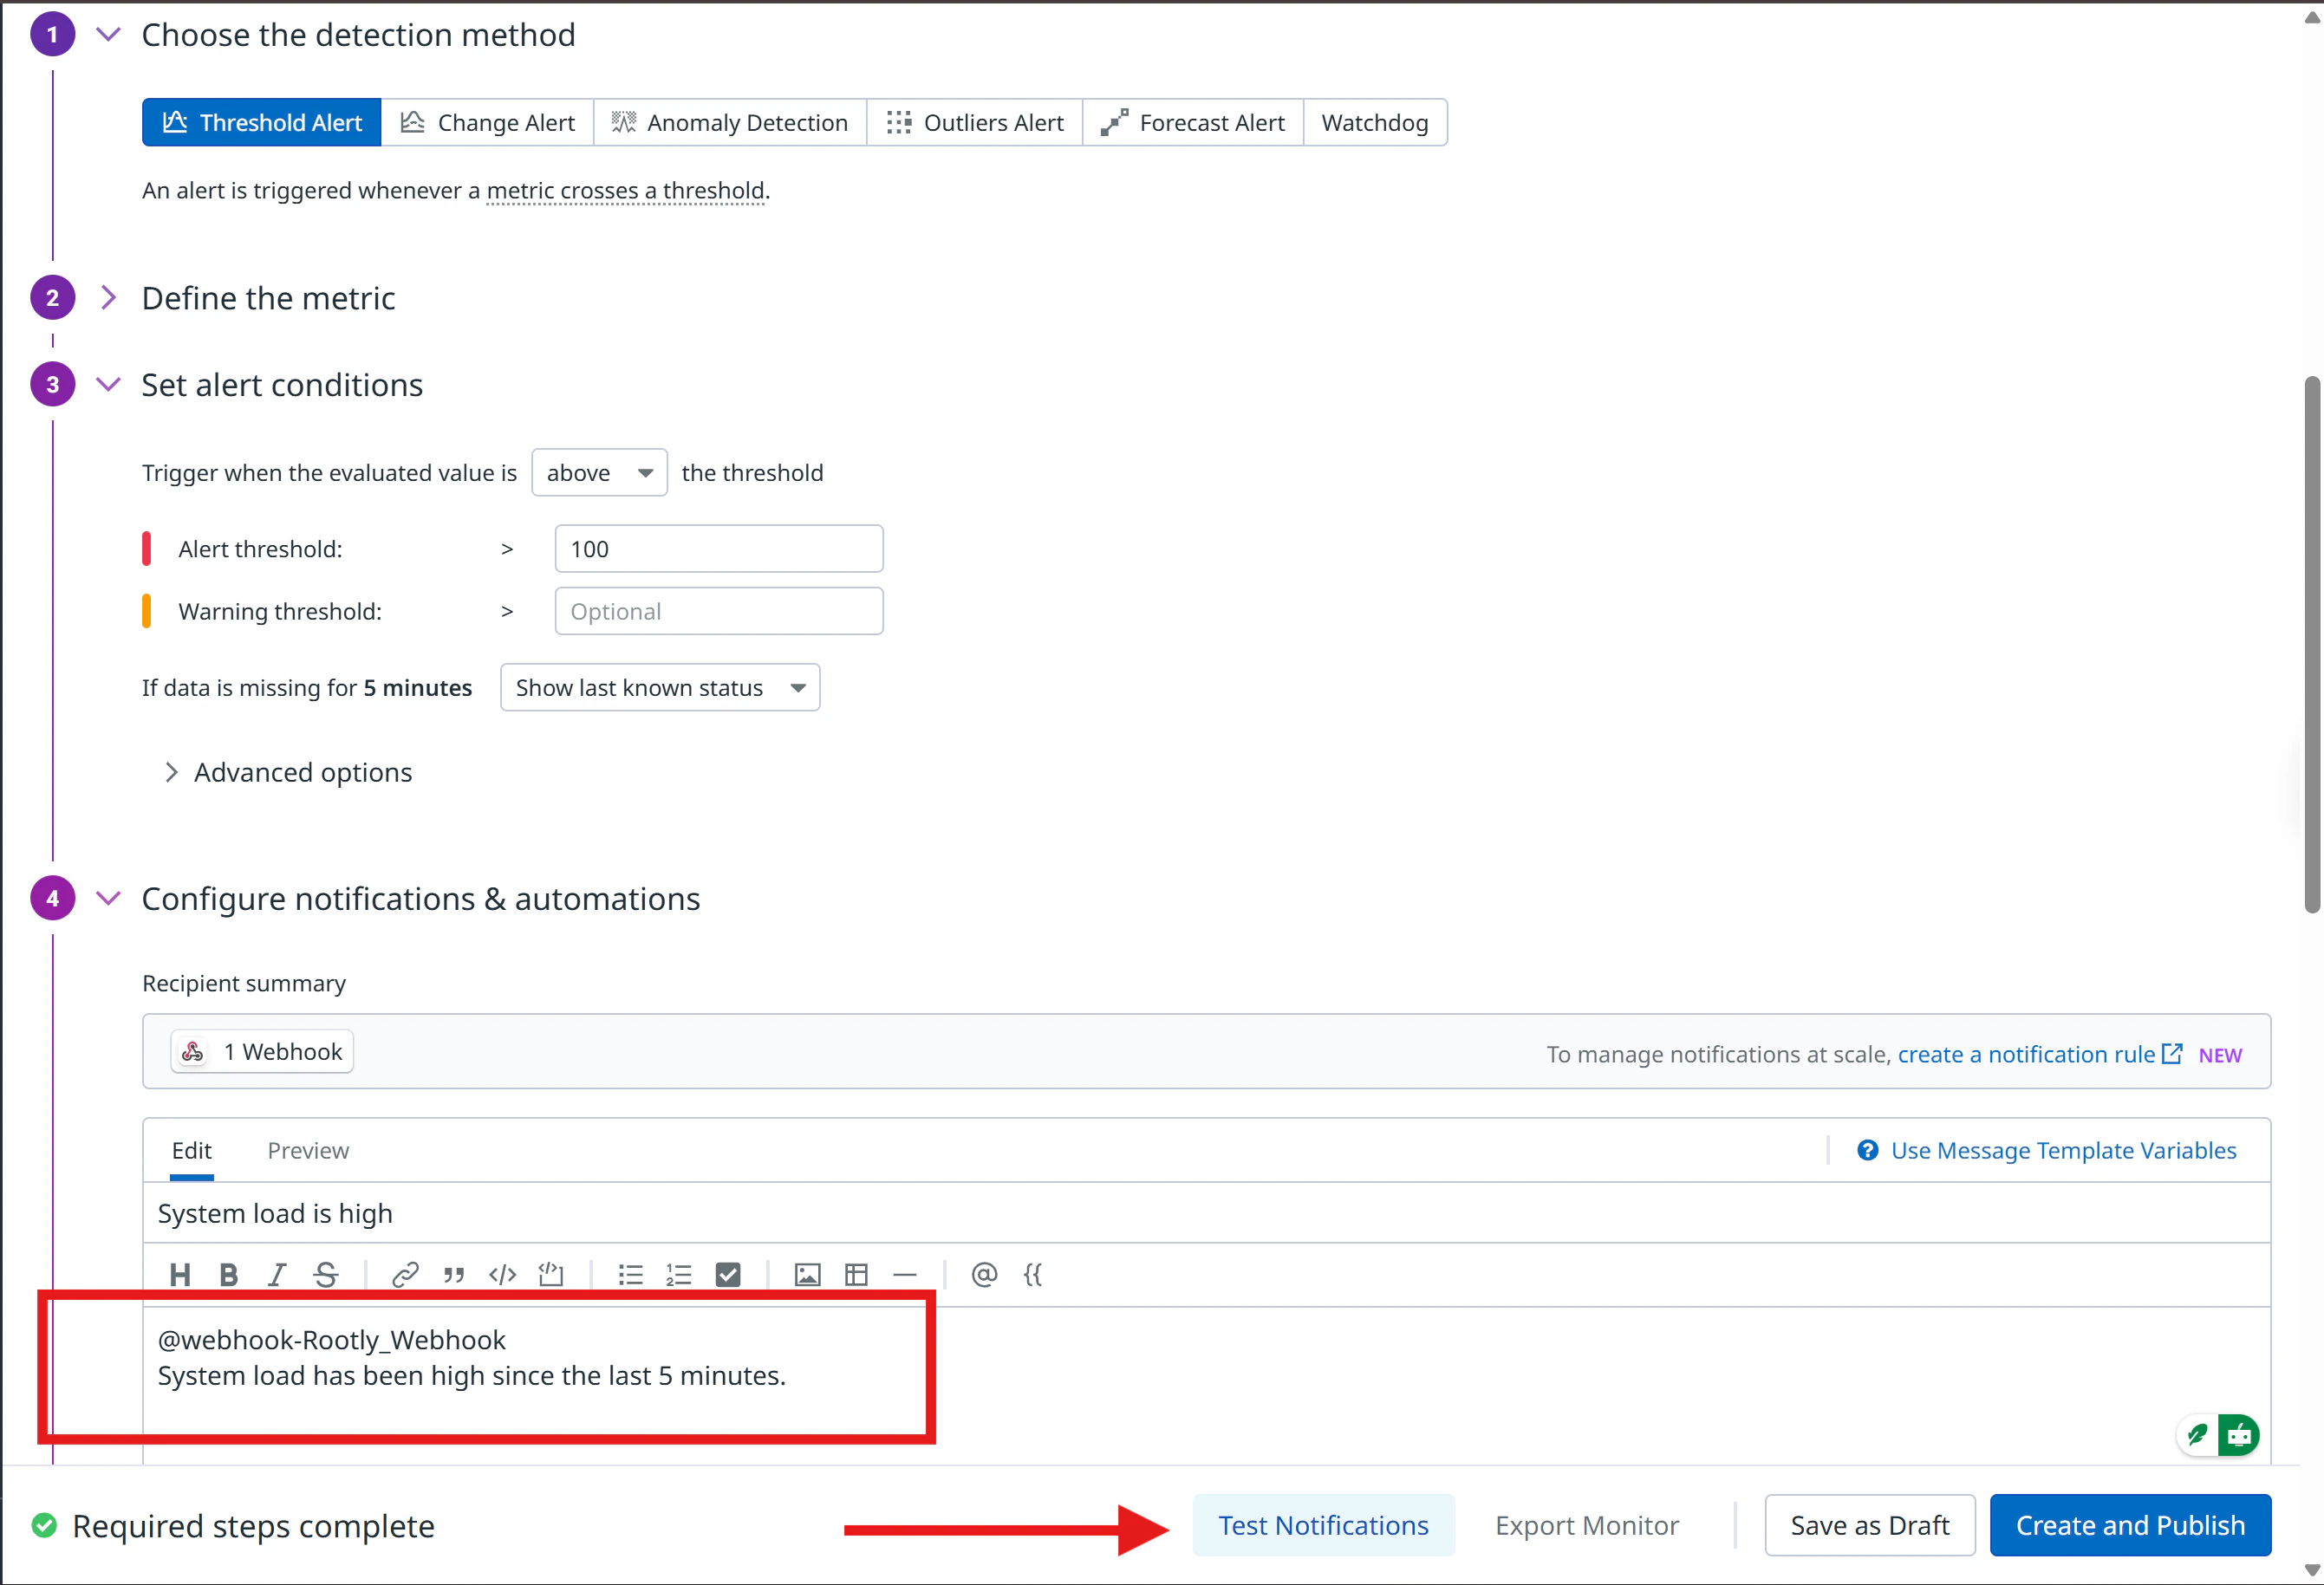
Step 3: Build Alert Workflows in Rootly
With alerts flowing into Rootly, create a workflow that reacts to them. Alert workflows let you check alert fields, apply conditions, and trigger automated actions like creating an incident or notifying responders.1
Open Workflows
Navigate to Workflows in Rootly and click Create Workflow.
2
Choose Alert workflow type
Select Alert as the workflow type. This workflow triggers whenever Rootly receives an alert from Datadog.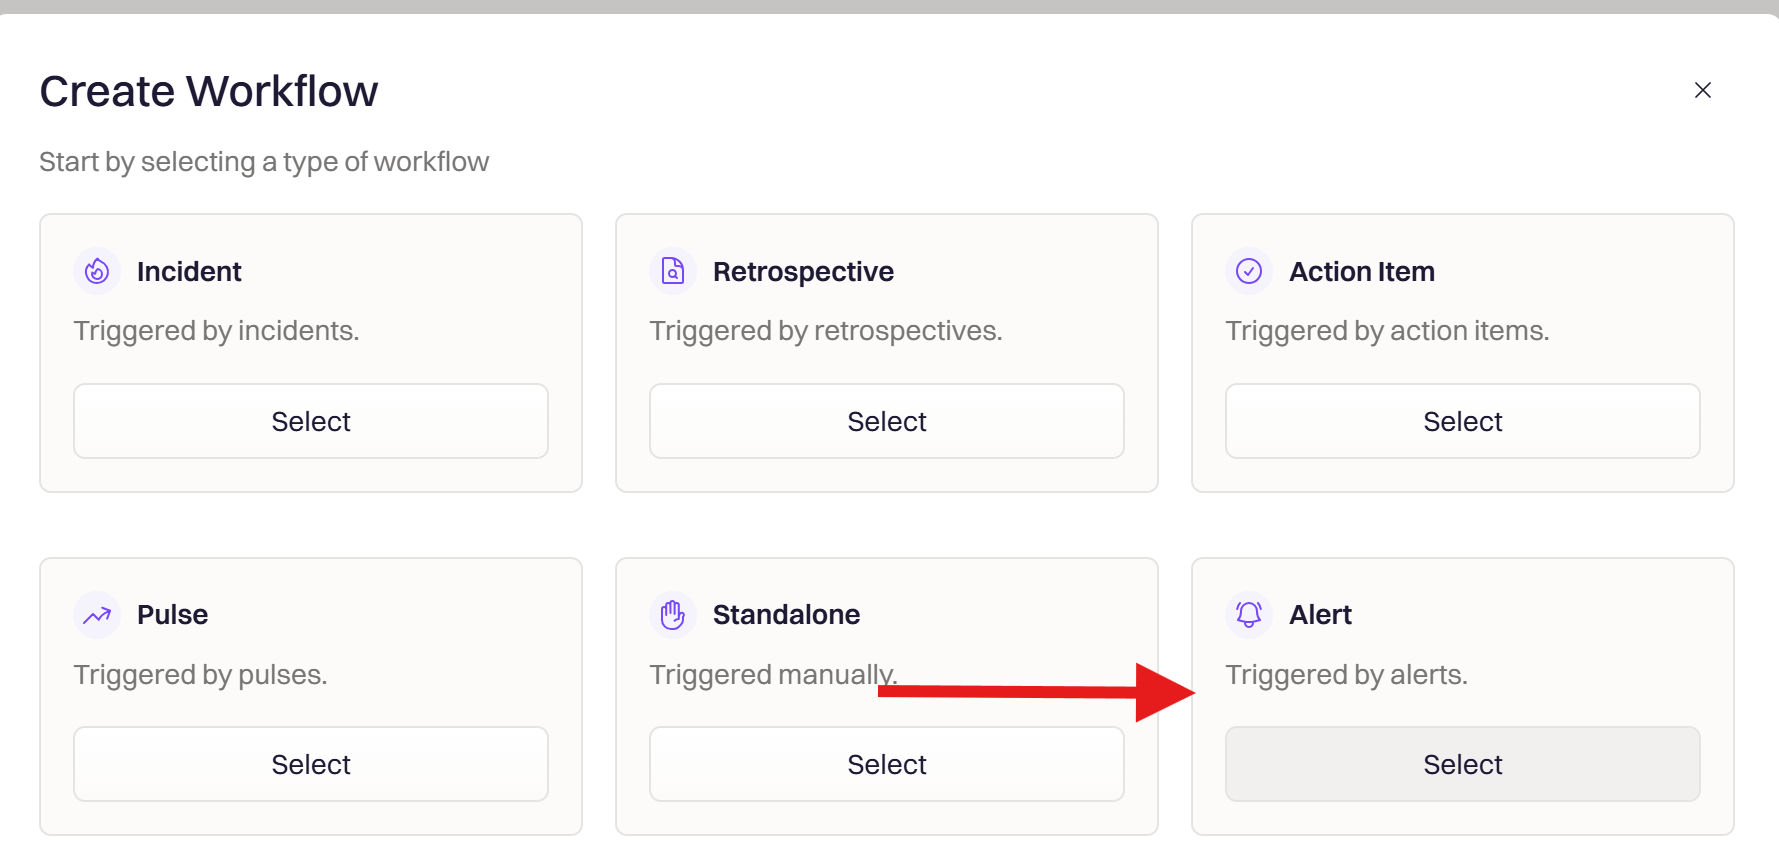
3
Set the trigger
Select Alert Created to fire on new alerts, or Alert Status Updated to react when an existing alert changes.
Available triggers: Alert Created fires when a new alert is received. Alert Status Updated fires when an existing alert changes state.
4
Add conditions
Filter which alerts should trigger this workflow. Common patterns:
- Match by source
- Match by payload
Add a condition where Source is Datadog to scope the workflow to Datadog alerts only.
Use Datadog payload fields like
alert_priority, alert_status, alert_type, and alert_title to build precise conditions.5
Add actions
Add one or more actions to execute when the workflow fires:
You can chain multiple actions for a complete response process — for example, create an incident and then send a Slack message in the same workflow.
6
Save the workflow
Name the workflow (e.g., 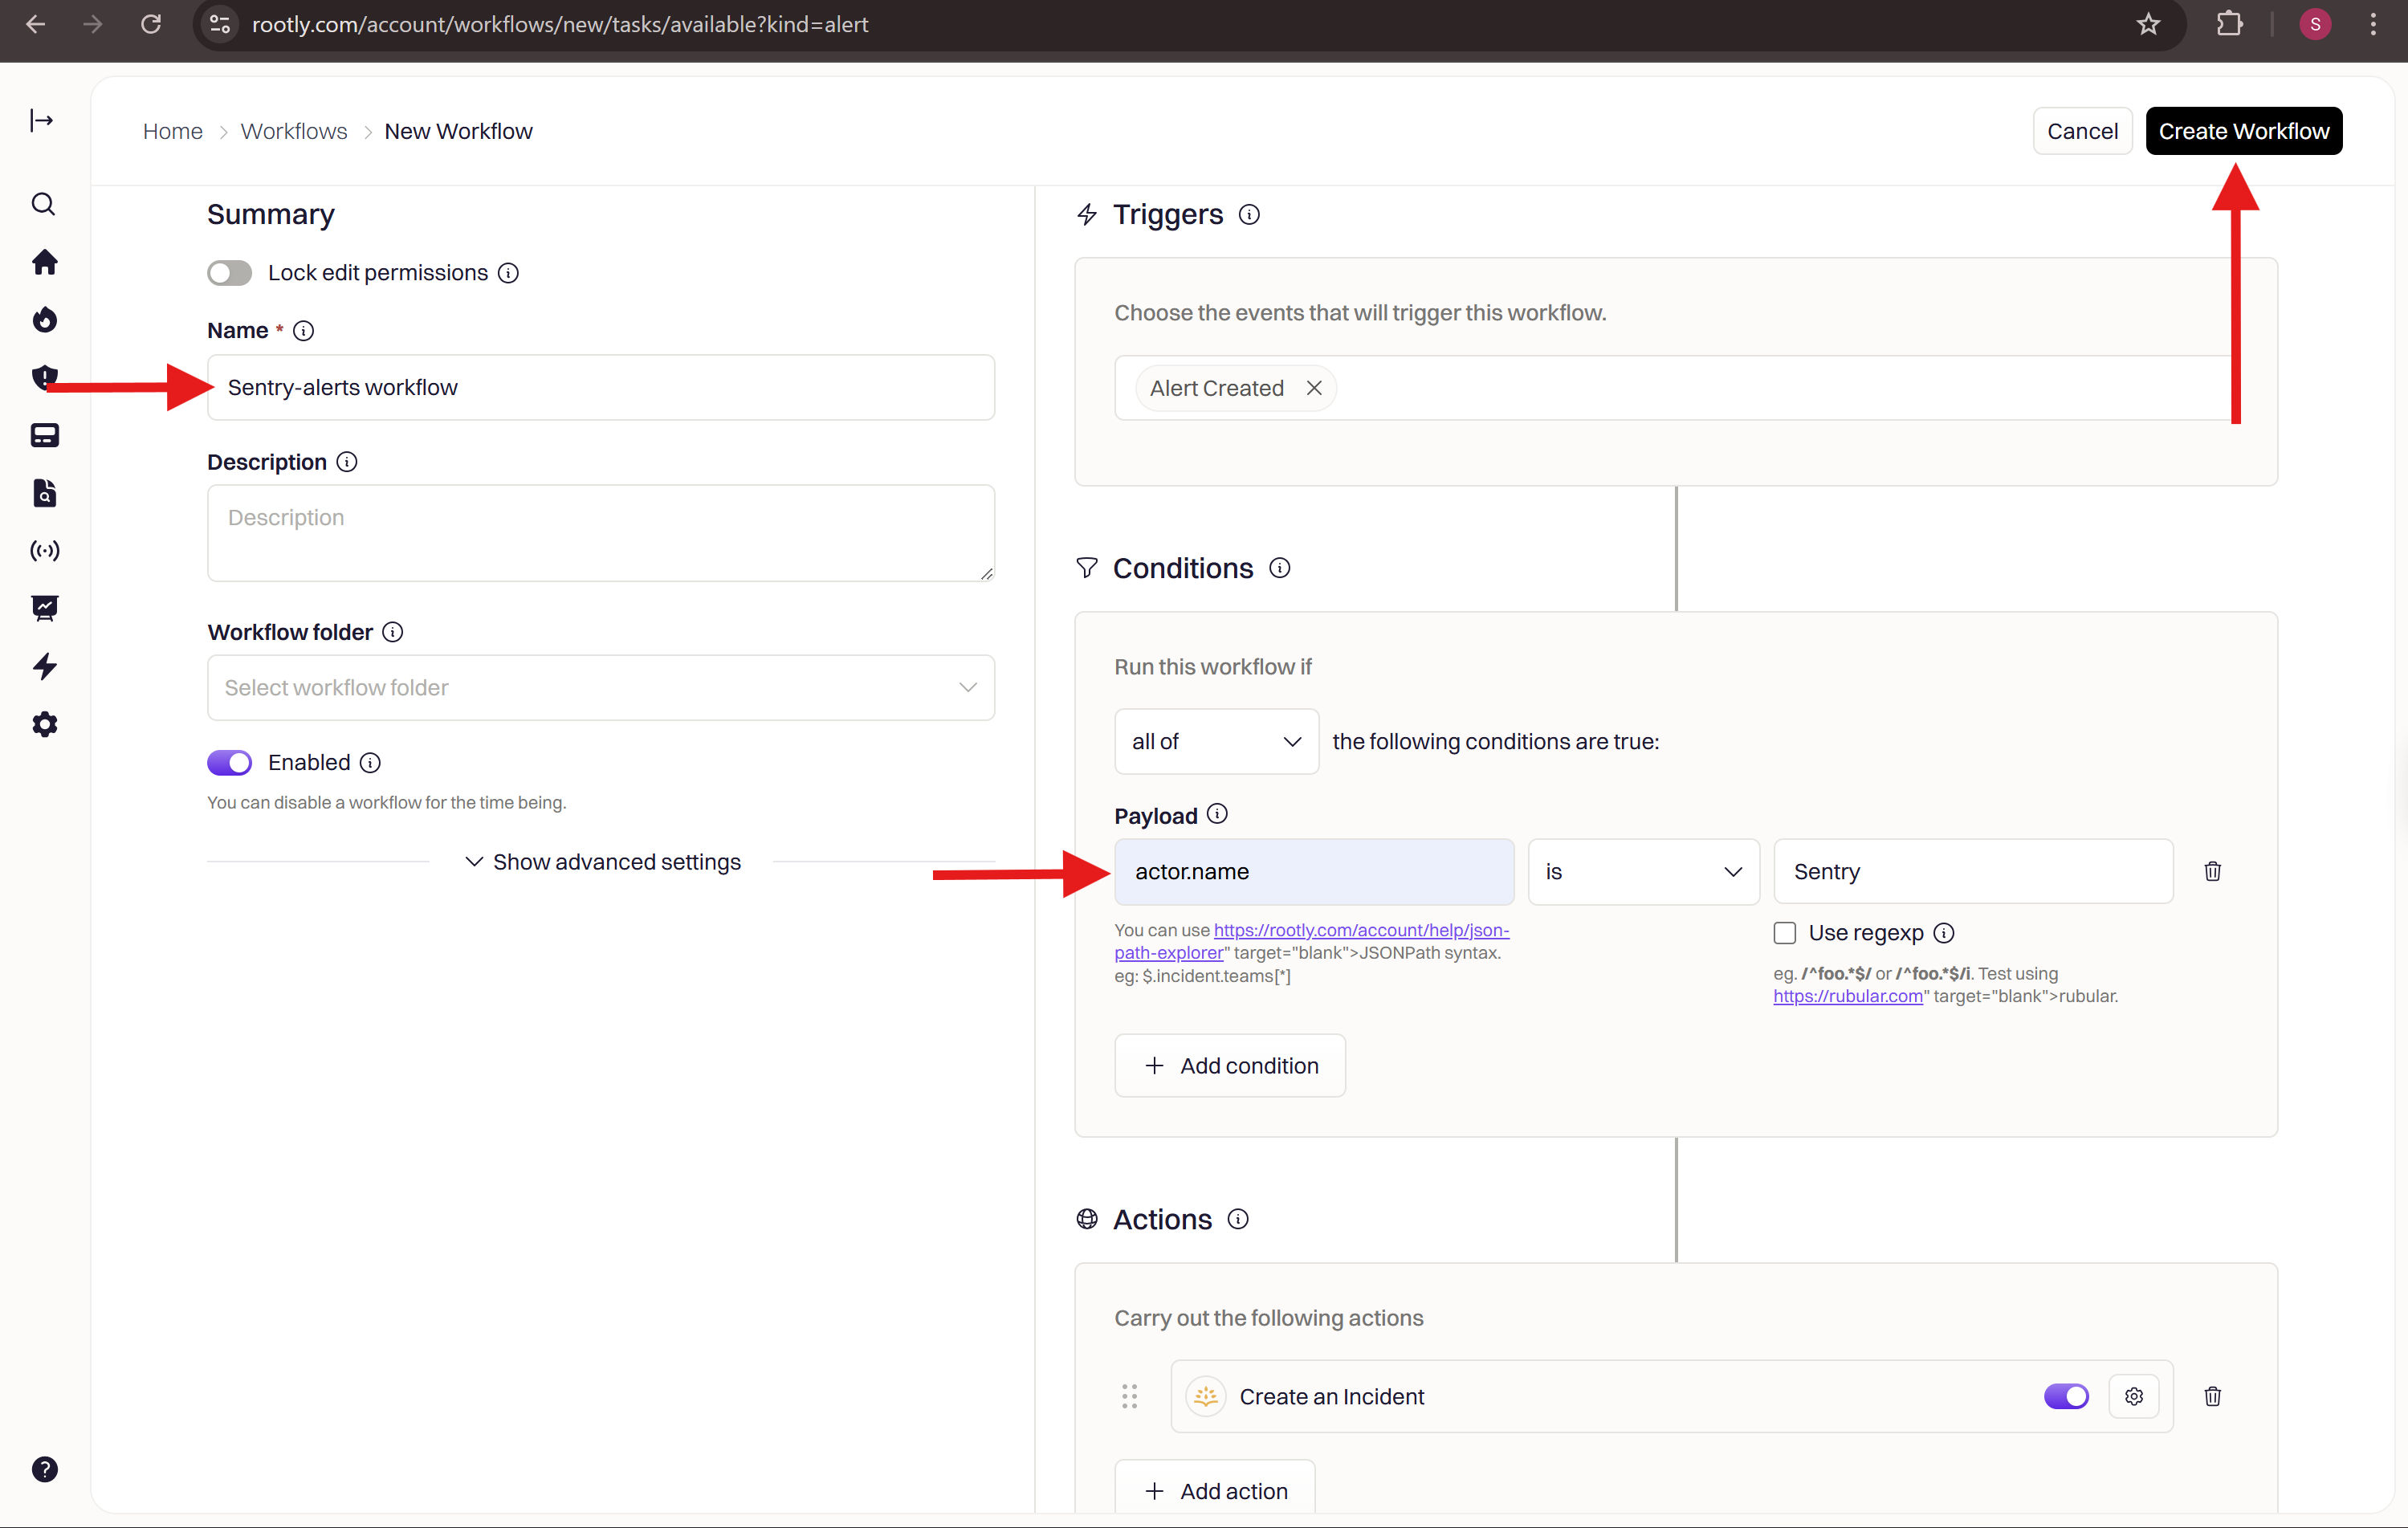
Create Incident from Datadog P1 Alert) and click Create Workflow.Verify the Workflow
After saving the workflow:- Return to Datadog and trigger a test alert from your monitor by clicking Test Notifications
- Confirm the workflow activates in Rootly and performs the expected actions
- View the run log under Workflows → History in Rootly
You have successfully built a Datadog alert workflow in Rootly!
Frequently Asked Questions
Alerts are not appearing in Rootly
Alerts are not appearing in Rootly
Verify the webhook URL is exactly
https://webhooks.rootly.com/webhooks/incoming/datadog_webhooks. Confirm the Custom Headers secret value matches what is shown in Alerts → Sources → Datadog → Configure in Rootly. Check that the Datadog integration is still connected under Configuration → Integrations.How do I find the ID for the notification_target?
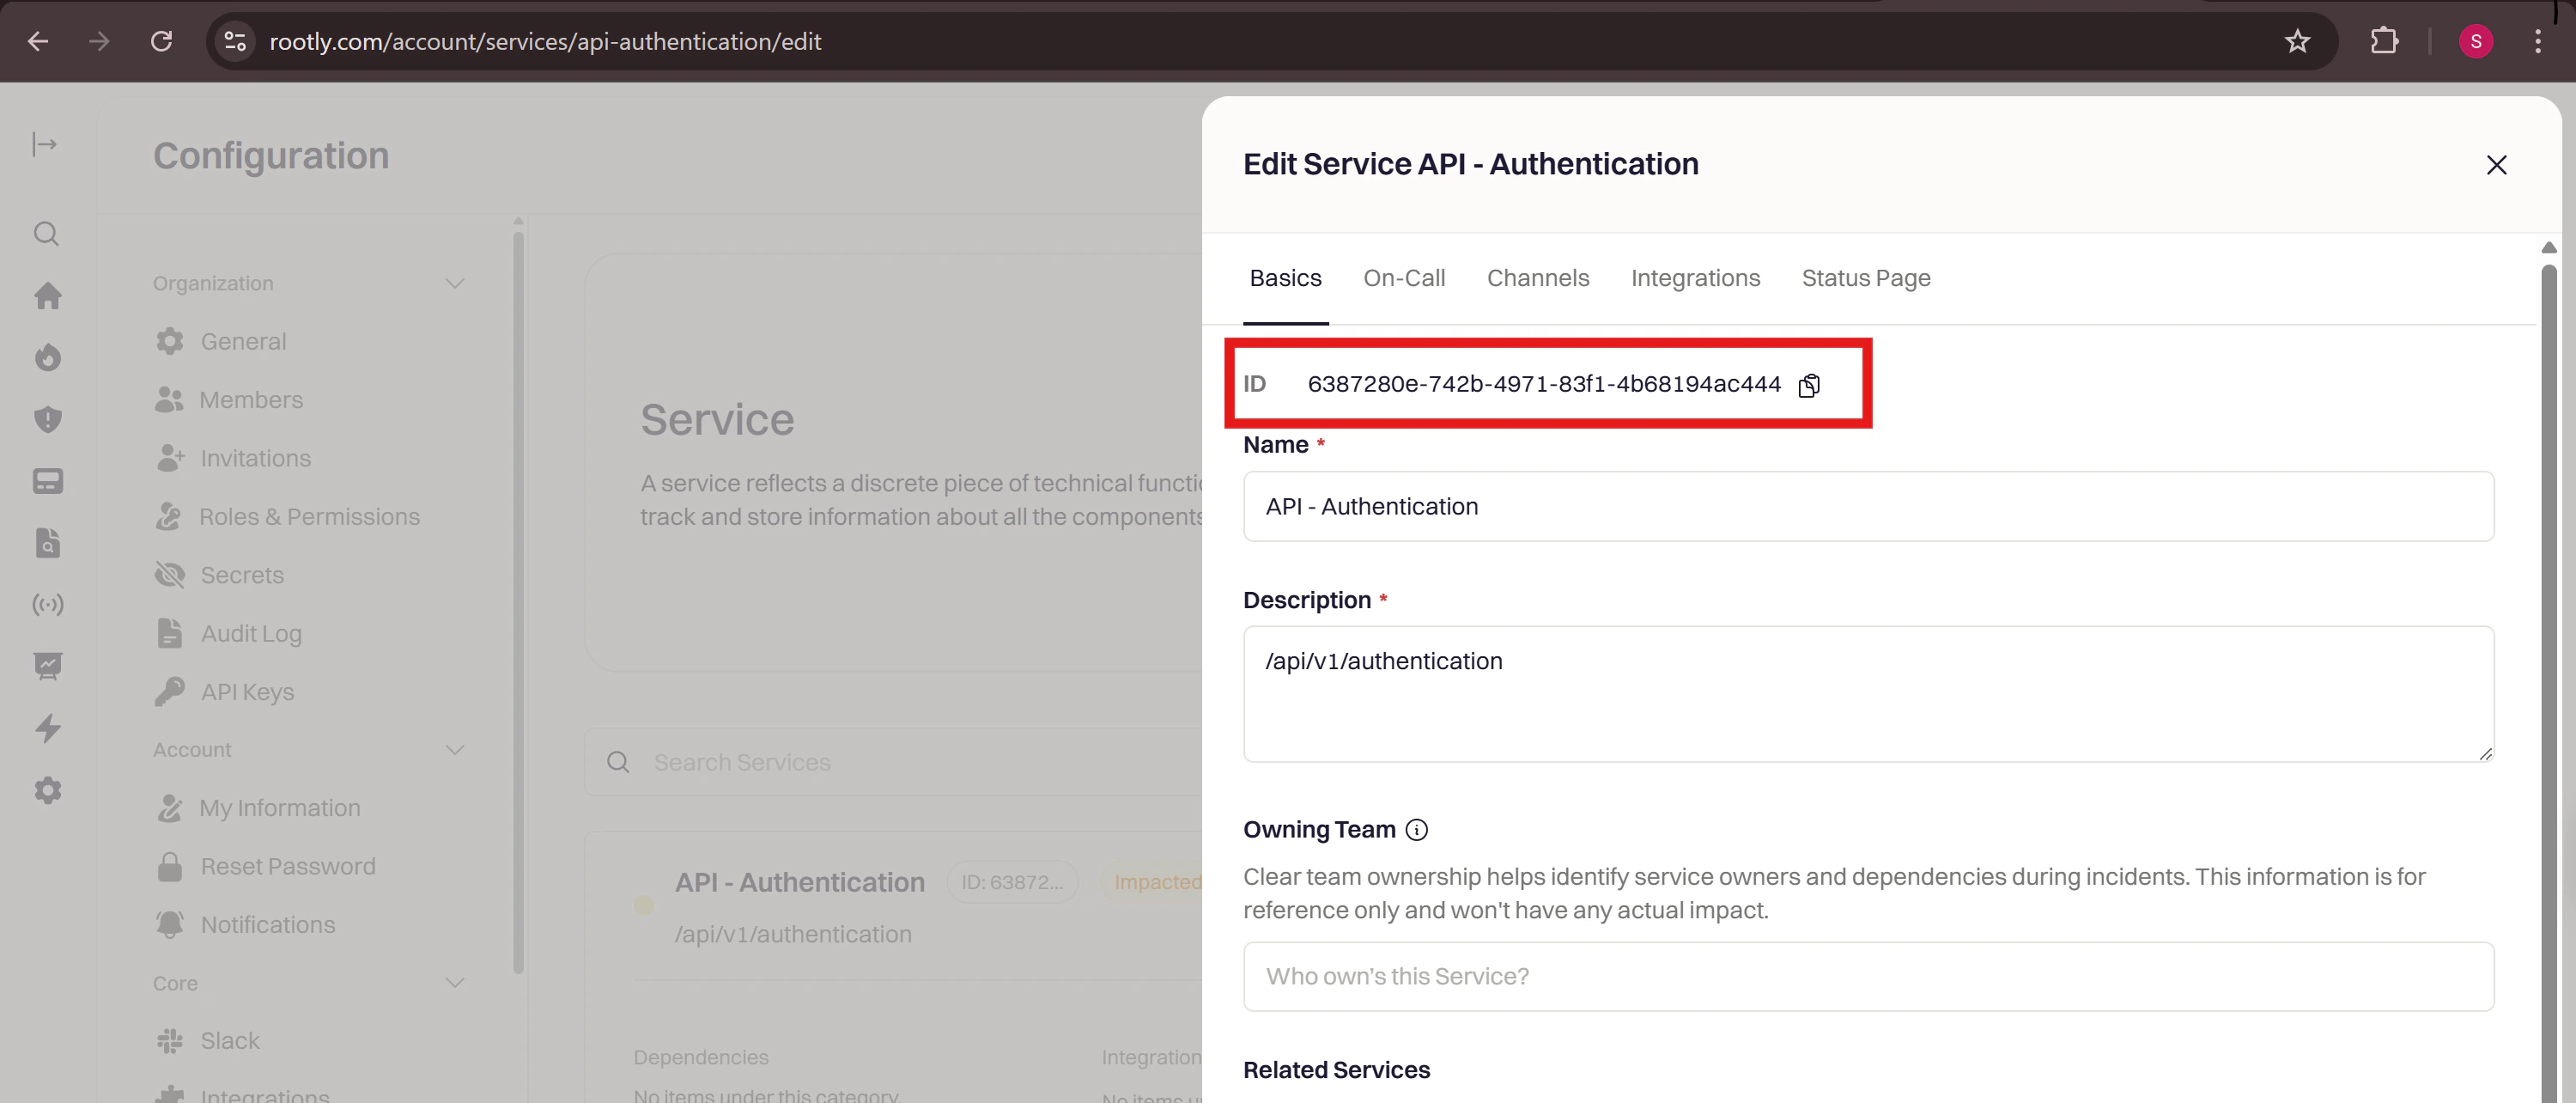
How do I find the ID for the notification_target?
Open the resource (User, Team, Escalation Policy, or Service) in Rootly and click Edit. The resource ID appears in the URL or in the edit form. Copy it and paste it into the
id field of the paging payload.Can I send alerts from multiple Datadog monitors to Rootly?
Can I send alerts from multiple Datadog monitors to Rootly?
Yes. Create one webhook and attach it to as many monitors as needed by adding
@webhook-<WEBHOOK_NAME> to each monitor’s notification body. Each alert will appear separately in Rootly’s Alerts page.What alert workflow triggers are available?
What alert workflow triggers are available?
Alert workflows in Rootly support Alert Created (fires on new alerts) and Alert Status Updated (fires when an existing alert changes). Use conditions to filter by source (Datadog), payload fields like
alert_priority or alert_title, or alert status.Why aren't my WARNING alerts paging me?
Why aren't my WARNING alerts paging me?
By default, Rootly only pages for CRITICAL alerts from Datadog. WARNING vs. CRITICAL is the monitor’s
alert_status field in the webhook payload — not alert_priority (which is your monitor’s P1–P5 importance and is independent of state). To extend paging to WARNING alerts, either configure your monitor to fire on the threshold you want treated as paging-eligible, or build an alert workflow that matches alert_status equals Warn (or Warning, depending on the value Datadog sends) and routes to the same target as CRITICAL.