

- Automatically create ServiceNow incidents from Rootly incidents
- Update ServiceNow incident priority, state, and custom fields as incidents evolve
- Receive ServiceNow incident events as Rootly alerts to trigger on-call paging
- Sync ServiceNow CMDB configuration items into Rootly services, teams, and custom catalogs
Before You Begin
Before setting up the integration, make sure you have:- A Rootly account with admin permission to manage integrations
- A ServiceNow instance with admin access
- Permission to create OAuth Application Registry entries in ServiceNow
Rootly recommends installing with a dedicated ServiceNow service account so the integration does not break if an individual user leaves your organization.
Installation
Open the ServiceNow integration in Rootly
Log into Rootly as an Admin and navigate to Configurations > Integrations > ServiceNow. Click Setup.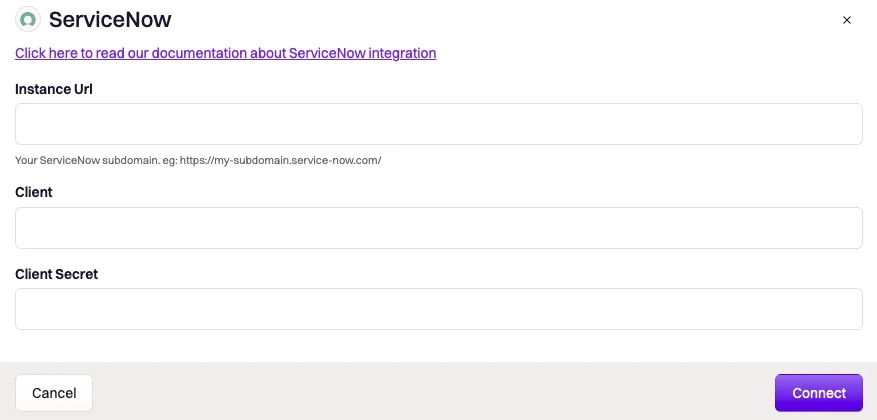
Create an OAuth Application in ServiceNow
Log into your ServiceNow instance as an Admin and navigate to System OAuth > Application Registry.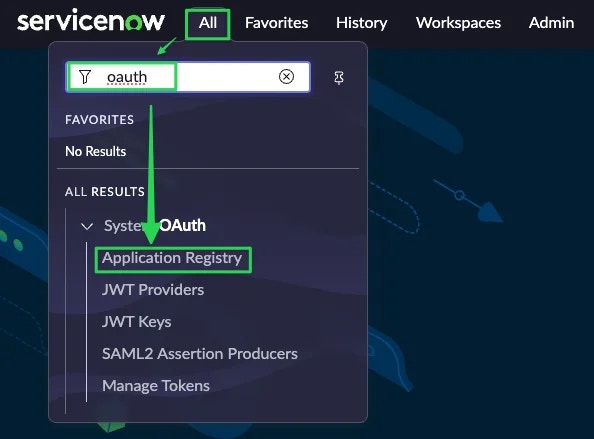
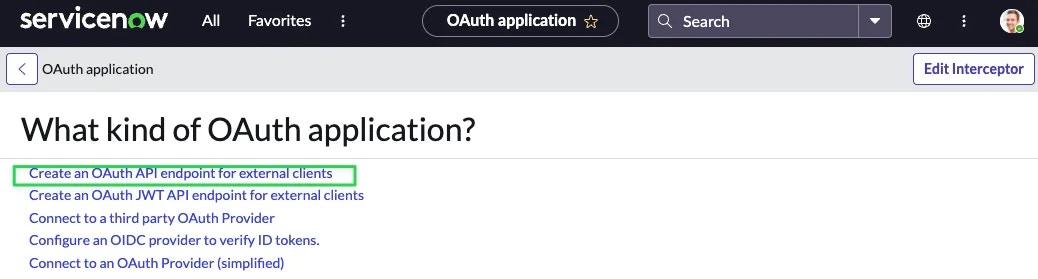
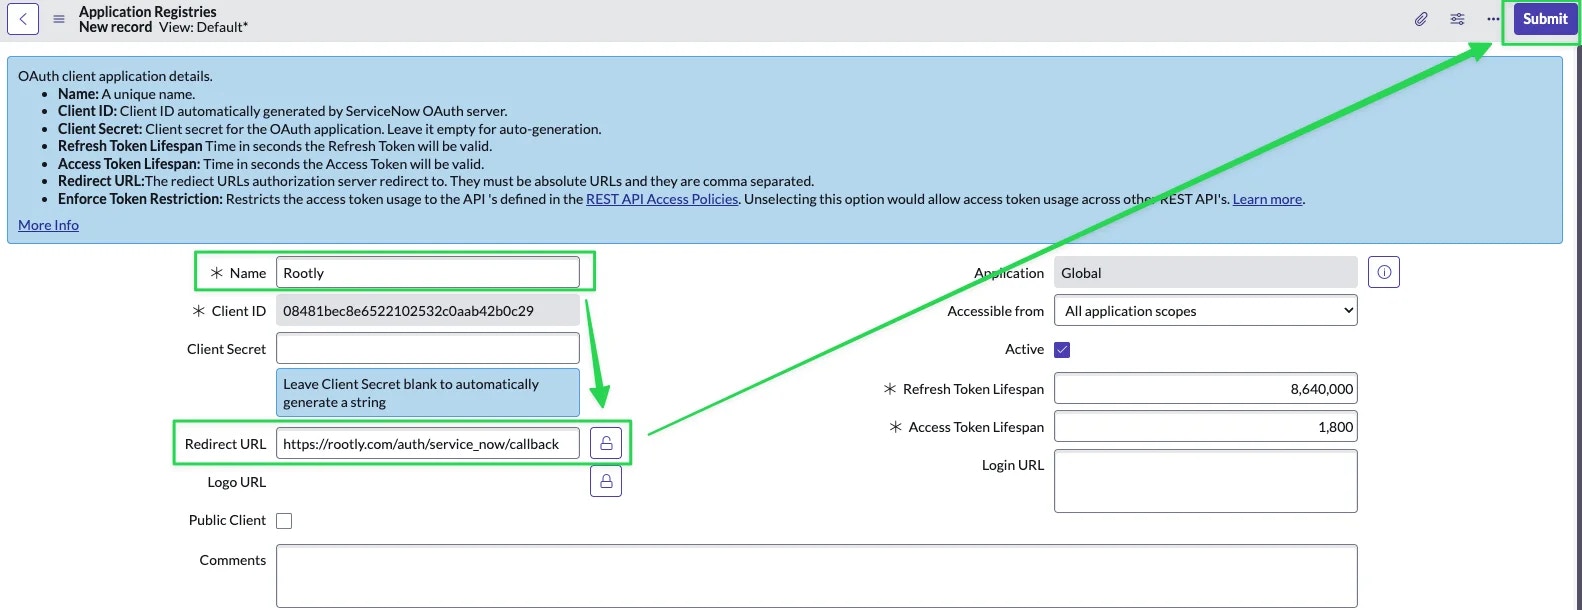
Copy credentials from ServiceNow to Rootly
Open the application you just created in ServiceNow and copy the Client ID and Client Secret.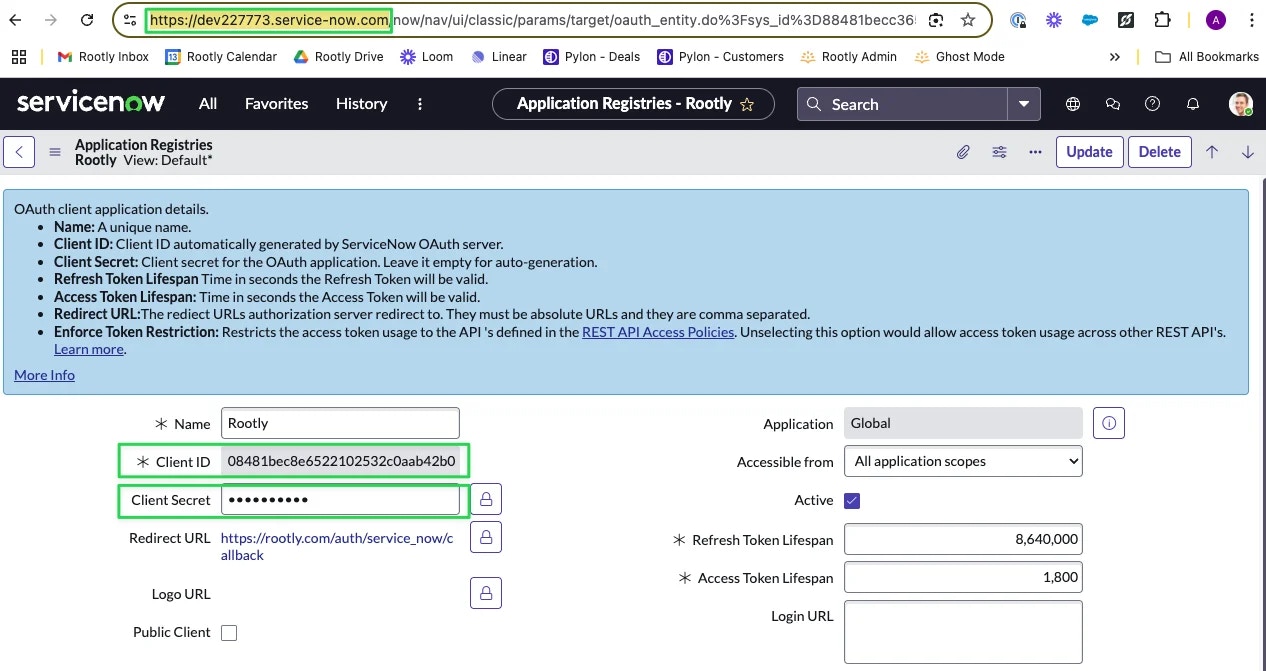
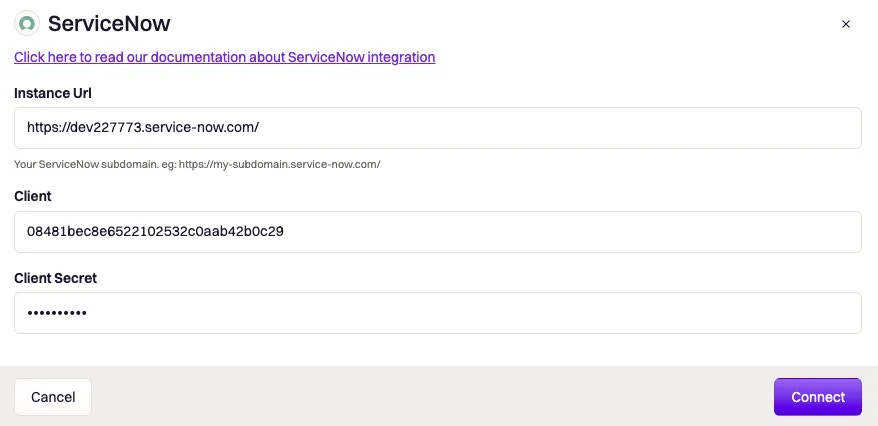
Authorize Rootly in ServiceNow
You will be redirected to ServiceNow to authorize the connection. Click Allow.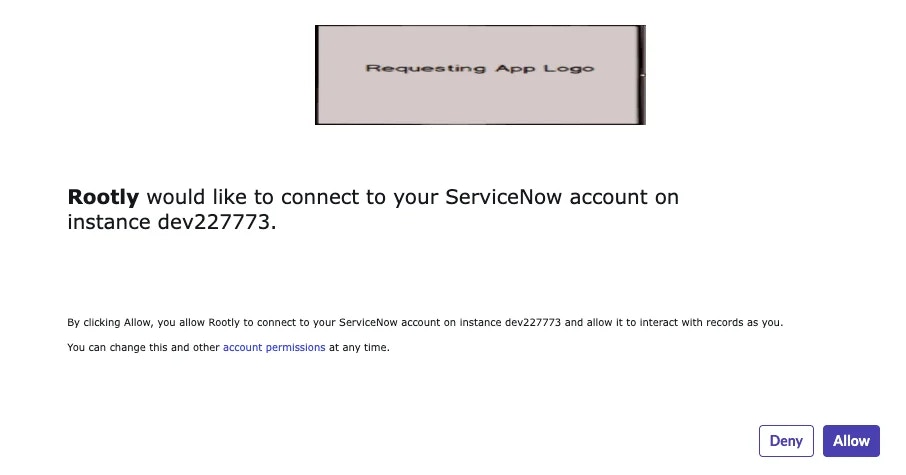
After authorization, the Create a ServiceNow Incident and Update a ServiceNow Incident workflow actions are available in your Genius workflows.
Ingest ServiceNow Events
To receive ServiceNow incident events as Rootly alerts, configure a Business Rule in ServiceNow to send events to Rootly’s webhook endpoint.Get your webhook URL and secret from Rootly
In Rootly, open the ServiceNow integration settings. Copy the Webhook URL and Secret values shown on the integration page.
Create a Business Rule in ServiceNow
In ServiceNow, navigate to System Definition > Business Rules.Click New and fill in: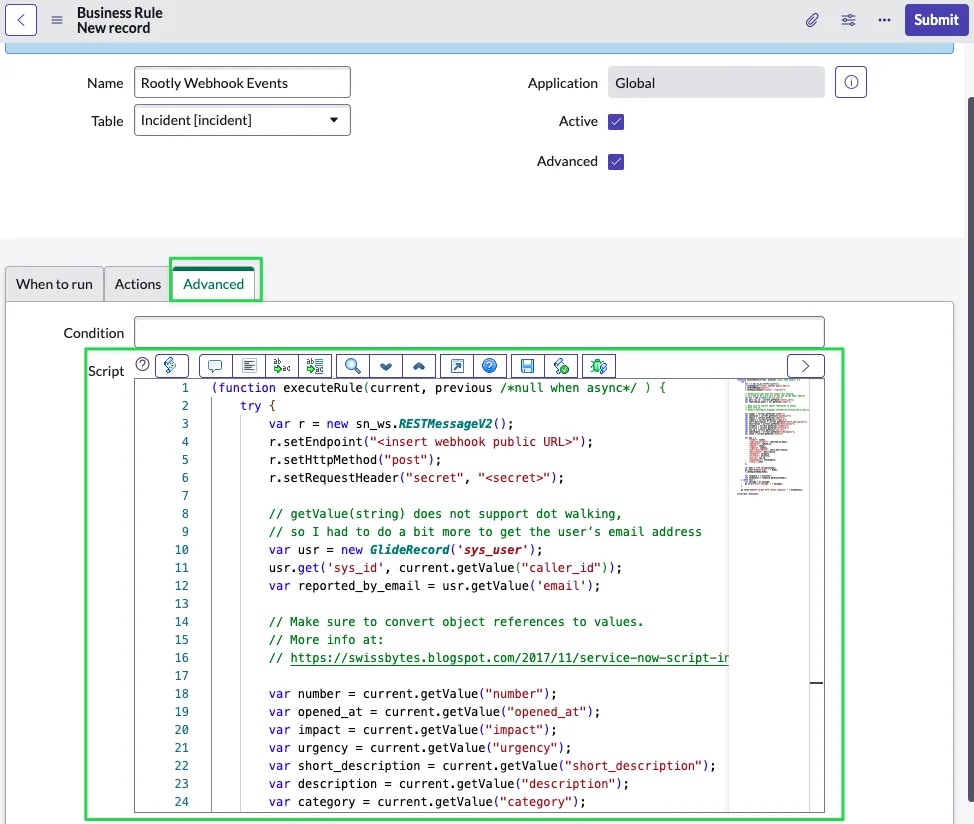
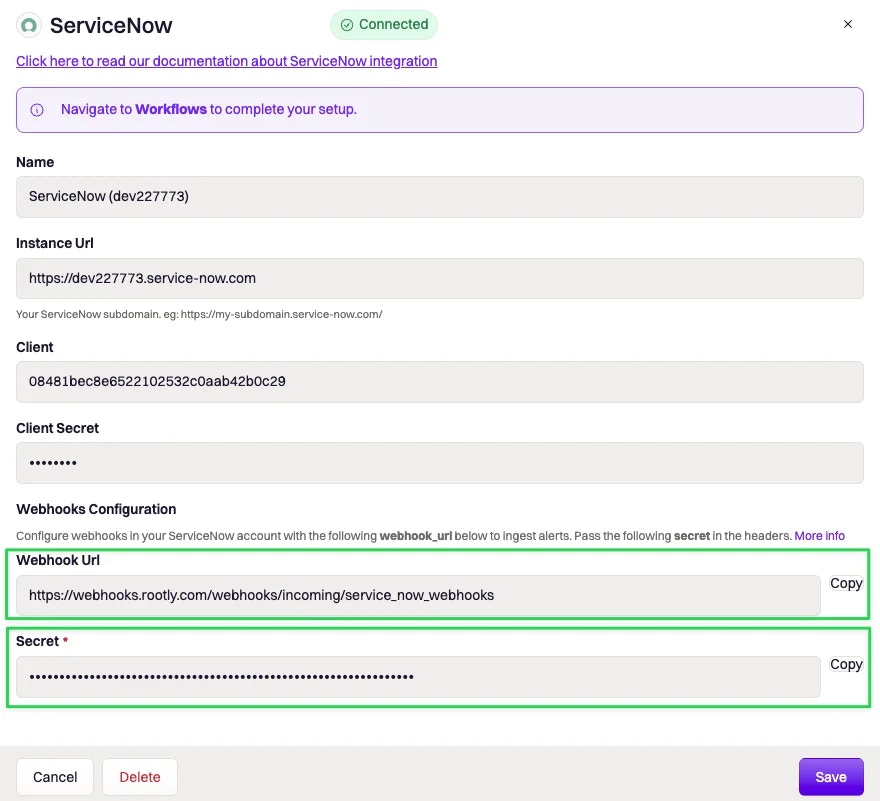
There are multiple Business Rules pages in ServiceNow. Make sure you select the one under System Definition.
<insert webhook public URL> and <secret> with the values from the Rootly ServiceNow integration page.How Alerts Are Mapped
Each ServiceNow event received creates a Rootly alert with the following fields:
Alert labels:
Using ServiceNow as an Alert Source
If your org uses Rootly On-Call, ServiceNow alerts can be used to page on-call users. Once the Business Rule is configured, alerts from ServiceNow will appear in your Rootly alert feed and can trigger on-call notifications through alert workflows.Workflow Actions
The ServiceNow integration provides workflow actions for creating and updating ServiceNow incidents from Rootly. If you are unfamiliar with how Genius workflows work, visit the Workflows documentation first.Create a ServiceNow Incident
This action creates a new record in the ServiceNowIncident table (for example, INC0010001) and links it to the Rootly incident.
Priority mapping (Auto)
Status mapping (Auto)
Available states: New (1), In Progress (2), On Hold (3), Resolved (6), Closed (7), Canceled (8).
Acts As User triggers a ServiceNow user lookup by first name, last name, or email. When matched, Rootly sets
caller_id, close_code, and close_notes automatically. It only applies when the state is set to Resolved (6).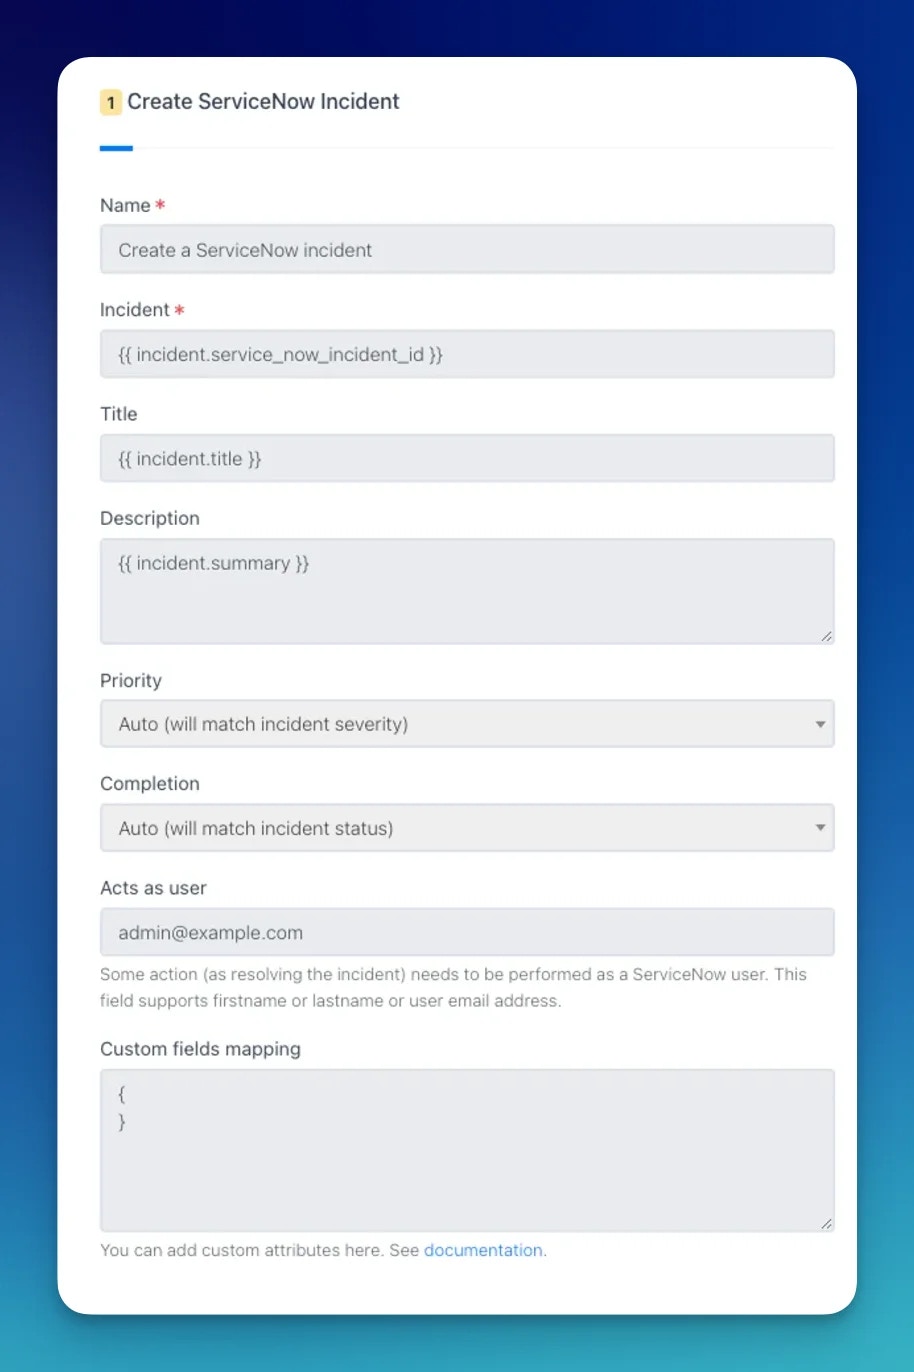
Update a ServiceNow Incident
This action updates an existing record in the ServiceNowIncident table.
When a Create a ServiceNow Incident action runs, Rootly stores the resulting
sys_id and incident number on the incident record. Reference them in subsequent update actions using Liquid variables.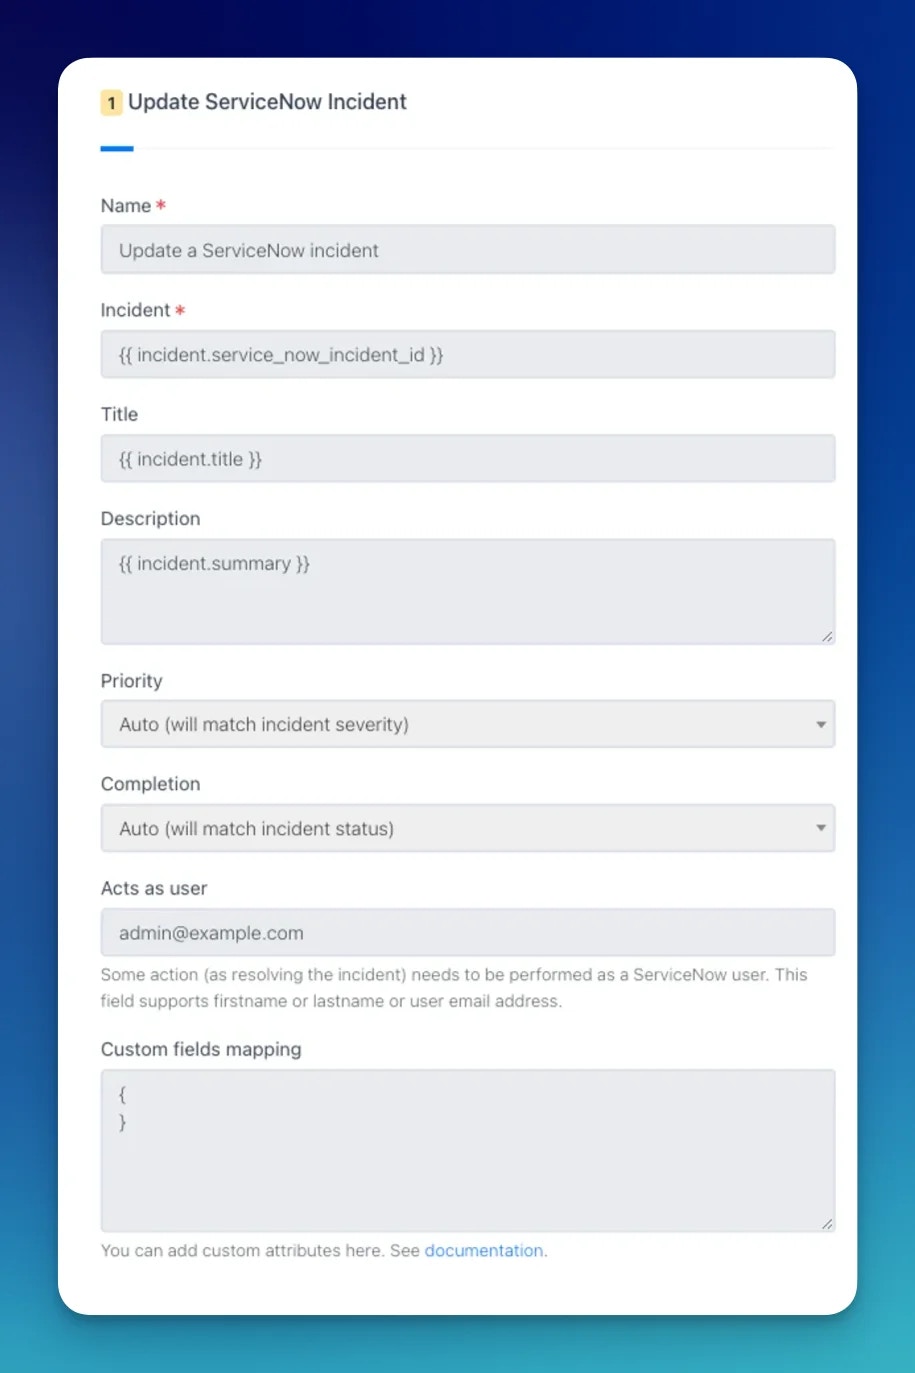
Common Custom Field Examples
Work notes (internal) — visible only to ServiceNow agents, not customers.Add Configuration Items (CIs) to an Incident
Adding configuration items to a ServiceNow incident requires multiple API calls (one per CI). Use Rootly’s HTTP Client workflow action with the ServiceNow Batch API to consolidate them into a single request.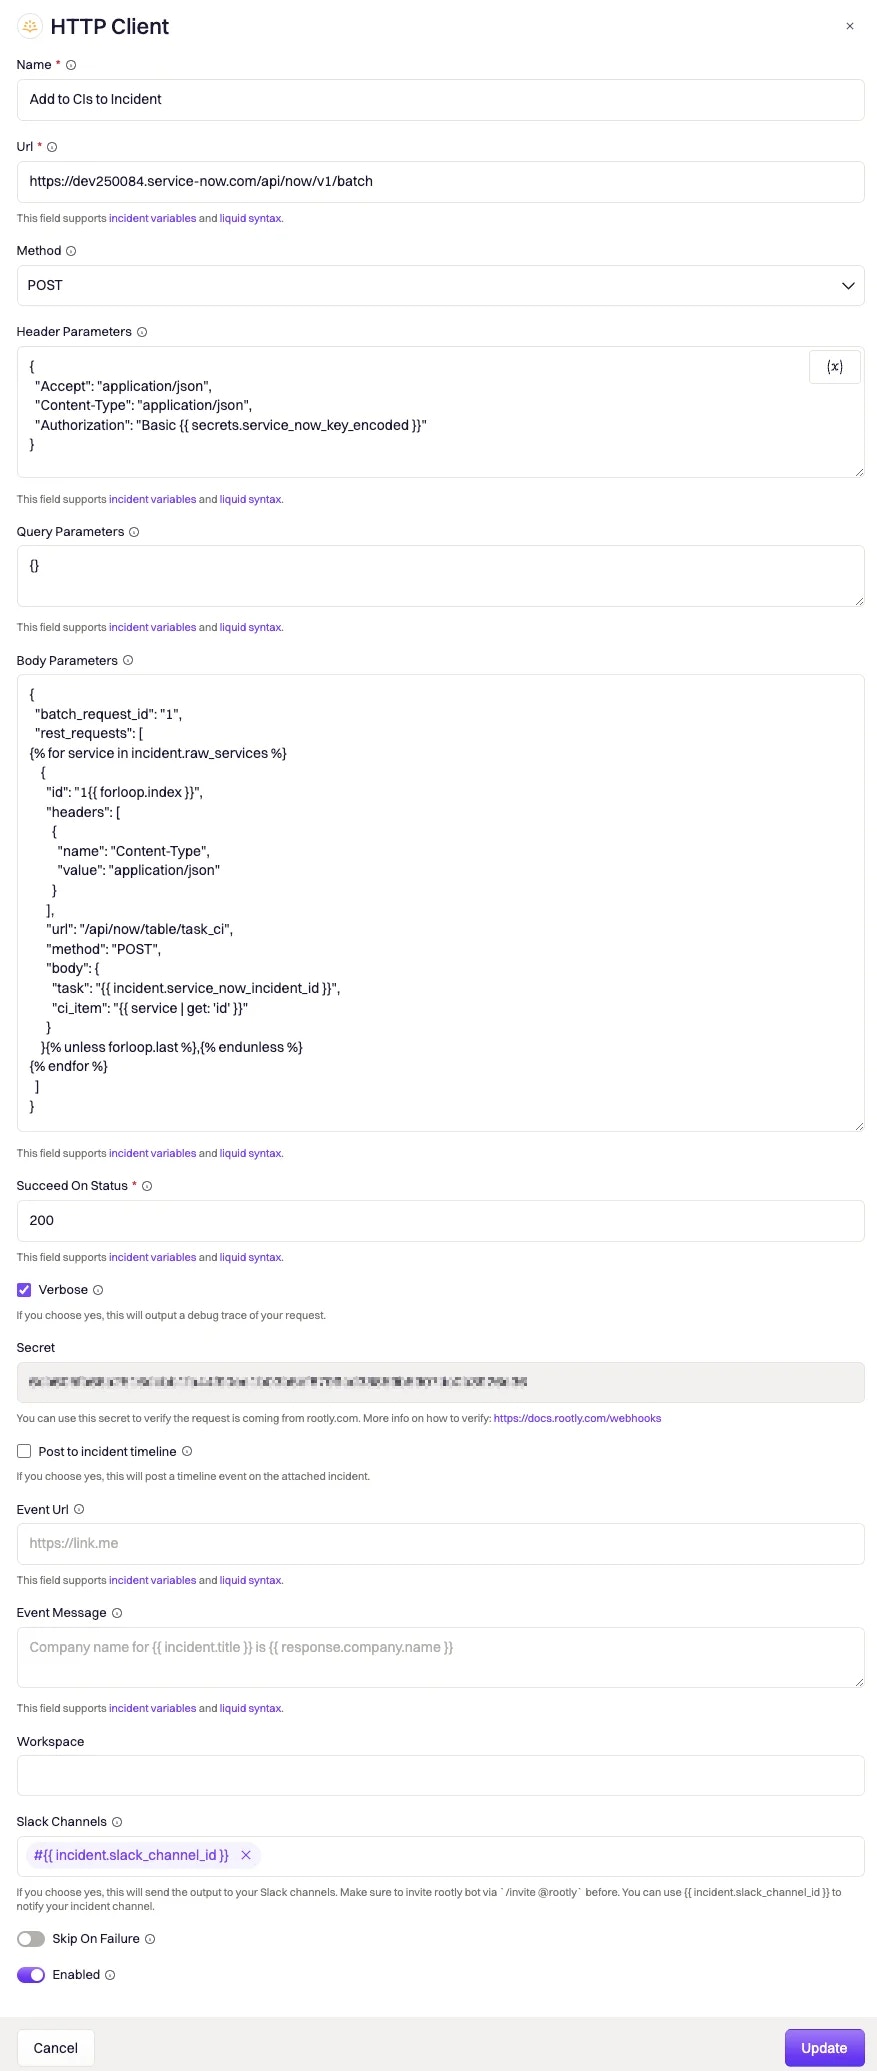
body Base64-encoded. The following Liquid template dynamically generates one batch entry per service associated with the incident:
To use this template, each ServiceNow CI’s
sys_id must be linked to the equivalent Rootly service using the service_now_ci_sys_id field.200. The ServiceNow Batch API returns 200 (not 201) on success.
Sync CMDB Catalogs
Catalog sync makes ServiceNow the source of truth for your Rootly catalogs. Rootly reads the CMDB classes you select and turns them into Rootly services, teams, and custom catalogs, then keeps them current on a daily schedule.Catalog sync requires the Rootly Catalog. If the Sync ServiceNow CMDB catalogs toggle does not appear in your integration settings, contact Rootly support to enable it for your organization.
Enable Catalog Sync
Turn on catalog sync from the ServiceNow integration settings and choose the classes to sync.Open the ServiceNow Integration Settings
In Rootly, navigate to Configurations > Integrations > ServiceNow and click Settings.
Turn On Catalog Sync
Enable Sync ServiceNow CMDB catalogs.
toggle
Sync CMDB configuration items from ServiceNow to Rootly. While this is on, ServiceNow owns the synced records and their synced properties in Rootly.
Select the CMDB CI Classes
Pick one or more classes in CMDB CI classes. Rootly lists the classes it can read from your instance, plus the group classes described below. At least one class is required.
multi-select
required
The ServiceNow tables to sync. Each class maps to a Rootly service, team, or custom catalog according to the class mapping.
Save
Click Save. Rootly starts the first sync immediately and shows a Syncing ServiceNow CMDB progress modal. When it completes, Rootly redirects you to the catalogs page.
Synced services, teams, catalogs, and entities show a Synced from ServiceNow badge. The badge links back to the integration settings.
How Classes Map to Rootly
Each selected class syncs into a different Rootly resource.
Only operational CIs sync, in other words, CIs whose
operational_status is Operational. For Group, only active groups sync.
For every synced service, team, and entity, Rootly sets the name and description from the ServiceNow record and adds these properties, marked as managed by ServiceNow. Rootly adds a property only when the record has a value for it.
Teams from Group (
sys_user_group) receive only Description and ServiceNow URL, because that table has no support group or operational status. Group Members adds no properties. It only manages team membership.
Matching Existing Records
Rootly keys each synced record on the ServiceNowsys_id, so renames in ServiceNow update the same Rootly record. When a CI has no linked record yet, Rootly adopts an existing unlinked service, team, catalog, or entity with the same name before creating a new one. If a name is already taken by a different record, Rootly appends a numeric suffix, for example Payments (2).
Services imported by an earlier CMDB-to-services sync keep their ServiceNow link, so enabling catalog sync updates them in place.
Removals and Cleanup
After a sync completes with no errors, Rootly cleans up records for CIs that ServiceNow no longer returns, because the CI was deleted or is no longer operational:- Records that catalog sync created are removed.
- Records that catalog sync adopted are unlinked from ServiceNow and kept as regular Rootly records.
Team Members
When Group Members is selected, Rootly adds and removes team members to match ServiceNow group membership. Rootly matches each member’s email in ServiceNow to any user in your Rootly organization. Rootly only manages the members it added: members you add manually stay on the team. A member whose email does not match a Rootly user appears on the sync errors page, and the rest of the group still syncs. If Rootly cannot read group membership from ServiceNow, it leaves existing members untouched. Deselect Group Members to stop managing members. Existing members stay on their teams.Protected Records
While catalog sync is on, Rootly protects what ServiceNow owns:- Synced services, teams, catalogs, and entities cannot be deleted in Rootly.
- Properties managed by ServiceNow cannot be edited in Rootly. Add your own properties to a synced catalog and edit them as usual.
- Owner teams that the sync assigned to a service follow the CI’s support group. Owner teams you add manually stay.
Run a Sync Manually
Use Sync now in the integration settings to sync without waiting for the daily schedule. Rootly first checks the catalogs it is about to write into.Click Sync Now
In the ServiceNow integration settings, click Sync now.
Resolve Required Properties
If a target catalog has a required property that ServiceNow does not populate, Rootly shows the Required properties detected modal. For each class, choose one option:Click Confirm and sync. If every class is skipped, nothing syncs.
option
Rootly marks the listed properties as optional and syncs the class. You need permission to edit catalog properties.
option
Rootly removes the class from CMDB CI classes and syncs the remaining classes.
Watch the Progress Modal
The Syncing ServiceNow CMDB modal shows the percentage complete. When the sync finishes, Rootly redirects to the catalogs page. If the sync recorded errors, Rootly redirects to the sync errors page instead.
Sync Errors
A problem with one CI does not stop the sync. Rootly records the failure and continues with the next record. When a sync has errors, the integration settings show a View sync errors button, and the Synced from ServiceNow badge shows a warning icon. The ServiceNow Sync Errors page lists each error with the entity, its class, the operation that failed, the error message, and when it occurred. Search the list to find a specific record, and click Sync again after fixing the cause. Each new full sync clears the previous errors.Troubleshooting
The catalog sync toggle is missing from the integration settings
The catalog sync toggle is missing from the integration settings
Catalog sync requires the Rootly Catalog and must be enabled for your organization. Contact Rootly support to turn it on.
Sync completed but a class has no records in Rootly
Sync completed but a class has no records in Rootly
For CMDB CI classes, Rootly only syncs CIs whose
operational_status is Operational. For Group, Rootly only syncs active groups. Check the status of the records in ServiceNow. Also confirm the OAuth application’s user has read access to the table. A table Rootly cannot read appears on the sync errors page.Team members are not syncing
Team members are not syncing
Members sync only when Group Members is selected in CMDB CI classes, and only for teams that came from Group or Group (CMDB CI) in the same sync. Each member’s email in ServiceNow must match a user in your Rootly organization. Unmatched emails appear on the sync errors page.
Sync status shows failed
Sync status shows failed
A failed sync usually means Rootly could not authenticate to ServiceNow, for example an expired OAuth token that could not be refreshed. Rootly does not remove any records when a sync fails. Reconnect the integration if needed, then click Sync now.