Introduction
The ServiceNow integration connects Rootly with your ServiceNow instance bidirectionally. Rootly can create and update ServiceNow incidents through workflow actions, and ServiceNow can send incident events to Rootly as alerts using Business Rules. With the ServiceNow integration, you can:- Automatically create ServiceNow incidents from Rootly incidents
- Update ServiceNow incident priority, state, and custom fields as incidents evolve
- Receive ServiceNow incident events as Rootly alerts to trigger on-call paging
- Sync ServiceNow CMDB business applications to Rootly services
Before You Begin
Before setting up the integration, make sure you have:- A Rootly account with admin permission to manage integrations
- A ServiceNow instance with admin access
- Permission to create OAuth Application Registry entries in ServiceNow
We recommend installing with a dedicated ServiceNow service account so the integration does not break if an individual user leaves your organization.
Installation
Part 1: Connect Rootly to ServiceNow (OAuth)
Open the ServiceNow integration in Rootly
Log into Rootly as an Admin and navigate to Configurations > Integrations > ServiceNow. Click Setup.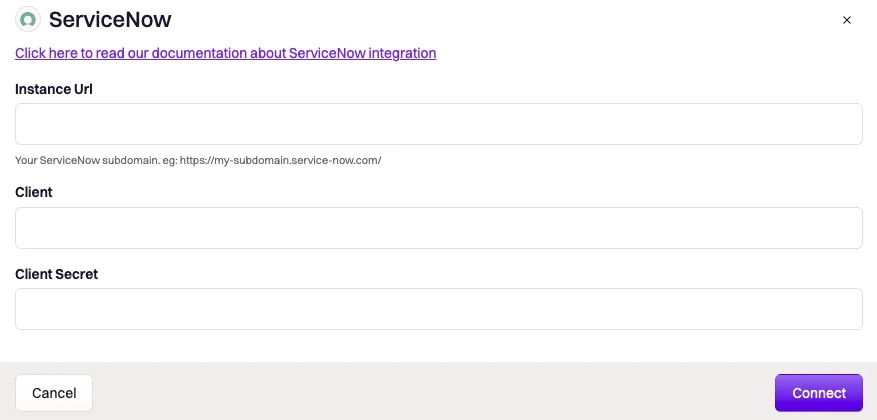
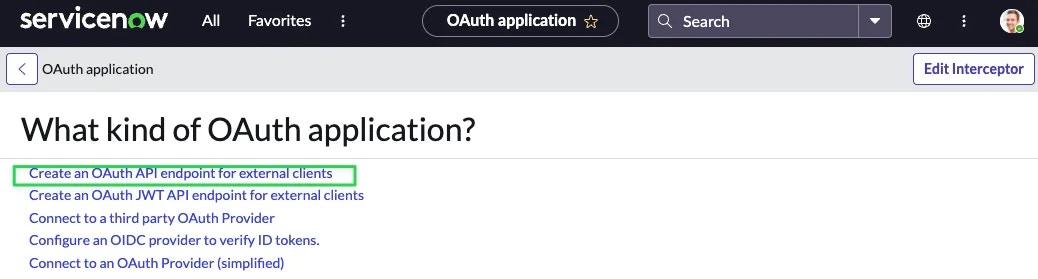
Create an OAuth Application in ServiceNow
Log into your ServiceNow instance as an Admin and navigate to System OAuth > Application Registry.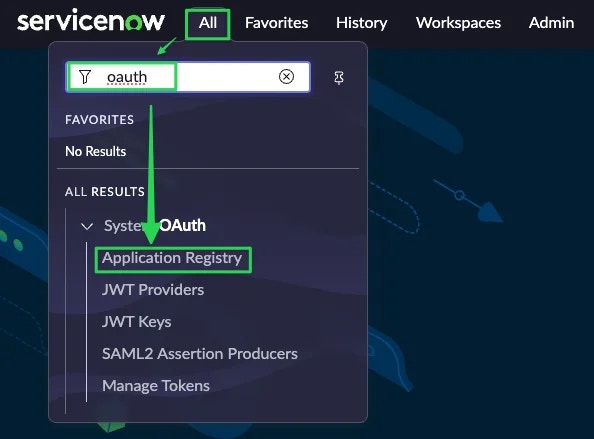
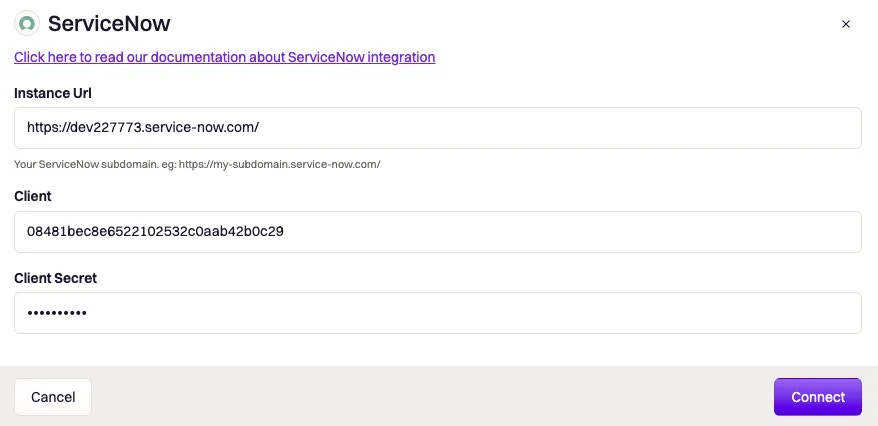
Copy credentials from ServiceNow to Rootly
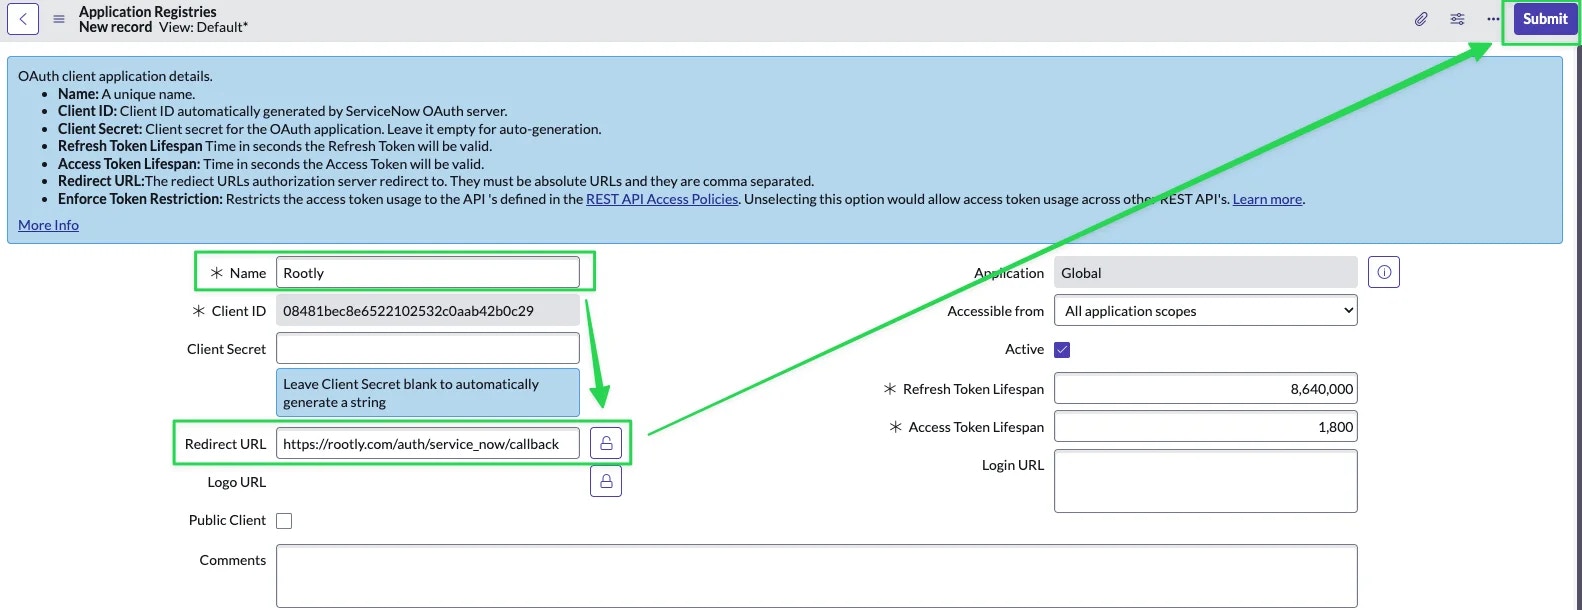
Open the application you just created in ServiceNow and copy the Client ID and Client Secret.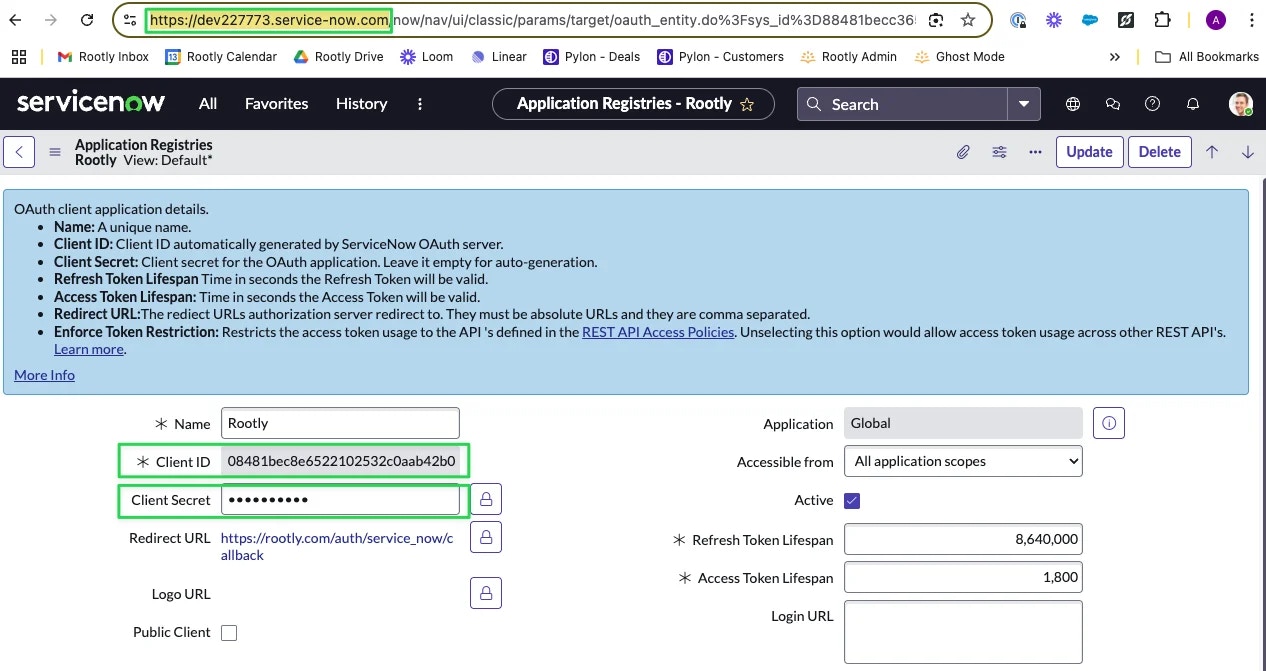
When copying the Client Secret, you may need to unmask it by clicking the lock icon. Masked values sometimes do not copy correctly in ServiceNow.
Authorize Rootly in ServiceNow
You will be redirected to ServiceNow to authorize the connection. Click Allow.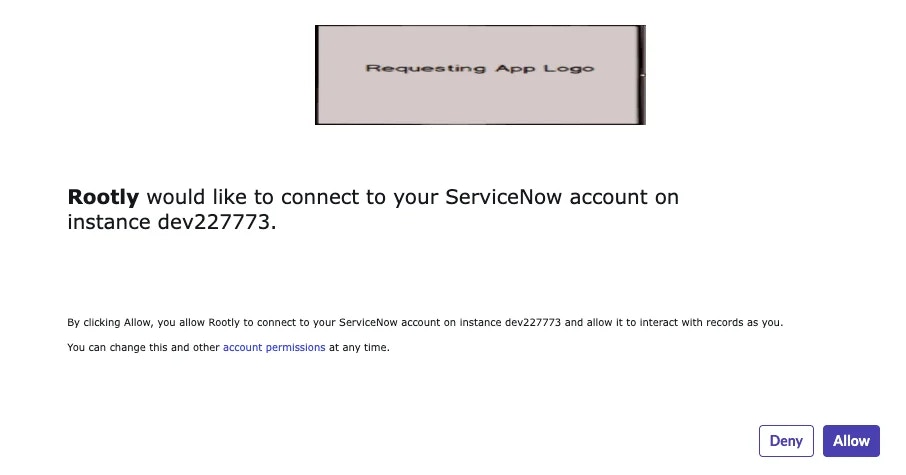
After authorization, the Create a ServiceNow Incident and Update a ServiceNow Incident workflow actions are available in your Genius workflows.
Part 2: Receive ServiceNow Events in Rootly (Webhooks)
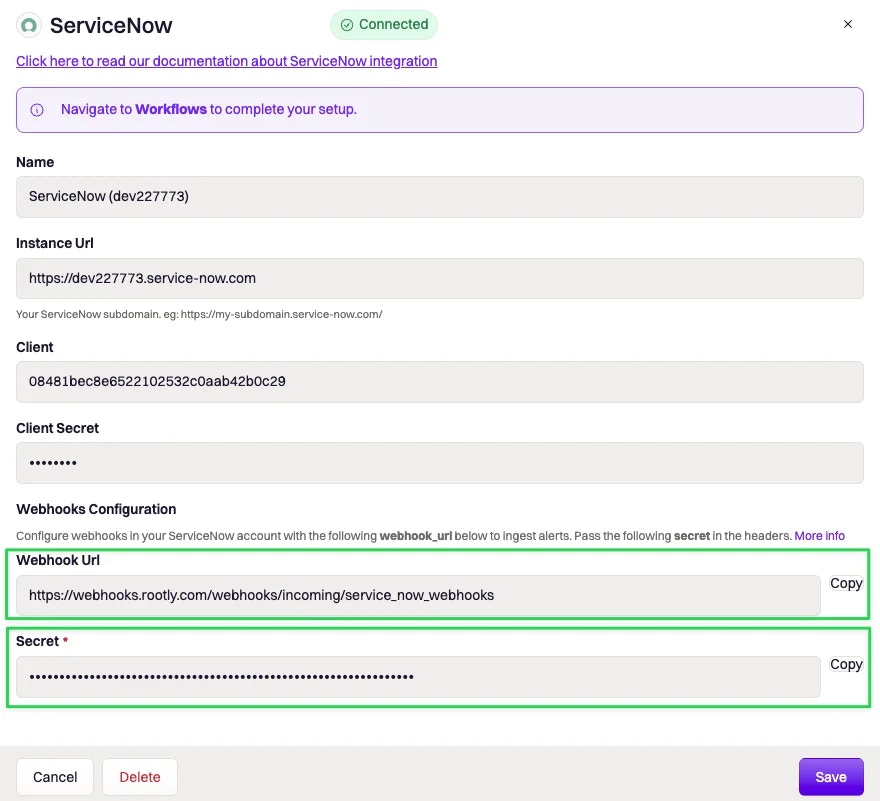
To receive ServiceNow incident events as Rootly alerts, configure a Business Rule in ServiceNow to send events to Rootly’s webhook endpoint.Get your webhook URL and secret from Rootly
In Rootly, open the ServiceNow integration settings. Copy the Webhook URL and Secret values shown on the integration page.
Create a Business Rule in ServiceNow
In ServiceNow, navigate to System Definition > Business Rules.Click New and fill in: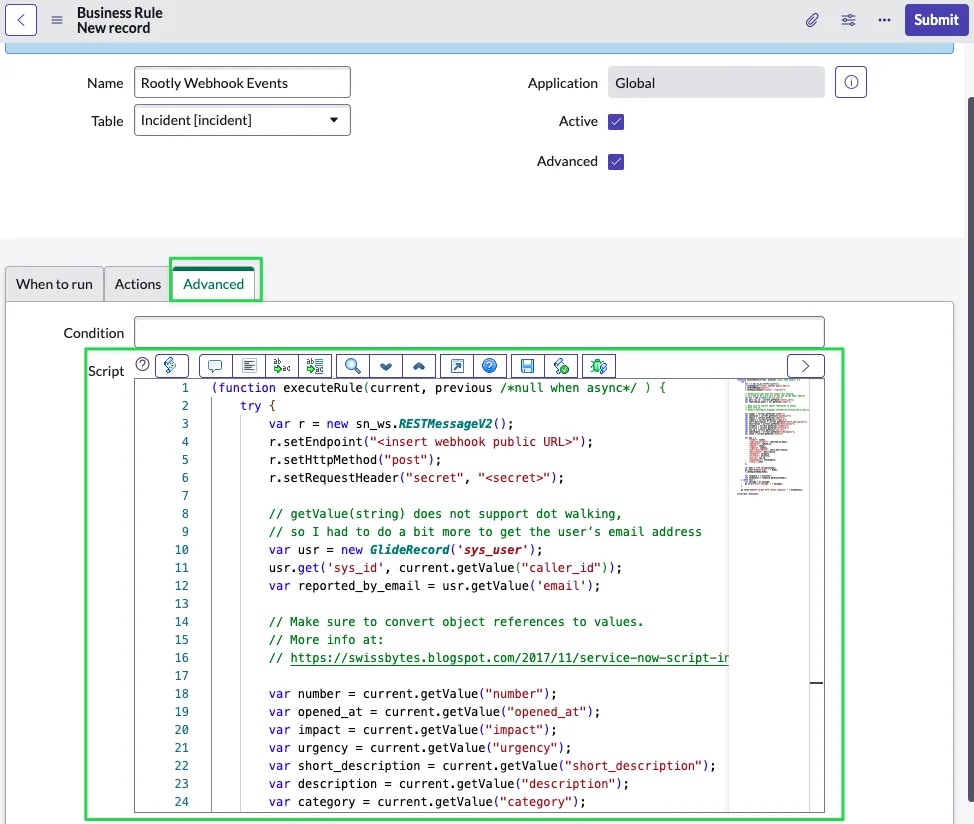
There are multiple Business Rules pages in ServiceNow. Make sure you select the one under System Definition.
<insert webhook public URL> and <secret> with the values from the Rootly ServiceNow integration page.How Alerts Are Mapped
Each ServiceNow event received creates a Rootly alert with the following fields:
Alert labels: