Before You Begin
Rootly supports two Confluence deployment types:Confluence Cloud
1
Open Rootly Integrations
Navigate to Configuration → Integrations in your Rootly dashboard.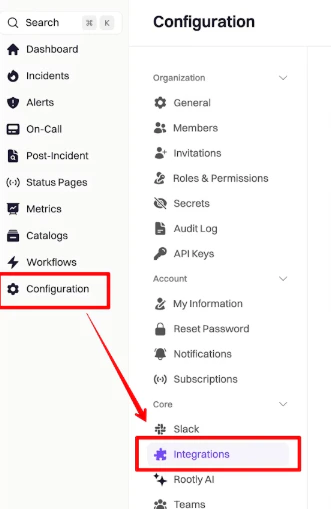
2
Find and set up Confluence
Search for Confluence and click Setup.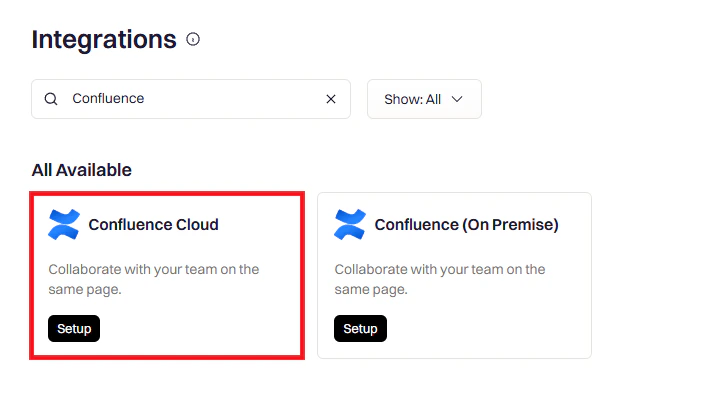
3
Authorize in Confluence
You will be redirected to Confluence to grant Rootly permission. Rootly requests the following OAuth scopes: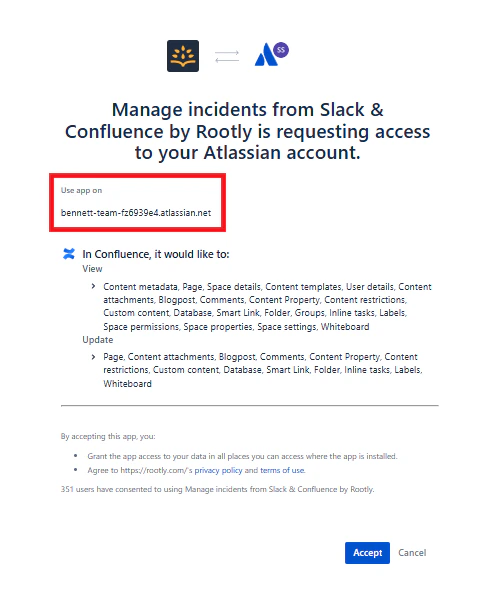
read:user:confluence— Read your user profileread:content-details:confluence— Read page contentwrite:content:confluence— Create and update pagesread:template:confluence— Read Confluence templatesread:space:confluence— Read spaceswrite:page:confluence— Create pages
4
Accept permissions
Click Accept to authorize Rootly.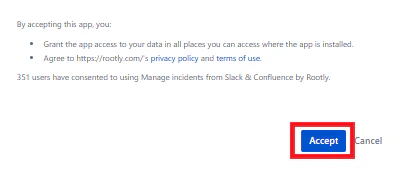
5
Confirm connection
You will be redirected back to Rootly with a confirmation message. The integration status will show Connected.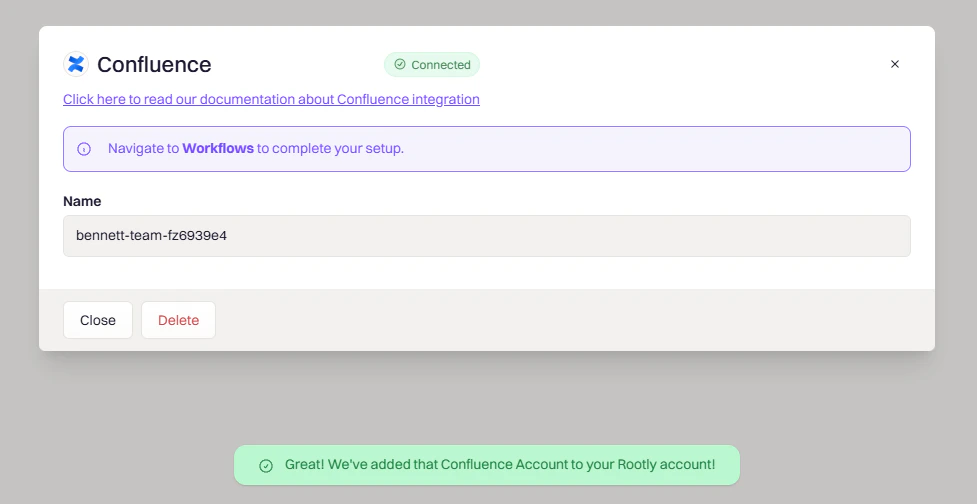
Confluence Server / Data Center
For on-premise deployments, Rootly supports authentication via Basic auth or a Personal Access Token (PAT).- Navigate to Configuration → Integrations and search for Confluence Server.
- Click Setup and enter your Confluence Server URL (e.g.
https://confluence.yourcompany.com). - Enter your credentials:
- Basic auth: Username and password
- PAT: Generate a token in Confluence under Profile → Personal Access Tokens and paste it into the Token field
- Click Save and Test Connection to verify.
Personal Access Tokens expire after 90 days by default. Rootly will notify you when a token is approaching expiry. Rotate the token in Confluence and update it in Rootly to avoid workflow failures.
Setting Up Retrospective Templates in Confluence
You can create custom templates in Confluence that Rootly will apply when generating retrospective pages. Rootly fetches available templates from your Confluence space via the API.1
Open your Confluence space
Navigate to the Space in which you want to create the template and open Space Settings.
2
Access templates
Under Look and Feel, select Templates.
3
Create a new template
Click Create New Template and build out your template content. Liquid syntax is fully supported — use the Liquid Variable Explorer to test variables.
4
Save the template
Save the template. It will appear in the Confluence Template dropdown when configuring a Create Confluence Page workflow action.
Uninstall
To remove the Confluence integration:- Go to Configuration → Integrations and find Confluence
- Click the Connected button to reveal the disconnect option
- Click Delete
Disconnecting the integration does not delete existing Confluence pages created by Rootly. Those pages remain in your Confluence space.
Troubleshooting
Server / Data Center connection fails
Server / Data Center connection fails
Verify the Confluence Server URL is reachable from Rootly’s servers — check any firewall or allowlist rules. Confirm SSL certificates are valid. For PAT authentication, ensure the token has not expired and has the required permissions.