What You Can Do
Incident Channels
Real-Time Updates
Notifications & Alerts
User Management
Slash Commands
/rootly commands.Block Kit Messages
How It Works
Connect Slack
Configure Automations
Incidents Auto-Managed
Before You Begin
- Rootly account with admin permissions
- Slack workspace admin or owner access
- For Enterprise Grid: Org Owner or Org Admin role
Required Permissions
Rootly requests the following Slack permissions during installation.Bot Scopes (Core)
Bot Scopes (Core)
Bot Scopes (AI & Assistant)
Bot Scopes (AI & Assistant)
User Scopes
User Scopes
Enterprise Grid Scopes
Enterprise Grid Scopes
Installation
Slack Free, Pro, or Business+
Slack Enterprise Grid
Slack Free, Pro, and Business+
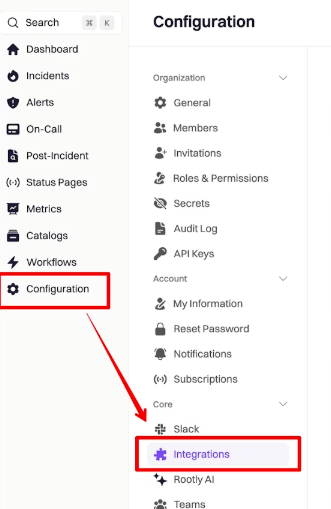
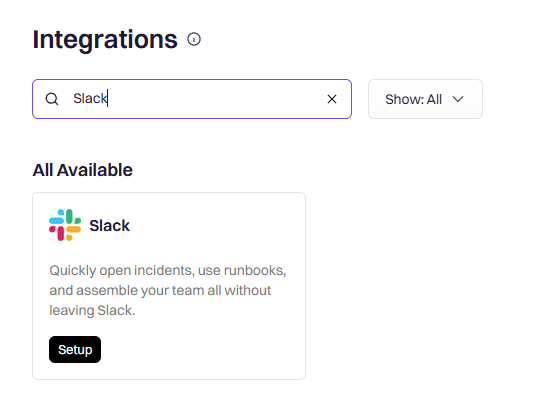
Open Integrations
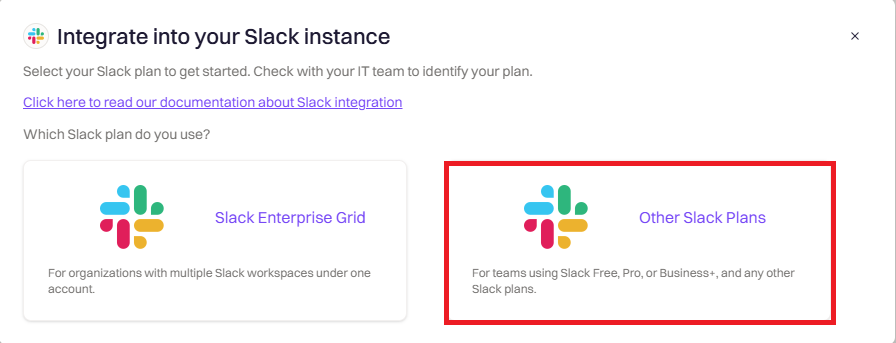
Select Your Plan
Authorize in Slack
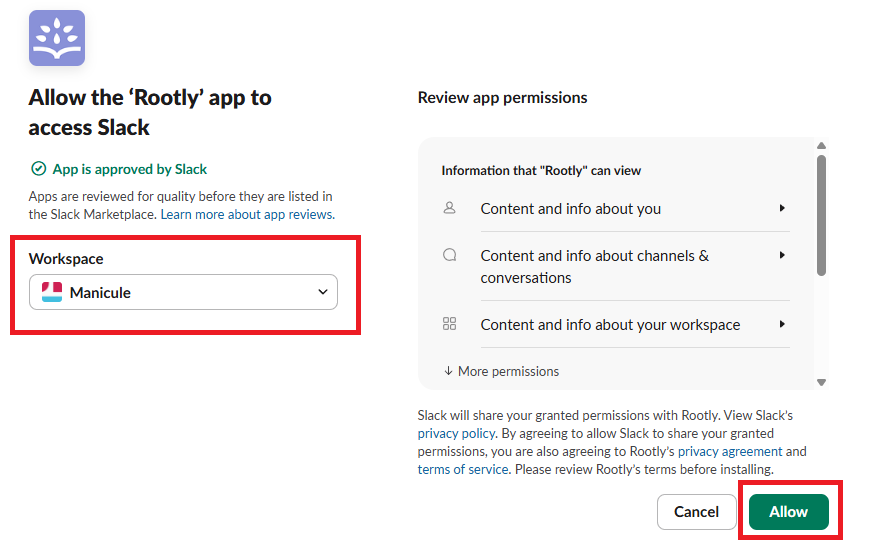
Confirm Connection
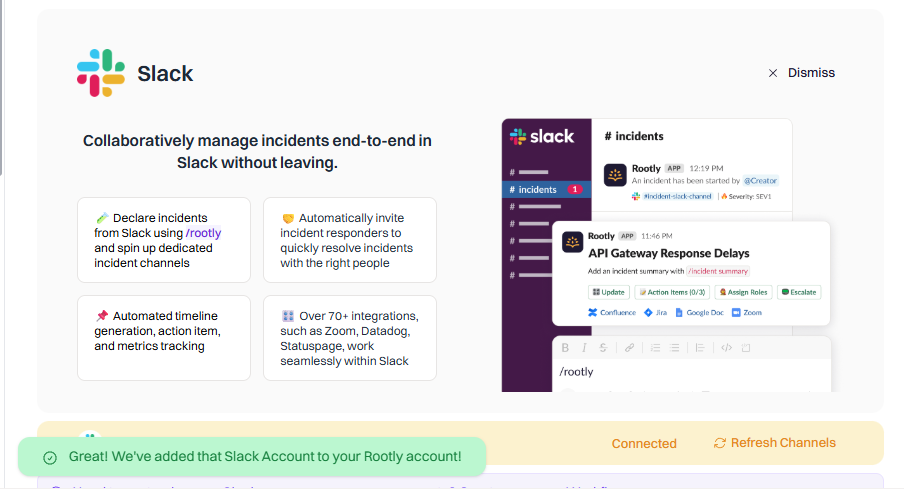
Slack Enterprise Grid
With Enterprise Grid, you install Rootly at the organization level, then add it to specific workspaces. This lets you manage incidents across multiple workspaces from a single Rootly account.Open Integrations
Select Enterprise Grid
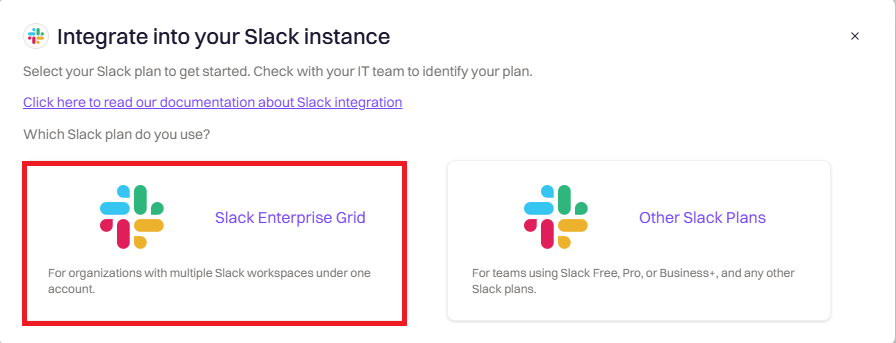
Install at Organization Level
Add Rootly to Workspaces
- Go to Organization Settings → Integrations → Installed Apps
- Find Rootly in the list
- Click the menu and select Add to more workspaces
- Select which workspaces should have access to Rootly
- Click Next and Allow
Configure Incident Workspace
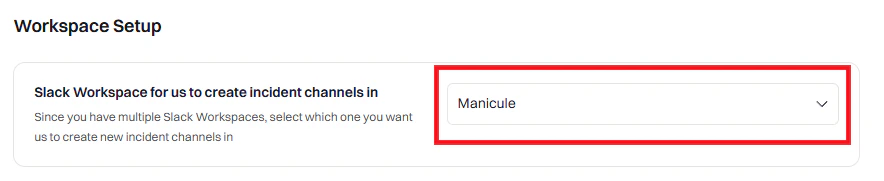
- Select incident workspace — Choose which workspace will host your dedicated incident channels
- Set announcement channel — Choose where new incidents are announced
- Set alerts channel — Choose where alerts are posted
- Click Save Settings
Set Up Shared Channels (Recommended)
- In Slack, create or select a channel (for example,
#incidents) - Click the channel name → Settings → Workspaces with access
- Add all workspaces that should see incident announcements
Switching From a Workspace Install to Enterprise Grid
If Rootly was originally installed at the workspace level (Slack Free / Pro / Business+) and you now want Enterprise Grid features — multi-workspace channel selection, Forms across workspaces, pin-to-timeline, shared cross-workspace incident channels — you need to disconnect and reinstall Rootly with the Enterprise Grid option selected.What’s Preserved Across The Reinstall
Disconnecting and reinstalling the Slack integration only resets the Slack integration’s own settings — the broader Rootly configuration around it stays intact. Specifically:Procedure
Disconnect The Existing Slack Integration
Reconnect And Choose Enterprise Grid
Reconfigure Slack-Specific Settings
- The incident workspace (which workspace hosts dedicated incident channels)
- The announcement channel
- The alerts channel
- Smart Defaults as needed
Verify Existing Workflows Still Reference Valid Channels
Re-Claiming the /incident Command
During the transition to Rootly, you may experience issues where Rootly’s bot claims the/incident Slack command from your existing bot. When multiple bots use the same command, Slack will always invoke the one that was installed most recently. If this interrupts your transition, follow the steps below to reclaim the /incident command from Rootly.
Option 1 (Recommended)
This is the safest method — it does not result in a blackout period where your old bot is unusable.- Ensure Rootly is already installed on your Slack workspace.
- Update your old bot’s Slack command from
/incidentto a placeholder (for example,/incident-1). - Save the change.
- Change the command of your old bot back to
/incident.
/incident command.
Option 2
If Option 1 does not work, try this option. There will be a brief blackout period where your old bot is unusable.- Ensure Rootly is already installed on your Slack workspace.
- Uninstall your old bot.
- Reinstall your old bot.
/incident command from Rootly.
Enterprise Grid Consideration
If the issue persists after trying the above, check your installation scope. If Rootly is installed at the Slack organization level (Slack Enterprise Grid), you must also reinstall your old bot at the Slack organization level, not just at the workspace level.Refresh and Reconnect
Most Slack problems that look like a broken integration are a stale cache or a missing scope, and both have a dedicated refresh control. None of the three below disconnect the integration or touch your existing configuration.Refresh Connection
Refresh Channels
Refresh Workspaces
Refresh Connection
Go to Configuration → Integrations → Slack. Refresh Connection sits in the banner at the top of the page. This re-runs the Slack installation so the app is reinstalled with its current scope list. It does not disconnect first, and your workspace selection, channels, Smart Defaults, and workflows all survive it. A Slack workspace admin approves the install on the Slack side, the same as the original setup. Reach for it when:- A Rootly feature needs a Slack scope your install predates. Turning on Rootly AI in Slack is the most common case, since the AI agent added scopes such as
assistant:writeandchannels:history. - The integration page shows a banner asking you to update permissions.
- Slack actions started failing with permission errors that no Slack-side setting explains.
Refresh Channels
Refresh Channels sits next to Refresh Connection in the same banner. A Refresh channels link also appears beside every channel picker in Smart Defaults, so you can refresh without leaving the field you are configuring. Rootly keeps a cached list of your Slack channels rather than querying Slack on every dropdown. The cache rebuilds automatically twice a day, at 09:00 and 21:00 UTC. Refreshing runs the same rebuild on demand as a background job, so allow a few minutes before the channel appears. Reach for it when a channel that exists in Slack is missing from a Rootly dropdown, which usually means the channel was created since the last cache rebuild.Refresh Workspaces
Go to Configuration → Integrations → Slack → Configure. Refresh Workspaces sits under the workspace selector. This reloads the list of Slack workspaces Rootly can see and applies immediately. It matters on Enterprise Grid, where the set of workspaces changes independently of the Rootly install. Reach for it after adding Rootly to another workspace through Organization Settings → Integrations → Installed Apps in the Slack admin portal. The new workspace will not appear in Rootly’s selector until the list is refreshed.Which One Do I Need
Smart Defaults
Smart Defaults let you configure automatic Slack behaviors without building custom workflows. Enable channel creation, set up announcements, configure reminders, and manage archiving from a single settings panel.- New customers have Smart Defaults enabled by default and can manage incidents immediately
- Existing customers have Smart Defaults disabled to avoid disrupting existing workflow configurations
- Go to Configuration → Integrations → Slack
- Click Configure
- You’ll see the Smart Defaults panel
Workspace Setup
Notifications
Configure what messages Rootly sends to Slack.Team Notifications

Default Announcement Channel
Default Announcement Channel
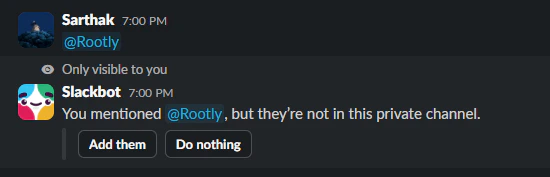
@Rootly in the channel to invite the bot.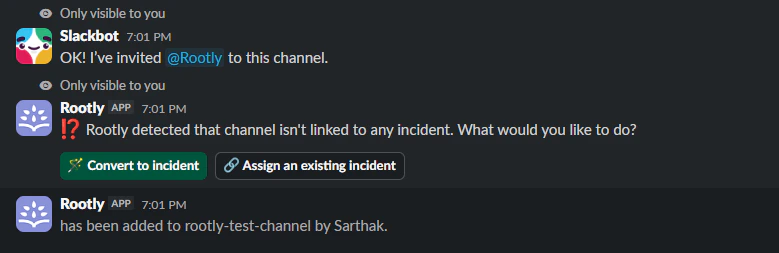
High Severity Notifications
High Severity Notifications
Default Alerts Channel
Default Alerts Channel
Smart Reminders
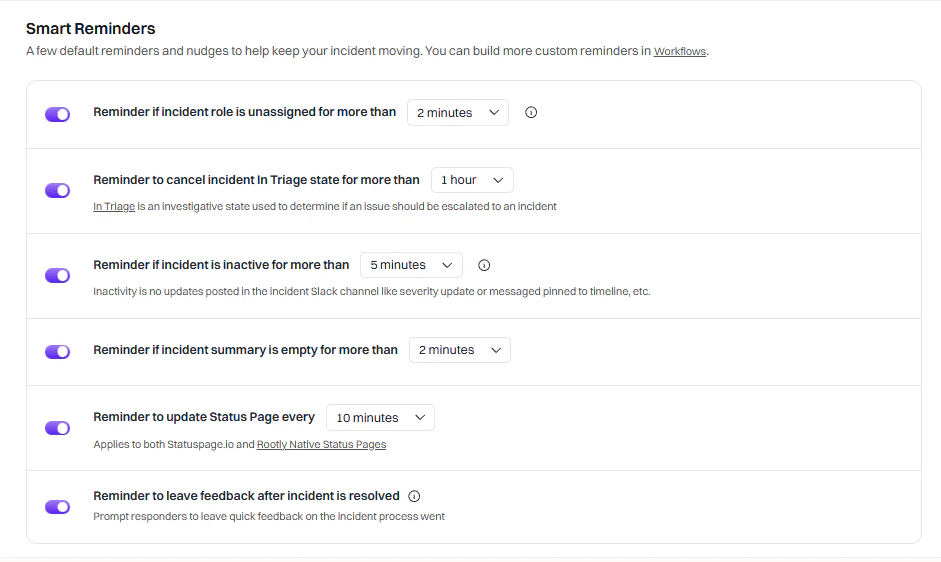
- Updating the incident summary ✓
- Using 📌 emoji to log timeline events ✓
- Regular messages in the channel ✗ (does not count)
Updates

Advanced

Incident Channel
Configure how incident channels are created and managed.Channel Settings

inc-{{ incident.sequential_id }}-{{ incident.title | slugify }}{{ incident.severity | downcase }}-{{ incident.created_at | date: '%Y%m%d' }}-{{ incident.title | truncate: 20 }}
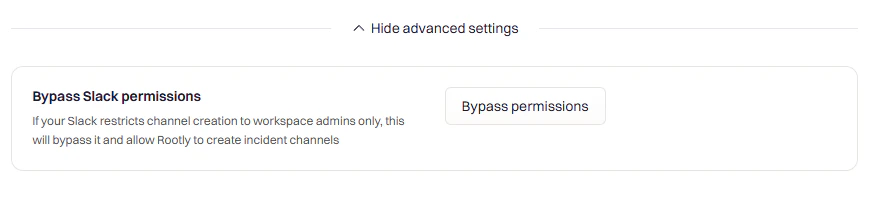
Bypass Slack Permissions
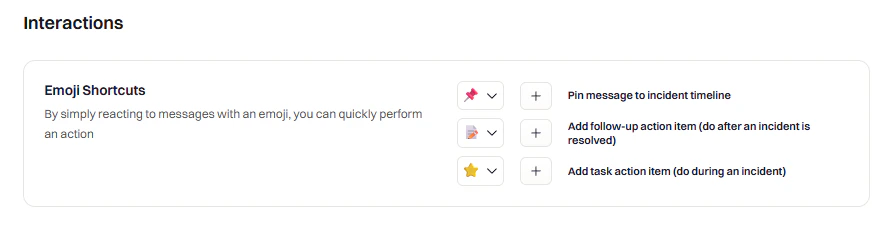
Emoji Shortcuts
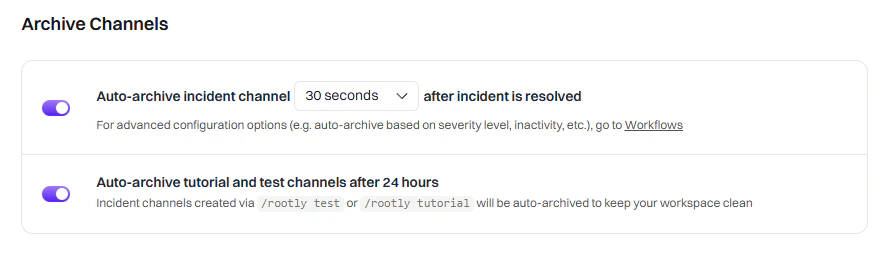
Archive Channels
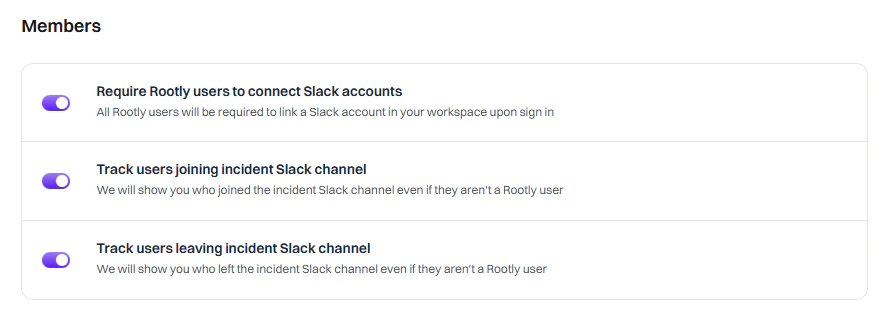
Member Tracking
When to Use Custom Workflows Instead
Smart Defaults cover common scenarios, but use Custom Workflows when you need:- Conditional logic — Different channels for different teams or severities
- Multi-step automations — Invite users, then send a message, then add a bookmark
- Integration actions — Create Jira tickets, page PagerDuty, update status pages
- Scheduled/delayed actions — Send reminders at specific intervals
- Custom message formatting — Use Block Kit for rich interactive messages
Workflows
Smart Defaults
Custom Workflows
Available Actions
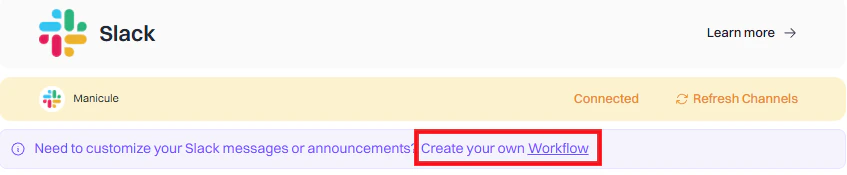
Custom workflows give you full control over Slack automation. Create channels, send messages, invite users, and more based on triggers and conditions you define. If you’re new to workflows, see the Workflows documentation first.Create a Workflow
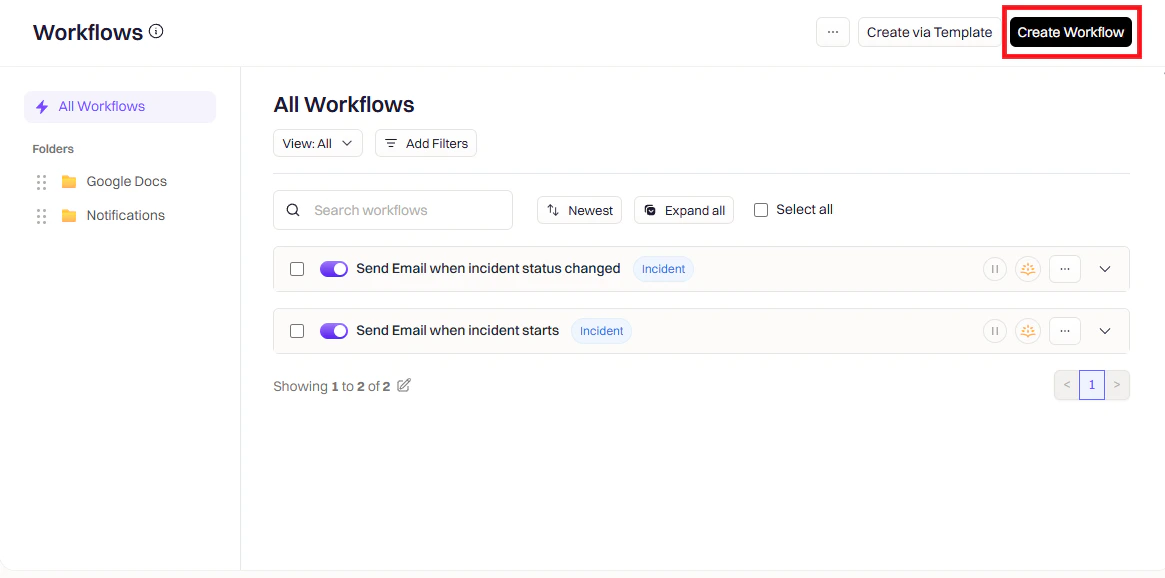
Open Workflows
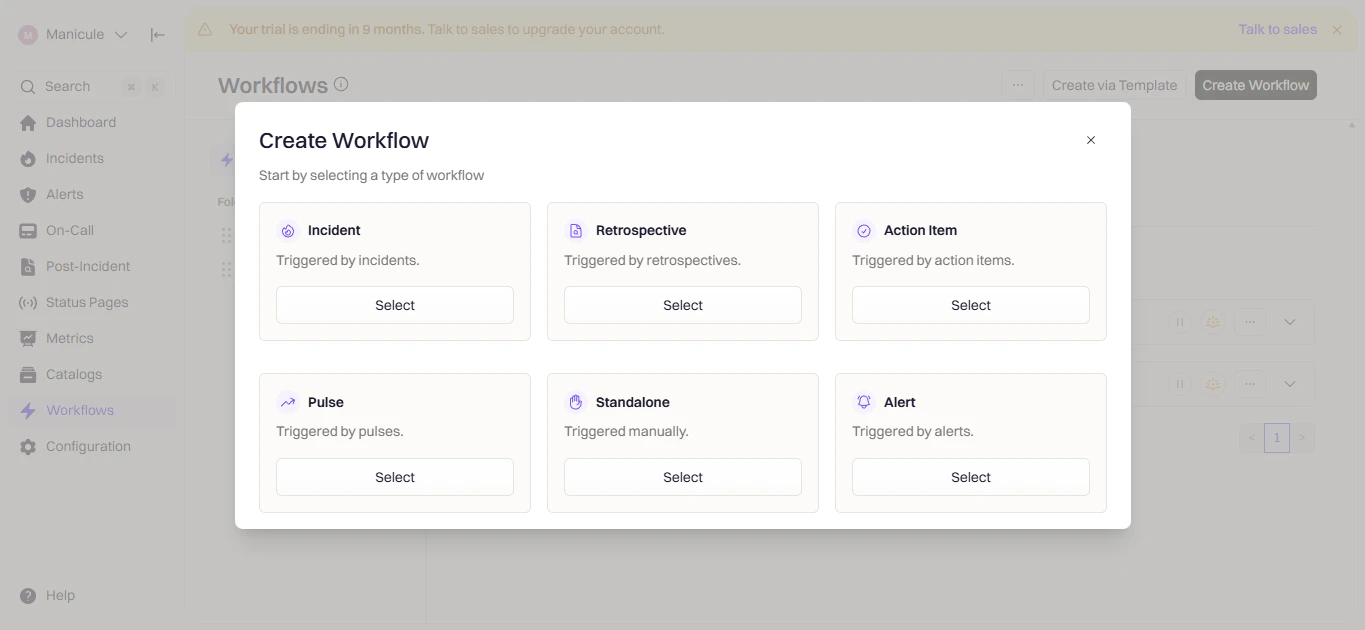
Choose Workflow Type
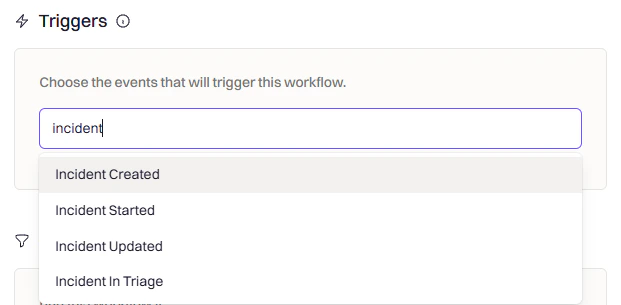
Configure Triggers
Add Conditions (Optional)
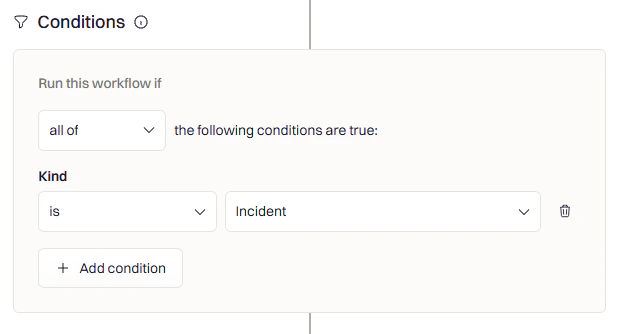
- Severity — Only for SEV-1 or SEV-2
- Team/Service — Only for specific teams
- Incident Type — Only for actual incidents (not tests)
- Environment — Only for production
Add Actions
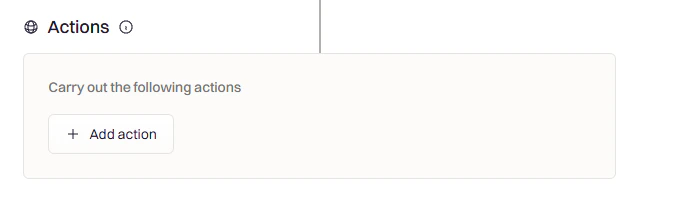
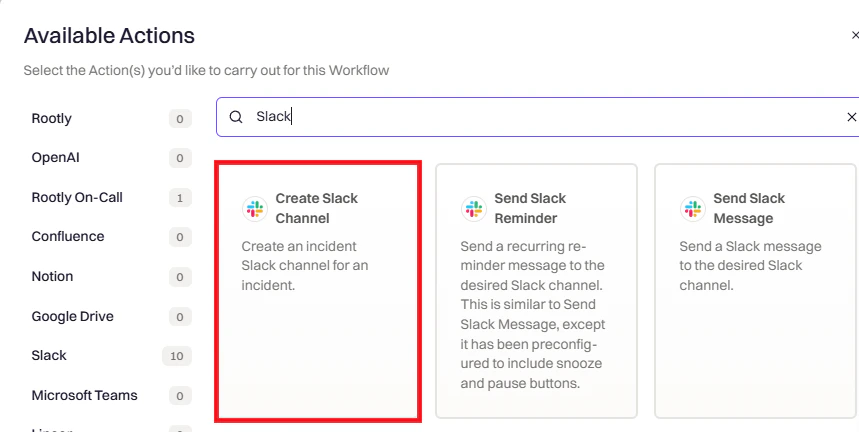
Action Reference
Create Slack Channel
Create Slack Channel
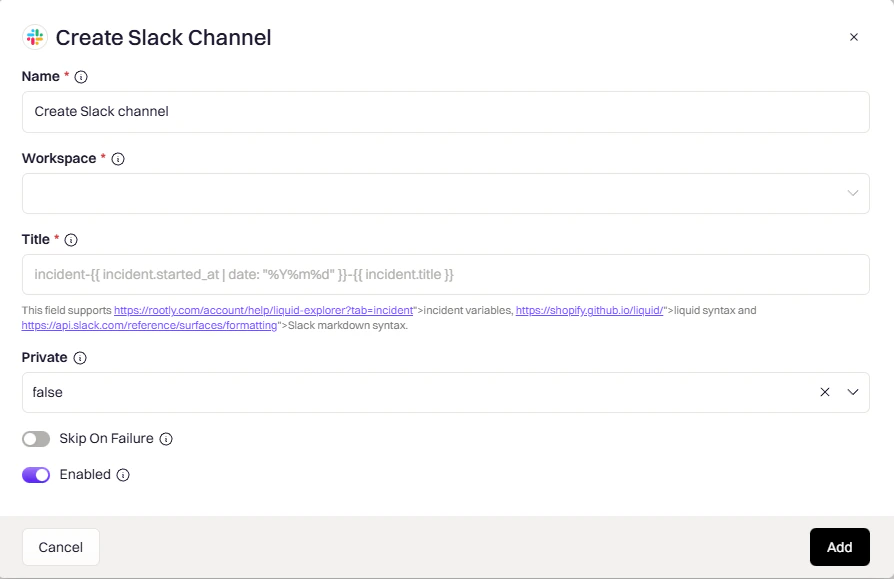
incident-{{ incident.sequential_id }}-{{ incident.title }}auto— matches incident privacy (private incident → private channel)true— always privatefalse— always public
Send Slack Message
Send Slack Message
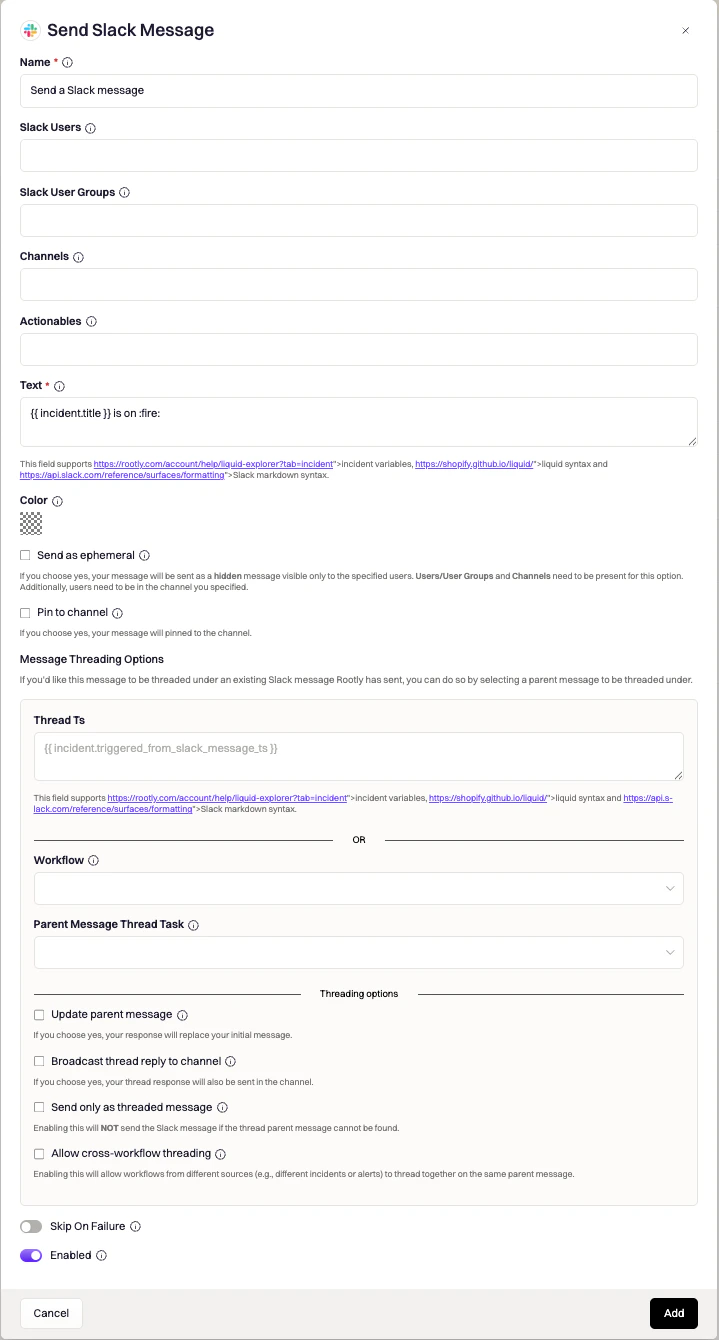
{{ incident.slack_channel_id }} for the incident channel. Supports Liquid variables.Send Slack Reminder
Send Slack Reminder
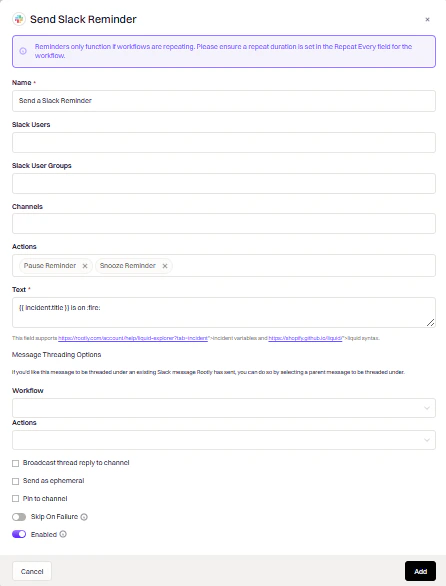
Send Slack Blocks
Send Slack Blocks
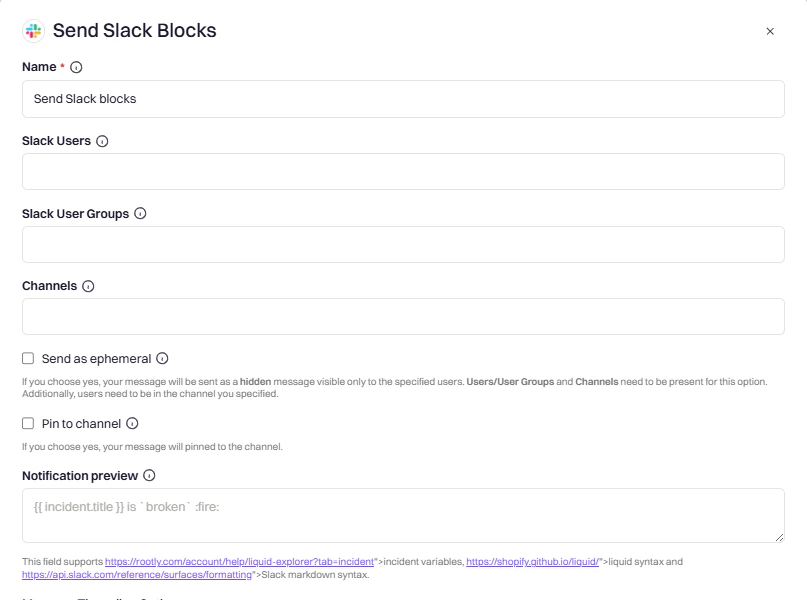
action_id values:Invite to Slack Channel
Invite to Slack Channel
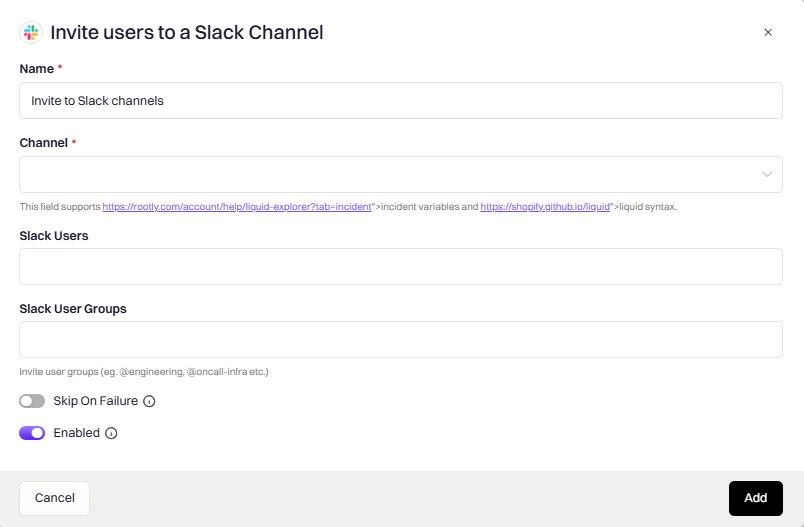
{{ incident.slack_channel_id }} for the incident channel. Supports Liquid variables.{{ incident.creator }} for the incident creator.Rename Slack Channel
Rename Slack Channel
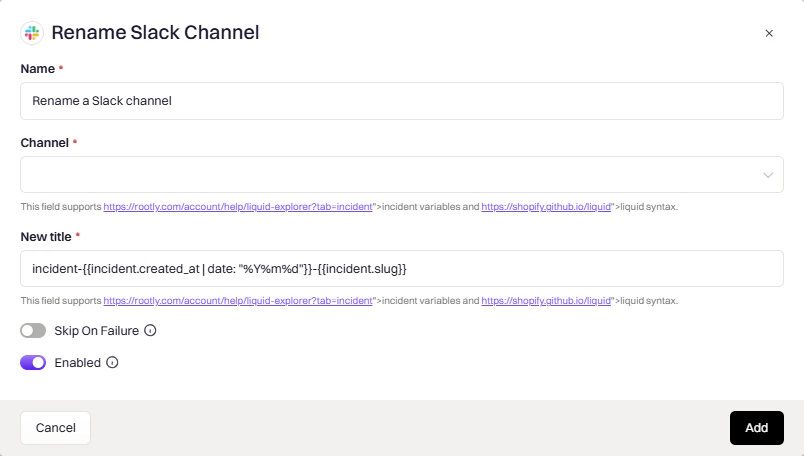
{{ incident.slack_channel_id }}. Supports Liquid variables.resolved-{{ incident.title }}resolved-database-outage).Update Channel Topic
Update Channel Topic
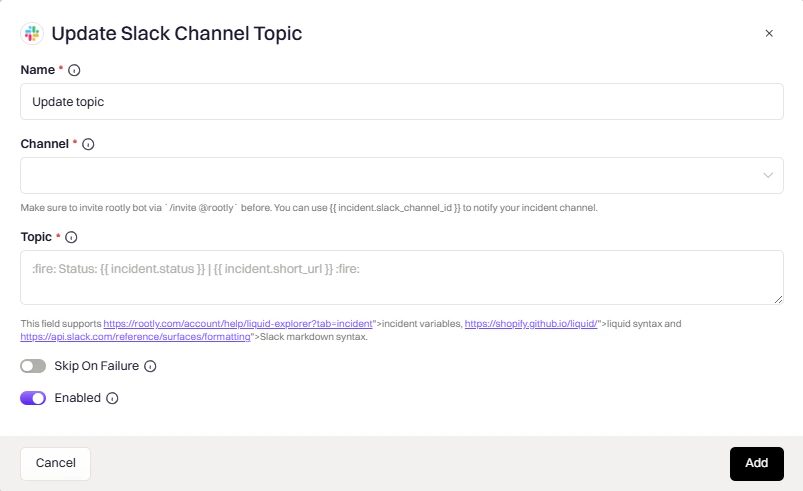
Add Slack Bookmark
Add Slack Bookmark
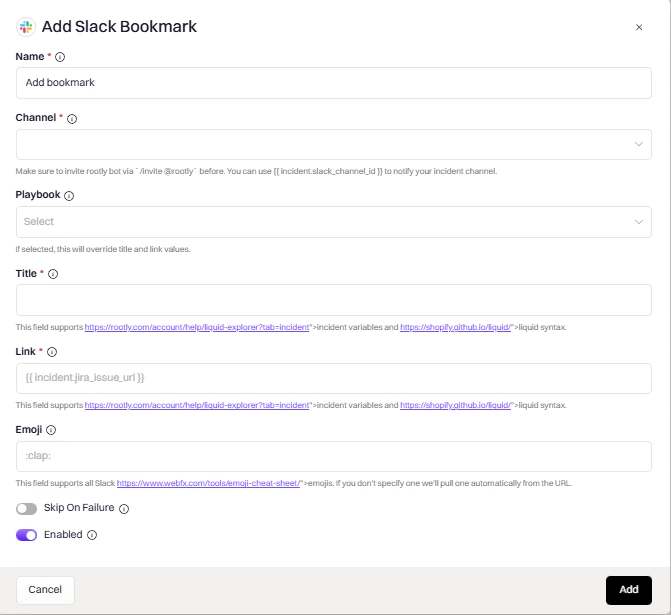
{{ incident.url }}, {{ incident.jira_issue_url }}. Supports Liquid variables.Archive Slack Channel
Archive Slack Channel
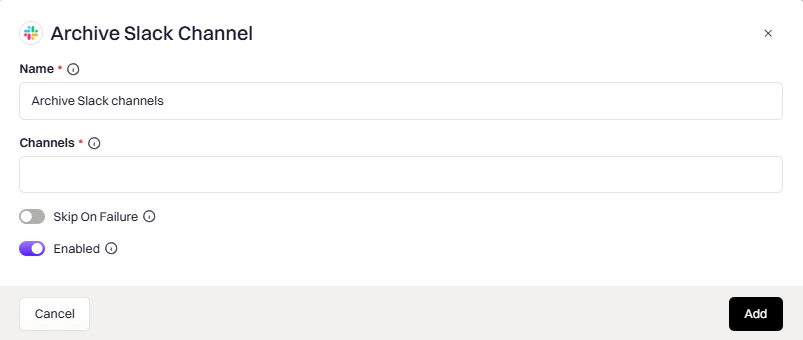
{{ incident.slack_channel_id }}. Supports Liquid variables.Change Channel Privacy
Change Channel Privacy
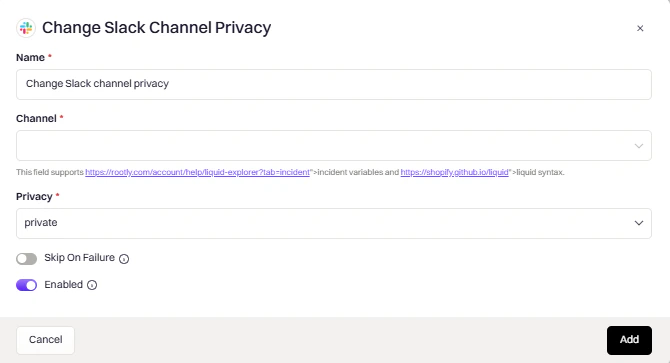
public— make the channel visible to all workspace membersprivate— restrict access to invited members only
Create Slack Channel Canvas
Create Slack Channel Canvas
{{ incident.slack_channel_id }} for the incident channel. Invite Rootly to the channel first. Supports Liquid variables.canvases:read and canvases:write scopes. If Rootly was connected to Slack before these scopes were added, reconnect Slack under Integrations before using them. Some Slack plans don’t allow channel canvases.Update Slack Channel Canvas
Update Slack Channel Canvas
{{ incident.slack_channel_id }} for the incident channel. The channel must have exactly one canvas. Supports Liquid variables.- Append to canvas (default) — add the content at the end of the canvas
- Replace all content — overwrite the entire canvas
Common Liquid Variables
Slash Commands
Getting Started
Create & View Incidents
Update Incidents
Incident Status
Teams & Services
Roles & Assignments
Action Items
On-Call & Paging
Advanced
Command Details
Creating Incidents
Creating Incidents
/rootly new
Opens the incident creation form. Fill in title, summary, severity, and type. Rootly will:- Create a dedicated Slack channel
- Post the initial incident message
- Trigger configured workflows
/rootly test
Same as /rootly new, but the incident is marked as a test and won’t be publicly announced. Use for training and workflow testing./rootly maintenance
Schedule planned maintenance. Maintenance incidents appear in the Rootly web UI and can be published to status pages.Managing Status
Managing Status
/rootly status
Opens a modal to change the incident status (In Triage → Active → Mitigated → Resolved → Closed)./rootly mitigate
Quick action to mark the incident as mitigated. You’ll be prompted to add a comment explaining the mitigation./rootly resolve
Quick action to mark the incident as resolved. You’ll be prompted to add a resolution comment.Action Items
Action Items
/rootly action items to manage this incident’s action items, or /rootly todo (alias /rootly tasks) to see the checklist of items assigned to you.On-Call Commands
On-Call Commands
/rootly oncall
View who’s currently on-call for any schedule. Works with Rootly On-Call and integrated providers (PagerDuty, Opsgenie, VictorOps)./rootly escalate · /rootly call · /rootly page
These three words are aliases for the same command — pick whichever your team prefers. The dialog that opens depends on where you invoke the command:- Inside an incident Slack channel — the escalation dialog opens with the current incident’s context. If your team has an external paging integration (PagerDuty, Opsgenie, VictorOps, PagerTree), the dialog routes the page through that provider; otherwise it uses Rootly On-Call.
- In any other channel — the manual page dialog opens for ad-hoc paging (Rootly On-Call schedules, teams, services, functionalities, or escalation policies).
@-mentioning them after the command: /rootly page @alice @bob. Non-mention trailing text is ignored.If a team admin has enabled a custom Slack paging workflow (Team Settings), the alias set is disabled and these commands won’t respond.Channel Conversion
Channel Conversion
/rootly convert
Convert an existing Slack channel into a Rootly incident channel. Use this when an incident discussion is already happening in a channel before it’s formally declared.Run this command in the channel you want to convert (not an existing incident channel).Troubleshooting
Workspace not showing during installation
Workspace not showing during installation
- You’re not an Admin or Owner of the workspace
- Workspace doesn’t allow members to install apps
- Logged into wrong Slack account
- Ask a Slack Admin/Owner to install Rootly
- Check Slack → Settings & Permissions → App Management
- Try in a private browser window with the correct Slack account
Enterprise Grid option not showing
Enterprise Grid option not showing
- Your org isn’t on Enterprise Grid
- You’re not an Org Owner/Admin
- Logged into a non-Grid workspace
- Verify your plan at Slack’s pricing page
- Ask an Org Owner/Admin to complete installation
- Log into your Enterprise org, not a standalone workspace
Channels not being created
Channels not being created
- Rootly bot lacks channel creation permissions
- Workspace restricts channel creation to admins
- Enable Bypass Slack permissions in Smart Defaults
- Verify Rootly has
channels:manageandgroups:writescopes - Check workflow logs for specific errors
Can't see incidents from other workspaces (Enterprise Grid)
Can't see incidents from other workspaces (Enterprise Grid)
- Announcement channel isn’t shared across workspaces
- Rootly not added to all required workspaces
- Create a shared channel for incident announcements
- Add Rootly to all workspaces via Organization Settings → Installed Apps
Disabling the native Rootly connector in Slack Workflow Builder
Disabling the native Rootly connector in Slack Workflow Builder
Can't pin messages to incident timelines 📌
Can't pin messages to incident timelines 📌
Solutions:
- Disconnect the Slack integration from Rootly
- Reconnect it, making sure to select Slack Enterprise Grid during installation and authorize at the organization level (not a single workspace)
Uninstall
To remove the Slack integration:- Go to Configuration → Integrations and find Slack
- Click Connected to reveal the disconnect option
- Click Disconnect