
Overview

Rootly’s Zoom integration automatically creates a Zoom meeting when an incident starts and posts the link directly in the incident’s Slack channel. Responders can join instantly without manual setup — no time wasted creating or sharing meeting links during a critical incident.
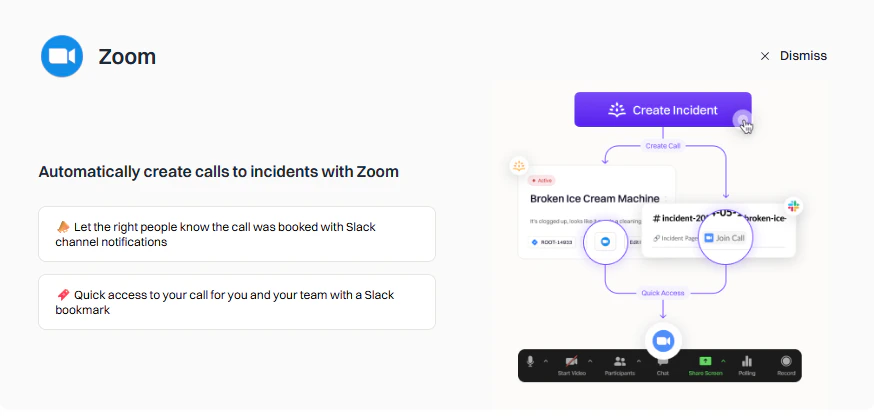
Zoom integration connected in Rootly

Features

Instant Meetings

Zoom calls created automatically when incidents start.

Slack Integration

Meeting links posted directly in the incident Slack channel.

Recording Options

Configure local or cloud recording and AI meeting capture.

Customizable Behavior

Configure triggers, conditions, hosts, and recording options per workflow.

Meeting Scribe on Zoom

The Zoom integration powers Rootly AI Meeting Scribe on your Zoom incident bridges — automatic recording, live transcription, PII-redacted transcripts, and Rootly AI meeting summaries fed straight into the incident’s post-incident artifacts. To enable:
  1. Go to Integrations → Zoom in Rootly.
  2. Toggle on Meeting transcript and summary.
  3. Enable Auto-join bot — highly recommended. Without this, someone needs to manually admit the scribe on every call, and it drops off after 10 minutes if no one does.
Auto-join is the single biggest lever for reliable Zoom scribe behavior. If you’re seeing intermittent “the bot never joined” reports, check this first.
Running into issues? See Zoom Meeting Scribe Troubleshooting for the common failure modes and fixes.

Before You Begin

Rootly recommends performing the installation with a shared service account (for example, incidents@yourcompany.com) rather than a personal account. This ensures the integration continues working if someone leaves the company. Ensure you are logged in as an Admin in Rootly.

Installation

To connect Zoom to Rootly, you will authorize Rootly via OAuth. This grants Rootly the permissions it needs to create and manage meetings on your behalf.
1

Open Rootly Integrations

Navigate to Configuration → Integrations in Rootly.
Configuration menu showing Integrations option in Rootly sidebar
2

Find and set up Zoom

Search for Zoom and click Setup.
Zoom integration card in Rootly integrations catalog
3

Sign in to Zoom

Select your sign-in method — Google, SSO, or email and password.
Zoom sign-in method selection screen
4

Select your account

Choose the Zoom account you want to connect to Rootly.
Account selection for Zoom sign-in
5

Create or confirm your Zoom account

If no Zoom account exists for this email, you will be prompted to create one.
Zoom account creation prompt
Zoom account setup confirmation
6

Authorize Rootly

Review and accept the OAuth permissions to grant Rootly access to your Zoom account.
Zoom OAuth permission request for Rootly
7

Confirm connection

You will be redirected back to Rootly with a success message. The integration status will show Connected with your Zoom account email.
Zoom integration successfully connected in Rootly
Your Zoom account is now connected to Rootly. You can configure meeting name defaults and recording preferences from the integration settings page.

OAuth Scopes

Rootly requests the following Zoom permissions during authorization:

Creating the Incident Meeting

Rootly workflows automatically create Zoom meeting rooms when incidents occur. You can use the built-in Auto-Create Incident Call setting for quick setup, or build a custom workflow when you need conditional logic, specific triggers, or advanced routing.
Rootly enforces one Zoom meeting per incident. Running the same automation multiple times updates the existing link rather than creating a new one. For additional meetings, create a sub-incident.

Option 1: Auto-Create Incident Call

The Auto-Create Incident Call setting lets you automatically generate a Zoom meeting when an incident begins — no workflow required.
Auto-Create Incident Call settings panel
Configure the following options directly in the integration settings:
Use Auto-Create for quick setup. Build a custom workflow when you need conditions, specific triggers, or advanced routing.

Option 2: Custom Workflow

For more control — such as only creating meetings for SEV-1 incidents or routing to specific hosts — build a custom Incident workflow.
1

Open workflow creation

Navigate to Workflows in Rootly and click Create Workflow.
Create Workflow button in Rootly
2

Choose workflow type

Select Incident as the workflow type.
Workflow type selection
3

Configure triggers

Choose when the workflow fires. Common triggers for Zoom meeting creation:
Trigger configuration panel
4

Add conditions (optional)

Use conditions to control when the workflow should run after triggering.
Condition configuration panel
Common patterns:
  • Severity filter — Only create calls for SEV-1 or SEV-2 incidents
  • Team filter — Only for incidents affecting specific teams
  • Incident type — Only when Kind is set to Incident
5

Add the Create Zoom Room action

Click Add Action, search for Zoom, and select Create Room.
Zoom Create Room action in workflow builder
Configure the action fields:
For Create as User, use the incident creator’s email via Liquid syntax, or set a dedicated service account like zoom@yourcompany.com to ensure meetings are always owned by a known account.
6

Save the workflow

Name the workflow clearly (for example, Create Zoom Call for SEV-1 Incidents) and click Create Workflow.

Variable Reference

Use the Liquid Variable Explorer to test variables with real incident data.

Zoom Variables

Incident Variables

Troubleshooting Meeting Scribe

Nearly every “the scribe didn’t join our Zoom call” report traces back to one of a small set of causes. Work through them in this order. For the full Meeting Scribe reference (limitations, retention, subprocessors), see Rootly AI Meeting Scribe.

The Bot Never Joins the Meeting

Auto-join isn’t enabled

The single most common cause. Without Auto-join bot on, someone has to manually admit the scribe from Zoom’s participant list on every call. Fix: In Rootly, go to Integrations → Zoom and toggle Auto-join bot on.
Auto-join uses a Zoom-side capability that lets Rootly’s bot bypass the waiting room. If your Zoom account plan or admin policy blocks bypass tokens, Auto-join can’t help — see the next section.

The Zoom account doesn’t have permission to bypass the waiting room

Rootly’s Auto-join relies on Zoom’s “bypass waiting room” feature. Some Zoom account tiers or admin configurations don’t allow it. Fix: Ask your Zoom admin to confirm your account supports bypass tokens (typically Business, Education, and Enterprise plans). If it doesn’t, either upgrade the plan or leave Auto-join off and admit the scribe manually — the fallback still works, it just needs a human.

The meeting URL isn’t attached to the incident

The scribe joins the meeting URL attached to the incident. If a personal-meeting-room link is being used and it hasn’t been attached, the scribe doesn’t know about it. Fix: Either use the Rootly-generated meeting link pinned in the incident’s Slack channel (works automatically), or attach the URL you’re using via Updating incident integration links.

The bot is in the waiting room and no one admitted it in time

The scribe waits 10 minutes in a Zoom waiting room. If no one admits it, it disconnects. Fix: Reinvite the bot from the Meeting tab on the incident and admit it promptly. Prevention: enable Auto-join.

The Bot Joined but Left Early

Nobody-joined timeout (5 minutes)

If the bot enters the meeting but no other participants show up within 5 minutes, it leaves. Fix: Start the meeting on your side first, then reinvite the bot. Alternatively, invite the bot after your team is already on the call.

The host removed the bot

Zoom hosts can eject any participant, including the scribe. If a host removed it (intentionally or by accident), the bot leaves and does not auto-rejoin. Fix: Reinvite from the Meeting tab. Consider giving your team a heads-up that the scribe should stay.

Network / Zoom-side disconnect

Rare, but the bot can be disconnected by Zoom for reasons outside Rootly’s control (network blip, Zoom service issue, plan-level restriction changing mid-call). Fix: Reinvite. If it happens repeatedly across incidents, check Zoom’s status page and open a support ticket with Rootly if the issue is inside Rootly.

Transcript or Summary Missing

Post-meeting processing is still running

Transcripts and Rootly AI meeting summaries are generated after the meeting ends. Processing typically completes within a few minutes. Fix: Wait ~5–10 minutes and refresh the Meeting tab.

The bot never actually recorded

If the recording icon didn’t appear in-meeting, the bot was likely in a waiting room the whole time or was removed early. Fix: Check the incident timeline for a “Recording started” event. If it isn’t there, the bot didn’t record. Reinvite for the next session.

Recording was paused and not resumed

The Meeting Scribe supports pausing mid-call (useful for sensitive topics). If it was paused and no one resumed, that segment isn’t captured. Fix: Check the recording session status in the Meeting tab. Resume any paused session.

Uninstall

In Rootly:
  1. Go to Configuration → Integrations and find Zoom
  2. Click the Connected button to reveal the disconnect option
  3. Click Delete
Click the Connected button to reveal the Disconnect option
In Zoom (to fully revoke access):
  1. Log in to your Zoom account and navigate to the Zoom App Marketplace
  2. Click Manage → Apps on Account or search for the Rootly app
  3. Click the Rootly app and select Remove or Disable

Frequently Asked Questions

Rootly enforces one Zoom meeting per incident. If you need additional meetings, declare a sub-incident from the main incident and create a separate Zoom link for it.
Ensure the Slack Channels field in the workflow action is configured with the correct channel. You can use Liquid syntax to reference the incident channel dynamically. Also confirm the Slack integration is connected under Configuration → Integrations.
The Meeting Name field supports Liquid syntax. Use the Liquid Variable Explorer to preview available variables. Common examples include the incident title, severity, and ID.
The meeting creation will fail if the email is not associated with a valid Zoom account. Use a dedicated service account email or verify the Liquid variable resolves to a known Zoom user.

Meeting Scribe Questions

With Auto-join on, Rootly uses a Zoom bypass token so the scribe skips the waiting room. Without it, the bot enters the waiting room like any external participant and needs a host or co-host to admit it. Auto-join is the recommended setup for reliable incident bridge coverage.
Auto-join works for meetings hosted on your own connected Zoom account. If your team joins someone else’s Zoom meeting (an external partner, a vendor call), the scribe would need that host to admit it — Auto-join tokens don’t carry across Zoom accounts.
Yes — declare a test incident (/rootly test in Slack) and the scribe will join the resulting bridge just like a real one. Test incidents are excluded from production metrics.
Each time the bot joins or rejoins is a new recording session. Up to 10 sessions per platform per incident. Both sessions are valid — the transcripts and recordings are attached chronologically.